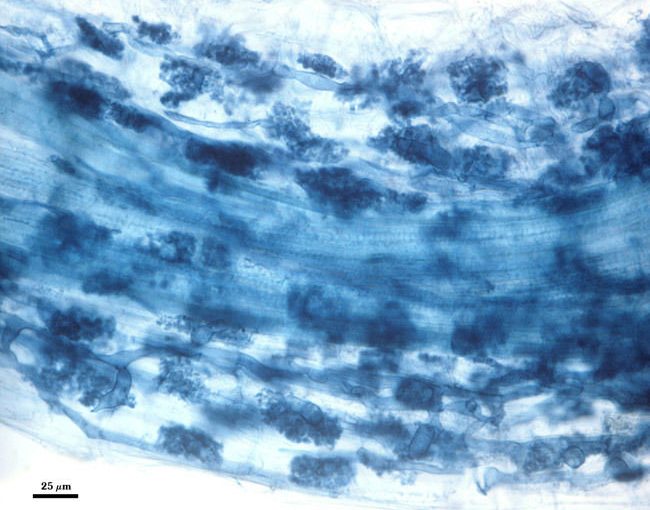
Here I will cover the process of staining Mycorrhizal roots. This is used when identifying the presents of mycorrhizal symbiosis on the root system of plants. The process is as follows:
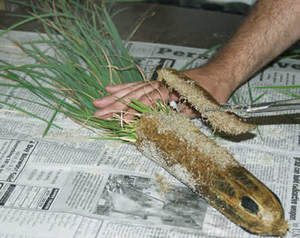
When sampling roots to detect and/or measure the amount of mycorrhizal colonization, it is important to select finer, more fibrous roots. Older roots or those from plants with taproots or other coarse roots, may have some mycorrhizae, but colonization usually is sparse, and consists only of hyphae that often is most visible outside the roots. For plants with a fibrous root system, then a random sampling suffices. Darkly pigmented roots should be avoided—to use them means going through an additional bleaching step (incubating in 5% household bleach for 5-10 minutes usually suffices but this should be tested empirically).
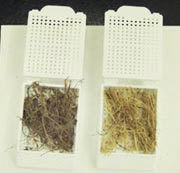
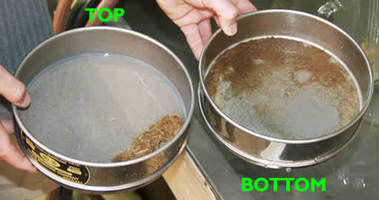
After thorough washing to remove all particulates, roots are placed in plastic cassettes used in medicine for processing biopsy tissues. Different types of cassettes are marketed (Fischer, TedPella, etc.), but the best for root samples are rectangular with 0.9 mm holes (photo at right). Cassettes with larger holes result in escape of roots, especially when roots are cut into small fragments. Pack roots loosely in cassettes (0.1-0.2 g max) for maximum infiltration of solutions.
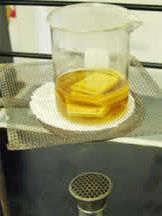
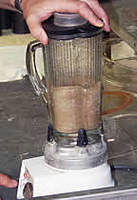
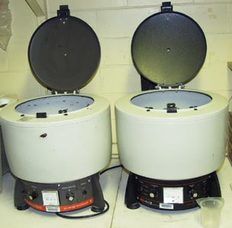
The roots are cleared (removing cytoplasmic contents from cells) using hot 10% KOH. Different approaches are used, from autoclaving cassettes for 5-10 minutes to boiling them in some container on the lab bench. Much depends on number of samples to be processed simultaneously. We usually process only 10-20 samples at a time. To minimize agitation, we preboil the KOH in a large beaker over a bunsen burner, and immediately add cassettes when the burner is shut off. Incubation time varies with thickness and fragility of roots, but 10 minutes usually is sufficient. Older thicker roots require longer incubation times. Browning of the solution is an indication of the clearing process.
Because most of the histological stains used for this procedure are acidic, it is critical that roots be acidified. So we wash roots (4 -5 x), and then immerse cassettes in 2% HCl for 15-20 minutes. For roots from highly alkaline soils, longer incubation times are recommended. If roots are uniformly dark and mycorrhizae are hard to see, then inadequate clearing often is the cause.
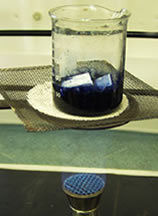
The same procedure described above to clear roots is carried out again, only with 0.05% direct blue or some other suitable stain (acid fuchsin, chlorazol black E). The stain is prepared by mixing with water, glycerin, and lactic acid in proportions of 1:1:1 (v/v/v). Incubation time varies, but 3-4 minutes works best for us with greenhouse-grown plants. In the photo at right, the cassettes containing roots were added to staining solution, heated on a lab bench with a bunsen burner, with the burner shut off when the solution began to boil. This step can be done without application of heat, but the incubation period then needs to be extended to 12 hr.
The stain is poured off into another container (it can be used again 1-2 times after filtration through cheesecloth) or discarded in a waste bottle. Rinse the cassettes with 4-5 changes of water and store at 4°C in water. More contrast between fungal tissue and background plant cells is obtained when the samples have been stored in water for a week or longer in the refrigerator (excess stain leaches from roots).
For long term storage of stained roots, we place them in screw-top glass tubes containing a water-glycerin mix (2:1 v/v) with 1-2 drops of 0.1% sodium azide at 4°C. Stain is retained in fungal tissue for > one year. Roots can be stored in fixative solutions like formalin, but only if you want to contract allergies, cancer, or other possible health problems.
References:
Phillips, J. M. and D. S. Hayman. 1970. Improved procedure for clearing roots and staining parasitic and vesicular-arbuscular mycorrhizal fungi for rapid assessment of infection. Transactions British Mycological Society 55:158-161. (classic paper)
Koske, R. E. and J. N. Gemma. 1989. A modified procedure for staining roots to detect VA mycorrhizas. Mycological Research 92:486-505.
McGonigle, T. P., M. H. Miller, D. G. Evans, G. L. Fairchild and J. A. Swan. 1990. A new method, which gives an objective measure of colonization of roots by vesicular-arbuscular mycorrhizal fungi.New Phytologist 15:490-501.