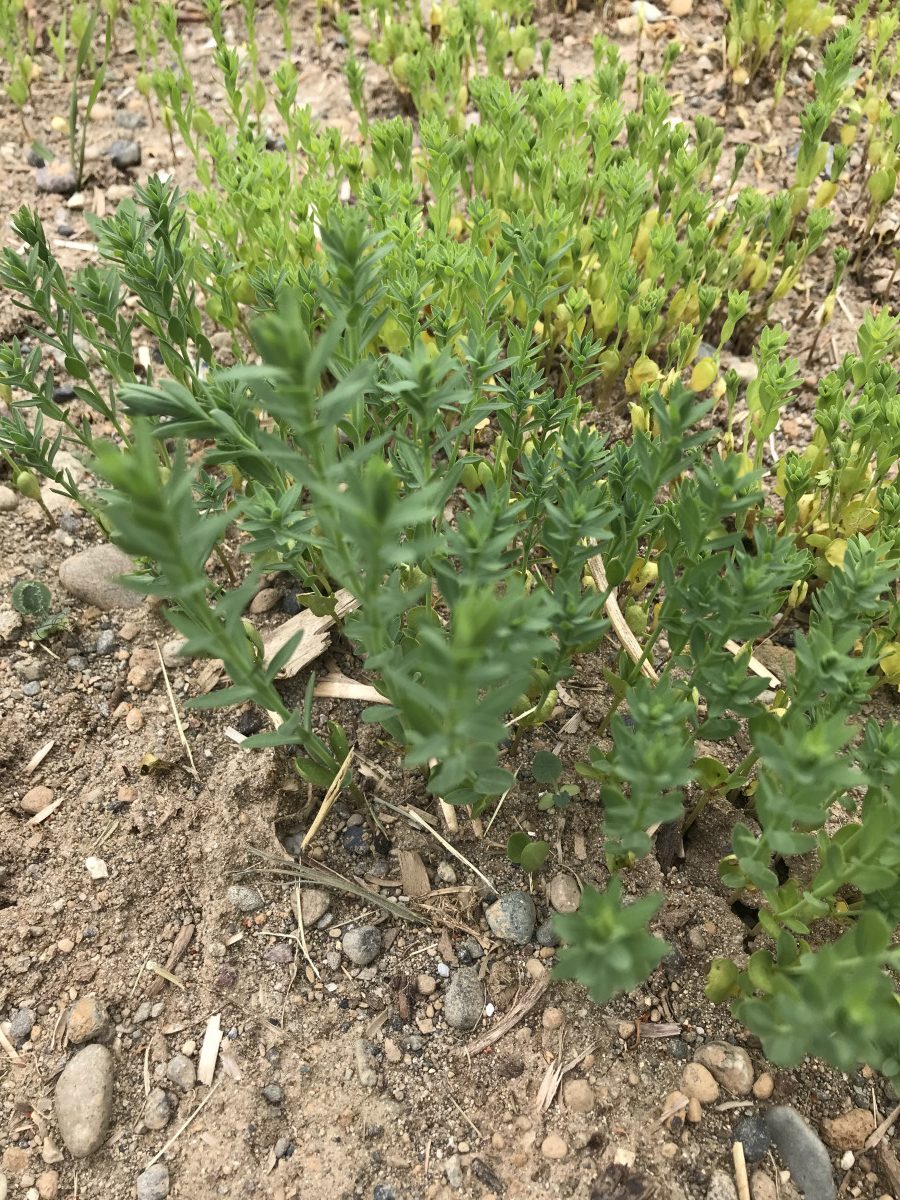
After watering and fertilizing the flax with kelp meal and letting it do its thing for a couple days, I went back to the farm to check on it and see how its doing:
After watering and fertilizing the flax with kelp meal and letting it do its thing for a couple days, I went back to the farm to check on it and see how its doing:
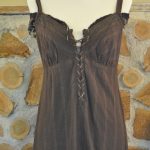
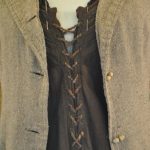
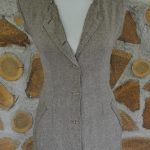
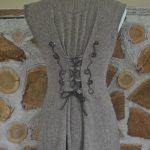
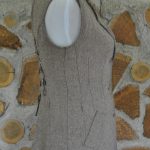
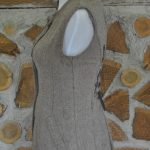
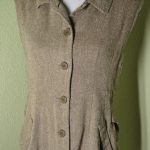
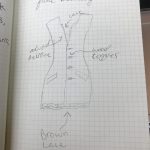
Yesterday I finished the most important alteration of the dress that I am upcycling – the lace-up front detailing. To do this, I simply removed the buttons from the dress, folded them over and hemmed. I then poked holes down the new hems and hand sewed grommets to give them a clean edge that also does not stick out. I used the same hand spun wool that I used on the silk vest to lace up the dress.
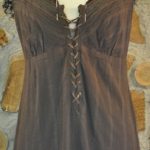
Stylistically, I am a bit obsessed with lace up detailing. I think it’s such an elegant way to elevate a simple garment. When examining historic undergarments I’ve always been awestruck with the detail that it takes to created threaded grommets rather than simple jamming the metal ones in. So, naturally, I had to try to create my own replica of what I have been inspired by. Mine definitely don’t have the level of craftsmanship that the garments I’ve seen do, but I think that subtle detail does create a look that is clearly unique and not machine-made. I didn’t have to cut the fabric at all for this part of the design, so it definitely has very minimal waste.
Next, I really just have to add a bit of lace and ribbon here and there and alter the skirt to complete the look. I’m anticipating that it won’t take me until the end of the quarter to finish this piece, so I may end up taking on another project before week 10 is up. Alternatively, I may dedicate the rest of the quarter to doing research on upcycling businesses and how they generate profit while maintaining accountability. We’ll see where the inspiration takes me!
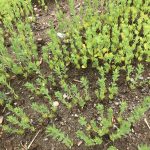
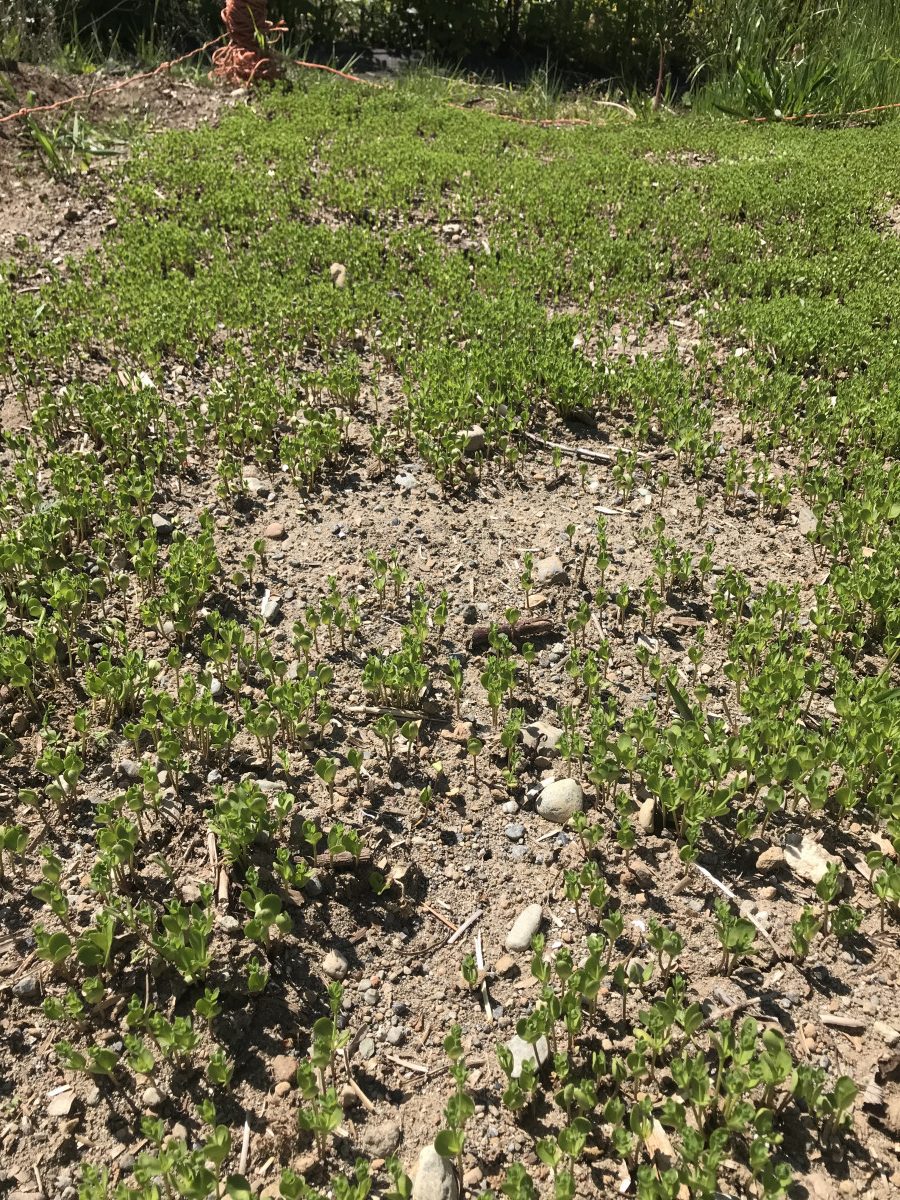
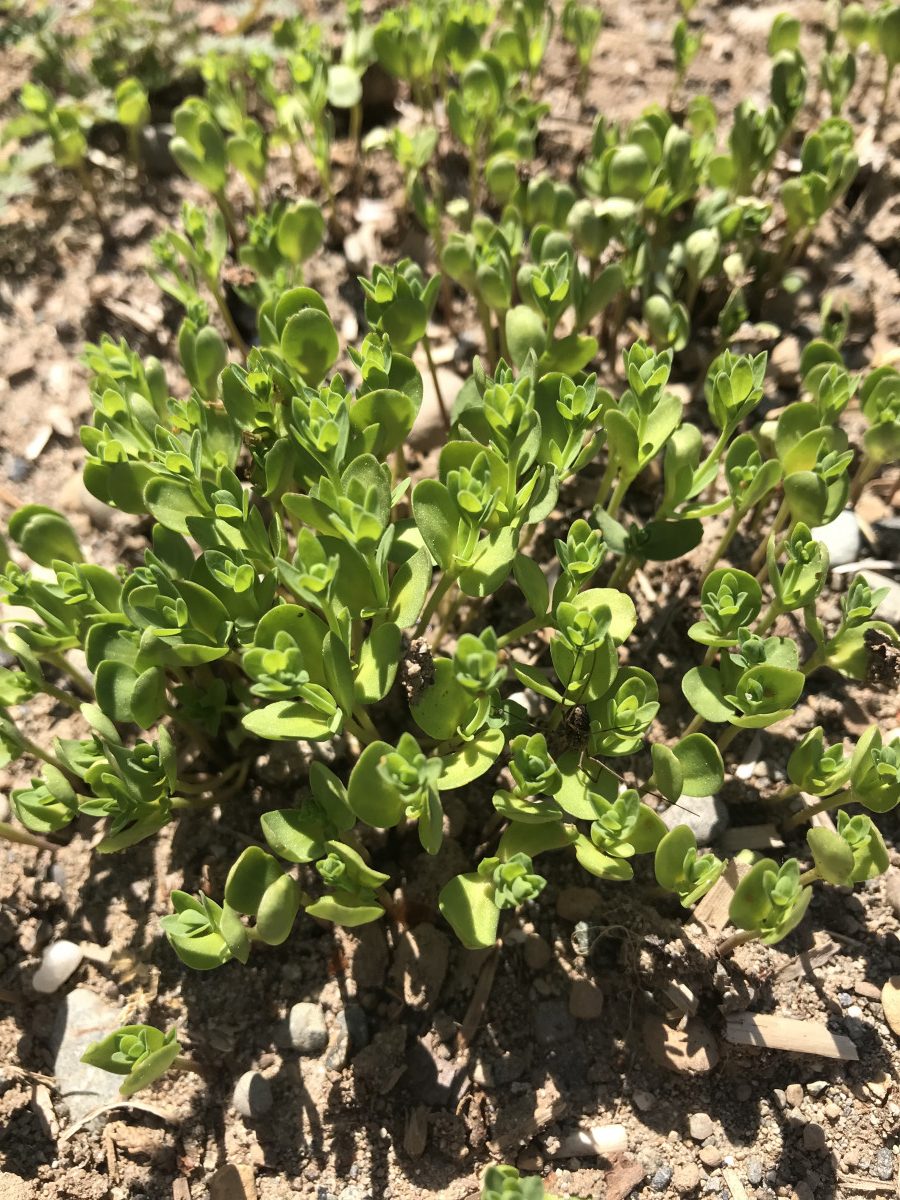
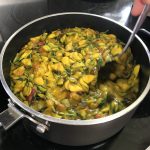
Today while going to check on my flax, I noticed that a good portion of the crop was yellowing at the base and some even looked a bit burned. With the hot weather we’ve been having, it’s not super surprising that they would be needing some extra help in regards to water.
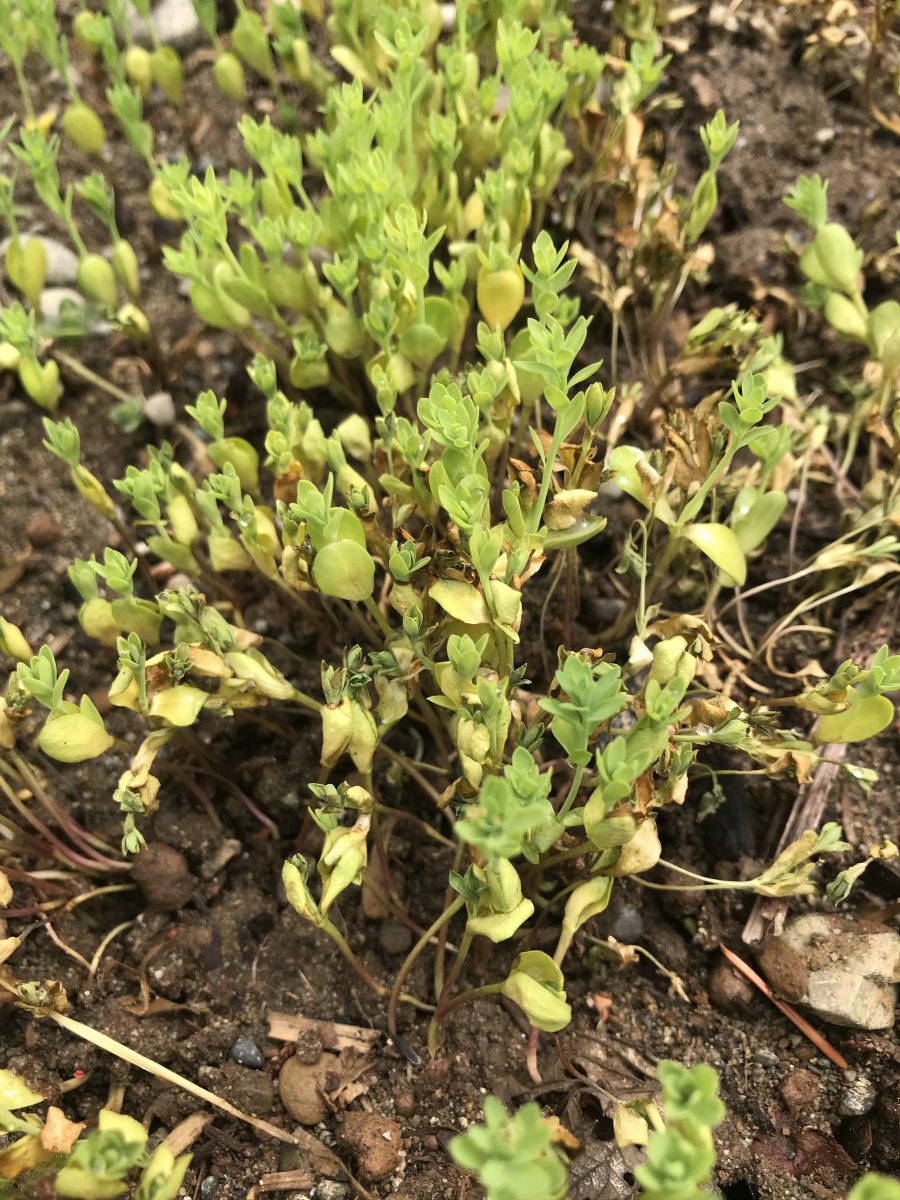
After watering, I consulted with Dave about the health of the plants and he pointed out that they are not flopping over in the way that under-watered plants do. This led him to believe that it could perhaps be a nutrient deficiency instead. Either of these potential issues are a not what I expected to encounter with flax given the information I had been reading about it. All of my sources have stated that flax is a light feed and usually does not require watering after germinating. But, things happen and unexpected weather can definitely have an unforeseen impact on even the most predictable of crops. So, I set about seeing how to ensure that my crops are as healthy as possible with some help from the wonderful Organic Farm staff.
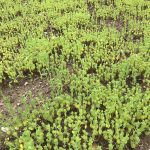
After further discussion with Dave, I set about applying a foliar spray to the leaves in order to get an idea of whether or not the yellowing is truly due to nutrient deficiency. The yellowing at the base of the plant indicates that it is probably either nitrogen or sulphur, so, kelp spray seemed to be the easiest solution. Kelp meal is made from seaweed which contains N, P, and K nutrients. It also contains growth hormones such as auxins and cytokinins that can help counter the stunted growth that occurs after a nutrient deficiency.
In order to fertilize my 5’x10′ bed, I applied 4 tbs of kelp meal to a gallon of water and loaded it into the backpack sprayer. I was able to spray the whole bed two times over with the liquid kelp. Foliar sprays tend to be pretty fast acting, so hopefully I will see some results within the next couple of days. If the plants react well to the spray, then I will know that it was, in fact, likely a nitrogen deficiency and I can begin working out a fertilizing plan to make sure that the flax continues to grow at a healthy pace. Results to follow!
This week’s most notable accomplishment was my focusing in on filling the gaps of my knowledge about the flax that I am growing on the farm. To do so, I did some research into the botany of flax and created a plant profile for the crop. While doing so, I am really pleased to have potentially troubleshooted the germination issues that I had. For further reading on that, you can find a post about it here.

Something that caught my attention while reading about flax is that it is best not to grow the crop successively due to soil born diseases that can occur when the same nutrients are consistently drained for the soil. This isn’t a particularly surprising concept to me given that most mono-cropping practices tend to yield the same result without heavy fertilization. However, because flax is a textile crop rather than a food crop it does make it a bit of a challenge to work out productivity of growing the one crop for the purpose of textiles while utilizing the land correctly. I definitely had considered this to be a possibility before planting my own flax, which is why I intend to compare the soil test that the POF class took of the management unit it is planted in with a soil test I do of the bed once the flax has been harvested. In the next week I am also going to be researching small flax farmers and millers to see how they combat that difficulty. Overall, I am finding there to be very few small-scale flax farms. So, it will be interesting to see what information I can get from those few who do run that particular operation.
Aside from that, I am still plucking away at the dress I am upcycling and am finding the lace-up top to be a tiny bit time consuming. This is mainly due to the fact that I am hand-sewing grommets onto it for the real historic effect. Once that portion of the dress is finished I am hoping the rest of the ideas I have for the design go relatively quickly to keep labor time down to a minimum.
I also read a study called “Embodied Multi-Discursivity: An Aesthetic Process Approach to Sustainable Entrepreneurship” by Kim Poldner, Paul Shrivastava, and Oana Branzei that has been really helpful for me in putting the mission of sustainable design into words. The study argues that sustainable entrepreneurship, in essence, is a much more emotional venture than a lot of other different business models. In fact, the emotions of the creator of a “sustain-ably constructed” product is often transferred over to the consumer in the form of education and explanation of design. Because the venture is more emotional, oftentimes entrepreneurs can get away with charging slightly higher prices than other products.
The authors also argue that this is very much a visual aspect of the design process and is an advantage for the business person and designer. In fact, they state that the choices the sustainable designer makes to create a product become an art in itself that can be expressed visually in the product, and become part of the portfolio of the business as a whole. I believe this hold particularly true to what I am attempting to do with upcycling, and I am really hoping to be able to express those choices through my own finished product.
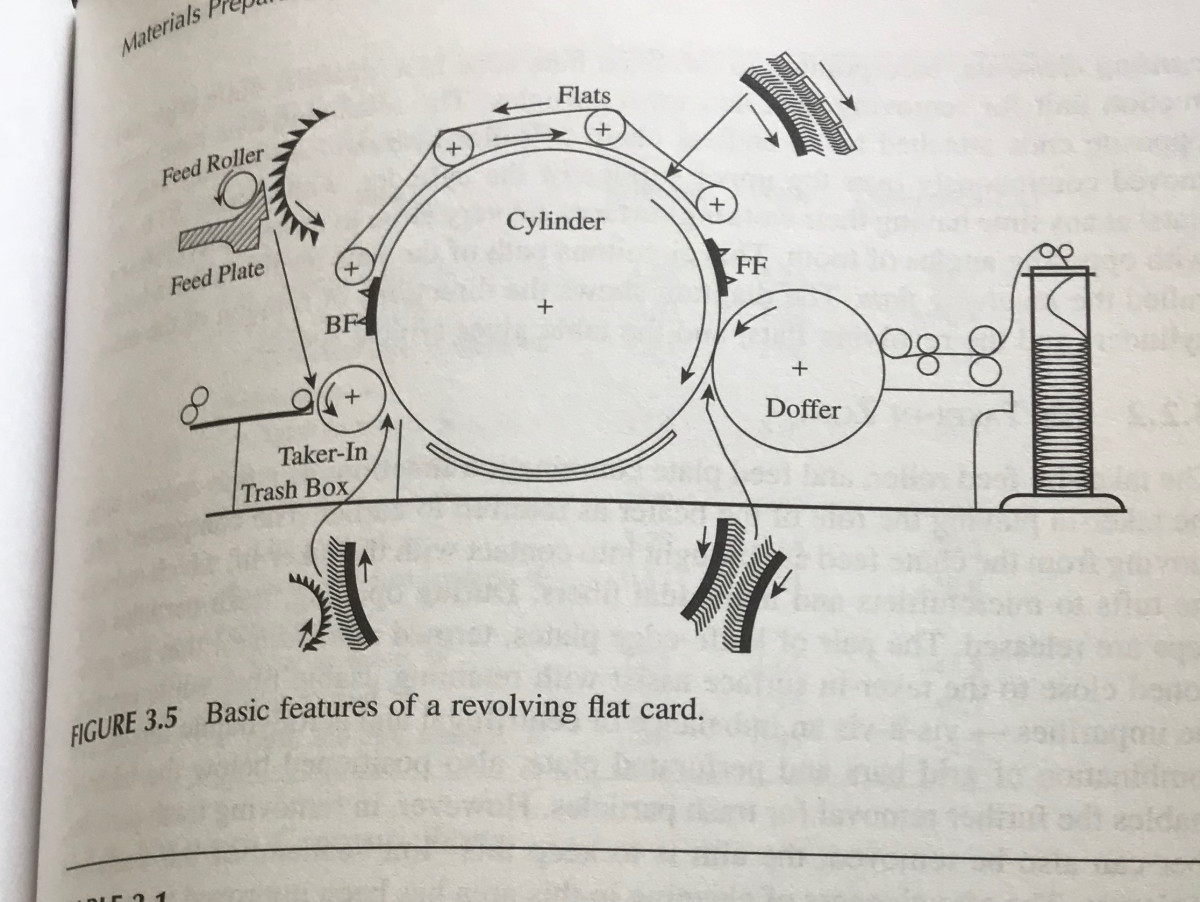
This week at Olympic Yarn & Fiber I got to learn how to use one of the more important machines in the yarn creating process: the carder.
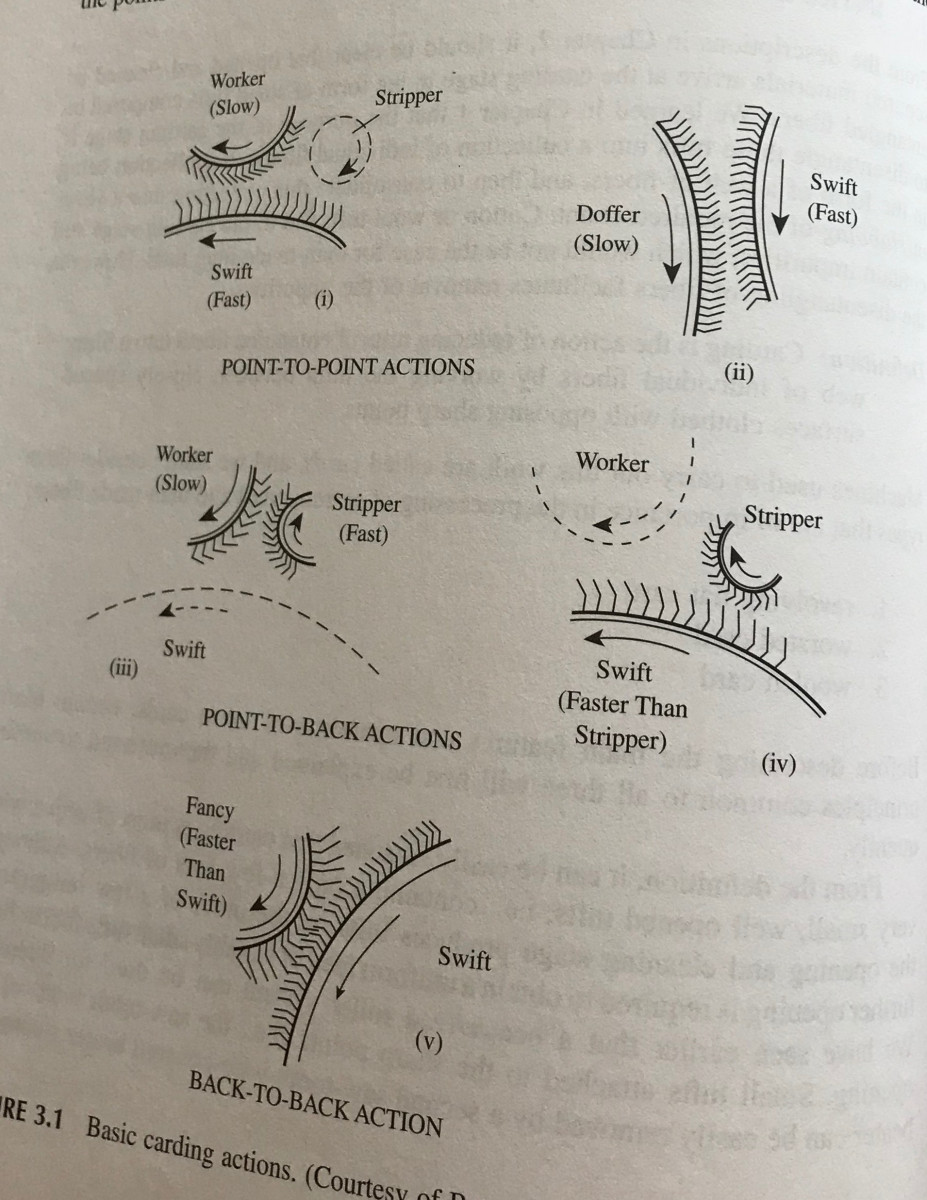
The carder is used to arrange the random, cleaned clumps of fiber into a parallel pattern that is even in thickness and cleaned of heavy guard hairs and vegetable matter. The Ramella carding machine that Olympic Yarn and Fiber uses is comprised of five different ‘workers’ or ‘flats’ that rotate on the base cylinder. The flats are made up of different small pin-like structures that rub in opposite directions to smooth out the fibers and cause them to lie flat. These diagrams from Fundamentals of Spun Yarn Technology by Carl A. Lawrence provide a great visual for the inner-workings of the machine:
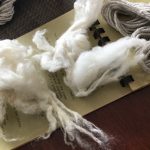
For this particular project, we were processing three different types of wool: angora goat, llama, and alpaca. The client only wanted roving (the finished product of carding) for hand spinning so we were able to run all three wools in the same run. In order to keep them sorted and even, we weighed out 8oz portions of the wools and loaded the carder by that weight.
Here’s a video of the carder in action:
An important part of the carding process that I learned about was how to remove static from the lighter animal fibers. For the llama fiber and especially the alpaca fiber, Lynn had me “re-hydrate” them in order to reduce static. To do this, I spread out the fiber on a table, sprayed both sides, and massage the water evenly through the wool. This allows the wool to move through the carder smoothly and without sticking to itself.
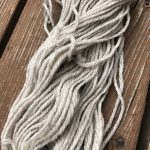
A photo of the finished goat hair:
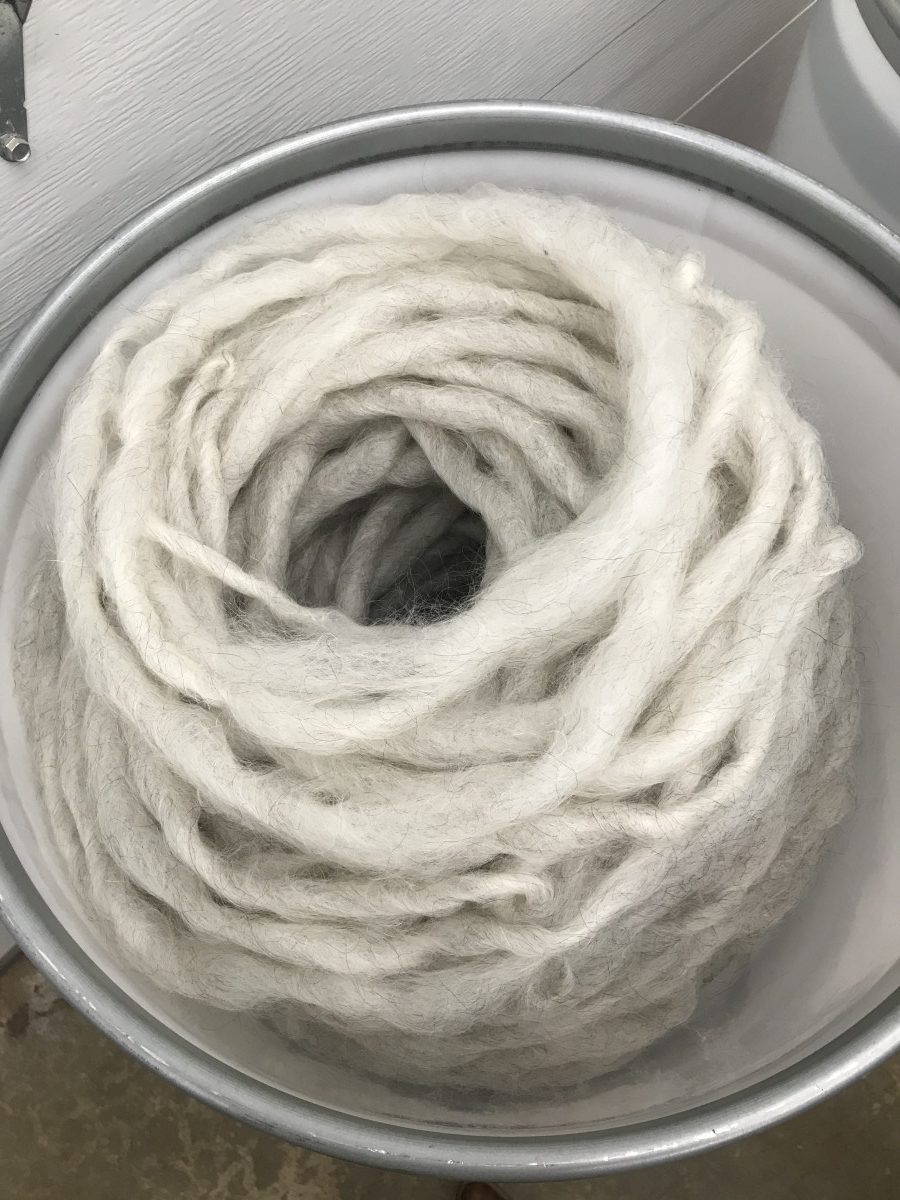
By the end of the process, we had carded about 9lbs of wool with only 6oz of waste. The waste was hardly waste, however, because the client is a hand spinner and able to spin from “the cloud” (a tuft of wool). Overall, it took us a little less than two hours to process the clients wool. After having my own experience with a drum carder (which took me 20 minutes to process an ounce on), I’m actually pretty amazed at the efficiency of the machine.
As my flax continues to grow, the bald spots that I originally noticed after germination have been looking even more profound. I was pretty stumped on why they so much of the seeds didn’t germinate. If anything I thought that the seeding would be too dense and I would have problems further down the road. However, while reading different science journals about flax propagation, I think I may possibly have an explanation for what happened.
While sowing, even though I am pretty positive I did the calculations correctly, I had too much seed to properly cover all of them with soil. I was expecting the seed at the top of the soil to be the unsuccessful ones, so, I was surprised to find that the patches of seed that I was unable to cover seemed to be to seed that actually germinated.
I read that flax seed is particularly sensitive to soil crusting. After doing a bit more research into soil crusting, I found that it is defined as a thin layer on the surface of the soil that is thicker than the rest. This makes it difficult for seeds to break through before they begin to rot. Oftentimes, heavy rainfall can be responsible for compacting the soil.
I sowed my flax seeds on April 10, so, I went back and checked the rainfall after that. On April 13 – 14th there was a period of time that saw 3 inches of rainfall, which is above average even for here. If I remember correctly, it was pretty heavy downpour as well. With this new information, I am guessing that this could definitely have something to do with the germination problems that I saw a few days after that rain. Despite that, much of the flax I grew continues to flourish and I believe it is about to take off given the warm weather that will hopefully last the rest of the season!
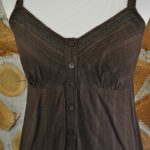
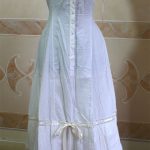
For the second part of my upcycling project, I am continuing with the Edwardian fashion inspiration. I found a used cotton sundress for $8 and will be altering to look stylistically similar to a cotton slip dress from the late Victorian – early Edwardian eras. The attention to detail in those historical garments is alway absolutely astounding to me, so I am hoping to be able to channel that a little bit.
The original dress already has the shaping of a slip so it ought to be pretty simple to make a few changes that make the piece stand out from other products of the fast fashion world.
Original piece:


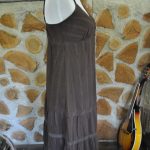
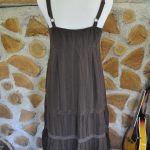
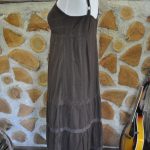
I actually think the dress as it is is very lovely. But, it is pretty simplistic in the way that you could find a ‘boho sun dress’ in this style pretty much anywhere. My intention in upcycling it is to use the small alterations to create something much more unique and difficult to find in the fast fashion world.
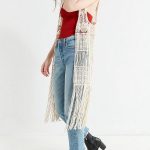
A few images of historical garments that I am hoping to draw some inspiration from:


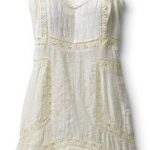
I’ve noticed that oftentimes, the petticoat or chemise is used in Edwardian and Victorian fashion to accent outer garments. I plan to use that same basic principal when designing this upcycled piece. Because of this, I am going to focus on making the biggest changes around the neckline and bottom of the skirt.
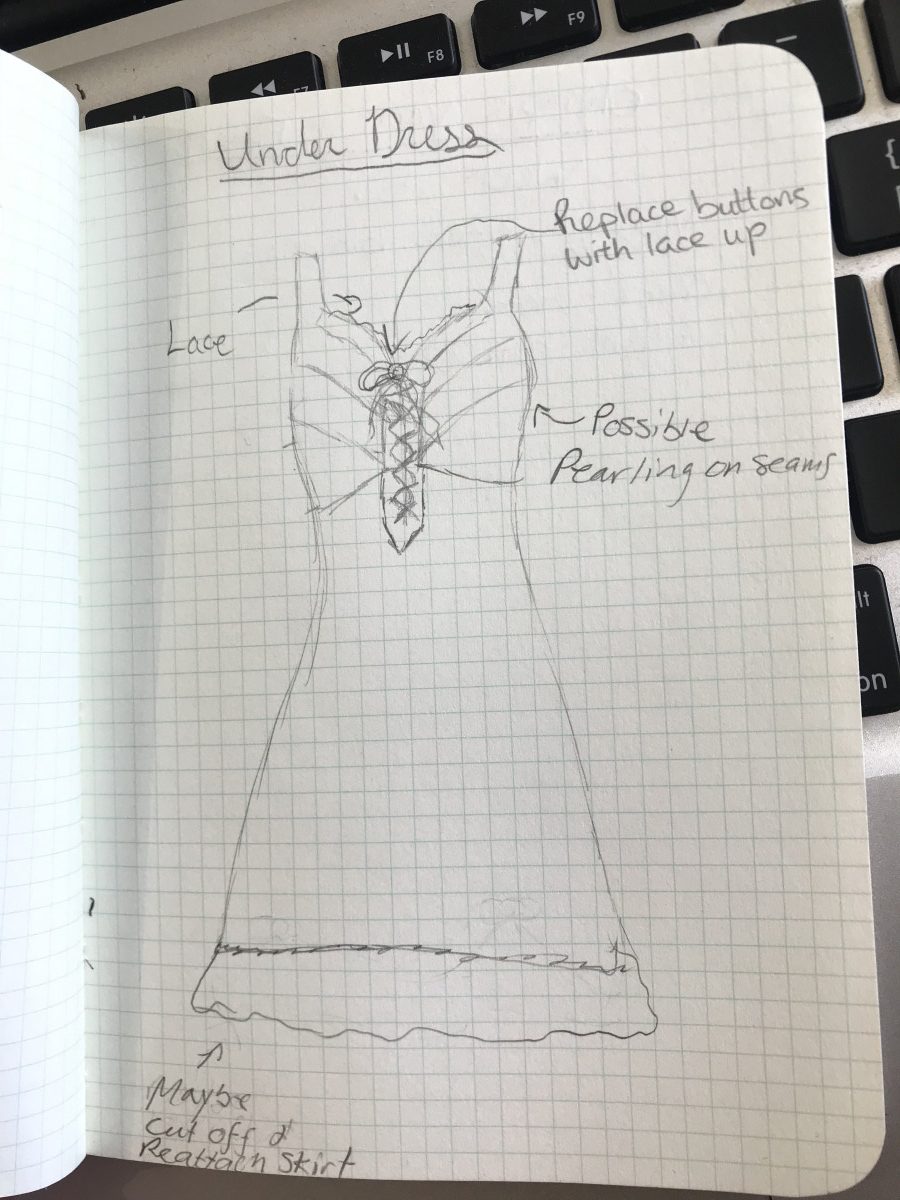
I think that I will need to shorten the skirt in order to make the entire outfit low together more smoothly. So, I am going to style that alteration after the basic layout of most Edwardian petticoats. That being to have the skirt fall strait, and then attach a separate tiered layer at the very bottom. This piece will essentially be a modernized, shorter version of that.
Flax (also known as linseed) is a broadleaf crop grown for both its seeds and fibers.
Botanical Name: Linum Usitatissimum (Linum – derived from Gaelic word for ‘thread’ and Usitatissimum derived from the Latin term for ‘most useful’)
Family: N.O. Linaceae
The geographical origin of flax has not been determined due to the fact that it has been cultivated in all climates for centuries – even being found in Egyptian tombs.
The flax plant grows to approximately 3 feet in height and features an alternate leaf pattern. It is an herbaceous annual that branches corymbosely above the main stem. Leaves are borne on both stems and branches. The edges of the leaf blades are entire*.
Flowers range from blue to purple and are radically symmetrical and feature five petals and sepals as well as five stamen. They are borne on long erect pedicels and are hermaphrodite.
Minimum tillage is best for flax crops as sturdier soils help the deep rooting structure. Because flax seeds are small and have little food storage, it is important to take necessary steps to ensure optimum environment for germination.
Flax should not be planted successively as it is prone to suffering from fusarium wilt. A three year period in between crops is recommended.
Sources:
After a two week break from my internship with Olympic Yarn and Fiber, we finally got to get back into the swing of things. Today was a beautiful day, so we decided to walk around the property of the farm to see if we couldn’t find something to naturally dye with. Lynn has a PHD in chemistry, so it was very helpful to hear her explain the science behind natural dyes.
However, before doing that, we surveyed the back pasture on the farm to see if it was ready to let the herd of male alpaca graze in. We checked to see if there was enough grass to make it worth it and also looked to see if there were any plants that could potentially be harmful to the animals. We did come across one plant called tansy ragwort that can kill most livestock if ingested. I learned that there is a moth called the tansy moth whose larvae live on and destroy tansy ragwort, so if a moth is found on one it is actually best to leave the plant in tact in order to encourage the survival of the beneficial insect.
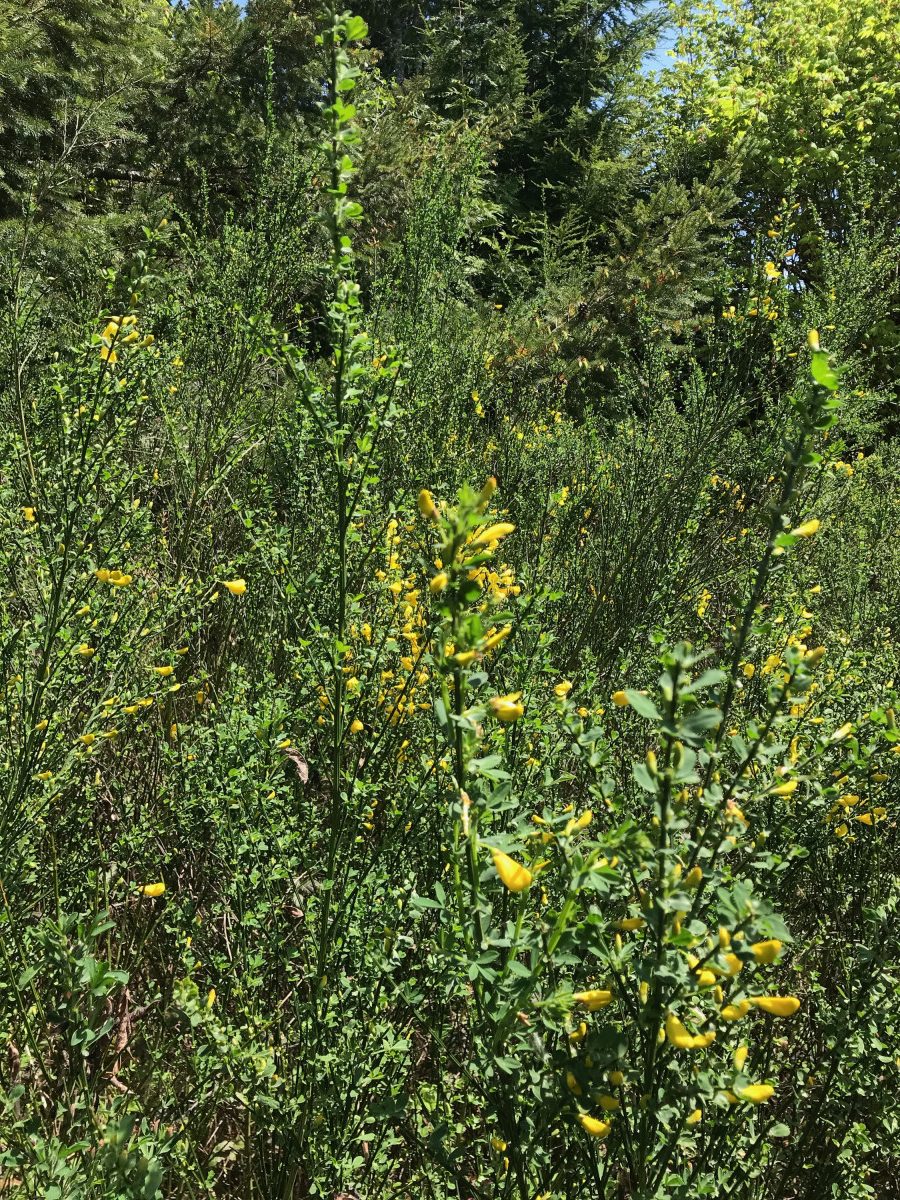
While walking, we noticed that the Scotch Broom on the property was flowering. Scotch Broom is incredibly invasive here in Washington, so we decided to see if we couldn’t find a use for it since the plant is everywhere anyway. We picked the flowers and branches and separated the two so we could discern where the color (if any) would come from. Then, boiled some water with vinegar to use as a fixative.
First, we added the flowers to the boiling water since we had a feeling that they would have the least amount of color in them. We turned out to be right since an hour of boiling yielded only the slightest yellow shade. We then added the branches to the mixture and saw that the color of the water darkened noticeably. We also decided to create a second dye bath out of red wine so that I could get an idea of the difference between a heavily pigmented and fermented dye and a freshly picked, lighter material.
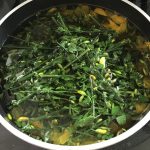

We dyed one skein of light gray sheep’s wool in the Scotch Broom mixture, and one in the red wine as well as a sample of white merino wool to get an idea of the true color of the dye. While we waited for it to soak, we went over some samples of dyes that Lynn uses for her own yarn collection and I learned a bit more about the dying process. I learned that sheep wool tends to take color more readily than alpaca fiber due to their structure, so lighter dyes tend not to even be worth trying when it comes to the later. I also learned that different mordants tend to yield vastly different colors because they alter which aspects of the dye materials hold to the fiber.
After an hour or so of soaking, we checked on the samples and found that the red wine dyed yarn took very quickly, and the Scotch Broom only yielded a very pale yellow color. It wasn’t all that surprising since we expected that if there were a truly significant use for the plant, somebody probably would have figured it out by now, but it was still fun to experiment with it! The yarn is currently drying, so next week week I will be able to take a photo of the finished product.

Next week we are going to be working on carding for a client who would like their wool to be processed into roving, so I am excited to be working with more machinery.
Last week I officially finished my first upcycled piece: the silk tweed vest!
The final product looked like this:
Overall, the total cost of the materials used to create this was $6.50 and it took me 13 hours including the hand-spun and sewn embroidery and 6.5 hours without. I did not use a sewing machine for this project because I wanted to have total control over what I was doing given the fact that it is a piece intended for learning rather than efficiency. However, if I were to recreate this design with the intent of selling, I estimate that it would take me 2.5 hours without the embroidery and 5 with the embroidery after having more practice with the skill.


I’m currently inspired by the idea of continuing to make my designs echo that of Edwardian women’s clothes. I have a collection of Edwardian clothing at home since they are the last of fashion to be truly handmade and “slow” in the way that the fashion world describes it now. Because of that, it seems fitting to honor that nearly lost craft by reclaiming mass-produced pieces and turning them into garments as unique as those from the past. While photographing, I played around with styling the piece into an outfit featuring an Edwardian blouse and linen skirt that I discovered at an antique mall in Pennsylvania, and I love the feel that they give my own original piece. I plan to take better quality pictures once I can get my hands on a tripod, but here are some basic concept photos:


Part of my reasoning behind creating this piece was to get an idea of how possible it is to create a quality piece of clothing at a relatively affordable price while still allowing for a living wage to be paid. Currently, in Thurston County, the living wage is calculated to be at $11.84 for one adult. If an artist were to create a similar piece with the intent of selling without the embroidery in the design and used a sewing machine, they could sell the piece for $40 and take in a wage of $13.40/hr. For “luxury markets” with the embroidery included, they could charge $75 and receive a wage of $13.90/hr.
I did some research into the pricing of decorative vests from 4 different clothing companies that represent different socioeconomic classes: Forever 21 (low income), Urban Outfitters (middle class), Free People (upper middle class), and Magnolia Pearl (upper class). The prices on their products are as follows:


Interestingly enough, the price of my design was closest to the price of the company frequented by customers with lower incomes, but the quality and design itself was more like the company frequented by higher incomes. To me, this hints that the consumer has been trained by the both fast fashion and the luxury market to automatically assume a high quality and unique “different-from-the-norm” piece is reserved for people who can afford to spend $250 on a vest. This could pose a problem when it comes to outreach for designers wishing to reach all income levels with their pieces. However, I believe if there were ever a time to communicate to people that they do not need to have endless disposable income in order to express themselves with one of a kind pieces, it would be now. The current attitude towards self-expression, sustainability, and re-using materials is at an all time high. So, I think that the market is primed for making a business like this a feasible feat.