Final Flax Timeline: Spring Quarter

Because Spring Quarter is ending, I decided it would be a good idea to put the past 10 weeks’ growth into a chronological, visual timeline with notes about each week’s progress. The idea for this is to be able to combine it with this Summer’s progress in order to create a full timeline that covers the progress from seed to textile.

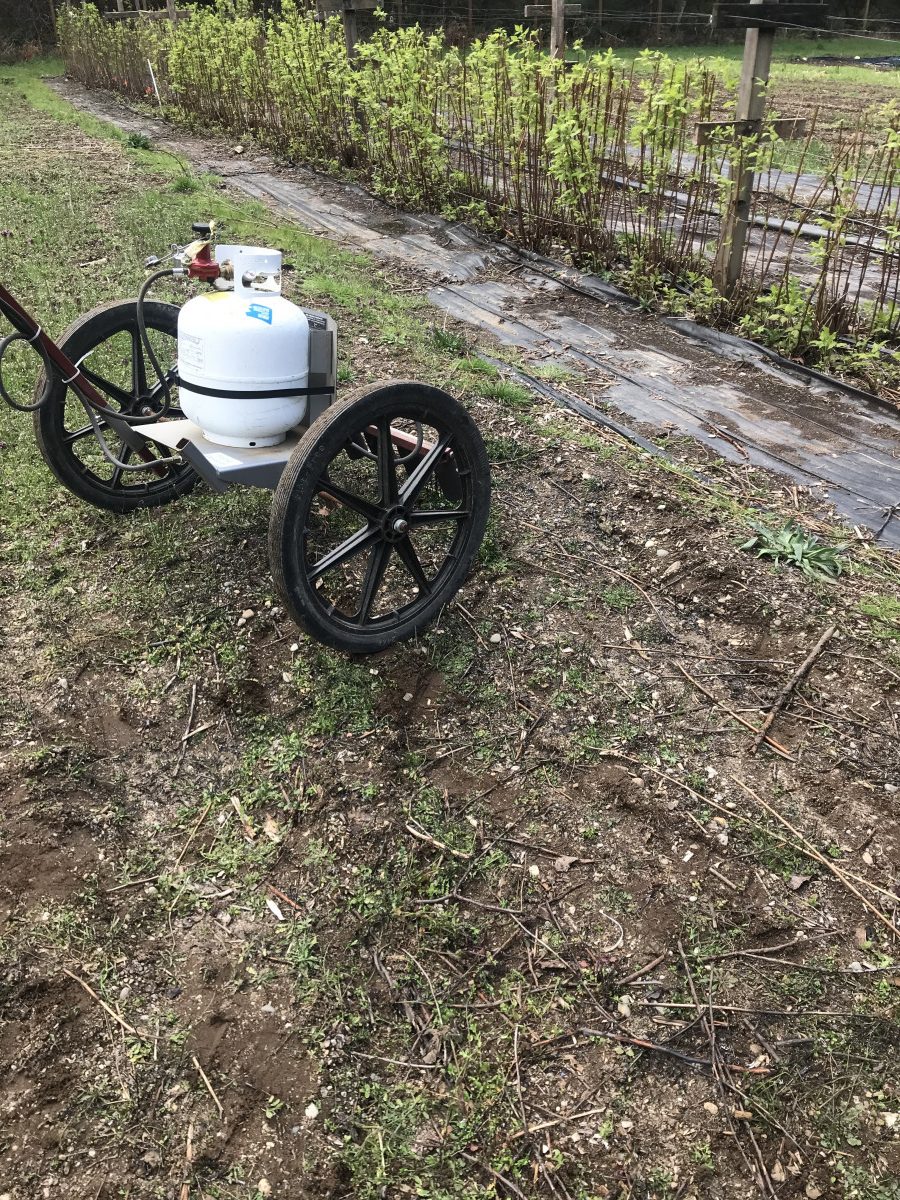
April 10 – 11: Flame weeding and seeding.

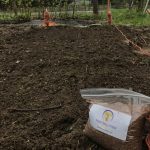
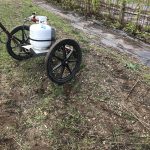
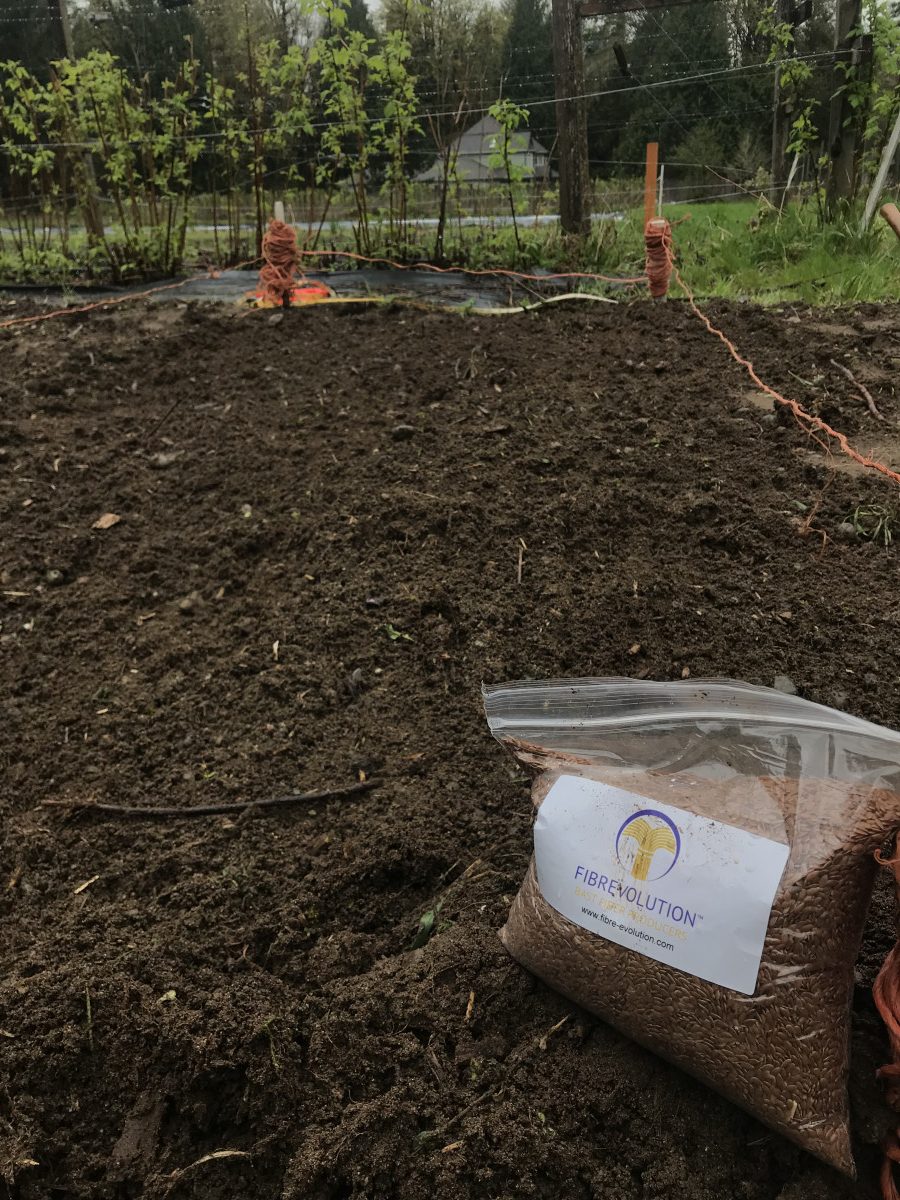
In order to prep the bed, I flame weeded the patch and then hand weeded the hard ones. I broadcasted the 0.5lb Fibrevolution ‘Agatha’ seeds over a 5′ x 10′ bed, covered the seeds, and did not irrigate.

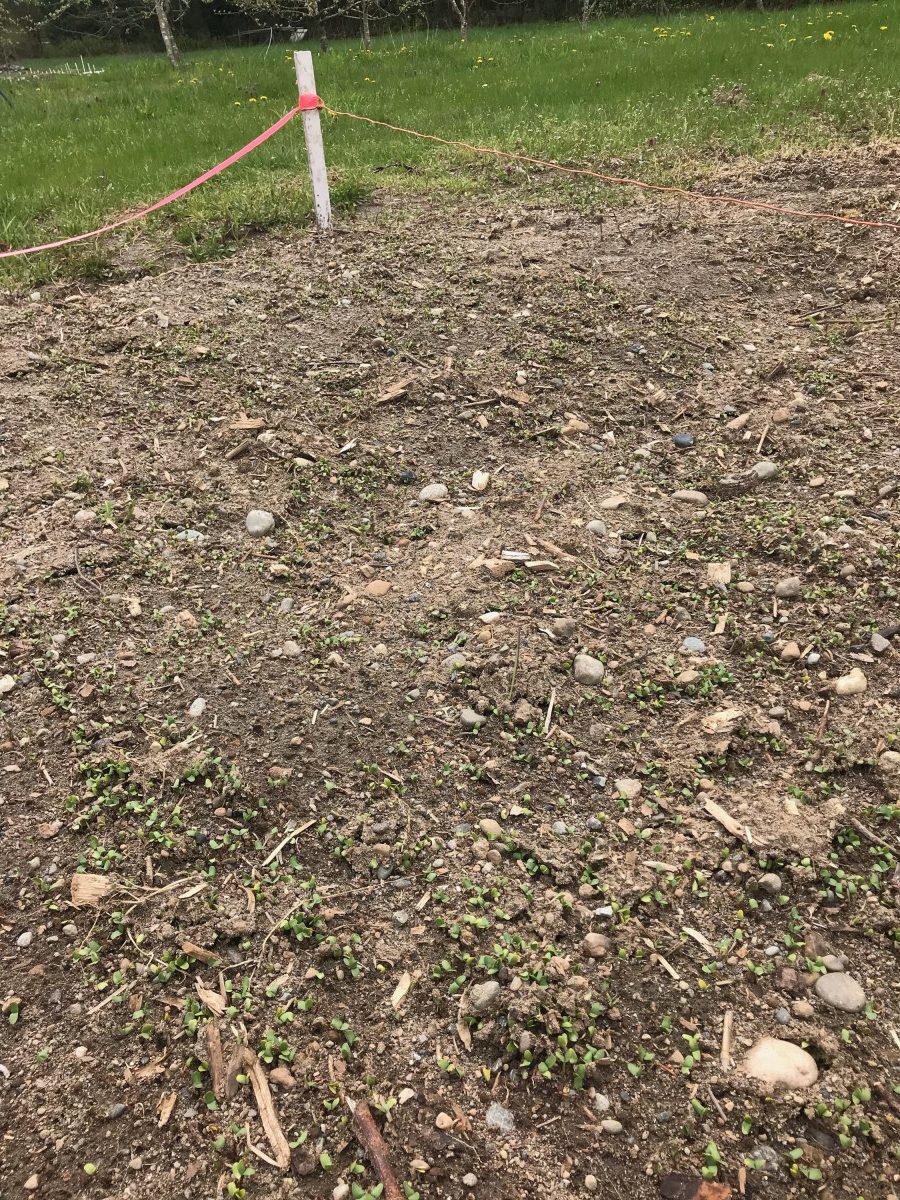
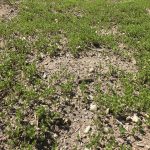
April 20: Germination

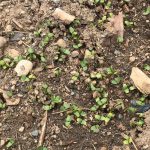
9 days post-seeding, I saw the first results of germination. My broadcasting was definitely less accurate than I thought, because there was a bit of sparseness in planting.

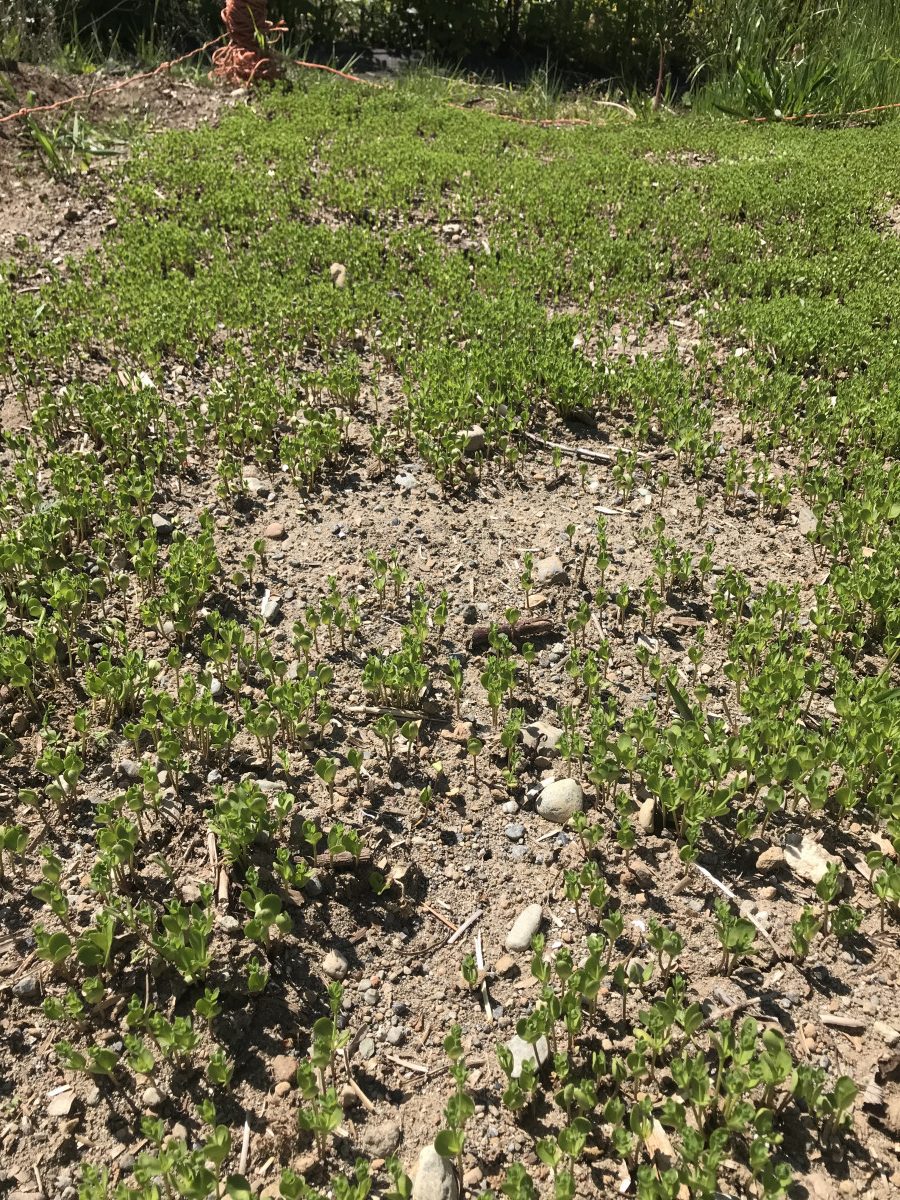
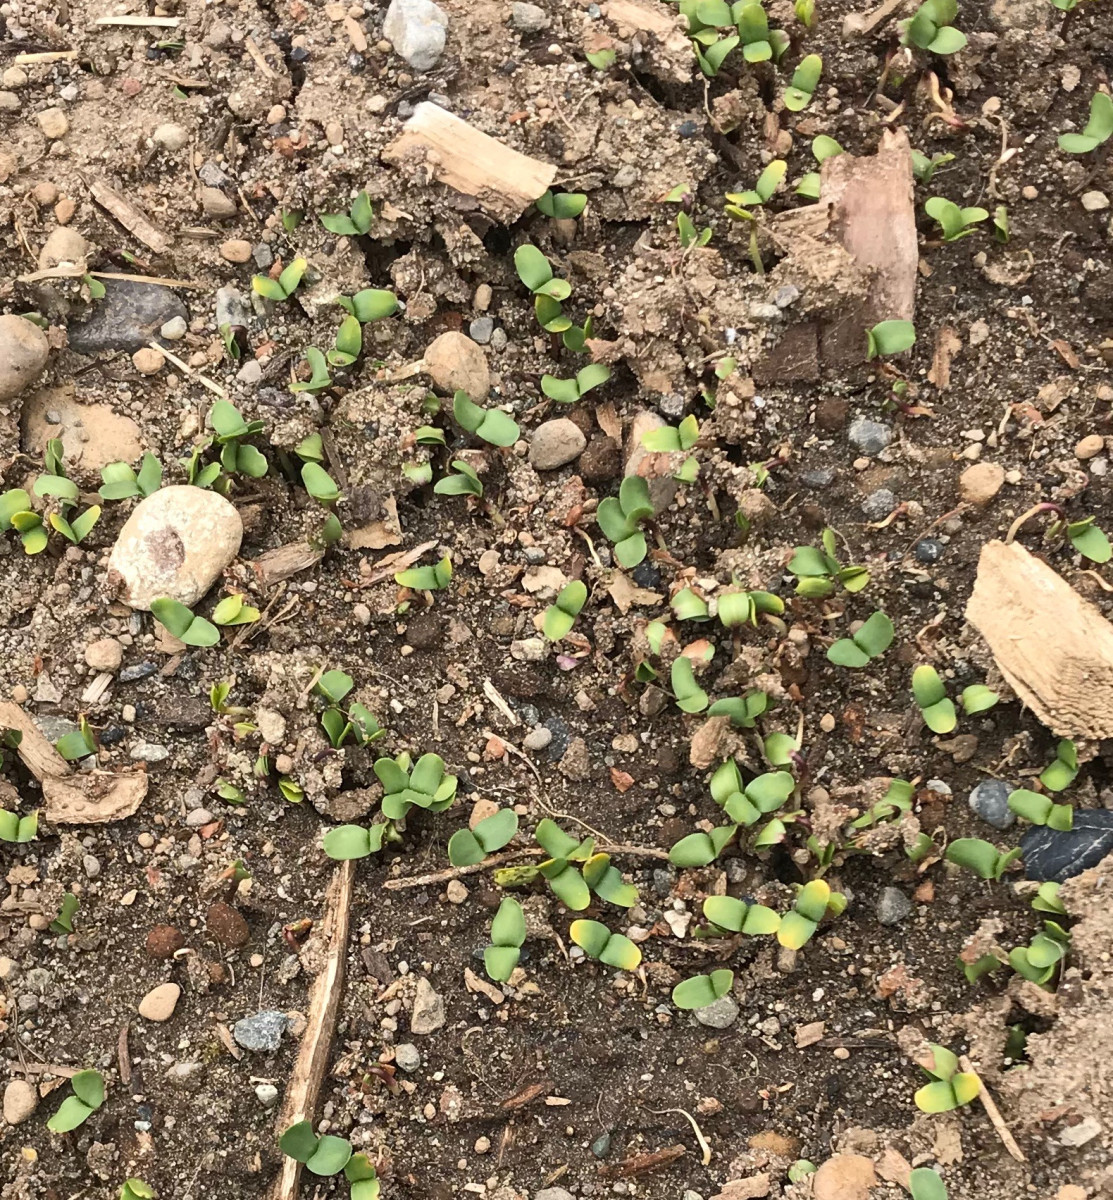
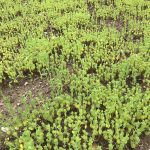
May 5: Cotyledon stage

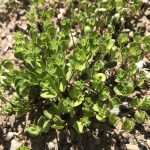
At this stage, all of the flax that was going to germinate had already done so. The cover remained a bit sparse but continued to look healthy. During this time frame we had received a steady amount of rain.
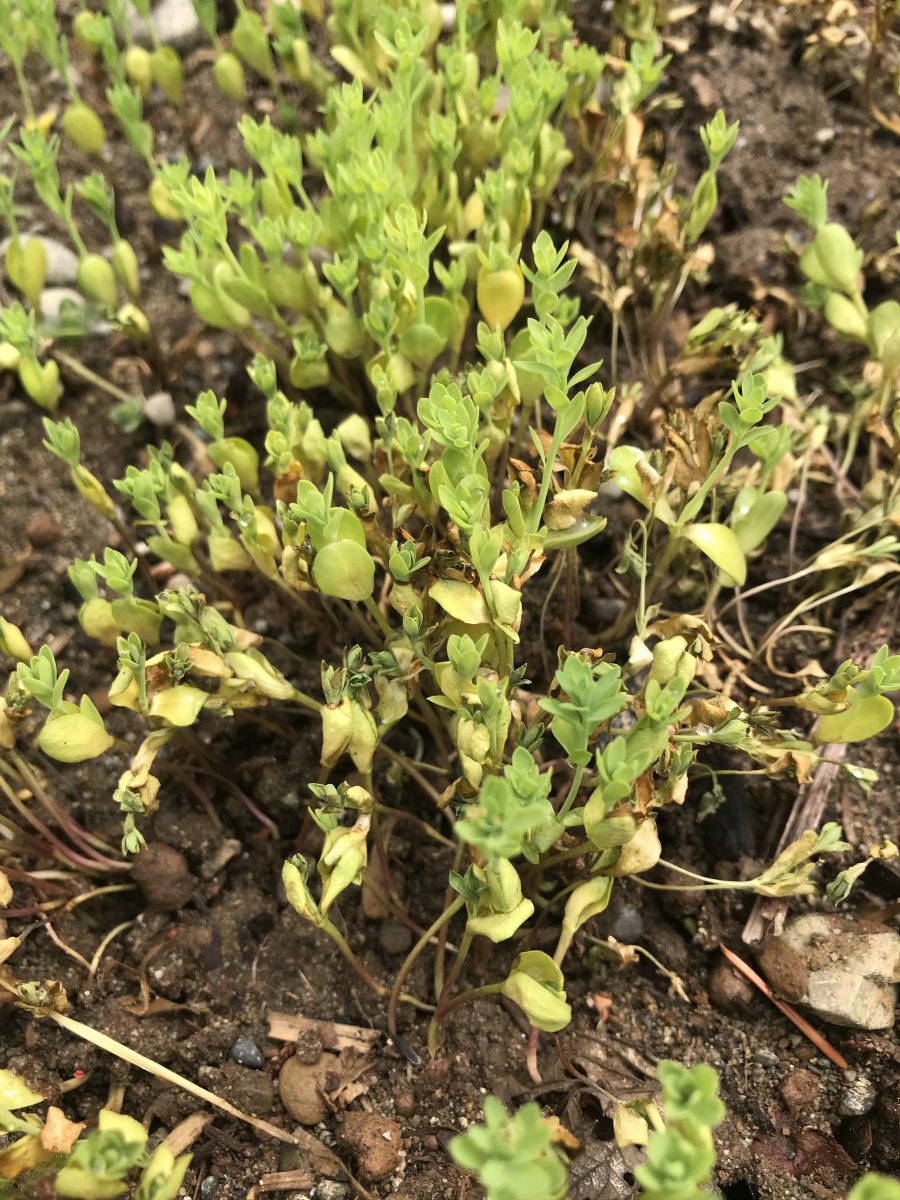
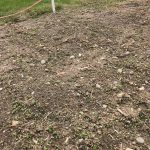
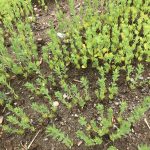
May 15: Parched and sad šŸ™

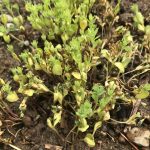
Some of the flax began to look very nutrient deficient and burnt. This was after the first dry patch of the season so I quickly learned that flax does need watering if planted in sandy soil. I watered the plants well and applied a kelp spray to the crop.

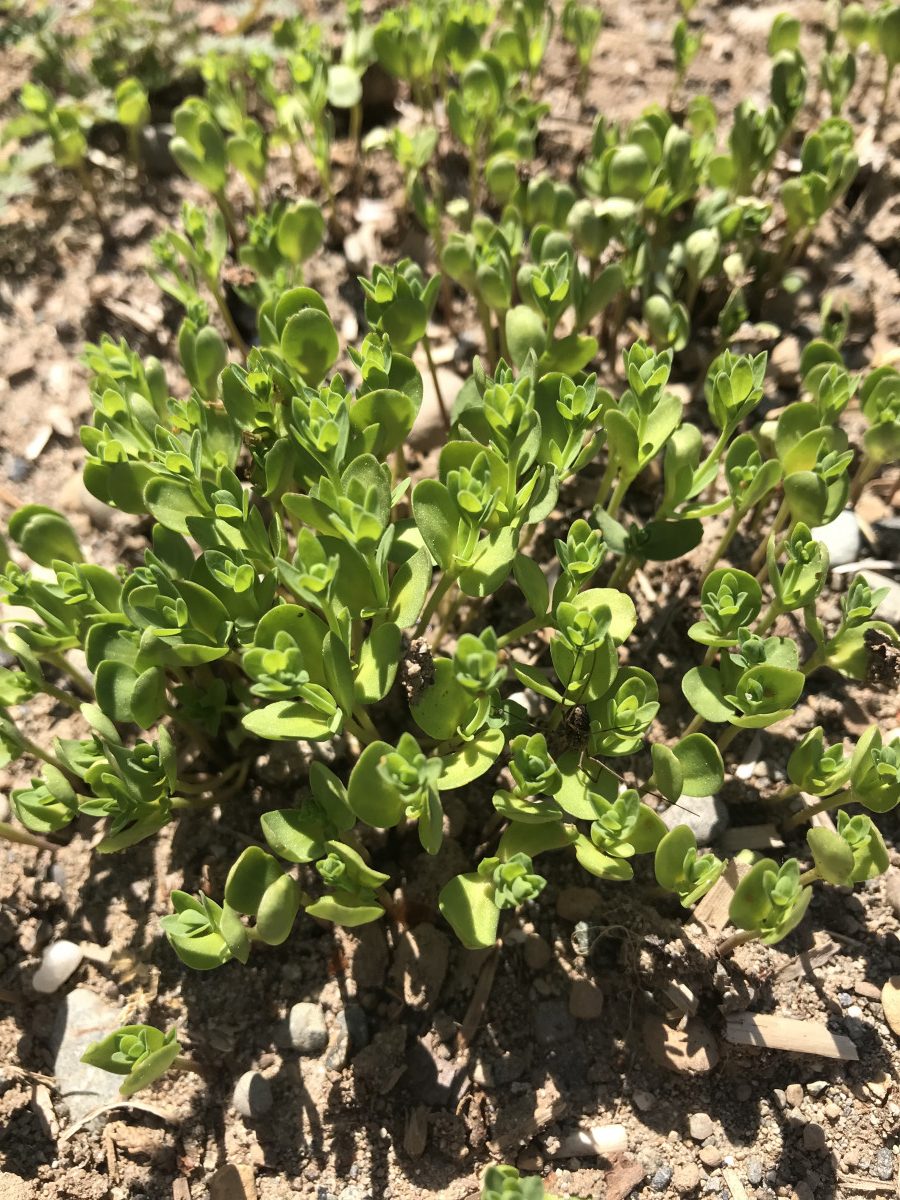
May 17: Recovering flax

After a couple days of watering and allowing the foliar spray to take effect, the flax began to look much, much better.
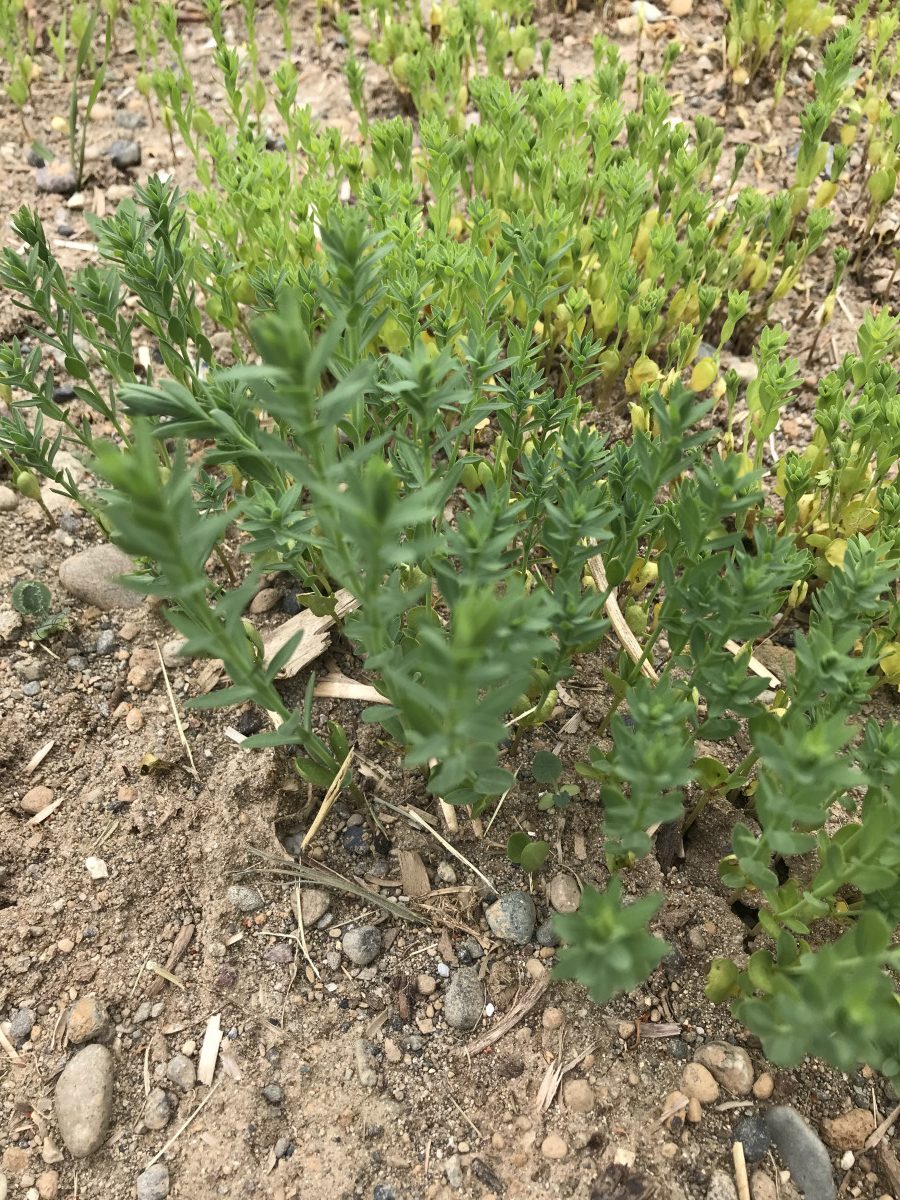
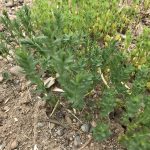
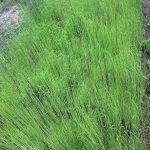
May 22: Thriving!

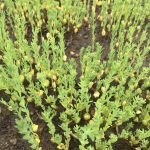
After a week of consistent watering every two days and another foliar spray application, the flax began to really perk up and speed up in growth.

June 5: Beginning to bloom

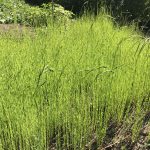
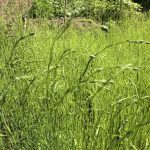
After two weeks of regular watering and consistently warm weather, the flax really took off and began to bloom.

June 12: First flowers

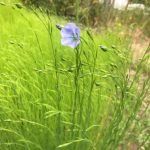
After two months since sowing, the flax is reaching its full height and has begun flowering! Just a few more weeks and it should be ready for harvest


Flax: Next Steps

The weather is warming and my flax crop is beginning to take off! So, I’ve spent quite a lot of time this week looking into the next steps of fiber processing so that I can try and be as prepared as possible when I begin the harvest in about a month and a half.

The harvest process is as follows:

  • Harvest when stem starts to yellow and seeds turn brown
  • Best to pull flax up by the root – increases fiber length and prevents sap from leaking out of the cut stalk
  • Allowed to dry in open air for a few weeks

After drying:

  • Threshing – removing all seeds from stalks by crushing the seed pods
  • Retting – separating the xylem and phloem of the plant by breaking down the pectins through prolonged exposure to moisture
  • Curing – drying after retting for a few weeks
  • Scutching – scraping woody parts away from the fiber with a small, wooden knife
  • Heckling – combing the fibers through a bed of nails in order to further separate the outer shell and finish off the process

My plans:

I think it is going to be a little bit tricky to get the timing right in order to be able to complete the process in time for the end of summer quarter. But, if everything goes well I think I can orchestrate it to where it works out perfectly.

Earliest possible harvest date: July 10

Drying: until August 1

Threshing: done by August 2

Retting: tank retting, done by August 6

Curing: until August 22

Scutching & Heckling: August 23

Spinning & Weaving: August 24 – 27

Flax: Fertilization Results

After watering and fertilizing the flax with kelp meal and letting it do its thing for a couple days, I went back to the farm to check on it and see how its doing:

It’s pretty clear that the plants are doing a lot better after only two days. The yellowing has reduced quite a bit, they are standing much straighter, and some have even begun to darken to a much richer green color. This leads me to believe that fertilizing the bed was the right move. Since it’s hard to say whether or not water also played a role in the yellowing (plants use water to absorb nutrients so either way it could have been partially responsible), so, I am planning to continue applying foliar spray weekly as well as watering a bit more frequently until the plants are well established.

Flax: Troubleshooting

Today while going to check on my flax, I noticed that a good portion of the crop was yellowing at the base and some even looked a bit burned. With the hot weather we’ve been having, it’s not super surprising that they would be needing some extra help in regards to water.

A clear picture of the yellowed base of the flax.

After watering, I consulted with Dave about the health of the plants and he pointed out that they are not flopping over in the way that under-watered plants do. This led him to believe that it could perhaps be a nutrient deficiency instead. Either of these potential issues are a not what I expected to encounter with flax given the information I had been reading about it. All of my sources have stated that flax is a light feed and usually does not require watering after germinating. But, things happen and unexpected weather can definitely have an unforeseen impact on even the most predictable of crops. So, I set about seeing how to ensure that my crops are as healthy as possible with some help from the wonderful Organic Farm staff.

This particular patch of the flax is growing perfectly, which leads me to think that maybe there was perhaps a compost clump there that allowed the plant to receive more nutrients than the others.

After further discussion with Dave, I set about applying a foliar spray to the leaves in order to get an idea of whether or not the yellowing is truly due to nutrient deficiency. The yellowing at the base of the plant indicates that it is probably either nitrogen or sulphur, so, kelp spray seemed to be the easiest solution. Kelp meal is made from seaweed which contains N, P, and K nutrients. It also contains growth hormones such as auxins and cytokinins that can help counter the stunted growth that occurs after a nutrient deficiency.

In order to fertilize my 5’x10′ bed, I applied 4 tbs of kelp meal to a gallon of water and loaded it into the backpack sprayer. I was able to spray the whole bed two times over with the liquid kelp. Foliar sprays tend to be pretty fast acting, so hopefully I will see some results within the next couple of days. If the plants react well to the spray, then I will know that it was, in fact, likely a nitrogen deficiency and I can begin working out a fertilizing plan to make sure that the flax continues to grow at a healthy pace. Results to follow!

Flax: Germination Speculation

As my flax continues to grow, the bald spots that I originally noticed after germination have been looking even more profound. I was pretty stumped on why they so much of the seeds didn’t germinate. If anything I thought that the seeding would be too dense and I would have problems further down the road. However, while reading different science journals about flax propagation, I think I may possibly have an explanation for what happened.

Clear image of the bald patches in the flax bed.

While sowing, even though I am pretty positive I did the calculations correctly, I had too much seed to properly cover all of them with soil. I was expecting the seed at the top of the soil to be the unsuccessful ones, so, I was surprised to find that the patches of seed that I was unable to cover seemed to be to seed that actually germinated.

I read that flax seed is particularly sensitive to soil crusting. After doing a bit more research into soil crusting, I found that it is defined as a thin layer on the surface of the soil that is thicker than the rest. This makes it difficult for seeds to break through before they begin to rot. Oftentimes, heavy rainfall can be responsible for compacting the soil.

Flax breaking out of its cotyledon stage!

I sowed my flax seeds on April 10, so, I went back and checked the rainfall after that. On April 13 – 14th there was a period of time that saw 3 inches of rainfall, which is above average even for here. If I remember correctly, it was pretty heavy downpour as well. With this new information, I am guessing that this could definitely have something to do with the germination problems that I saw a few days after that rain. Despite that, much of the flax I grew continues to flourish and I believe it is about to take off given the warm weather that will hopefully last the rest of the season!

Flax: Plant Profile

Flax (also known as linseed) is a broadleaf crop grown for both its seeds and fibers.

Botanical Name:Ā Linum Usitatissimum (LinumĀ – derived from Gaelic word for ‘thread’ andĀ UsitatissimumĀ derived from the Latin term for ‘most useful’)

Flax – Source

Family:Ā N.O. LinaceaeĀ 

The geographical origin of flax has not been determined due to the fact that it has been cultivated in all climates for centuries – even being found in Egyptian tombs.

The flax plant grows to approximately 3 feet in height and features an alternate leaf pattern. It is an herbaceous annual that branches corymbosely above the main stem. Leaves are borne on both stems and branches. The edges of the leaf blades are entire*.

Flowers range from blue to purple and are radically symmetrical and feature five petals and sepals as well as five stamen. They are borne on long erect pedicels and are hermaphrodite.

Minimum tillage is best for flax crops as sturdier soils help the deep rooting structure. Because flax seeds are small and have little food storage, it is important to take necessary steps to ensure optimum environment for germination.

Flax should not be planted successively as it is prone to suffering from fusarium wilt. A three year period in between crops is recommended.

Sources:

Government of Canada, Canadian Food Inspection Agency. ā€œThe Biology of Linum Usitatissimum L. (Flax),ā€ March 5, 2012. http://www.inspection.gc.ca/plants/plants-with-novel-traits/applicants/directive-94-08/biology-documents/linum-usitatissimum-l-/eng/1330979709525/1330979779866.
ā€œChapter 1: Crop Rotation.ā€ Flax Council Of Canada (blog), February 26, 2015. https://flaxcouncil.ca/growing-flax/chapters/crop-rotation/.

Flax: Germination!

Today marks the 9th day since sowing my flax seeds, so I went over to the farm to check how their germination was looking. Generally it takes about 10 days for flax to germinate, so I was pleasantly surprised to see my seedlings well into their cotyledon stage. I’m a bit concerned that the plants look to be growing a bit sparsely (which is odd because the seeding seemed quite dense) – if I were growing to sell I would consider reseeding the bald patches. However, this crop is all experimental so I’m just going to let the germination run its course and see if there are just a few “late bloomers,” so to speak.

Close up of the seedling flax.

The weather also seems to be on my side during this growth process. During the past week of germination, we got quite a lot of rain. Because of this, I didn’t need to irrigate at all. Now that my seeds have germinated, I was happy to see that we are expecting clear skies for the next 10 days, which is exactly what the crop needs.

An example of the sparseness of germination.

The bed also does not seem to be experiencing too much weed pressure. I pulled out a bit of grass weed, but other than that the flax seems to be able to grow unencumbered. The soil in the bed that I’ve chosen is a bit rocky which could be another concern for plant development, but I think it will be interesting to look at it from a “no till” perspective.

Flax: Bed Prep and Sowing

This week my goal was to get the seeds for my fiber flax into the ground in order to be able to harvest them come July. So, I started the week by taking advantage of the break in rain to prep the bed for seeding. I received 1lb of ‘agatha’ flax seeds from Fibrevolution in Oregon, which covers one 10’x10′. I wanted to be sure that I had extra seeds just in case I run into germination problems with my first try, so I decided to use a 5’x10′ plot for my project – this only requires half of the bag of seeds that I have.

The flame weed about to destroy the weeds.

The bed that I chose is in full sun and was pretty full of weeds when I started, so I opted to flame weed. I know that once the flax begins to grow, it will crowd out all the weeds so I am not too worried about them further down the road. Looking back, it would have been more efficient to simply tarp the bed to eradicate weeds and would have used less resources from a sustainability perspective, but unfortunately I needed to get the seeds in the ground as soon as possible so I did not have the time to do so. The ground was a little wet which compromised the flame weeding a bit, so afterwards I went over the bed and hand weeded the tougher ones.

Seeds about to go in the ground!

After weeding, I went over the bed with a rake to create indents in the soil in order to allow the seeds to better germinate. I weighed out 0.5lb of the flax seed and broadcasted the seeds evenly over the 5’x10′ bed and then used the back of the rake to cover the seeds. The seeds should take about 10 days to germinate and will be ready for harvest in 90 – 100 days.

I had originally planned to irrigate 1″ per week during germination, but we have received quite a lot of rain lately and are expecting more, so I made the decision not to irrigate at all. A great benefit to the sustainability of flax is the fact that (especially in the PNW) it requires very little water to thrive, so I am going to test that by not irrigating at all during its growth.

Flax Cultivation Plan

For this student originated study, one learning object will be to cultivate flax for the purpose of processing into linen. This project will be completed over the course of Spring and Summer quarters.

Materials needed:

  • One bed at least 4ā€x4ā€ (preferably with decent sun exposure)
  • Flame weeder
  • Drip tape (only during germination)

Seeds used: Fiberevolution organic ā€œAgathaā€ flax seed

Cultivation plan for Spring Quarter:

  • Week 1: Flame weed
  • Week 1: Sow Ā½ tablespoon for every 5 square feet, use a rake to push seeds about Ā¼ inch into soil
  • Week 1 – 3: Water 1ā€ per week until germinated, cease watering after germination
  • Week 3 – 10: Visit the crop at least every other day to keep an eye on weeds and crop health


Cultivation plan for Summer Quarter:

  • Week 1 – 3: Ā Visit the crop at least every other day to keep an eye on weeds and crop health
  • Week 4: Harvest crop by pulling stalk out by root, bunch and leave on bed for 10 days.
  • Week 5: Bunch flax and remove from field to begin retting process


Benefit for farm:

Opportunity to expose POF students to farming for a purpose other than food, flax plants flower continuously for 3 to 4 weeks which attracts many beneficial insects.

Benefit for student:

Hands-on experience cultivating one of the most common plant fibers, opportunity to analysis the sustainability of that particular farming practice.