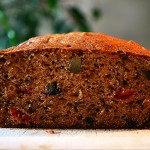
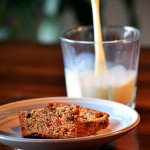
 This week I have chosen to focus my food photography on recipes and lighting basics. I have learned that recipe shots are the most common form of food photography and that the photos can be of the finished dish, the ingredients used to make the dish or the preparation of the dish. I also learned the different types of basic lighting and what kind of image you will get depending on where you place the light. I continued to use a tripod and a cable release cord. I sliced the bread and arranged the subject/s where I wanted them to be. I placed the bread on the kitchen table near the sliding glass door again and I chose to use the side lighting technique because after looking at the way the bread looked when I tried

other techniques I had liked this one the most. It made the bread look like it has a warm feel to it and made it look extremely appetizing. I placed a basic desk lamp to the side about a couple feet away and began taking multiple different photos. After getting a few photos that were different than last weeks I began editing them in photoshop. This time I adjusted the levels, applied a high pass filter and bumped up the contrast and the saturation just a little.


Your photos look absolutely luscious. I see that you have recipes uploaded. Now I’m looking forward to reading about what you are learning as you proceed through this project. What is the intention of the surveys and what are the results pointing to? What sort of intrigues occur as you photograph the breads? It would be quite instructive to the reader to learn how you achieve such pristine photographs: lighting, set arrangements, editing and so on. And then there is the emotional significance of baking bread for colleagues and listening to their critiques!