Author: latmad26
A farewell to AislingQuoy, and a welcome to new beginnings
I am very sad to report that I have left AislingQuoy due to the fact that I was struggling with severe hay fever and asthma in the environment there. After assessing my health with a doctor, Lyndal, and my parents, we all came to decide that in order to protect my wellbeing I must move on. I miss Lyndal, Steve, Maddy, and every animal already but I know that it is for the best as my health is already improving significantly after departure. If I ever do have my own goats or sheep I might have to find something else to feed them besides hay!! Even though my time was cut short, I am grateful for all that I have learned from this wonderful farm, and honored to have had the privilege to work with Lyndal, who was an astonishing mentor. I gained a lot of insight as to what it’s like to live on a sustainable farm to provide for yourself, and am thoroughly impressed and inspired by the work that goes on at AislingQuoy to make this lifestyle possible. I felt the passion and motivation that Lyndal and Steve feel for their special place, and greatly admire their desire to be so connected with with where their food comes from. The knowledge I absorbed and the experiences I had will always be remembered.
For now I am visiting another farm in Motueka, a small town on the north end of the south island. A lovely lady named Lynda (I know it’s confusing because it’s only one letter away from Lyndal) owns a little farm where she grows herbs for her herbal medicine counseling. When she first bought the property a few years ago, it was a commercial kiwifruit orchard. She is now in the process of converting it into a permaculture garden and has lots of work to do! I am hoping to do some work with farmscaping and learn more about herbal medicine, as well as help her out with the maintenance that needs to be kept up with and doing odd jobs that are required when beginning a farm. I am hoping to get a better idea of the practicalities of starting out with a dream and a messy plot of land.
As for the rest of my journey for the quarter, I’m planning to do some traveling throughout the country studying what is growing where, and why. I plan to visit other intriguing farms, attend food festivals, volunteer at co-ops, farmers markets, or community events, get in touch with the native Maori population and learn about their food culture, and spring on any opportunity I find to learn about alternatives to the super-market diet. I am feeling optimistic and excited to see where my path takes me!
Have I mentioned I’ve been eating well?
The best part of farm life is that every day I get to eat foods that are made from home-grown and hand-picked ingredients. It can be a bit taxing to come up with new ways to create meals out of whatever needs to be eaten that day, but Lyndal is a wonderfully creative chef who is used to cooking in this way so she always has lots of fresh ideas. I believe at AislingQuoy we have all worked together to succeeded tremendously in cooking up masterpieces. Current surpluses include mostly peas, zucchini, and plums. Of course there’s always plenty of cheese too. Here are photos of some of my favorite things we’ve been concocting!
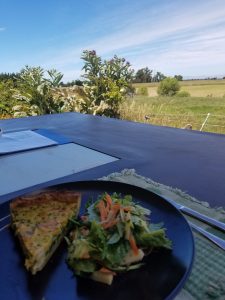
Pea & goat cheese quiche with a carrot & kale salad
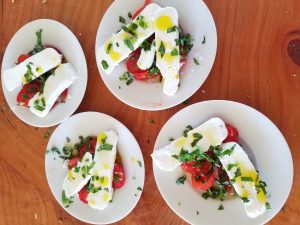
Cherry tomatoes with a mozzerella-style cheese, basil, and olive oil
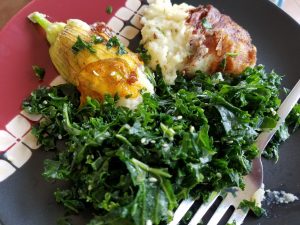
Garlic mashed potatoes, zucchini blossoms stuffed with potatoes, and massaged kale with olive oil and sesame seeds (massaging the kale gives it a similar texture to cooked kale while keeping it cold)
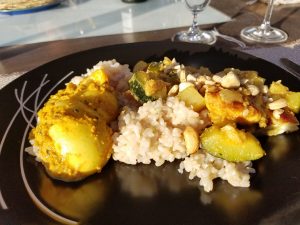
Left side: egg curry, right side: curry with zucchini and fried halloumi (halloumi made by Maddy &I!)
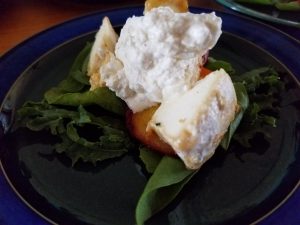
Spinach and lettuce salad, topped withed apricot slices and some homemade cheeses
Plum and goat cheese tarts with a custard base (Made by Maddy Q. & Lyndal)
Omelette with tomatoes, green onions, and a mozzerella-style cheese
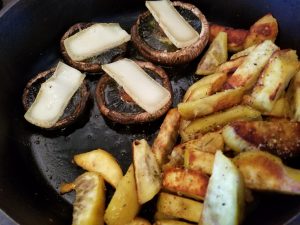
Foraged mushrooms topped with truckle cheese, alongside potatoes frying in olive oil and spices
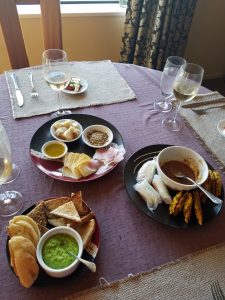
A beautiful spread consisting of breads from the bakery paired with olive oil and a spice blend, freshly made pea-pesto, sliced truckle cheese and beets, spring rolls filled with carrots and zucchini, and fried zucchini fritters, and a soy-sesame sauce for dipping
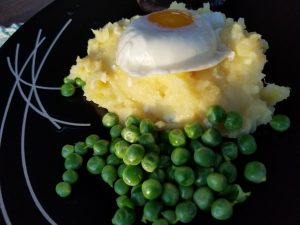
Steamed peas, and mashed potatoes topped with a poached egg (Fun fact: if you take an egg that was laid TODAY, you can crack it directly into boiling water and it will stick together perfectly and come out looking like this)
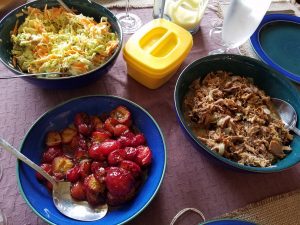
Sandwich making supplies: pulled pork, roasted plums with rosemary, and a carrot-cabbage blend. Piled on top of fresh bakery bread!
Perhaps my new favorite dish of all time, pavlova! It’s a common dessert that people make here, and consists of a big fluffy merengue that is still soft and oozy in the middle, smothered with creme patisserie and layered with fresh fruit (in this case wild cherries, blackberries, and plums) This work of art was created by my dear friend Madeline Quarles. Isn’t it impressive?
Food Preservation
One of the challenges of a self-sustaining food system where much of the food consumed is grown yourself is that when things are ready, you have buckets full of more than you can eat, and want it to last across the year until next years crop is ready again! I’ve been doing lots of preservation of different fresh things that need to be prepared for storing through the months where they aren’t in production. At AislingQuoy, Lyndal and Steve provide much of their own diets with things they grow and only need to buy in things like bread, tortillas, flour, sugar, butter, maple syrup, tortillas, peanut butter, wine, etc., items that they either can’t make themselves or don’t have the time to make. In order to have fruits and veggies in the winter, they have to use various methods to keep them safe to eat for later consumption.
Pile of apricot pits
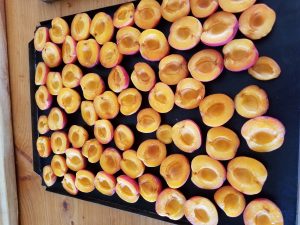
Putting apricots in oven to dry and save
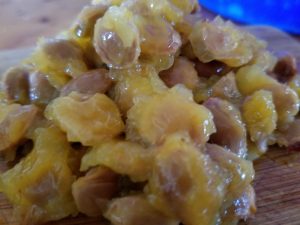
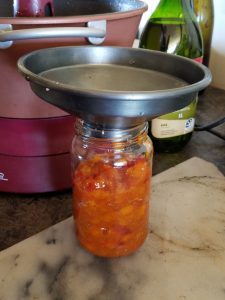
Apricot, ginger & vanilla Jam. Recipe is 1 kilo of diced apricots, one cup water, two cups sugar, spoonful of powdered ginger, and a spoonful of vanilla
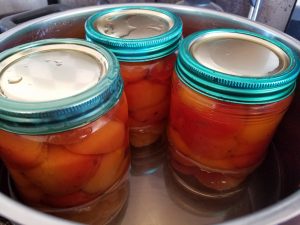
Canning apricots, sealing the jars by boiling them in water
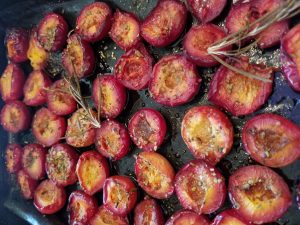
Roasting plums with rosemary, to be frozen and used in the off-season
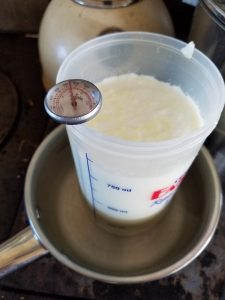
Making yogurt! Done by putting a tub of milk into a pot of water, monitoring temperature until it reaches 85 degrees, then letting it cool to 32.
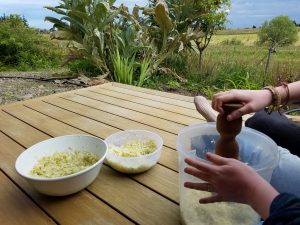
Pounding cabbage to make sauerkraut
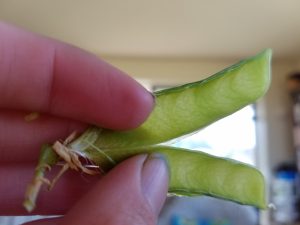
Shelling peas to be blanched and frozen, stopping along the way to admire the shells beautiful veins
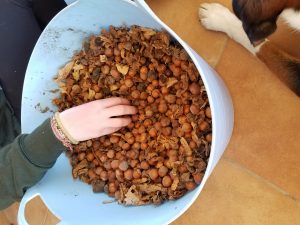
Hazelnut sorting, picking out the hollow nuts from the full ones
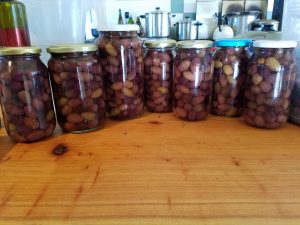
Olive bottling, in a solution of 50% saltwater brine, 50% red wine vinegar
Vegetable Rennet Experiment
There are other ways to coagulate cheese that don’t involve animal rennet. Plants like thistles, nettles, and figs all contain enzymes that act similarly to the chymosin and rennin that is extracted from the 4th stomach of calves, lambs, and goat kids.
Madeline Q. had a fantastic idea that we could use some of the surplus milk that we can’t drink or make cheese with (since we gave some of the animals a chemical wormer) to experiment on. Lyndal had never played around with how many stamens to use for coagulation so it was a brilliant way of doing a purposeful experiment with the unusable milk.
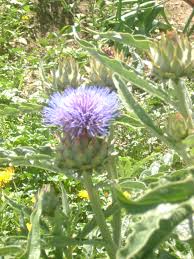
Jazz and I sitting by the cardoon plants
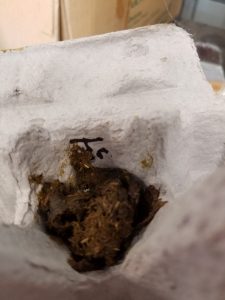
Cardoon Stamens
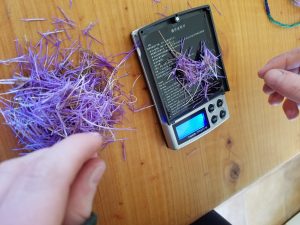
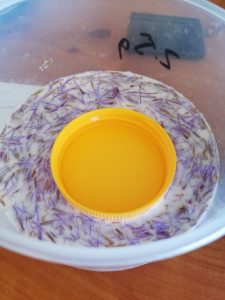
To use the plant for rennet, you extract the purple stamens from the blooming heads. To coagulate the milk properly, it must reach a point called flocculation fairly quickly, but not too fast. Flocculation means that the molecules of the milk are starting to bond together, and it is measured in the time that it takes for the milk to become coagulated. Flocculation is tested (in the simple way) by putting a plastic lid on top of the thickening milk and giving it a spin. Before you add the rennet, and in the first few minutes, the lid spins freely without resistance. When the milk is flocculated, the lid will be hard to spin and turn only sluggishly. Typically once the milk has reached the flocculation point, you add the equivalent amount of time to wait for the milk to become curd. Sometimes it needs to be doubled or tripled depending on the firmness of the desired cheese.
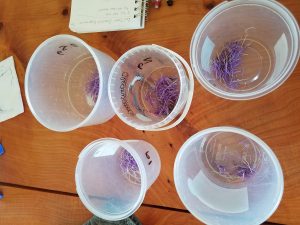
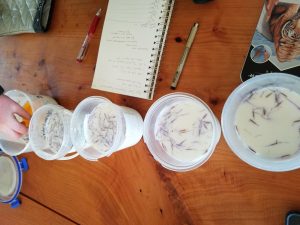
We had absolutely no idea how many stamens to start with so our attempts were a shot in the dark. We had 2.5 liters of milk from the morning from the animals we dewormed, so we decided to split the milk into five 500ml samples. We then collected stamens and measured them out into samples of .5 grams, 1 gram, 1.5 grams, 2 grams, and 2.5 grams. Each jar received one of these amounts, and then we added 500 mls of milk to each one.
The experiment design and process was primarily designed and carried out by Maddy, who was very excited about her idea. I had fun being an active watcher and learned a lot just from observing.
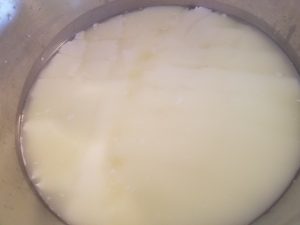
After waiting for about 15 minutes, nothing was happening. Lyndal told us the milk definitely should’ve reached flocculation by now so we clearly didn’t add nearly enough stamens for proper coagulation. There weren’t too many stamens left on the plants, but we collected the remaining ones which gave us an additional 5 grams. We threw the 5 grams in with the sample that had 2.5 in it already. Alas, the milk was thick and flocculated 6 minutes later, which is a much more appropriate time.
Our experiment didn’t give us too much data, other than that many more stamens are needed to coagulate the milk than we thought. Once the cardoons produce more stamens we could rework the experiment with larger sums of the stamens or less milk to get better results. At least we know more than we did before and made use of unusable milk!
Introduction to Cheesemaking
We have lots of milk from the dairy everyday, and the best way to use it is to make cheese! Maddy and I, as beginning cheesemakers, started with Halloumi, because it is one of the most forgiving cheeses you can make. It will still turn out well even if you make a mistake here or there. We also did some Ricotta because it’s a good way to use up the excess whey from other cheeses.
Maddy and I each did our own batches and they both turned out a little different since our procedures ended up varying a little bit.
The first step for Halloumi is to heat the fresh, raw milk to 32 degrees Celsius. For Halloumi, we used a sheep and goat milk combination. Our batches will also turn out slightly different because my mix happened to contain more goats milk than sheep, and Maddy’s was more sheep’s milk than goat.
Anyways, my batch was already off to a shaky start from the beginning because I accidentally underestimated how fast it would heat and it shot up to 34 in a minute. Cheese-making is a precise art and even one degree can totally change the final outcome, although thankfully since Halloumi is flexible Lyndal assured me I didn’t ruin it. After the milk is heated, we added the calf rennet. Calf rennet is an extracted enzyme from the stomach’s lining of a young cow, and it contains compounds called Chymosin and Rennin which curdles the casein (main protein in milk). Calves, goat kids, and lambs all have these enzymes in their stomachs because it helps them digest their mothers milk. Traditionally, you choose which animal’s rennet to use to match the kind of milk, but goat and sheep rennet is much harder to come by and lots more expensive so Lyndal typically just uses calf rennet. The calf rennet is strong so it was dissolved in water, and we added 4 drops of rennet for every liter (mine was 5.2 liters of milk so I added 21 drops). To incorporate it into the milk properly, we very slowly used an up and down motion with a whisk. When handling milk, it is absolutely key to be incredibly gentle with it. Also, for proper cleanliness it’s critical to give any utensils that touch the milk a cold rinse immediately after contact, so we washed whisks right after they came out of the milk. Once the rennet is mixed in it needs to sit for about an hour to set and coagulate.
While we waited, Lyndal talked a little bit about milk production and composition. We discussed the curve of lactation over a season. When a baby goat or sheep is born, they will require about 1 liter of milk each day. The mother will always produce a little bit more than this a day to ensure the baby always has some in the udder for them. It’s not bad for us to milk the mothers because they usually produce more than their babies want. Sometimes they do have empty udders, but we don’t mind because that just means their children are drinking plenty and growing fast! After the first few days, the milk curve rises. At 21 days old, a baby will require the most milk, so the mother reaches her peak production. The milk is also at its peak nutrition wise, it is very full of proteins which is great because when we use that milk for cheesemaking the curd yield is incredible since there’s plenty of casein to curdle. After the 21 days have passed, the milk production starts to very slowly curve downwards over the course of the next months. If you keep milking the animals regularly everyday, they can produce for a very long time! The lambing/kidding season is around September or October here, and most of the dairy animals keep on milking well into April or May.
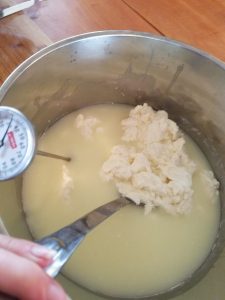
In an hours time, the milk was much thicker and we could tell the rennet had worked its wonder. As soon as the half hour was up we cut our curds. The size for Halloumi is 1/2 cm^2 cubes, and we achieved this by taking a knife diagonally each way across the curd mass. The idea is to make sure the knife reaches the bottom of the pan so that there aren’t big chunks at the bottom, and to then holding the knife as horizontally as possible to also slice the curd through that way. The end product wasn’t perfect but we did end up with small, decently consistent size chunks.
We then heated our batches up to between 35 and 38 degrees Celsius. The temperature is usually more precise than that, but like I mentioned, Halloumi is a lot more flexible than most cheeses. It does need to be heated very gradually and steadily, however, because if heated too fast it won’t press properly and you could scorch the milk at the bottom. Heating needs to be done because it expulses the whey from the curds, separating the two and and concentrating the curds. The milk was 30 degrees before heating, and according to the typical rate (one degree every 5 minutes) we set out to bring it up to 36 degrees over the course of a half hour, stirring all the while. While the best case scenario is this controlled, steady rising, the second best possible scenario is that it starts off too slow and then gets faster at the end. The worst possible heating would be temperatures that are fluctuating up and down multiple times, or rising up really quickly and then flattening out.
We managed to stay focused and control the temperature just right so that both Halloumi pots heated up nice and steadily. Lots of taking the pot off the burner and putting it back on was involved but it worked out well. Our curds ended up looking like little lumpy blobs floating around (no longer nice cubes).
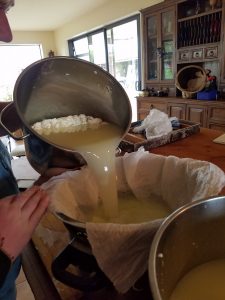
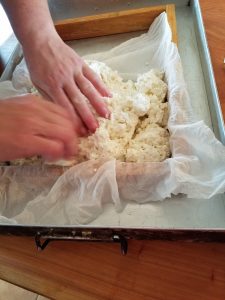
Next, the lumpy curd blobs just sit in the whey for 5 minutes in order for them to shrink a little bit and sink into the whey. Once time was up, we drained out the whey in a double-lined sieve.The whey buckets were immediately put back on the stove for Ricotta making, because it can’t dip back down in temperature and needs to rise up to 90 degrees fast. We spread out the curds into the press, still in the cheesecloth. We arranged the curds so that there was no significant air patches, and so that all the curds were evenly distributed and pressed up tight against the edges of the wood frame. We wrapped up our curd sheets in the cheesecloth, ready to be pressed.
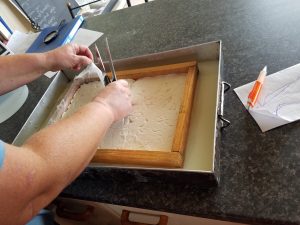
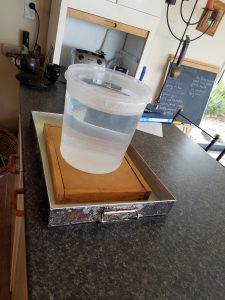
A cheese press can be complicated (a designed machine) or very simple. In our case, we don’t have any special “cheese press”, we use a very easy method that anyone can replicate at home. First, we put a sheet of flat wood over the frame. The cheese needed the pressure of 1 kilo applied onto it, and since 1 liter of water weighs 1 kilo we just placed a bucket containing 1 liter of water on top of the press.
It’s worth noting that my yield of curds was a little lower than Maddy’s batch. Mine took up a little less than half of the press. This was likely due to the fact that mine overheated by 2 degrees initially, and we believe there may have been too much rennet in it as well (I may have used a little less than 5.2 liters of milk, our records aren’t perfect). An additional reason is that my goat to sheep milk ratio was a little higher in goats milk than Maddy’s. In terms of milk composition, sheep have the best curd yield, goats have less of a high yield, and cows milk yields only about half the curds that sheep milk can produce. It’s kind of interesting that most cheese in America is made with cows milk when its really not as effective as sheep or goats.
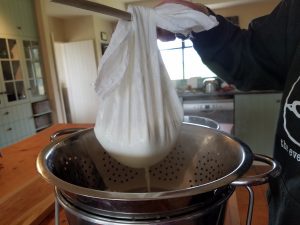
Almost right after we finished getting the press situated, the whey for our Ricotta was heated to 90 degrees. Lyndal then told us that alternatively, my batch of Ricotta would likely be richer and better yielding since I had more whey drain from my curds. The whey from the ricotta had curdled into finely grouped cheese bits. All we did afterwards was add 2 teaspoon of vinegar and 2 teaspoons of salt to each batch, stirring gently after each addition. Then we let it sit for one minute before draining. For the draining process, we practiced a technique called the cheesemakers knot, where we held 3 corners of a sheet of cheesecloth in one hand, the fourth corner in the other, and tied it around a spoon which we let sit across the pot to drain for quite awhile. Voila! We had 2 big cheesecloths full of Ricotta. It’s a super easy cheese to produce, and we just stored it in plastic containers in the fridge after all the whey drained out. The remaining whey got fed to the pigs (who really love it), and a bit was saved for preserving the Halloumi in.
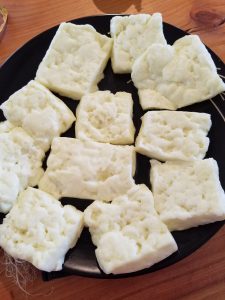
Just after we tied the Ricotta the Halloumi was ready to be dealt with and had finished pressing. When we removed the sheet of wood from the press the curds had solidified together and formed one sheet of smooth, spongy, delicious looking cheese. My batch was just a little bit more condensed than Maddy’s but overall the finished product looked and tasted very similar. The final steps were easy, all we had to do was cut it into squares and use a slotted spatula to drain off any residual whey. Some of them went to be stored in the fridge, sitting in a brine we made that was 500ml of leftover whey mixed with 500ml of 20% salt solution. A few squares went into a pan of sizzling butter, so we could eat fried Halloumi!
The taste was fresh and creamy, a little bit salty but most of the flavor was sweet like the milk it came from. It had a squeak sound when you bit into it, and the texture was similar to chicken. I think I would absolutely love to eat nothing but this cheese for every meal. I think our dairy animals would be proud to know that their milk got turned into something this yummy. We’ll be cooking with it over the next couple days. One of Lyndal’s favorite ways to use Halloumi is to fry it and then put it in curry with vegetables. How exciting!
Animal Welfare Management
Unfortunately, AislingQuoy is facing a bit of difficulty with worm issues in the goats. Quite a few of them are looking rather thin and off-color, have low appetites, and we’ve noticed a big drop in milk production. Once the animals seem to reach an uncomfortable level of illness it’s important to get further data on their conditions and treat them as needed.
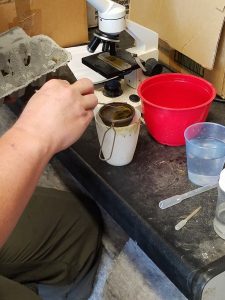
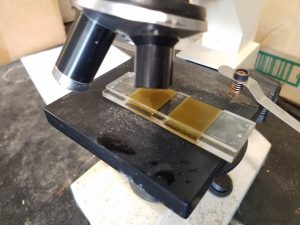
One way to tell how an animal is doing is to lift up their eyelids and check for paleness. A healthy goat will have a nice pink color, and a sick goat may have a pale eyelid because worms cause anemia which in turn lowers blood flow. A few of the goats didn’t check out to be too good so more testing was needed. Alas, we decided to do a fecal exam and get an egg count. The worms spread by releasing eggs into the feces, which hatch on the grass and then the other animals in the paddock eat the larvae off the grass. We sat around their pasture and carefully waited for each one to poop so we could collect and label it for the count. After gathering samples from all the ill goats we prepared them for microscope slides. This was done by placing 2 grams of each feces in a small strainer and slowly adding 28 mls of saturated saline solution. We worked the saline through the sample and got a bunch of brown goopy water in the bottom, full of eggs. We then used the dropper to fill the slides with the feces solution and let it sit for two minutes so the eggs could rise to the top of the slide.
Once the sample was in the microscope we used the grid lines to count how many eggs we saw and noted which kind of worms they were. The two kinds we found were Coccidia and Barber Pole (Haemonchus contortus). They look kind of similar, both oval shapes, except that the Coccidia were much smaller.
Sadly our results were that almost everyone we tested had ridiculously high counts. We decided to treat 3 of our milkers who had serious issues. The treatment is a really gross chemical called Matrix and it looks like purple paint. We had to feed it to them with a plunger syringe and they all turned away and tried to avoid it because they know it tastes really bad. It made Lyndal, Maddy and I all pretty sad to give it to them because we all believe organic practices are to be followed, but it was for their own good and animal welfare is always the most important thing to remember. It’s just not moral to keep an animal suffering. There is a milk withholding period of 35 days associated with the medicine. It’s going to be hard because we have to keep milking them and just discarding the milk because if we don’t, their lactation season will end now until they have another baby because their bodies won’t see a reason to keep production up, and then after the 35 days we’d lose some useful milk down the road. If we keep milking them morning and evening now they will produce milk for another couple months. For now we are just going to be feeding the milk to the pigs but we’re looking into other options for milk use, like potentially storing it in a friends freezer and bottle-feeding it to baby goats next season.
Anyways, we learned a decent bit about assessing severity of parasite problems and what treating them means. Not one of the best days on the farm but that’s what life is like raising animals sometimes.
Experiencing the Essence of Milk
The dairy animals are a big component to the farm as they provide milk for drinking and cheese-making. They also occupy a few hours of our time both morning and evening!
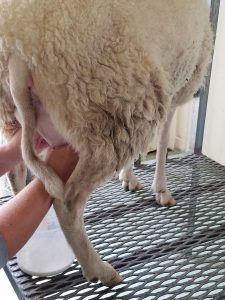
Maddy and I are just learning to do the actual milking, and there’s a bit of a trick to getting it just right. Every animal has different lengths and widths of their teats, along with different sized orifices so it takes individualized practice with each one to get it right. The general idea is to close off the top of the udder with your thumb, and firmly apply pressure flowing through each one of your fingers like the scale on a piano down to the base of the teat with your pinky. This motion is repeated over and over, with a hand on each teat, switching off in a melody. It’s important not to pull on the teats or they won’t like it, and to make sure you’re not putting too much squeezing pressure on the udder tissue. It’s also good to get every last drop of milk out in order to preserve the long-lasting health and production of the udder. When the milk stream starts to get down to a trickle, we take a break from the squeezing and give their udders little massages with the back of our hands. This imitates the head of the babies nuzzling them, and is my favorite part because it seems endearing and sweet. They usually have a bit thicker of a milk stream right after you do that too, so it seems as though they enjoy it. There’s certainly a melody about going through the whole process, and it’s a rather lovely time so I’m having fun getting into the rhythm of it.
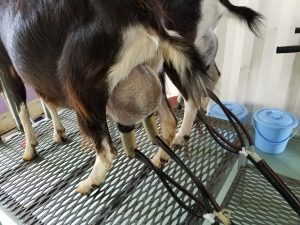
In the morning, the goats get milked by the machine. They have more milk in the morning so it’s more efficient to do it that way. The machine is really easy to use, other than cleaning it at the end with a few different washes which I’m still getting used to since it’s a lot of steps. Basically for milking, the machine has tubes that are connected to an alluminum bin on one end, and have suction cups on the other. The cups just grab right on to the teats when you place them firmly there, and a section of the tube is clear so you can see when the milk is flowing nicely. After the milk turns to just a dribble, it’s time to take off the cups and massage the udders a little. The cups slide off pretty easily when you stick your thumb in between their teats and the cups edge, although sometimes the goats don’t like the feeling and stamp their feet a bit. While the machine is convenient, I do prefer hand milking as it feels more personal and I like to give the animals lots of touch.
Lyndal really loves each of her animals and it’s so inspiring to see the care she takes with each one during milking. The animals all love it too, they’re very loud, persistent, and eager to come in for their turn each morning and evening.
When I drink their milk, it’s another magical moment. I know that the milk has been loved, tenderly, and happily drawn out from happy creatures. It’s nothing like drinking hormone-injected, pasturized plastic-jugged milk that tastes factory made. It’s real, true milk, raw and straight from the source. It tastes of bliss, and I don’t know that I’ll be able to go back to drinking “normal” milk in the States as I’ve grown attached to the white, silky rich fluid that my new good friends provide.
