Since the last batch of beer (and first ever) that I brewed I have had significant time to research and determine what I want out of the finished product, and how to achieve that. The first beer I made was a simple recipe using malt extract. It was a mixture of malt extract syrup (6lbs Pilsen), dried malt extract (1lb pilsen), and about a pound of crushed barley to steep for flavor and color. Also this first recipe used only 3 ounces of hops, all the same variety (Chinook). It was an easy recipe and a good baseline for comprehending the fermenting process. At the start of the first brew I did not fully understand hop characteristics, or the importance of a proper grain bill. As I learned the intricacies of brewing I realized my mistakes from the first batch, and gained a great deal of knowledge for success in the next brew.
The first batch was drinkable, but not something that I would purchase. It had a slightly yeasty scent, and aftertaste, and was rather bitter; but not in the good  way. It also did not attenuate to the degree that I desired. This was due to three things-The first issue was that that the yeast pitch rate was incorrect (I should have made a starter), the second was that the wort was not properly aerated, and the third was that the ideal fermentation temperature was not maintained. I attributed the off-flavored bitterness to my initial hop addition to the kettle during the boil. My first kettle was extremely cheap and thin causing the hops to fall to the bottom and mildly burn when not constantly stirred. On the kettle was the perfect imprint of the heating element of my electric range. The first kettle was too thin to disperse heat, and thus caused the additives to easily burn.
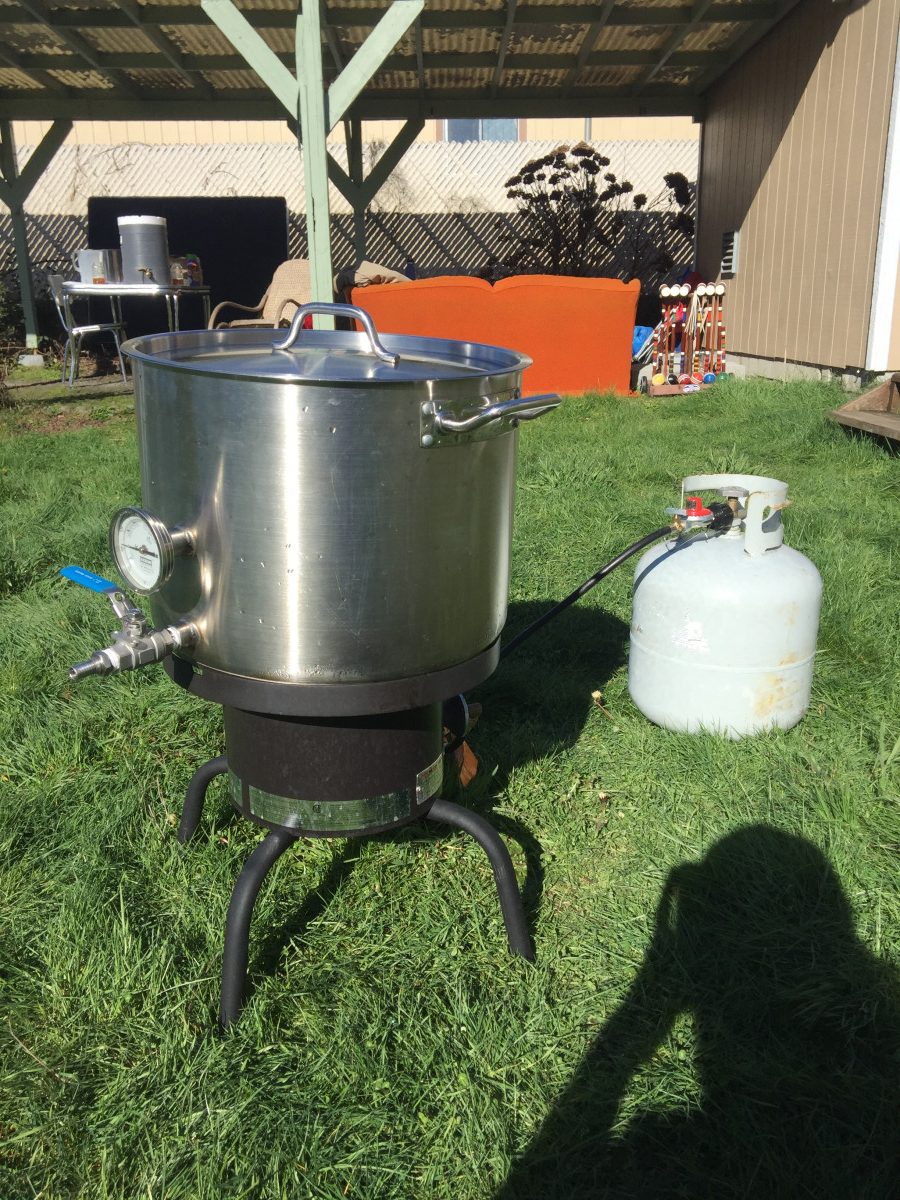 My new kettle is extremely thick on the bottom, and features both a spigot, and thermometer which makes it very useful for heating mash and sparge water. It also has a capacity of ten gallons as opposed to my previous one, which was only five; and could really only support extract brews. Also since the last brew I have purchased a fifty foot stainless steel immersion wort chiller, mash tun, and fermentation heat wrap with a temperature controller (just a seedling mat). These upgrades will definitely improve the overall quality of my brewing and fermenting.
Now with one very simple brew under my belt, I decided to ramp it up and create my own recipe. My research began mainly with looking at the inputs for clones of my favorite beers. Hop varieties, and malt bills kept seeming to overlap, and the start of my recipe had begun. I had tried to keep my mash bill to under 12 pounds, because the woman who owns the local home brewing store told me that this would most likely be the capacity of my mash tun. My grain bill ended up being a total of 12lb 10 oz, with plenty of space to spare.
Grain Bill
- 10lb 2-row
- 1lb 12oz Munich 10L
- 12oz honey malt
The 10 pounds of base malt seemed perfect, with almost two pounds of Munich 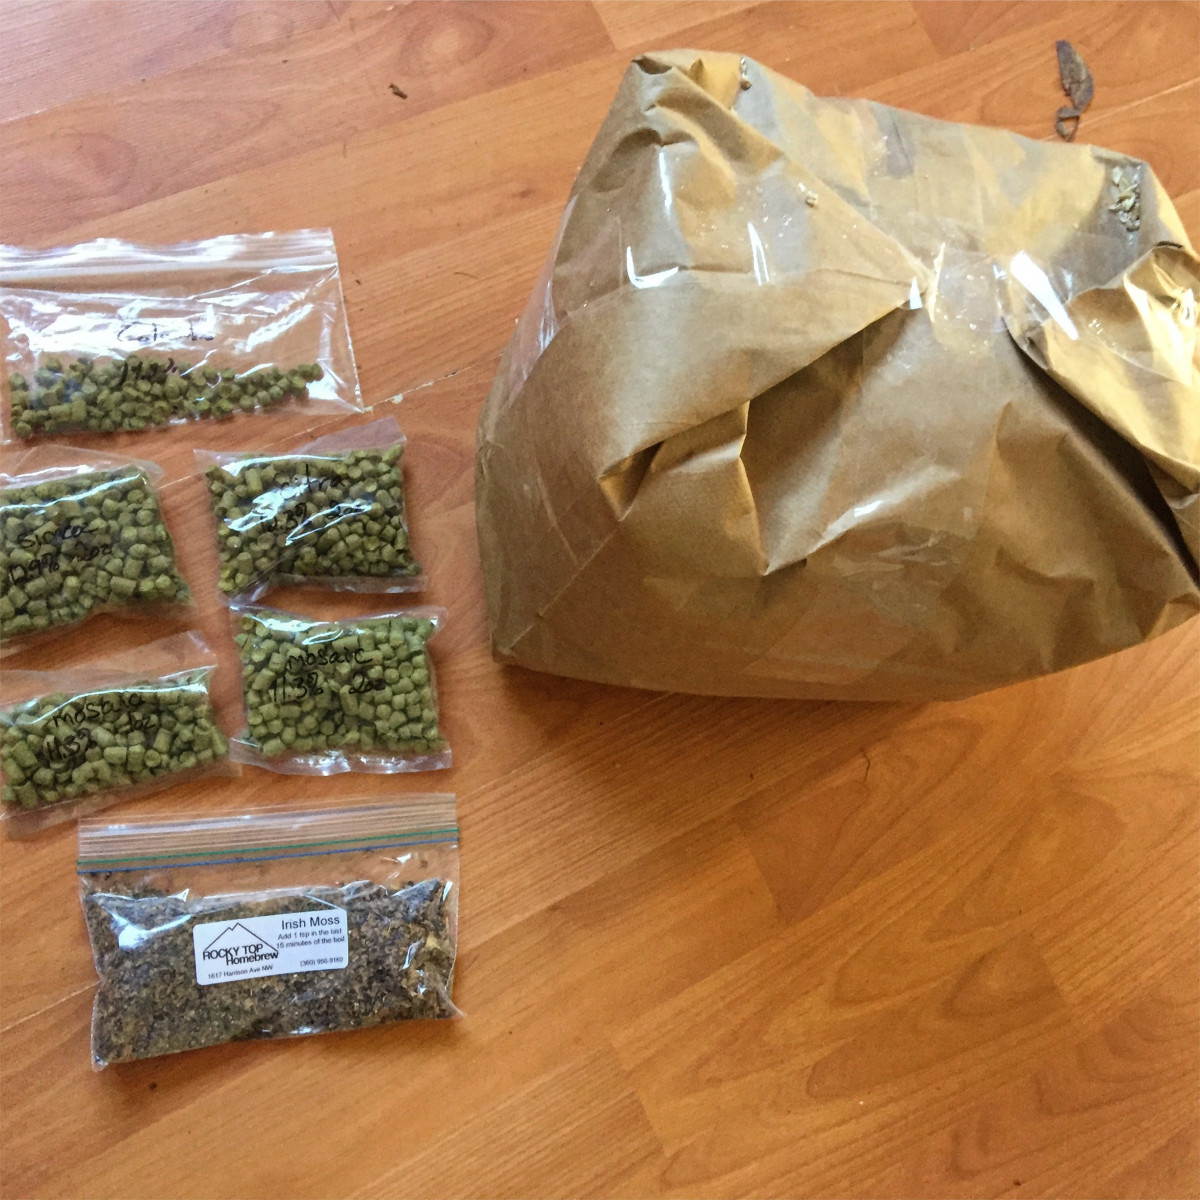 10L for a small amount of color, sweetness and breadiness. I now regret adding so much of the honey malt due to a few articles that I recently read on how it can impart too much sweetness in the finished product. I initially added it to the bill for its sweet characteristics and honey flavor. I now know for an IPA it either should be used at low quantities such as three ounces or not at all; I still think that this beer will turn out much better considering.
My hop choices were varieties that are always present in beers that I enjoy. They are Mosaic, Simcoe, Citra and Columbus . Originally I was going to try a variety called Nelson Sauvin as a dry hop addition. Nelson Sauvin is a hop variety from New Zealand and has a gooseberry like flavor with spicy undertones. Within the last few years it has become a popular hop variety, but unfortunately they did not carry it at the home brew store near my house. I switched the Nelson Sauvin addition out for Citra, which is a staple hop in many of the beers I like, and has relatively similar properties.
Hops:
- 2oz Simcoe
- 3oz Mosaic
- 2oz Citra
- 0.5oz Columbus
I began the brew day with cleaning all of my equipment thoroughly and setting up. This process took about an hour and a half and ensured ease throughout the day.
I then heated my 4.5 gallons of strike water to 169.4 degrees Fahrenheit. This 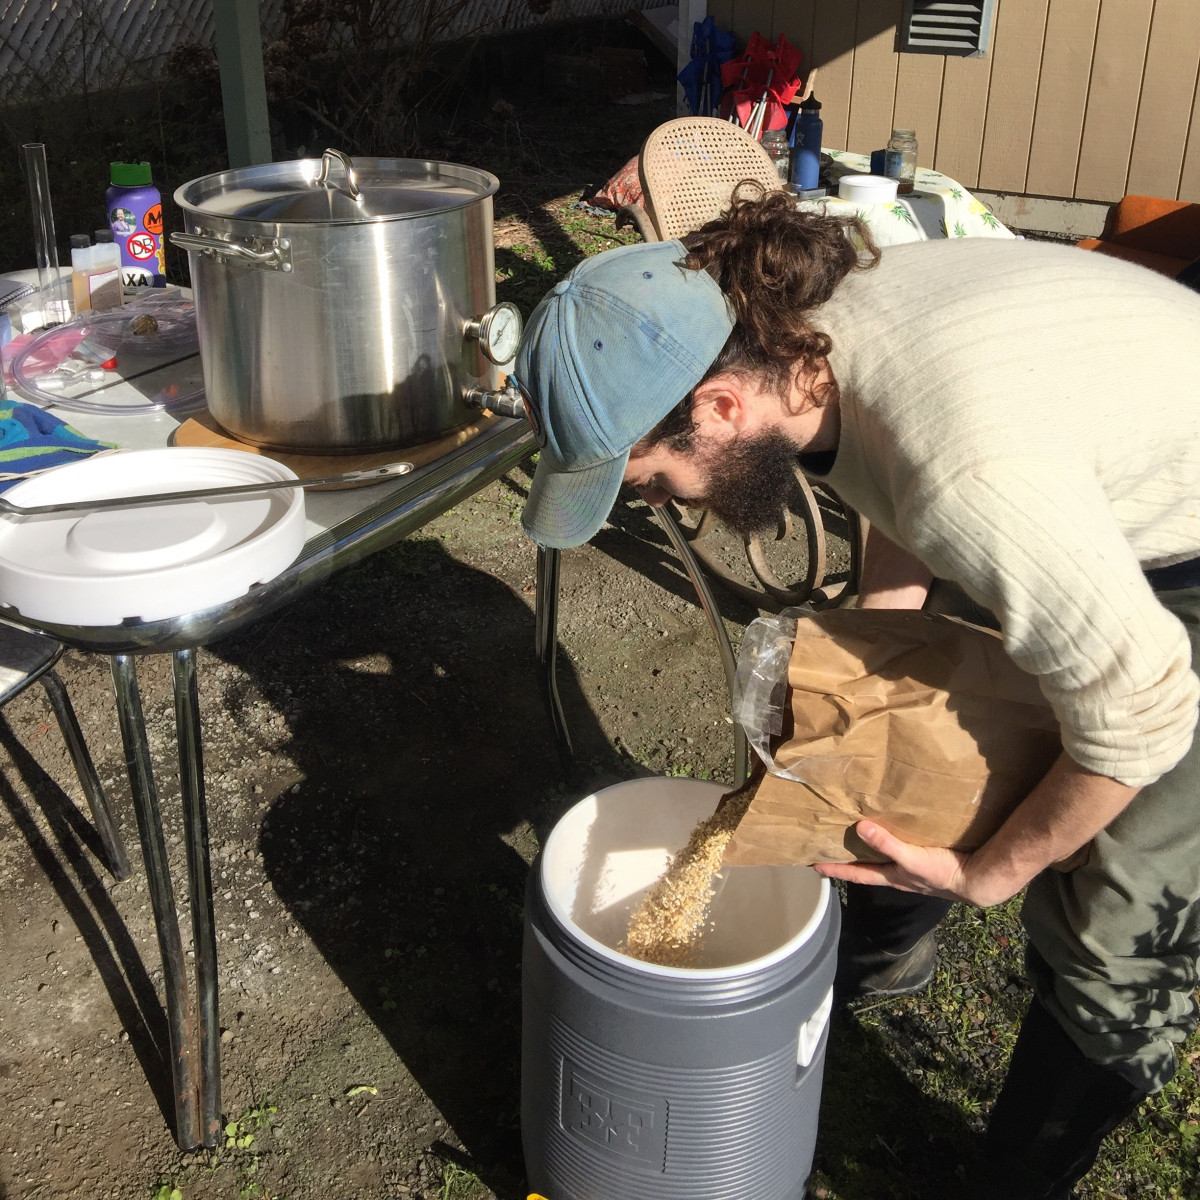 equalled about 1.4 quarts of strike water per pound of grain which is an average amount for mashing. While heating the mash water I added 1.25tsp of gypsum towards the end using the rate of a quarter teaspoon per gallon (This rate was given to me by the owner of the home brew store near my house; he says he adds this amount to every brew he does with the Olympia water) Unfortunately I have still not received a municipal water analysis that I requested, so this addition seemed like a good place to start. Gypsum (calcium sulphate dihydrate) is commonly used to lower mash pH, as well as bring out positive bitter flavors in a finished IPA. With the amount of water, and temperature, the mash was supposed to be 154 degrees Fahrenheit, however, it was only 152.5 degrees. This temperature is totally fine, and in turn will produce a mildly drier finished product.
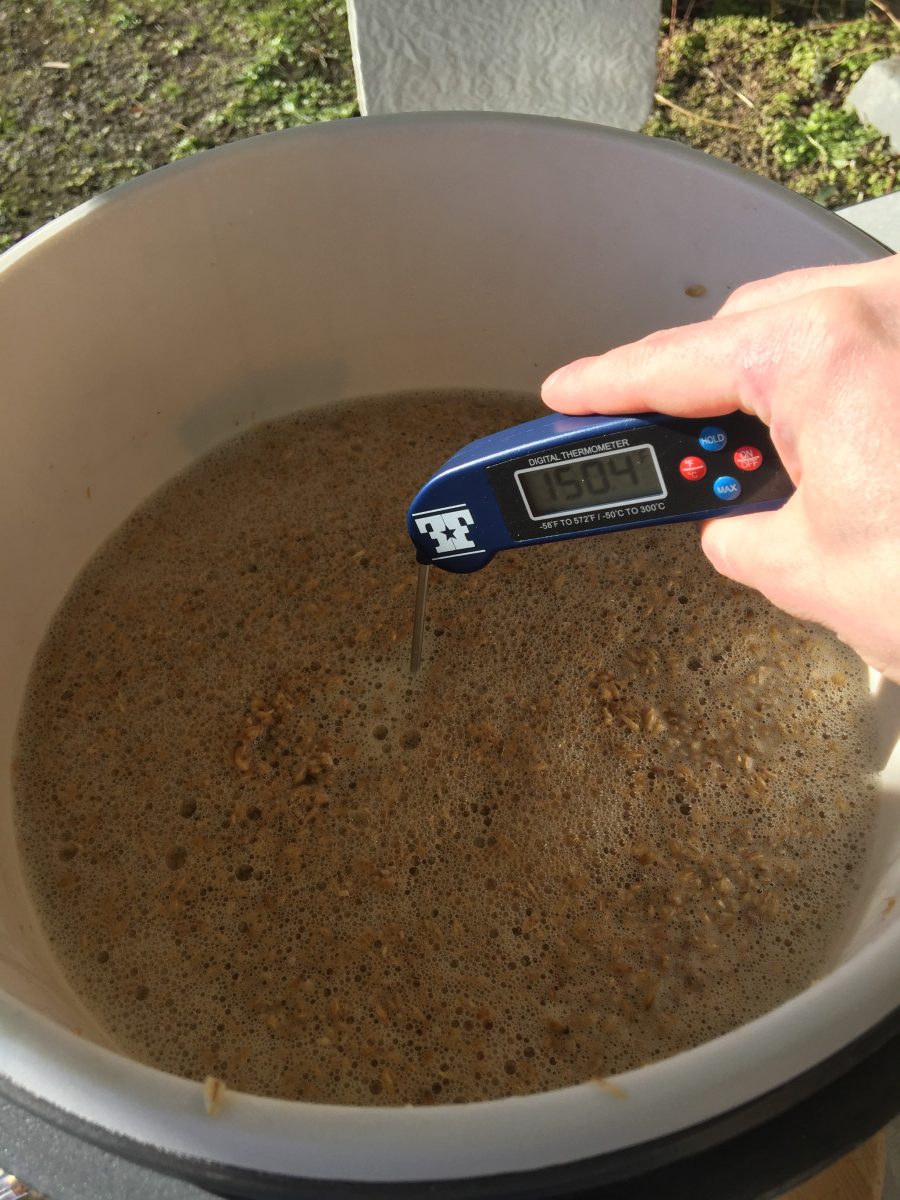 The ideal range for starch conversion is 150 to 155 degrees Fahrenheit. Above and below this range work as well, and will produce different end results. The higher the temperature, the sweeter, and the lower the temperature, the drier. The ideal mash pH range is anywhere from 5.2 to 5.8, usually airing on the low side. Too high of a mash pH will cause unwanted tannins to be extracted and too low of a pH can cause enzymatic activity to slow down and produce acetone like flavors in a finished product.
My mash pH was 5.4-measured at room temperature for an accurate reading. pH measured at mash temperatures can be about 0.3 higher than the actual pH (So mine might have read 5.7 at mash temperature).
While the grain was having its starches converted into sugars, I took the time to rinse what what soaking in powdered brewery wash, and move it to sanitizer 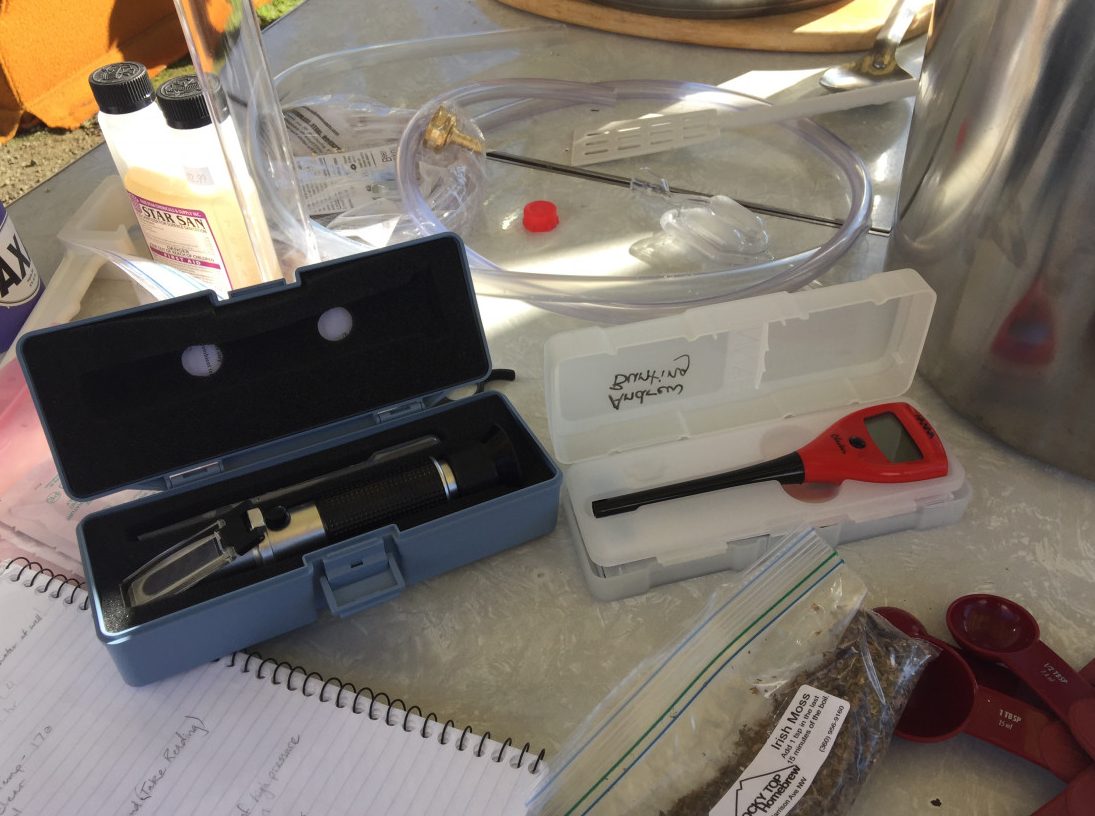 solution. At this time I also heated up sparge water. The sparge water was heated to 170 degrees Fahrenheit to halt the enzymatic activity of the mash. This too was 4.5 gallons of water, which at the time seemed like plenty. I drained the wort from the mash into my secondary brew kettle to hold while I sparged the rest into my primary kettle. I allowed the sparge water to be in contact with the grains for about ten minutes, then drained the wort into my kettle. At this time I mixed the mash wort in with the sparge wort.
Now was time to boil. I put the kettle on the propane heater and allowed it to come to a boil. I used the time while waiting to measure out my hop additions.
Initial Hop Additions
- 0.5oz Simcoe at 60 minutes
- 0.5oz Simcoe at 30 minutes
- 1 oz Mosaic at flameout
- 0.5oz Simcoe at flameout
My boil went very well and lasted just a little over an hour. With twenty minutes 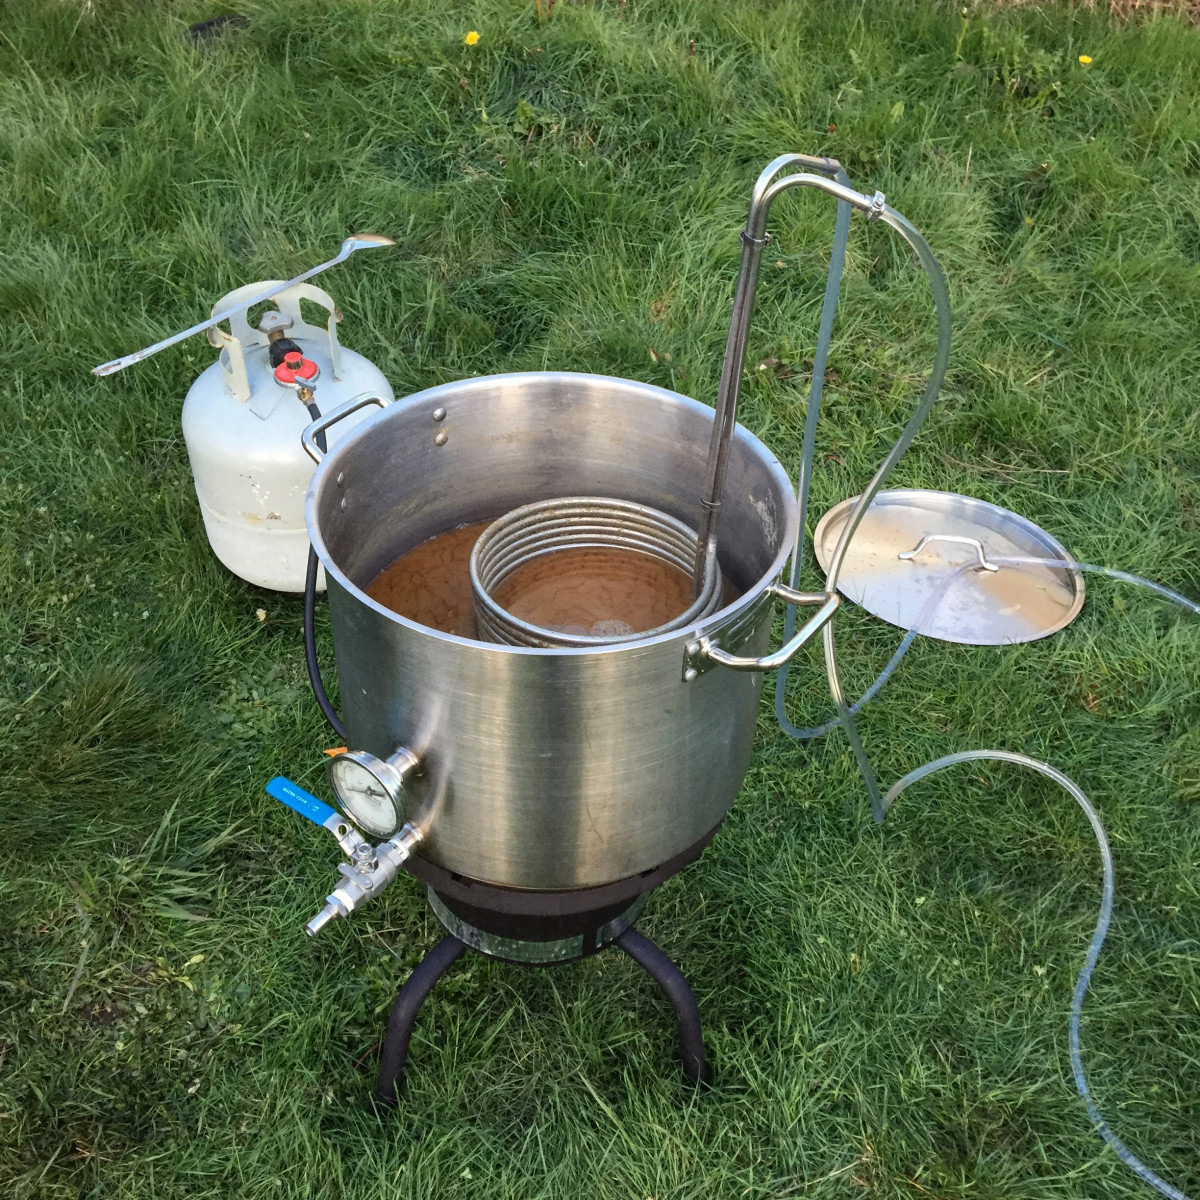 left I placed my wort chiller in the kettle to use the boiling wort to sanitize it. At fifteen minutes I added a teaspoon of Irish moss to the boil to aid in protein coagulation to prevent chill haze and produce a finished beer with enhanced clarity. Once the sixty minute boil was over I turned the gas off and added my flameout hops. I turned the water on for my wort chiller and used it to create a whirlpool to allow the hops to be mixed in, and then settle at the bottom. The cooling process took about twenty minutes. and then it was time to transfer it to the fermentor.
I transfered the wort to the fermentor, and promptly too a spectrometer reading. The original gravity came out to 1.081. This was too high of a gravity for the amount of yeast that I had to pitch, and I also only had about four gallons of wort at the end of the boil. Stupidly I decided to add more water, but in doing so I 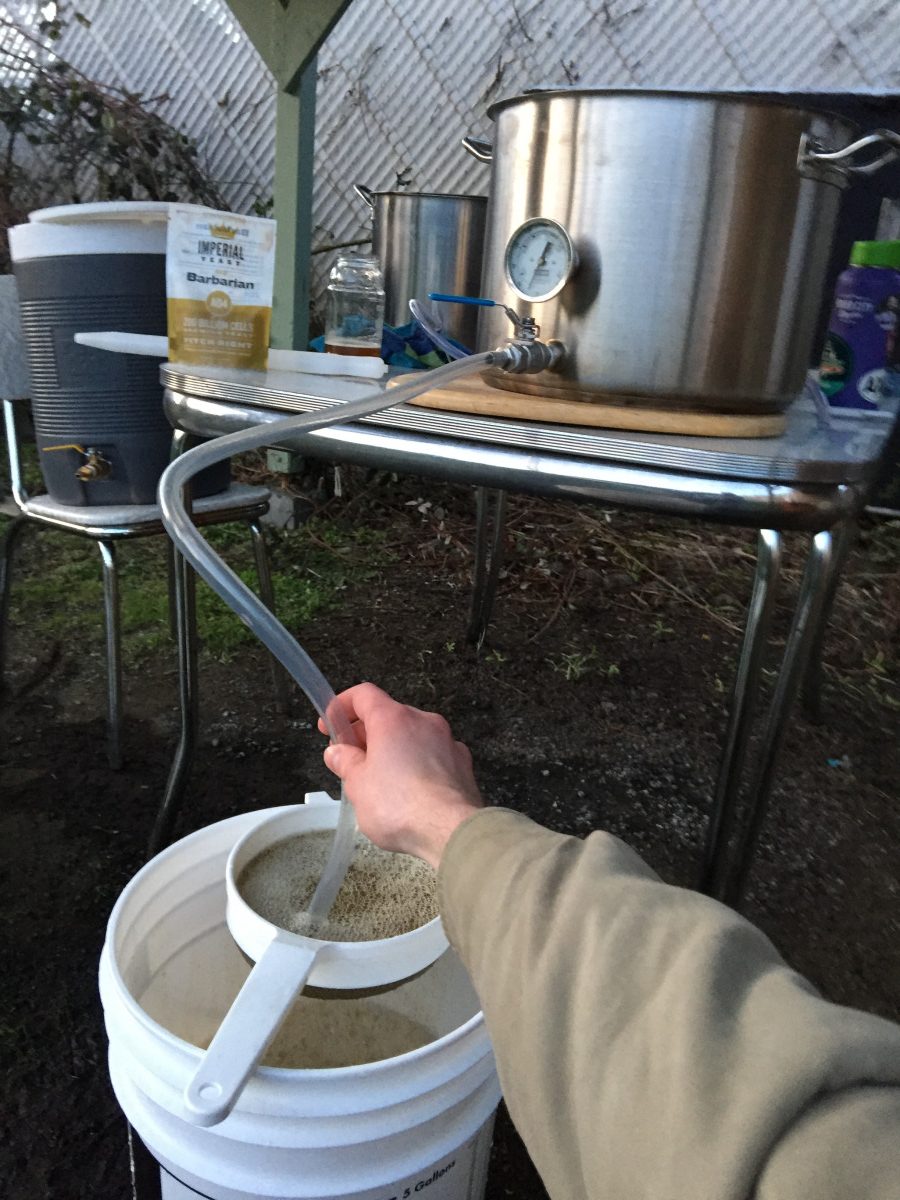 heated the wort up to 80 degrees by adding hot water. I should have re-cleaned my word chiller and cooled it with that, but instead I stirred and sloshed it around with a sanitized spoon for about a half an hour… This was definitely not the best thing to do as contaminates easily could have gotten into the wort. The Idea is to chill the wort quickly to prevent unwanted contaminates entering the beer, which I did, but then tried to make adjustments. The one positive thing to this poor execution of cooling the wort was that it got extremely aerated which is necessary for the yeast to thrive. Next time i will have a measuring stick to know what my boil volume is, and add water earlier. Ideally I will properly account for grain moisture retention in the mash, and the evaporation and condensing rate during the boil. The adjusted gravity was 1.072, and the temperature was 68 degrees. I then pitched the yeast. I dumped in the starter slurry, lidded my fermentation
 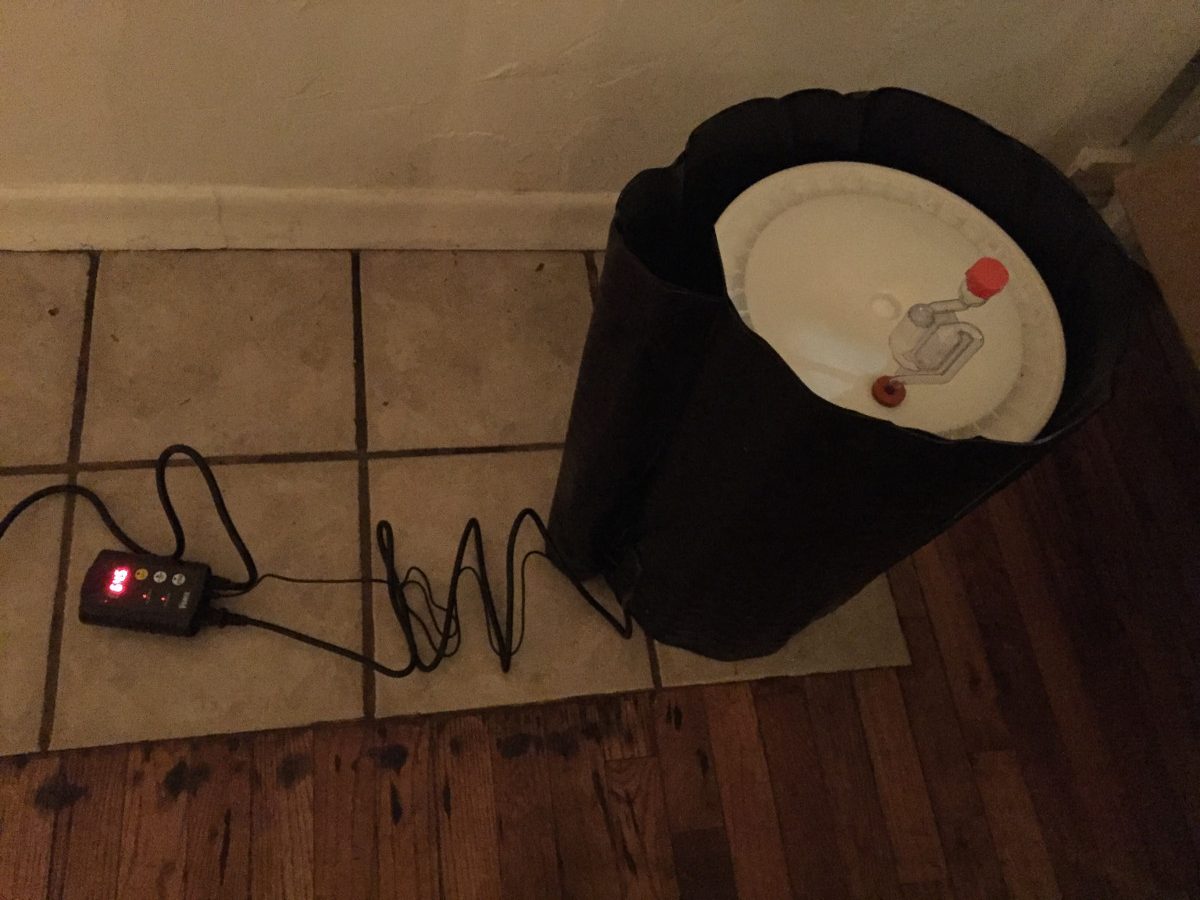 bucket, and agitated. The yeast I used is called The Barbarian from Imperial Yeast in Portland Oregon, and is USDA Organic. I then air-locked it, moved it inside and set up my fermentation heating pad. The heating pad is just a 48”x20” seedling mad with a temperature controller and probe wrapped around, and bungee-corded to my fermentation bucket. I used weatherproofing foam to insulate the temperature probe to the side of the fermentation bucket in hopes that it will read properly. The fermentation temperature is set at 68 degrees Fahrenheit, although I do not think this pad will properly maintain that temperature for the fermentation. Luckily as the yeast is in its beginning stages of converting the sugars to alcohol, it is working hard and keeping the temperature up. As the fermentation slows, I plan to raise the temperature to 70 degrees to help finish the attenuation.
Just one day into the fermentation the bubbling in the airlock was happening at a 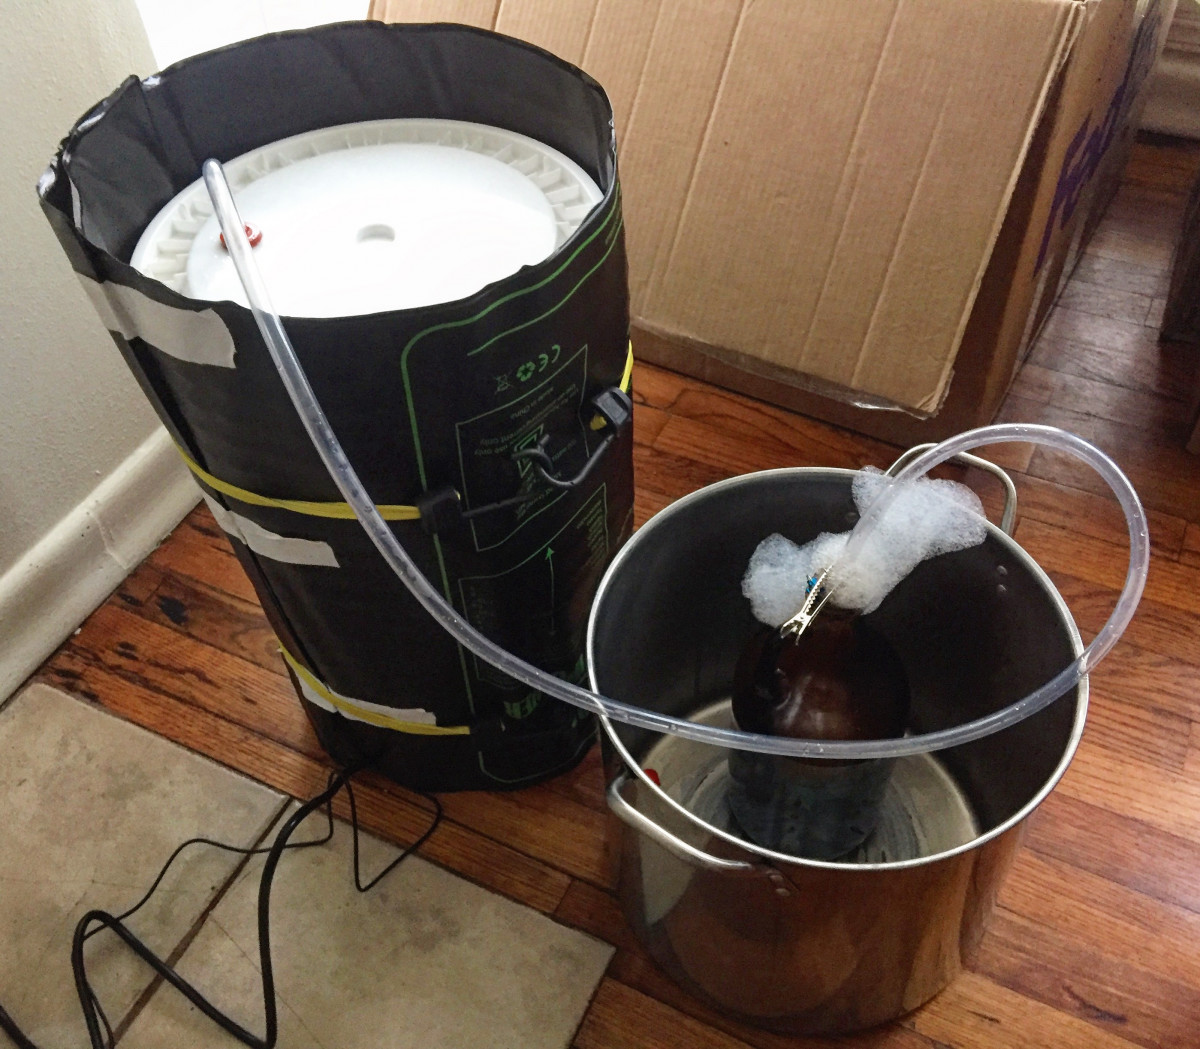 forceful rate; the cap had come off the airlock and it was spewing sanitizer. I had to switch the airlock out for a blow-off assembly, which is essentially a giant airlock comprised of a piece of tubing that runs from the grommet in the bucket lid to a large vessel filled with sanitizer (I used a growler). This allows CO2 to escape from the fermentation at a much faster rate than an airlock would allow. When the primary fermentation is complete (3-5 days) I will rack my beer to a secondary holding vessel to be dry hopped and condition.
Dry Hopping
- 2oz Mosaic-5 days into fermentation (at racking to secondary)
- 0.5oz Columbus-5 days into fermentation (at racking to secondary)
- 2oz Citra-7 days (2 days after first dry hopping)
- 0.5 Simcoe-7 days (2 days after first dry hopping)
After 6 days after the second dry hopping I will pull the hops out. Then after about a week I will make up a priming solution, rack to my bottling bucket, and bottle the beer. The bottle conditioning will take a minimum of two weeks, with flavor and carbonation improving with time.