Malting is the process of sprouting a grain to allow it to reach its maximum enzymatic levels, then kilning it at a low temperature to preserve the enzymes until needed. In addition to grains, other seeds like buckwheat can be malted, and also beans if desired. Barley is the standard grain to malt mainly for its high level of enzymes that promote an easy starch-to-sugar conversion during mashing. Many people have been experimenting with using millet as a base malt, and getting great results. Alternative malting is extremely beneficial for those with gluten intolerances, and will soon be a lucrative market.
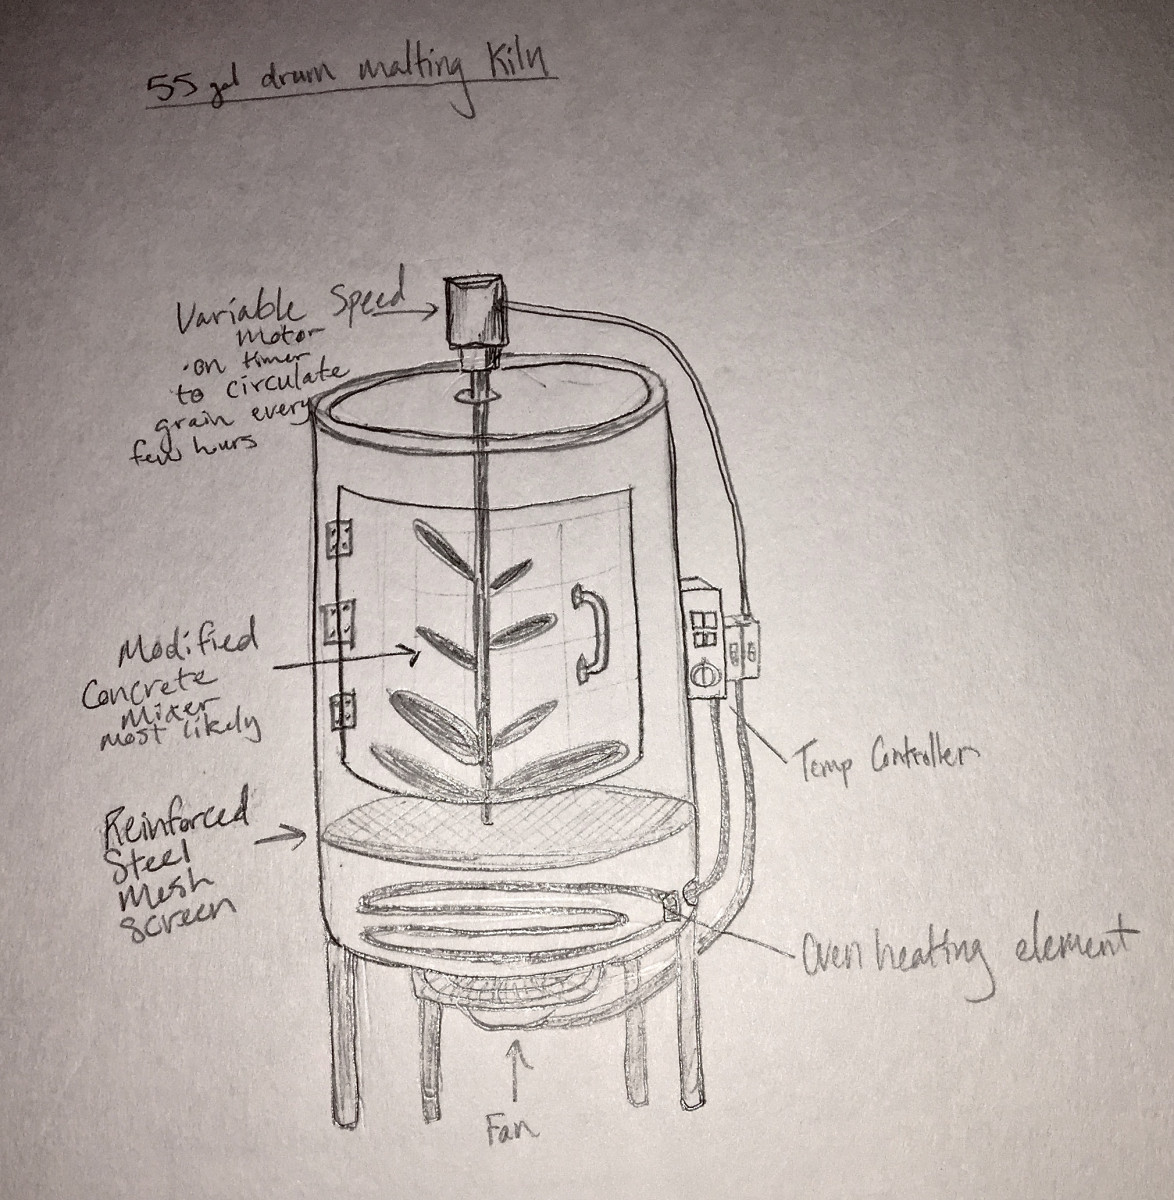
My research this week has focused on developing a small scale malting malting operation for the farmer or gardener who also is an avid brewer. The Designs that I drew up are just preliminary sketches with parts and cost lists. They are meant to be simple to build, and last for years. During my research I viewed multiple home kiln designs, and drafted up some ideas from these. My main intentions were to have the parts be readily available, common, and salvageable if possible.
The first step to malting is soaking the grain. On a very small scale many home-maltsters will soak grain in a standard five gallon bucket with numerous holes drilled or punched in it, which sits inside another bucket. It is important to change the water each day during the 3-4 day soaking. The inside bucket will act like a colander, and make it easy to drain the water. Oxygenation in-between soakings is necessary so that the grain does not become unviable. This period can be anywhere from 8 to 12 hours. After three days or so the grain is ready for sprouting. The grain is ready when it starts to chick, this is when it becomes fully saturated and begins to put forth a rootlet.
Once the water is drained from the grain for the last time it is then time to germinate. The grain needs plenty of oxygen at this stage and has to retain high moisture levels to sustain germination. It is ready to be kilned when the first sprout or acrospire is about the length of the grain. The ideal temperature for spouting barley is 50 degrees Fahrenheit. An old method of sprouting that is still used in some places consists of simply spreading grain in a thin layer on a concrete floor or tarp, and turning it a few times daily. This method is tedious, and requires a large space. Many of the new malting machines are fully automated single tank systems that soak, sprout, and kiln all in one vessel.
My design for a home soaking/sprouting machine is built around a modified 80 gallon compost tumbler. This tumbler would be hooked up to a variable speed motor attached to a timer to rotate the vessel at specific intervals. A drain port would be added to the bottom of the tumbler to expedite the draining process. The tumbler already comes with paddles on the inside to properly mix compost; these paddles would be perfect for properly mixing grains while sprouting. If rotated frequently, this closed system would be ideal for sprouting a great deal of grain in a small area; it would hold about 150 pounds.
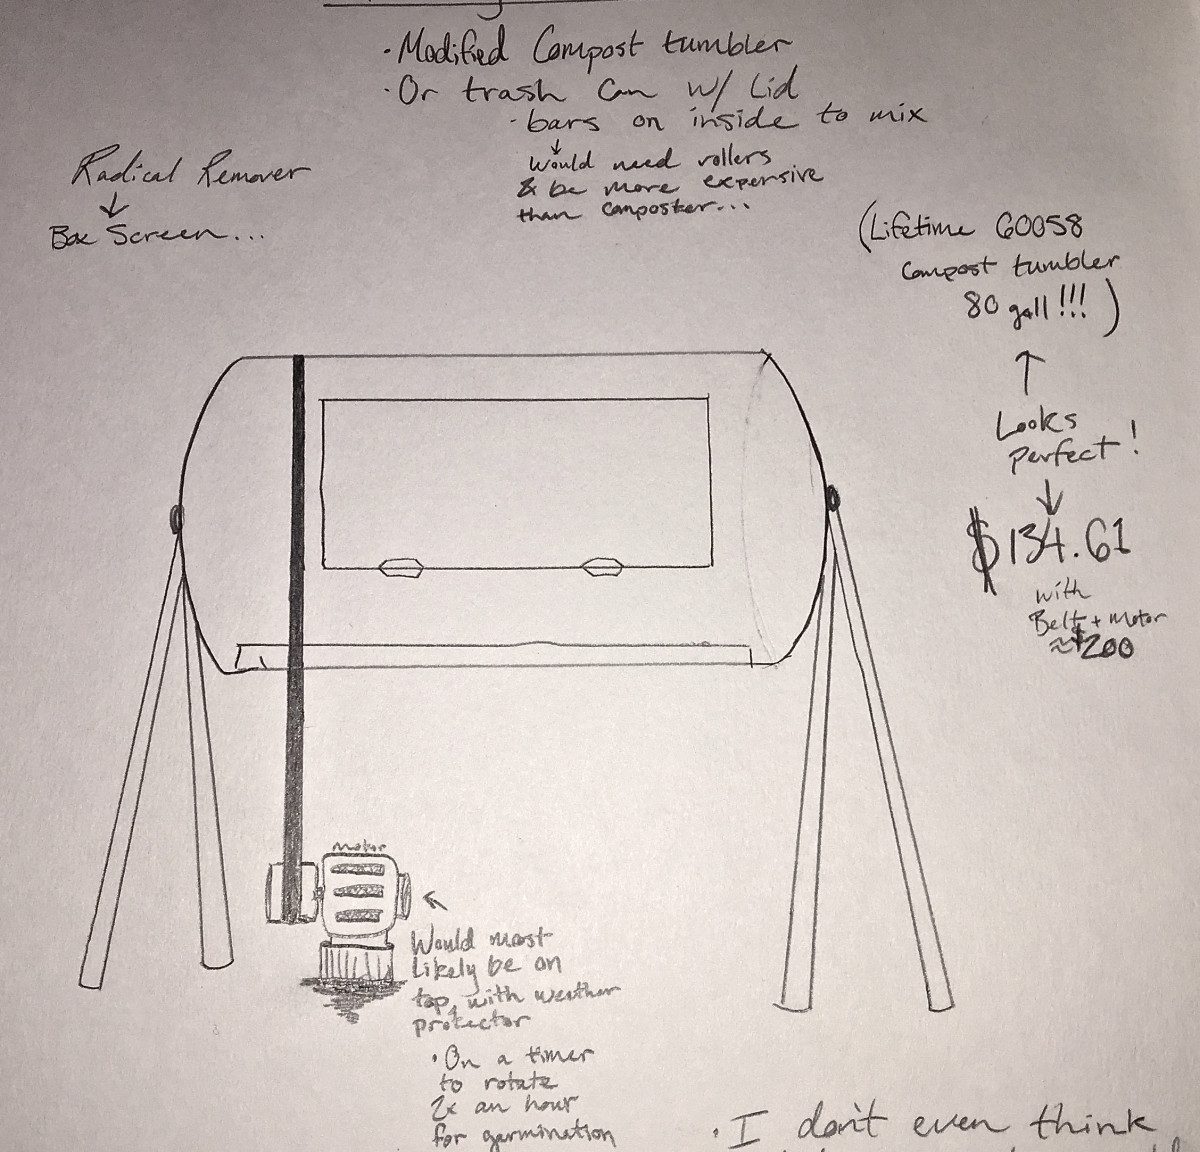
Sprouting Machine:
- 80 gallon compost tumbler-$135
- Variable speed motor-$60
- Motor Controller-$60
- Belt-$30
- Digital 7 day timer-$65
- Wiring materials-$25
- Waterproofing materials (plexiglass and silicone)-$40
- Total-$415
The last step of the malting process is kilning. This is where the wet, germinated grain is then dried to preserve its enzymatic properties until brew day. For base malts it is only necessary to be dried to between 100 and 120 degrees F. Malt is ready when it reaches five percent moisture. Air circulation is imperative to process; the malt will dry too slowly without proper air flow. Once the malt is fully kilned and dry, the rootlets or radicles need to be removed. Radicles will cause astringent flavors in finished beer. They can be removed with a simple box screen made from two by fours and any fine screen material. The finished malt has to be agitated and shaken on the screen until the majority of radicles fall through. More heat and time is required for producing specialty malts, like crystal and chocolate malts. This can be easily done in a well calibrated oven. Proper circulation is not as important when making these malts.
Originally for this quarter long project I was going to design both a hop oast, and a malting kiln, Through further investigation I found that the temperatures needed for curing both of these products were similar, and likewise the technology to do so. I had already sketched up a few ideas, and designed an inexpensive option just for kilning malts, before realizing that I could kill two birds with one stone, and save space. My final design has two chambers, each separately temperature controlled, circulated, and ventilated. The parts are mostly all common, that could be sourced from any hardware supply store. Also many parts could easily be sourced for free, or used. The malt kiln/hop oast has a capacity of 150 pounds wet weight on either side for a total capacity of 300 pounds. It consists of 8 shelves on each side that are screened on the bottom, and reinforced with thick wire mesh.
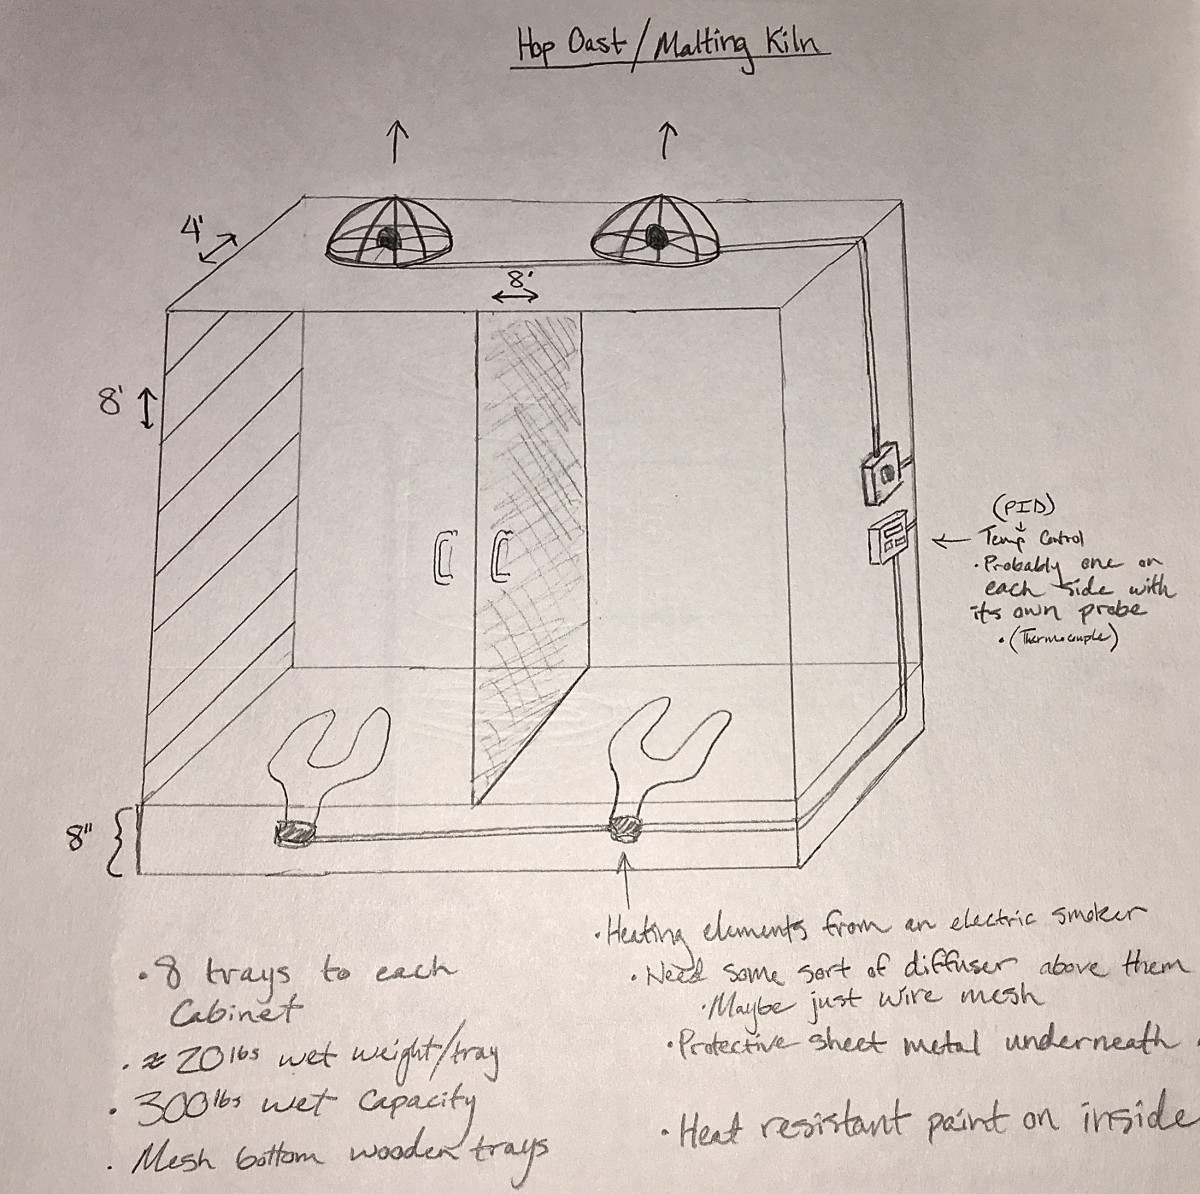
8’8”x8’x4′ Hop Oast and Malting Kiln:
- 8-4’x8′ hardwood plywood-$264
- 2-2”x8”x16′ lumber-$60
- 2-6” duct fans with grounded cords-$44
- 2-Electric smoker heating elements-$80
- 2-Handles-$10
- 6-hinges-$30
- 2-PID Temp Controllers-$100
- 2-fan switches-$20
- 160′ of 2”x4” lumber-$160
- 100′ of aluminum screen-$100
- 100′ of galvanized hardware cloth-$120
- wiring materials-$30
- heat resistant white paint-$30
- 12 5”x4′ heat transfer plates-$84
- Total-$1048