Nematodes can be a very useful tool for controlling soil pests. They are semi-microscopic unsegmented roundworms, and entomopathogenic species attack insects.
This method is based on this video from MSU, and the photos of the method are taken from said video.
Life Cycle:
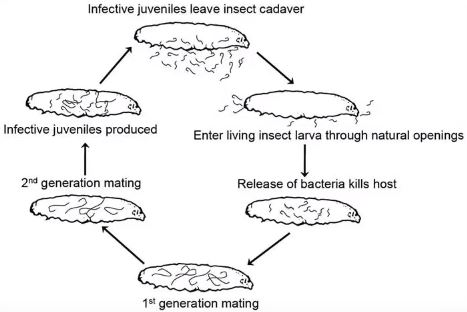
Entomopathogenic nematodes leave their cadaver host as infective juveniles. This is the only stage in their life when they are active and mobile. They enter through natural holes inside insects, such as tracheae or the mouth, and then enters the hemocoel. They then release a symbiotic bacteria that kills the insect host in 24-48 hours, and the nematodes continue to eat, mature, and mate for some time. Infective juveniles are produced and the cycle repeats.
Required Materials for Rearing:
- 10x magnifying microscope or hand lens
- 0-200µL micropipette or syringe
- 100mm & 60mm petri dishes
- 60mm filter papers or paper towels
- 500mL Erlenmeyer flask or mason jar
- 1L tissue flask
- Wax moth larvae
Rearing Process:
1. Colony Assessment and Population Density Count: In this step, you want to find out how many nematodes there are per µL of solution. Place a volume (e.g. 50µL) of the nematode-water mixture into a 60mm petri dish with a grid pattern, then fill it with deionized water until the bottom is covered. Use a microscope or hand lens to count the number of living, moving nematodes, and repeat this at least 3 times, with the same volume of solution. After doing that, take the average number of nematodes per µL by dividing your average count by the volume you use (50 µL in the example).
2. Host Infection:
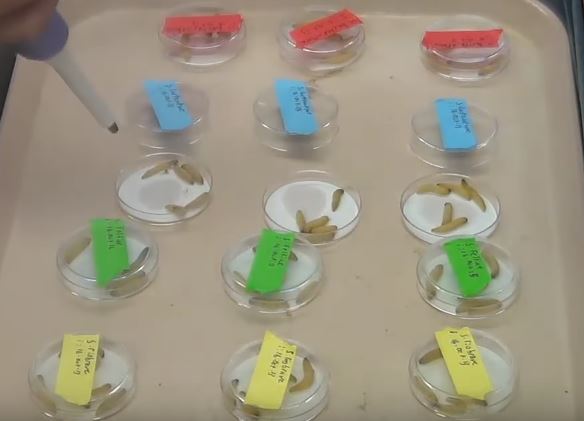
A 60mm petri dish with a paper filter at the bottom holds the hosts and nematodes. Each dish fits 5 wax moth larvae (Galleria mellonella). The ideal number of nematodes per host is 20, so you should use your calculation from earlier to make sure you know the correct volume to add. Use your micropipette to put the nematodes into the center of the dish, then add ~1/2 ml of deionized water so that the nematodes have solution to move around in. Next, cover the petri dish, and label the nematode species and infection date. These should then be stored in a dark location at room temperature for a week. Each host should provide 25,000 – 100,000 infective juveniles.
3. White trap: The 60mm petri dish described above should be placed into a 100mm petri dish, which should be slightly filled with deionized water. Any alive or diseased larvae should be removed. The color also should be correct; depending on the species of nematode, this may be beige or red. This can then be covered and placed in the same place as the infection period for about 3-4 weeks.
4. Harvesting Reared Nematodes: After waiting 3-4 weeks, you can discard the infected hosts from the 60mm dish. The larger dish will be filled with nematodes, giving it a white slurry appearance. This solution can be poured into the tissue flask. Depending on how successful the rearing was (a hand lens can be used to see how many nematodes are present), you may want to continue to add nematode cultures to this flask, or split them into another. After the satisfactory amount of nematodes is added, add deionized water until the flask is at its max fill line. At this point, the nematodes should be clearly visible inside the solution.
Storage: Short term storage can take place in a dark room. They must remain here for at least 3 weeks before they will be ready to infect new hosts, and can remain this way for up to 2 months. Long term storage can happen in a refrigerator, or by using an airstone and an aquarium pump to aerate the nematodes. Steinernema spp usually can live 6-12 months, while Heterohabditis spp can live 3-6 months.
Application: They should be applied directly to moist soil. A backpack or airblast sprayer can be used, as long as all filters are removed. Juvenile nematodes will clog them otherwise. Apply in the morning and evening, while maintaining soil moisture. It should be 68-86 degrees F, with soil pH between 4 and 8.
Conclusion: While this method is not ideal for large scale rearing, it is very useful at a small scale. It only uses a few tools and can be done without significant labor, is easily stored, and can be applied quickly enough. Connor has expressed interest in these and I think it would be a good thing to attempt next quarter.