Week 1
Beginning the mushroom journey
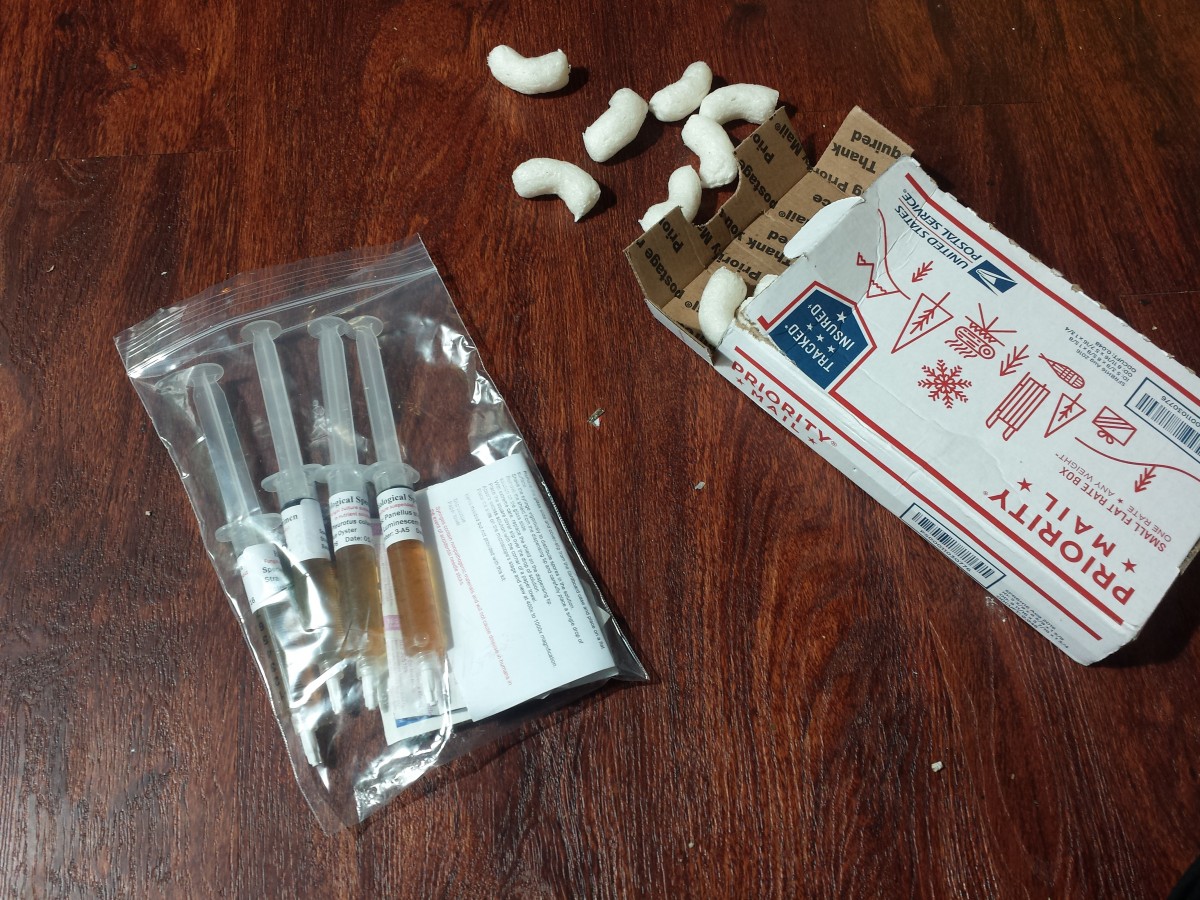
There is a lot of getting ready to do. This week the theme is preparing for the future. I began with ordering oyster mushroom spores and liquid cultures online. My final choices were Pearl, Pink, and Blue Oyster mushrooms. I also got luminescent Panellus mushrooms just for fun.
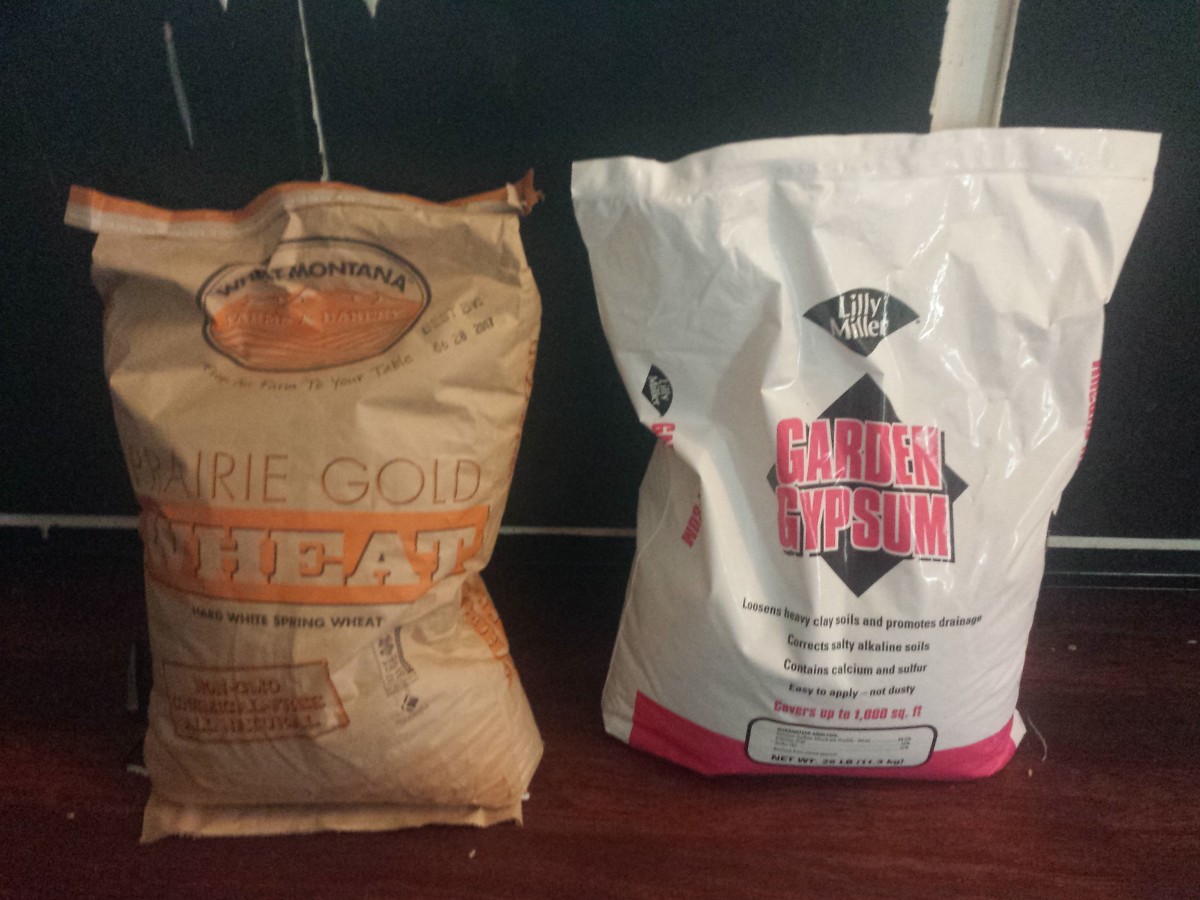
Other shopping included buying grain from WinCo, straw from Keep it Simple farms, and gypsum from Lowes. It looks as though my Oyster mushroom order should come in tomorrow, so I get to begin the process! Yay!
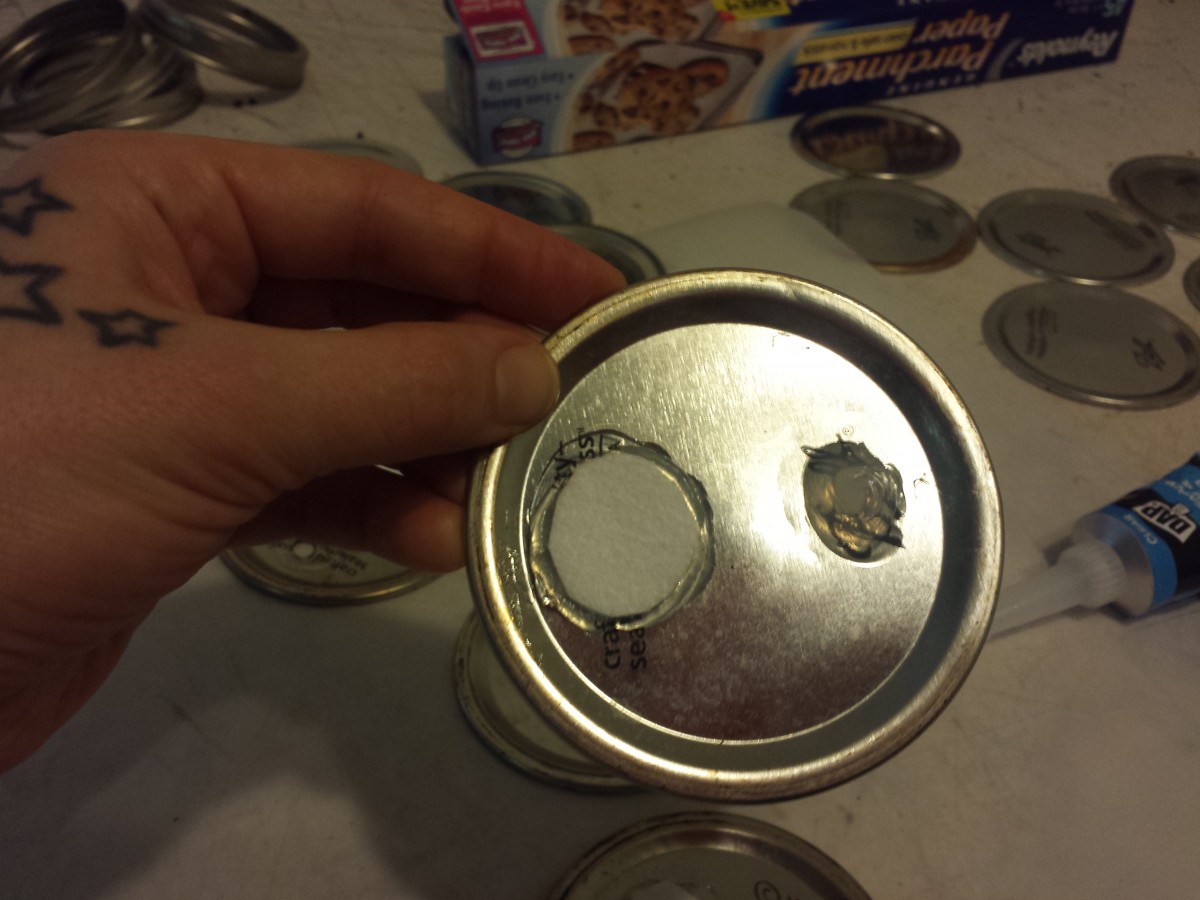
Step 1: preparing jars! I had to make over 40 lids. This process involved drilling two holes into the top. One hole is an inoculating port, used to inject the liquid culture. The other allows for gas exchange. Then all the holes needed to be sealed with a self healing automotive silicone (to withstand a lot of heat) and micropore filter disk (allows gas exchange).
Step 2: of the process was soaking the grain for 12-24 hours. This is to germinate the endospores, which are microorganisms that live within the grain and well…..everything. The endospores can survive pasteurization while in its dormant stage. The soaking process activates the organism, making it more vulnerable and not able to survive pasteurization. As you can see, the soaking is necessary.
Here are two sites that explain more on endospores:
http://www.cmsweb.org/articles/cultivation_2.htm
https://micro.cornell.edu/research/epulopiscium/bacterial-endospores
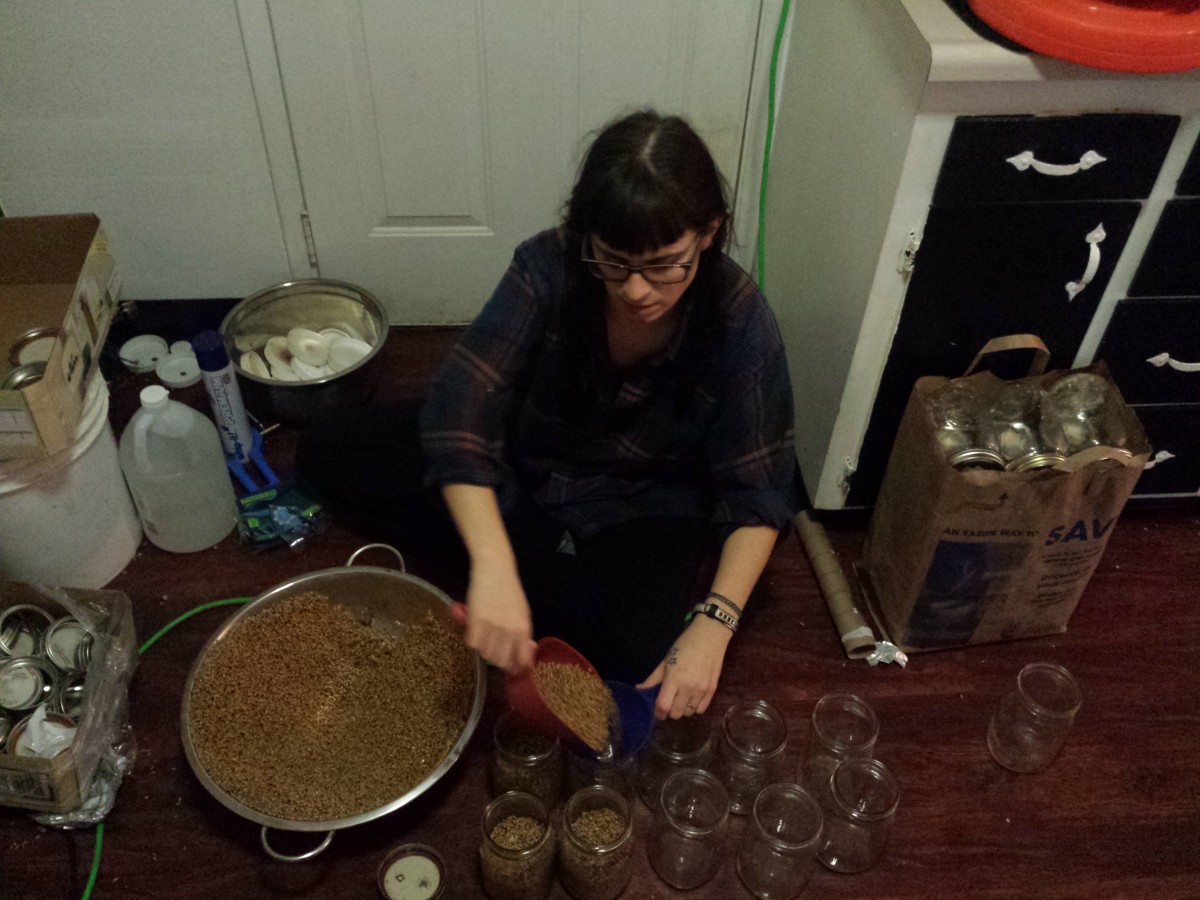
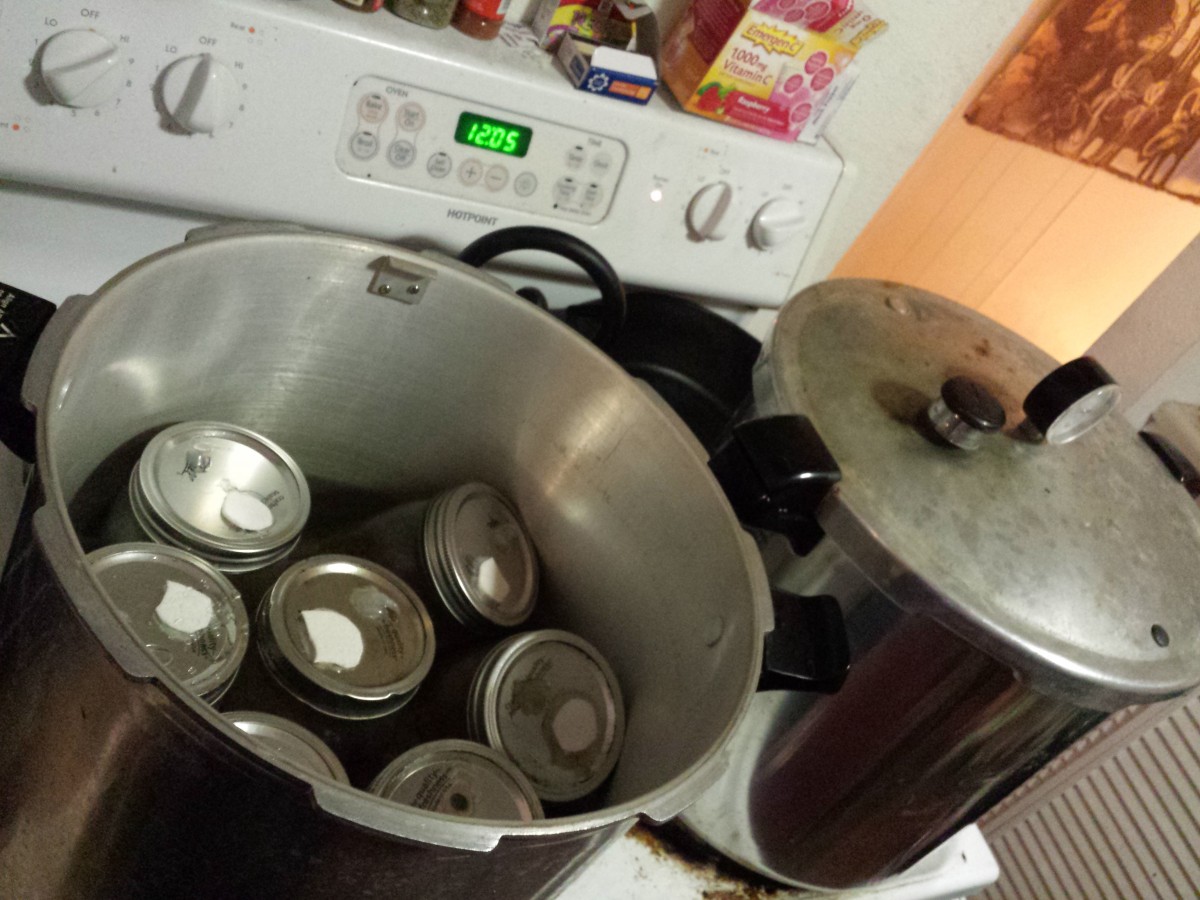
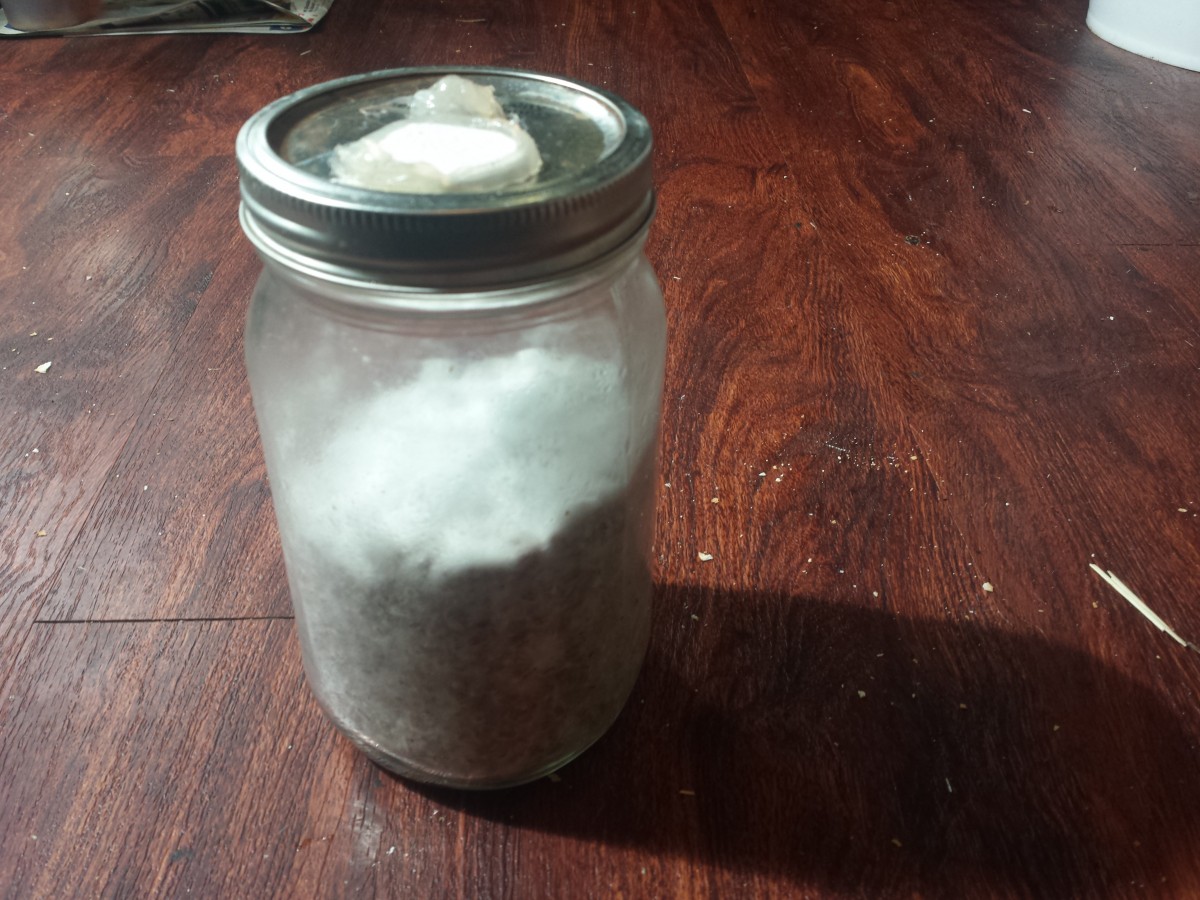
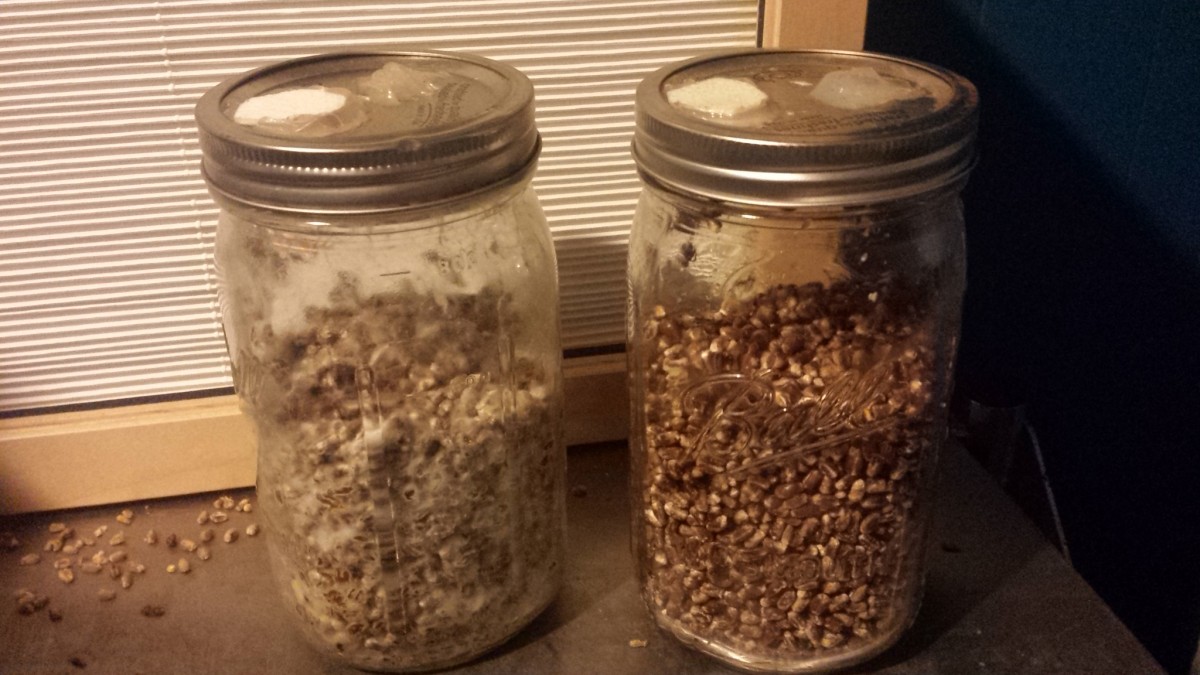
Step 3: Sterilization! After letting the grain strain and cool for 12 hours, I filled 20 jars with grain, screwed on my newly made lids and popped them into the pressure cookers. The jars need to heat up to 256 degrees Fahrenheit for about an hour and a half. Then the pressure cookers need to cool down overnight so as to not kill the cultures.
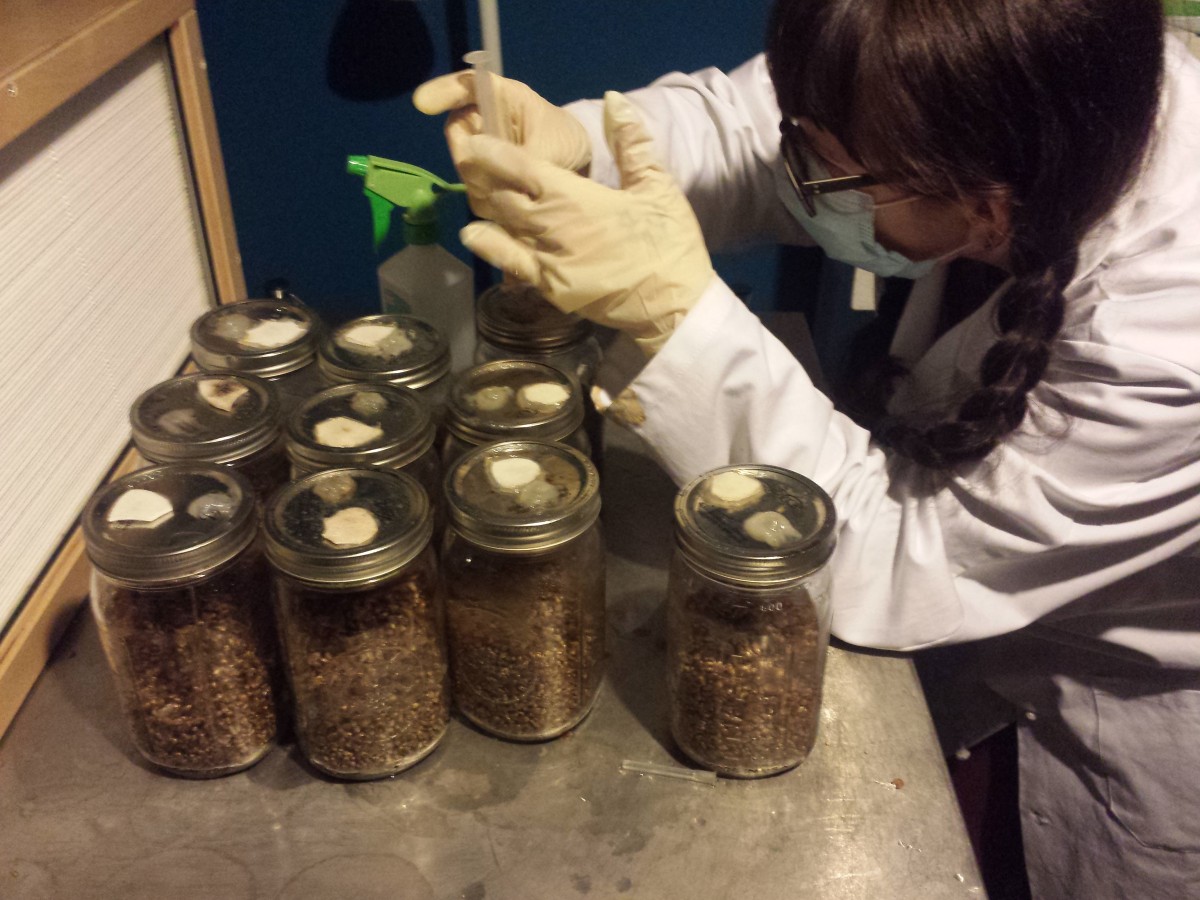
Step 4: inoculating! This is the part I found to be the most exciting. It’s also a careful process. Contamination happens really easily, so being extra careful is necessary. This involves taking a quick shower, wearing a lab coat and gloves, spraying everything down with isopropyl alcohol and working in front of a flow hood (piece of machinery the blows sterile air).
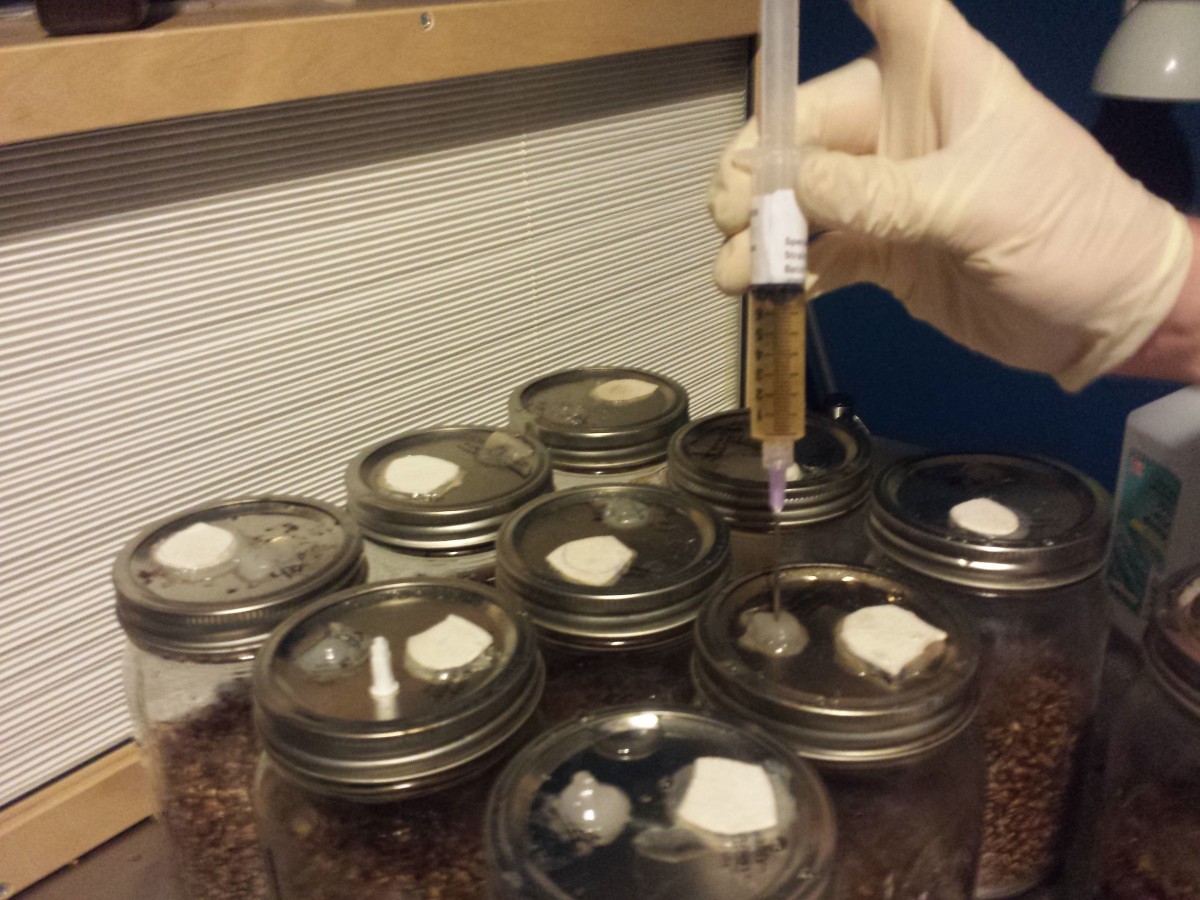
I chose to start with blue and pink oyster mushrooms. I injected 10 jars with the pink and 10 with the blue oyster mushroom liquid cultures. I then shook up the jar to spread the culture and shelved it. Hopefully I will start to see mycelia growing within the week.
Other than shopping and starting my oyster mushrooms, I’ve been watching and listening to a lot of videos and podcasts online. I was pretty sick this week, so videos and podcasts have saved me!
One video I really liked was The Future of Fungi, by Paul Stamets. He is the mushroom wizard! Paul has made some very fascinating discoveries on mushrooms. He also went to Evergreen! Yay!
Here is the video I watched, if anyone is interested:
https://www.youtube.com/watch?v=cwLviP7KaAc
Week 2
Sculpture making!
Oyster Mushrooms are taking a break this week. It will take some time for the mycelium to take hold of the grain. This week I am focusing on my art sculpture.
I began the week looking at my book, BioArt, for inspiration. There are some really awesome piece shown in this book. I’m very happy that I chose it. This book features so many kinds of media, from sculptures to paintings. Everything shown somehow relates back to something biological, and often brings some sort of awareness to environmental or biological issues. A few art pieces that have particularly inspired me made use of animal bones.
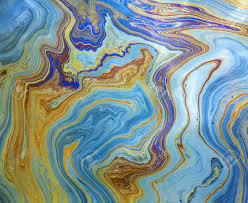
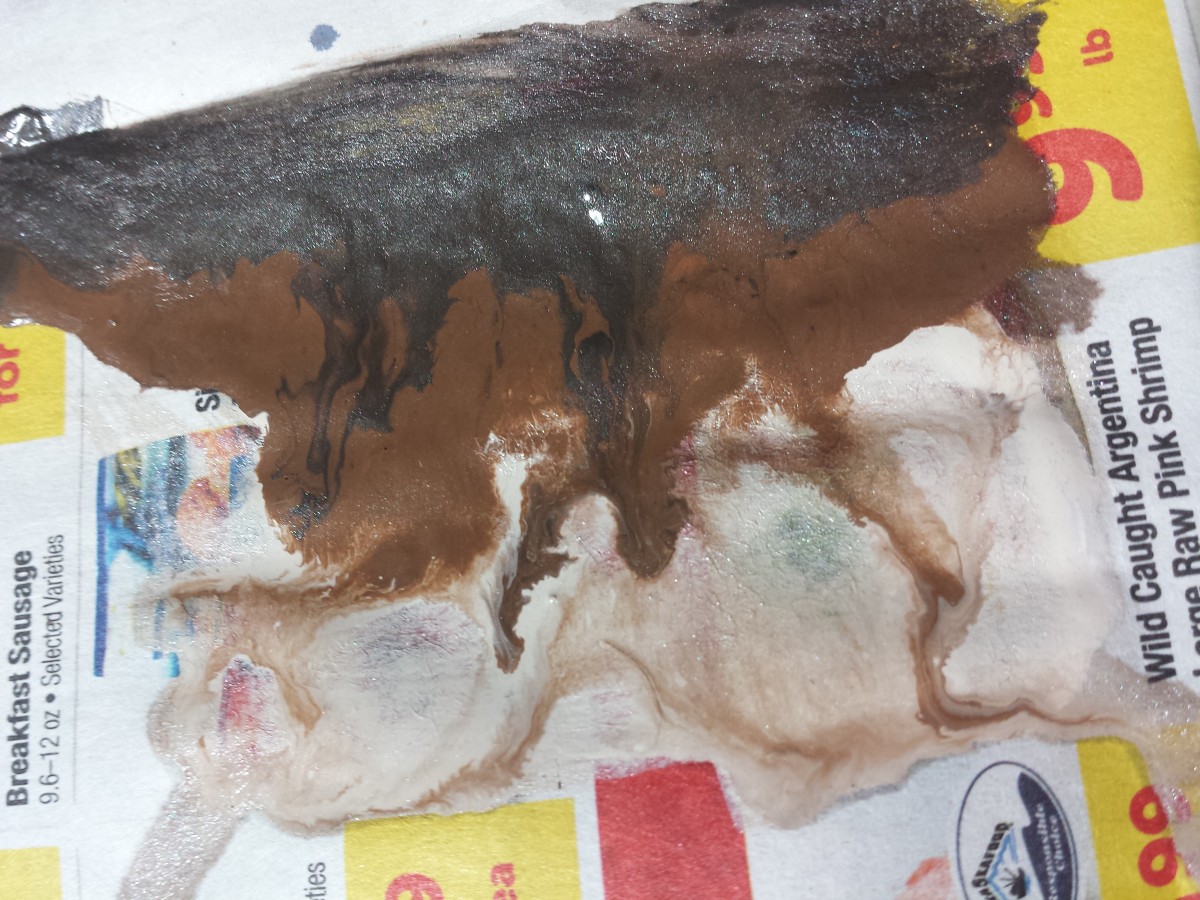
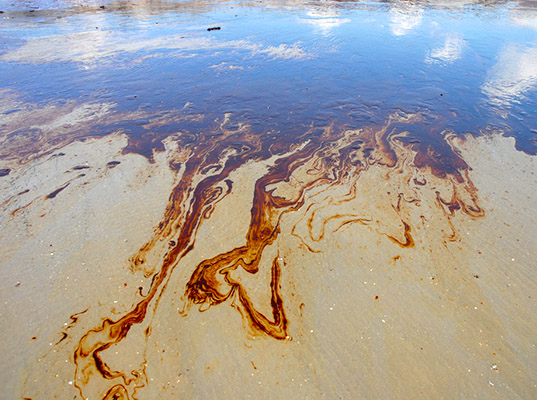
It always amazes me how much time I can spend on art. It’s quite comical how off I am with my predictions of how long art projects take me. Today I spent five hours on my sculpture, and I have barely scratched the surface. Mostly I have just played with mixing paints. I would like to paint in a way that resembles the look of petroleum or an oil spill (not an easy task).
I started by making some test pieces of sculpey clay to paint on. I’m also painting on newspaper (I may make most of the sculpture from paper mache). I played around with acrylic paints and resin. I also hope to find out if the paint has any reactions when mixed with the resin.
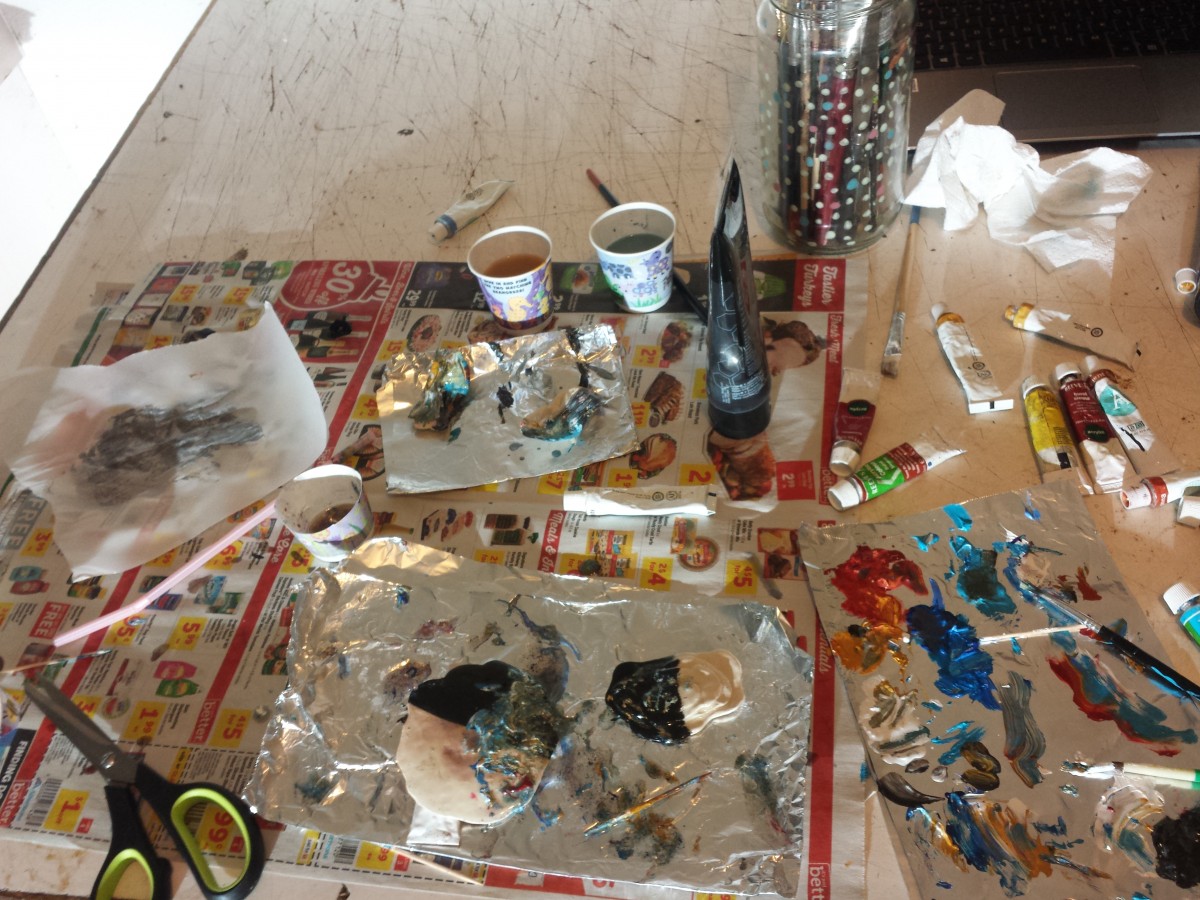

So far I’m not completely happy with my attempts at recreating an oil-in-water rainbow metallic look. However I think the brownish-black sludge look is close. I may need to use some actual oil paints to give me the “oil look” I’m aiming for.
Here are a few photos of my paint tests compared to oil spill pictures I found online:

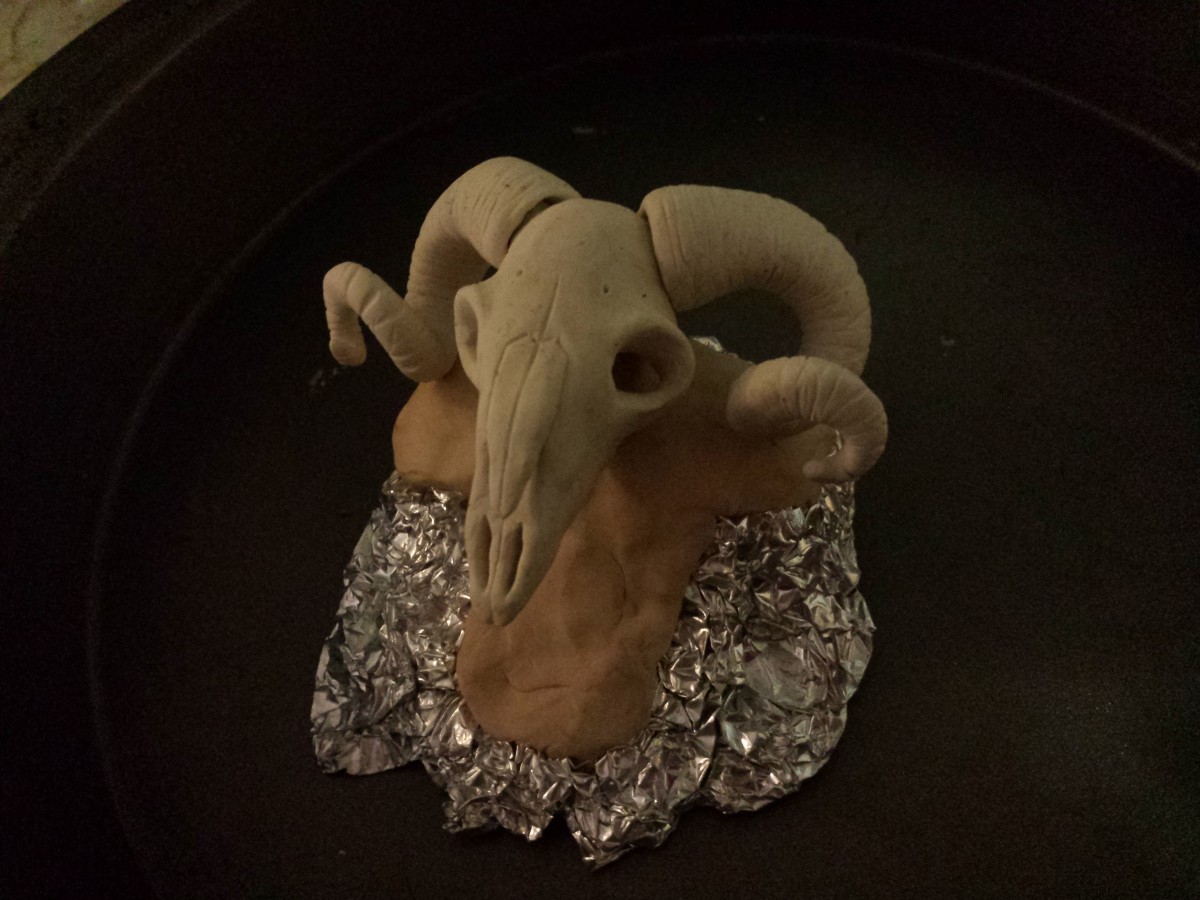
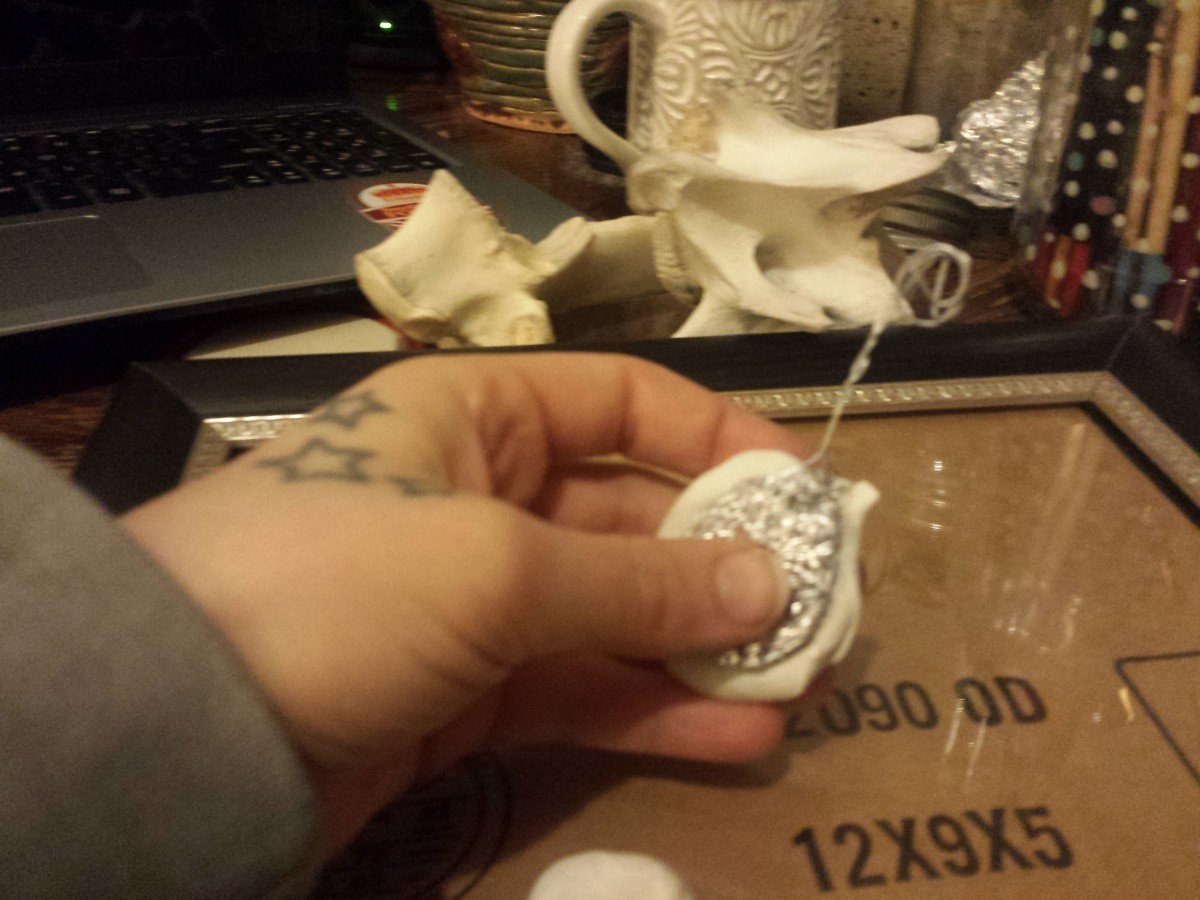
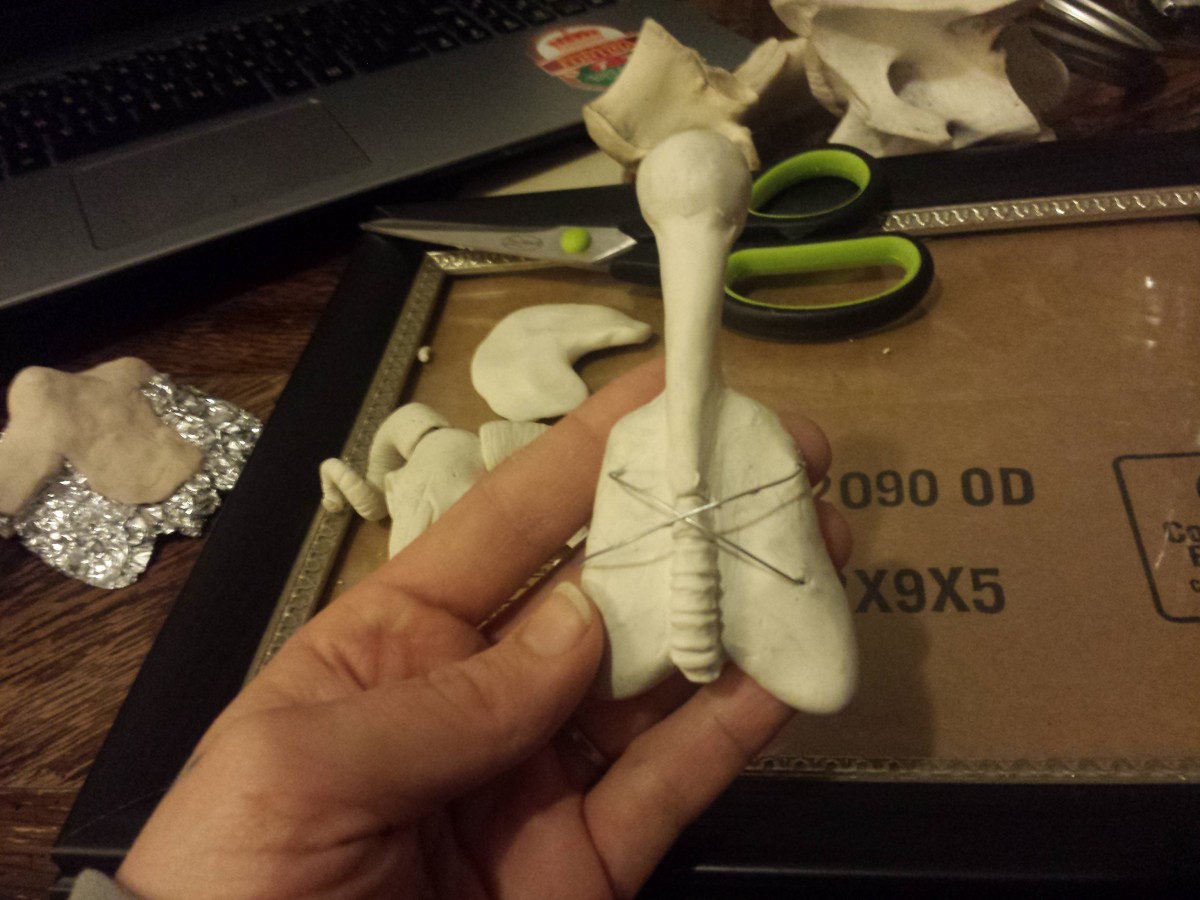
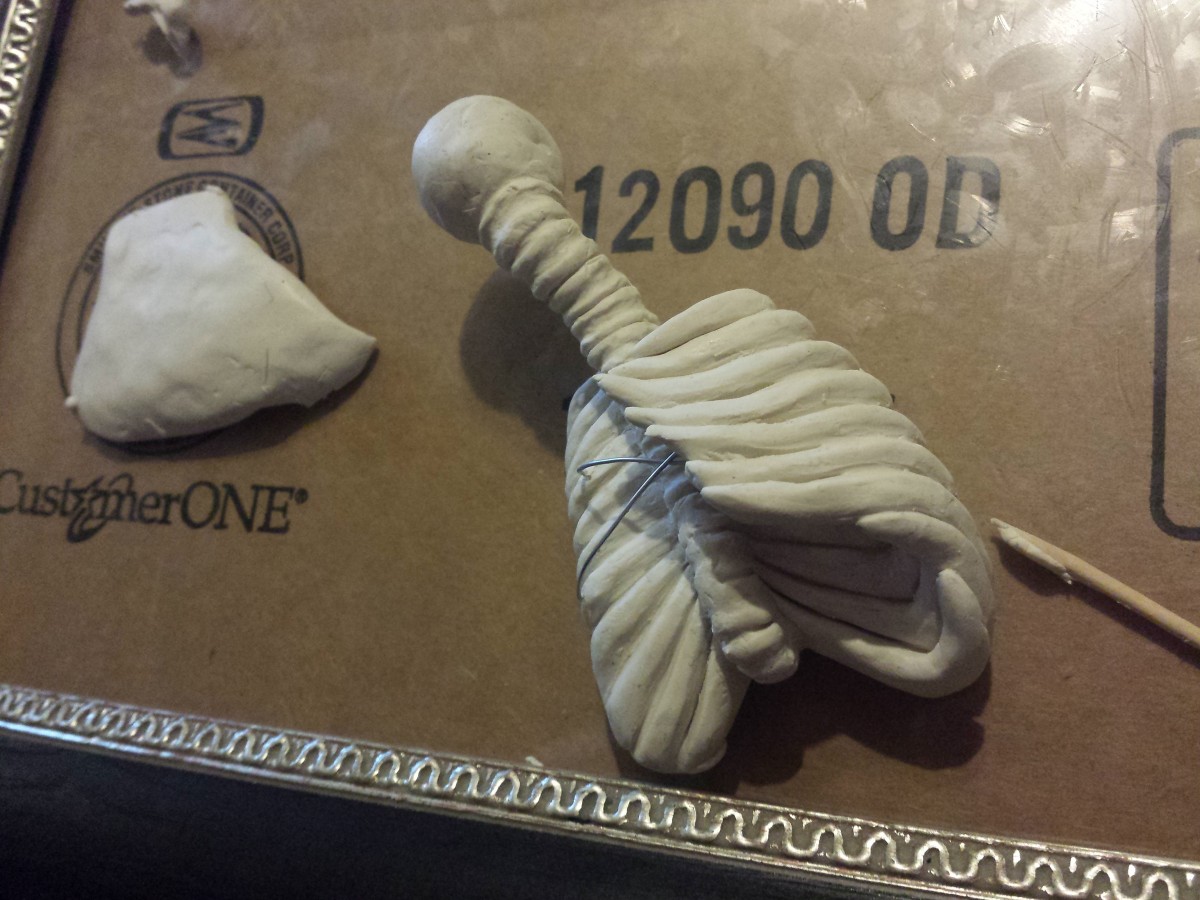
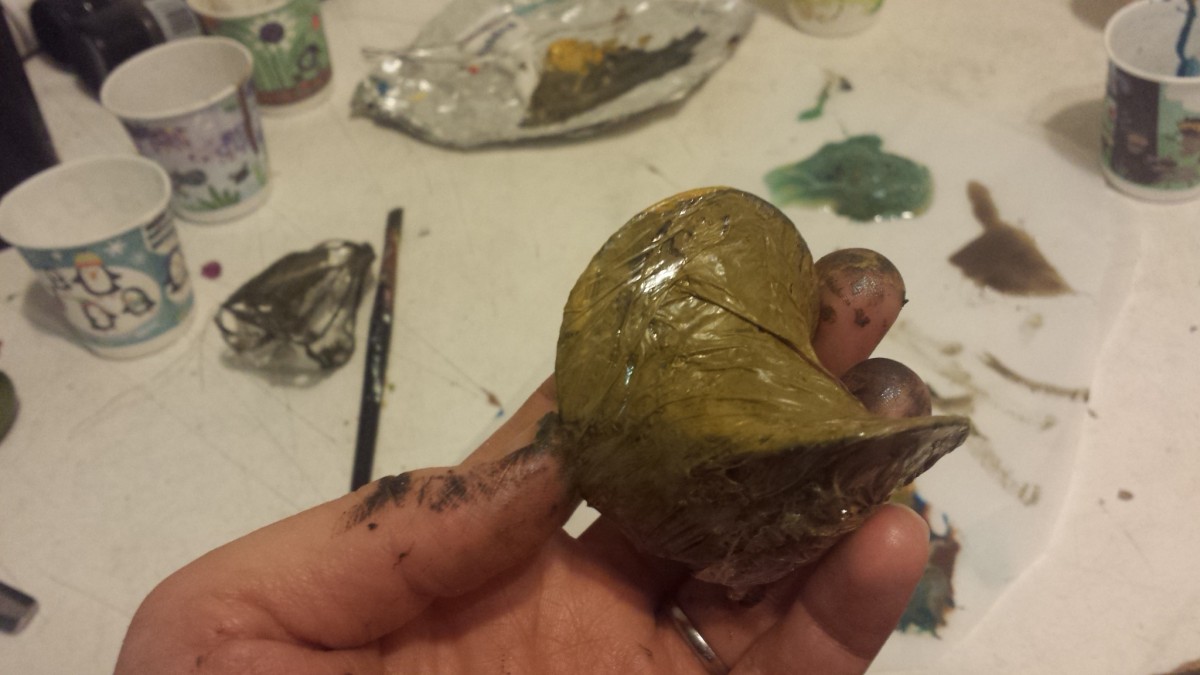
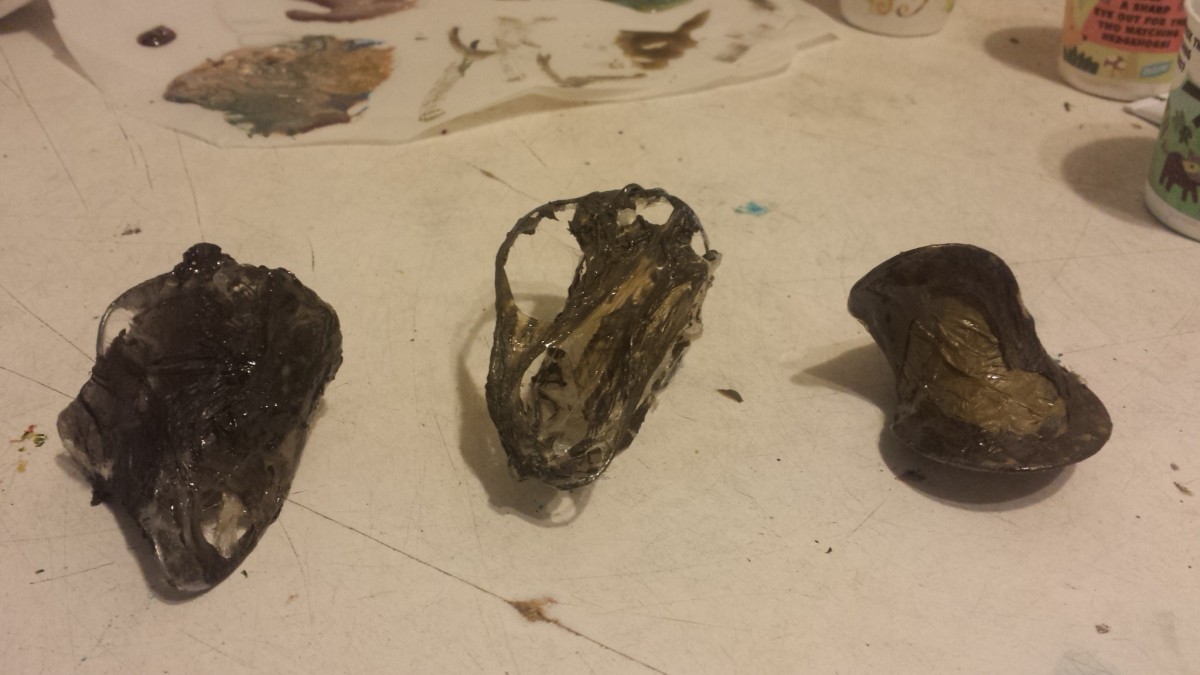
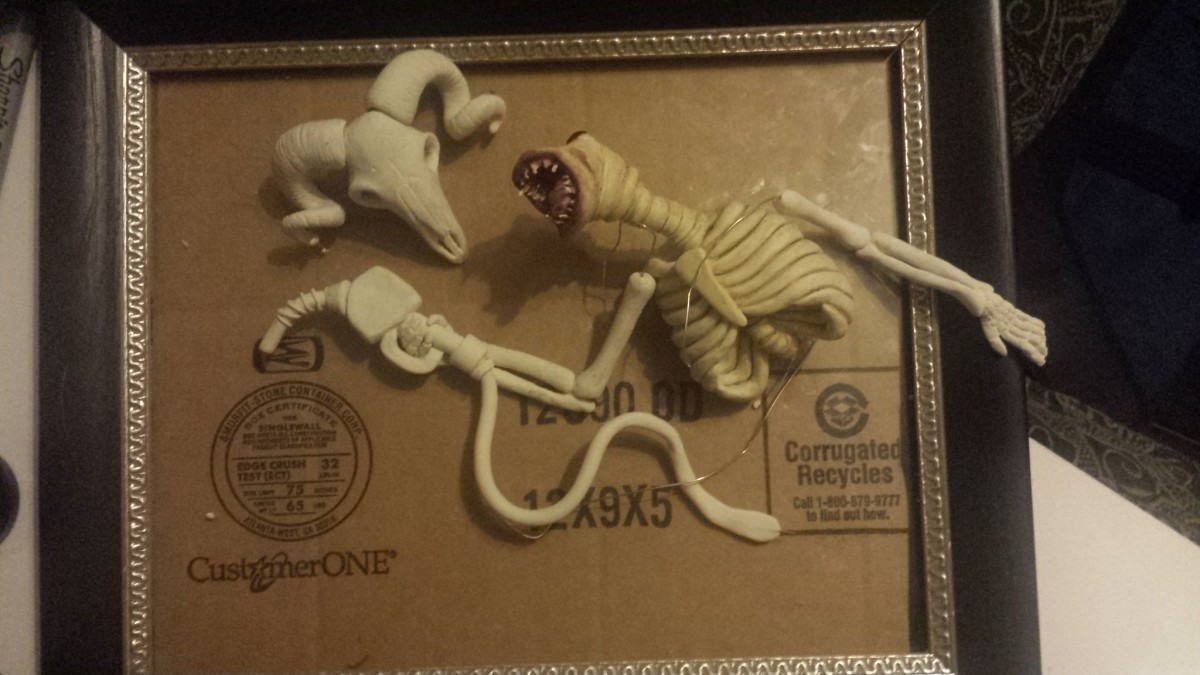
As for the sculpture itself, I plan on making an oil monster wearing a skull mask. I began by making two demo skull masks (mostly to gain a feel for what I wanted) out of sculpey clay. However, I ended up really liking my second the skull mask (a ram skull). It turned out much better than I had planned, so I think I’m probably going to stick with it.
Other work
This week I also listened to two episodes of the Joe Rogan podcasts, with guest Dr. Rhonda patrick.
So….. I cannot say this enough times… Dr. Rhonda Patrick is amazing!!! I have spent so much time listening to Dr. Rhonda Patrick, even before starting this project. She is absolutely amazing, and so insightful in regards to nutrition. She’s a guest on the Joe Rogan podcast, which I advise everyone to give a listen to. She breaks down mechanisms of what is happening in your body on a micro level, and she does it in a way that is easy to understand.
How does listening to Dr. Rhonda Patrick relate to Urban oyster mushroom farming you ask? Well I shall tell you!
Dr. Rhonda Patrick mostly talks about nutrition, which can directly relate to oyster mushrooms. For example: Oyster mushrooms have many medicinal properties, starting with the vitamins and minerals they carry (Thiamin, vitamin B6, Magnesium, Zinc, Potassium, copper, etc.). Dr. Rhonda Patrick talks about what these vitamins and minerals are doing in your body, so the information goes full circle. Having a better understanding of this material helps me understand how Oyster mushrooms are beneficial overall.
Week 3
Mushroom report:
The mason jars have fully colonized and are ready to spawn to bulk!
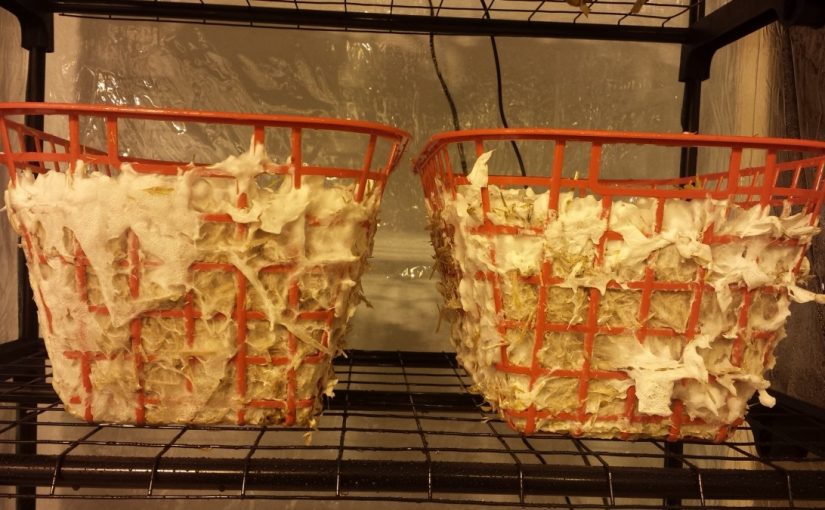
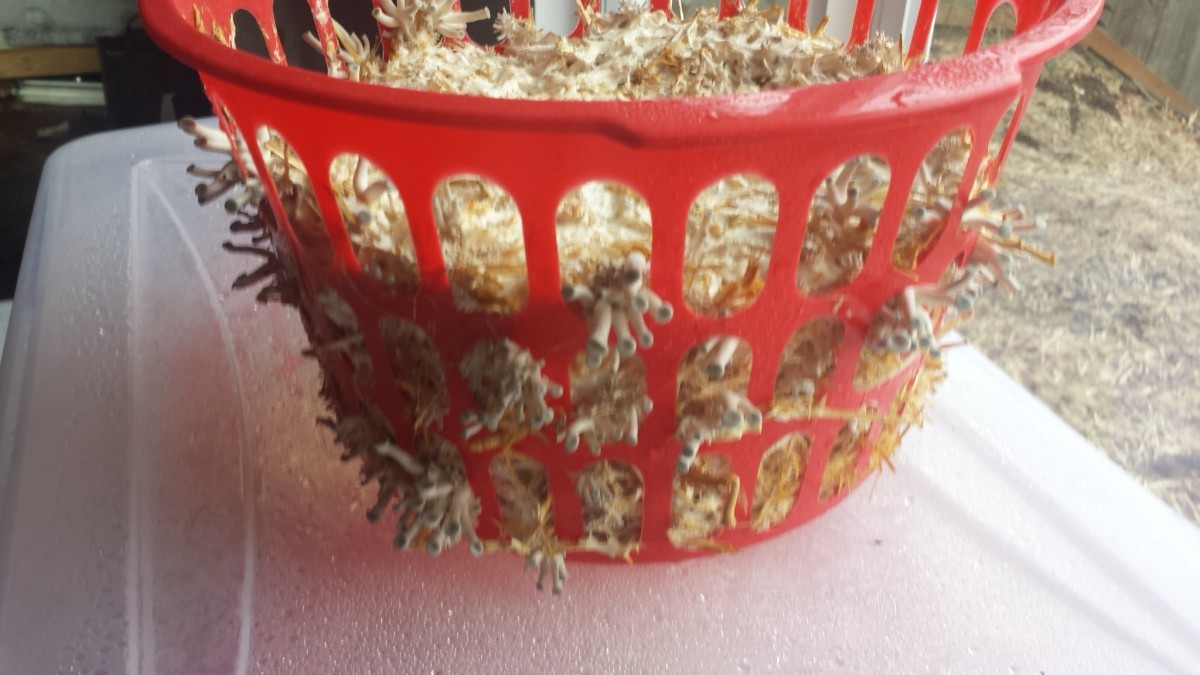
This week my Blue oyster mushrooms have fully colonized the spawn (The mycelia has completely grown over the grain) and is now ready to be transferred to straw. This is known as the spawning to bulk substrate process. I am keeping four out of the ten colonized mason jars (the master jars) to be redistributed and increasing my stock to 40 jars. This is called a grain to grain transfer. This can be done several time before the genetics hit senescence (the genetics become weak lessening its ability to fight off contaminants and cell replication retards).
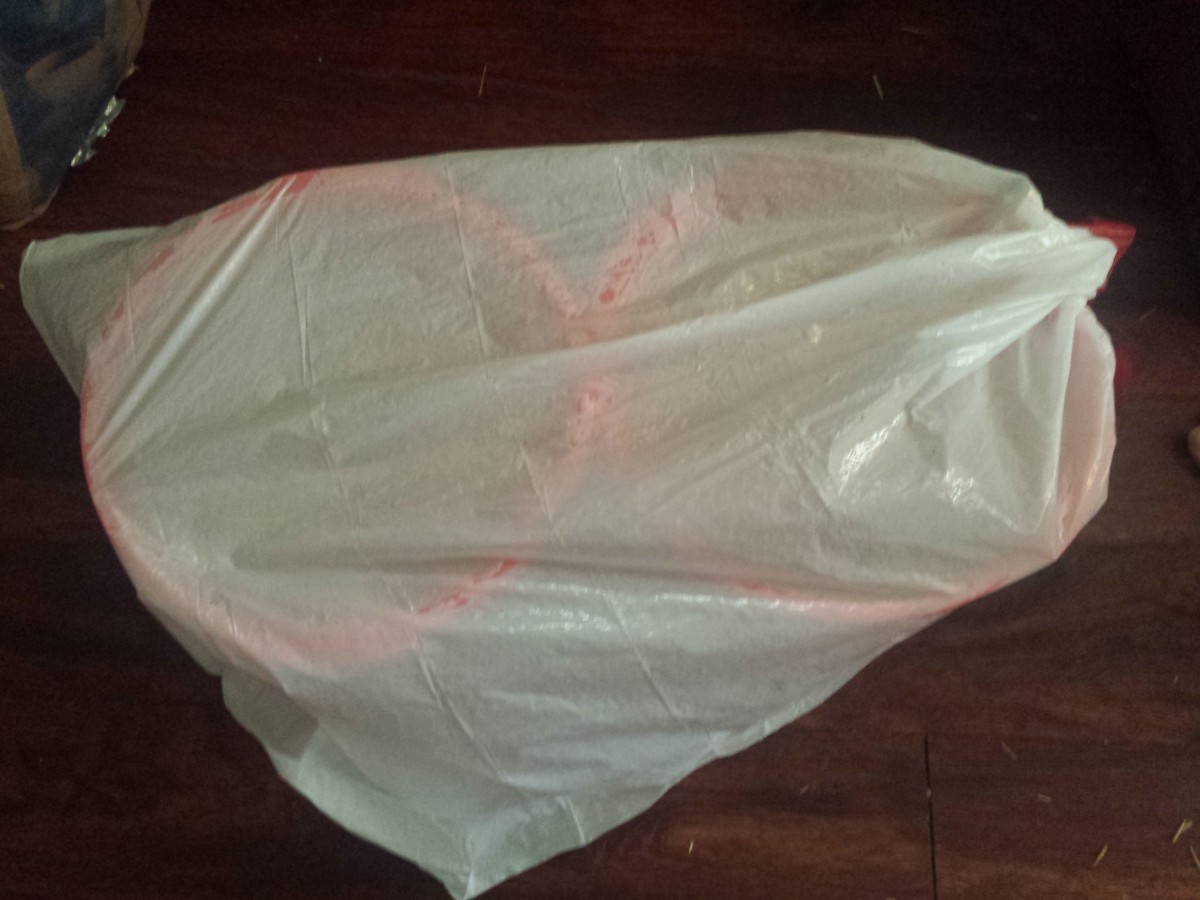
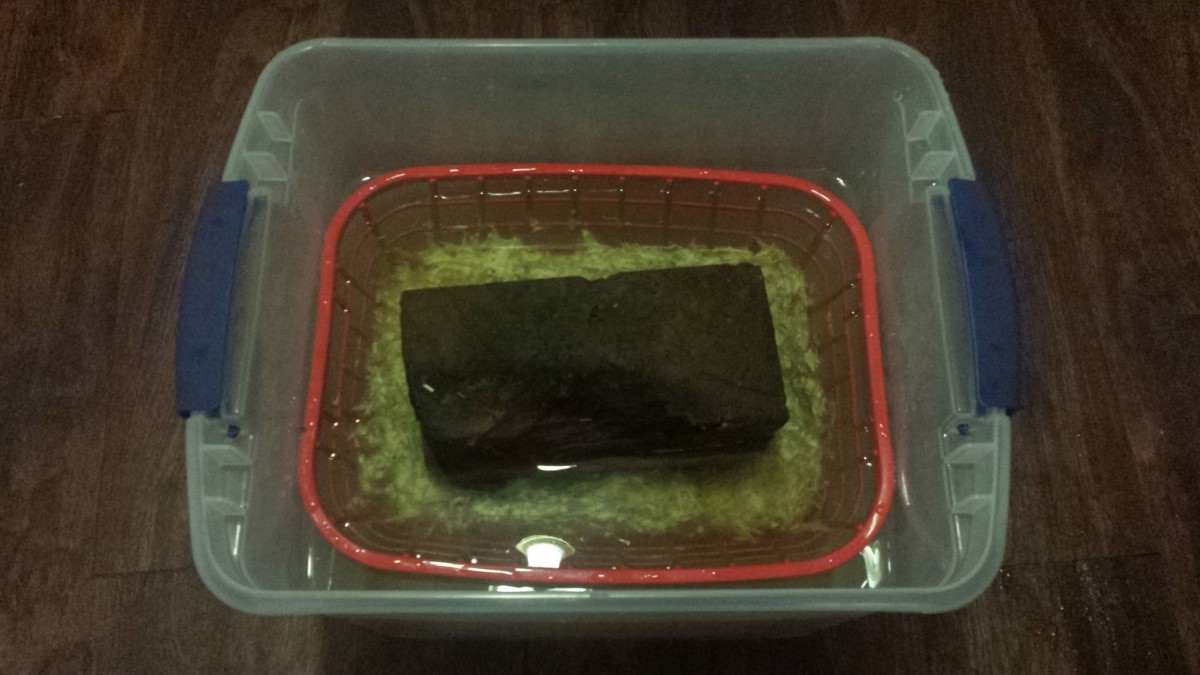
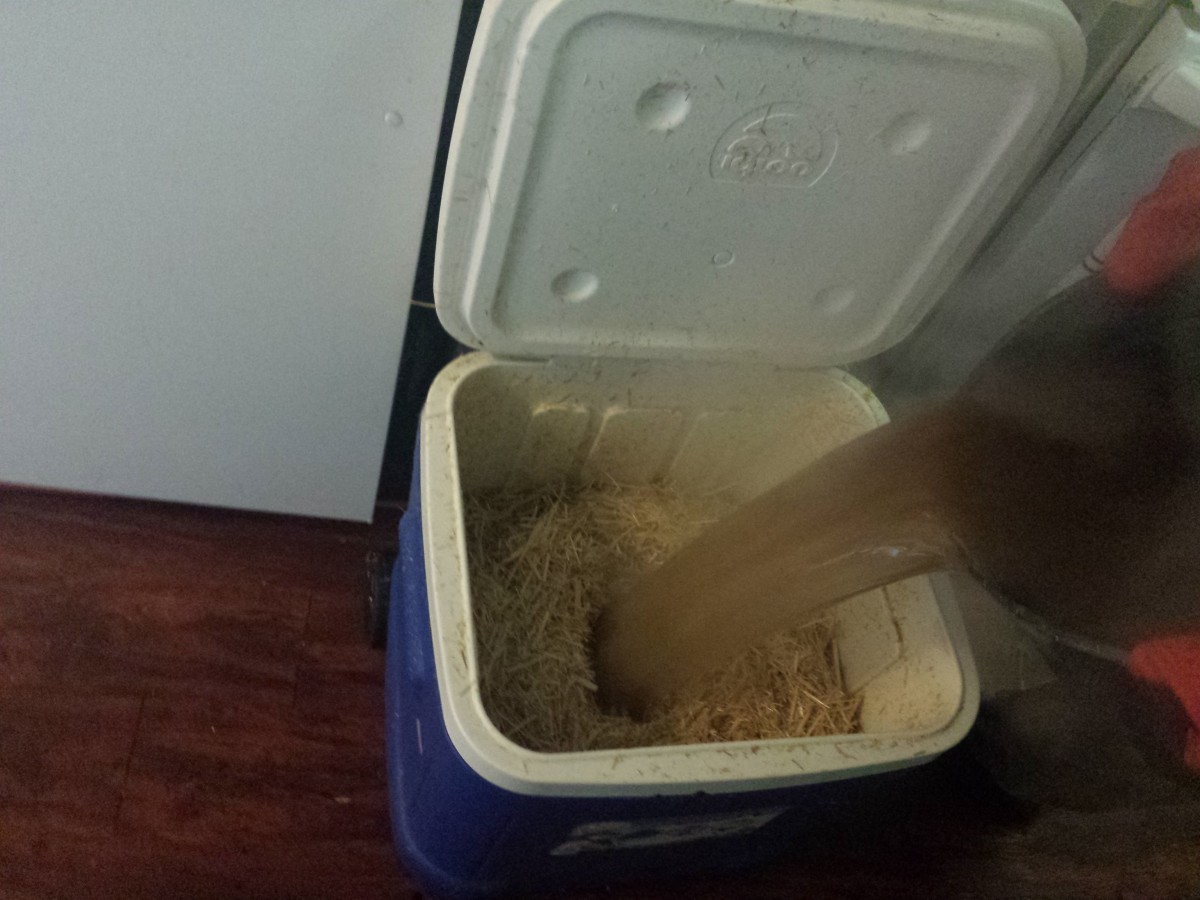 First the straw needed to be pasteurised. I accomplished this by filling a cooler with with about 10 large handfuls of straw (roughly 1.5 cubic feet) and then poured boiling water over the top. The straw needs to be between 140-160 degrees fahrenheit for an hour to kill off any harmful spores or possible contaminants. I left the cooler to sit overnight to cool the straw enough to safely work with as well as not kill the mycelia.
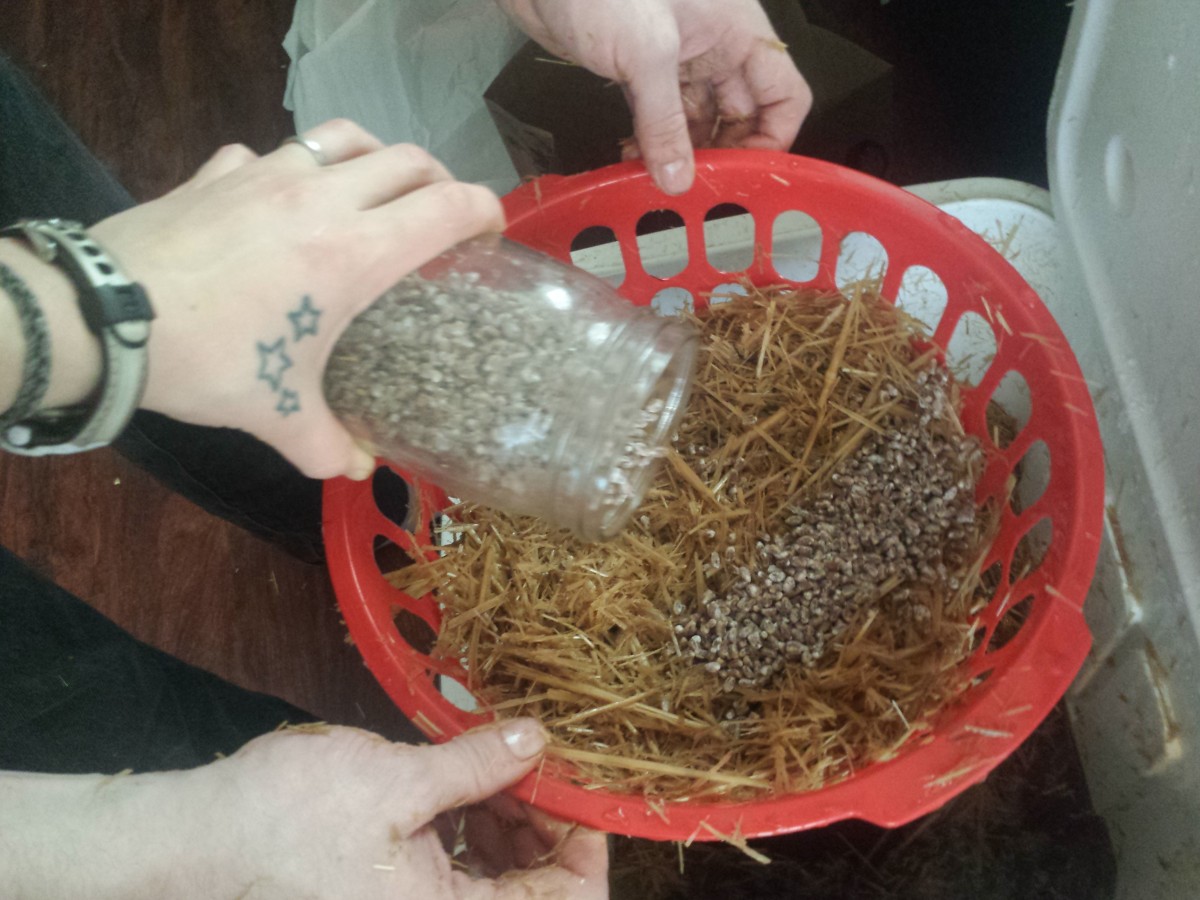
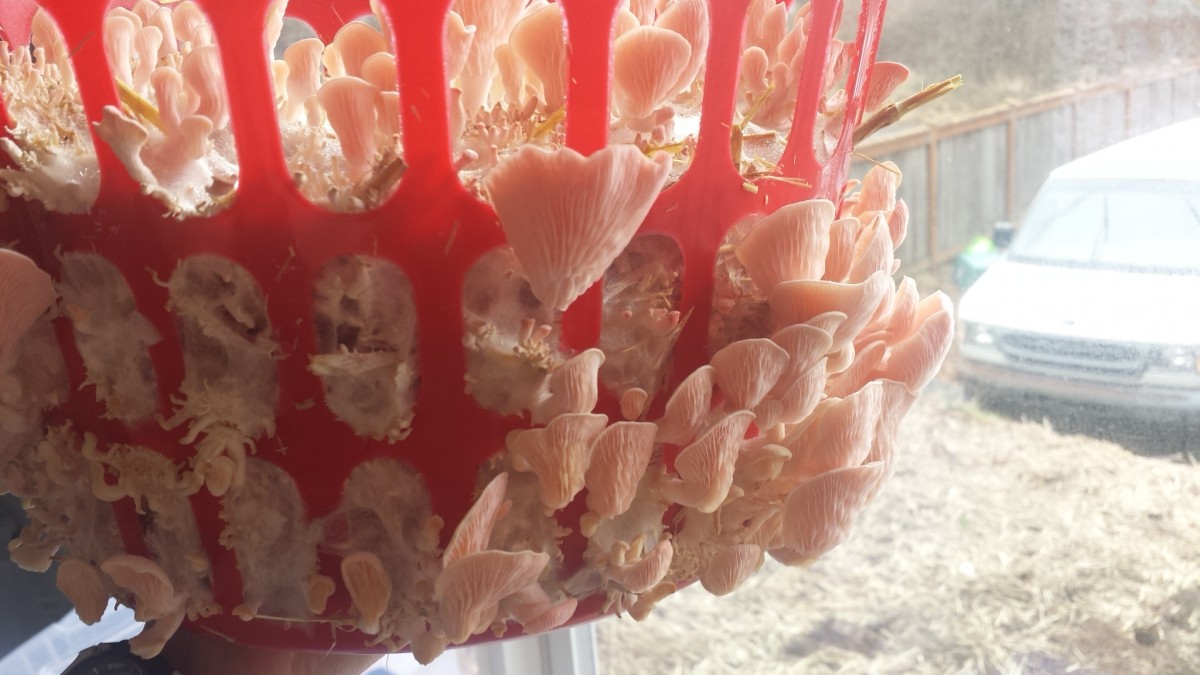
The next day I filled six plastic baskets (I bought the day before from the dollar tree), with five layers of straw, the cultivated grain and gypsum. The straw is mostly supplying nitrogen as well as some macronutrients. The gypsum provides sulfur and trace minerals. This will feed and give energy to mycelia so it can begin to pin. Pinning is when the mycelia begins its reproductive stage by growing mushrooms. This can also be called the fruiting stage.
Mushrooms need three elements that trigger the fruiting process: Water, light and oxygen.
To force the mushrooms to go into aggressive fruiting state, one out of the three elements are suppressed until the mycelia is fully colonized. Then when the third suppressed element is returned, the mycelia begins to fruit rapidly. The easiest and most commonly suppressed element is oxygen. Suppressing oxygen is known to be the quickest way of trigger the pinning or fruiting stage.
All six baskets were put into plastic bags to help keep it isolated from contaminants and create buildup of CO2. Later, when mycelia fully colonizes, the straw baskets will be removed from the bags to create more air flow. The increased Oxygen supply stimulates the mycelia to begin pining (going to fruit).
Sculpture update:
I really need to work on my research project, but I’v been so excited about working on my sculpture. My feelings are if I’m actually inspired to do art, I should do it. Anyone who does any kind of art knows how hard it can be to work up inspiration.
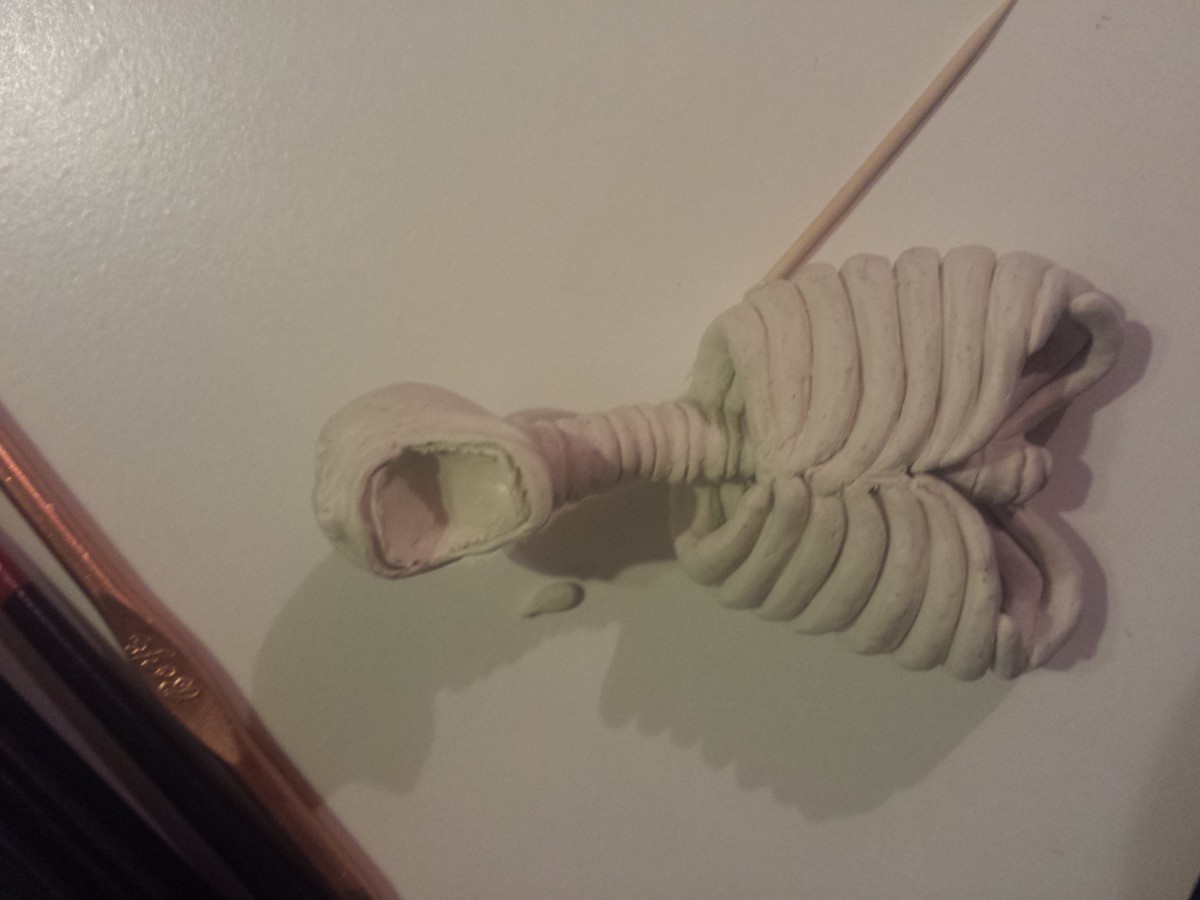
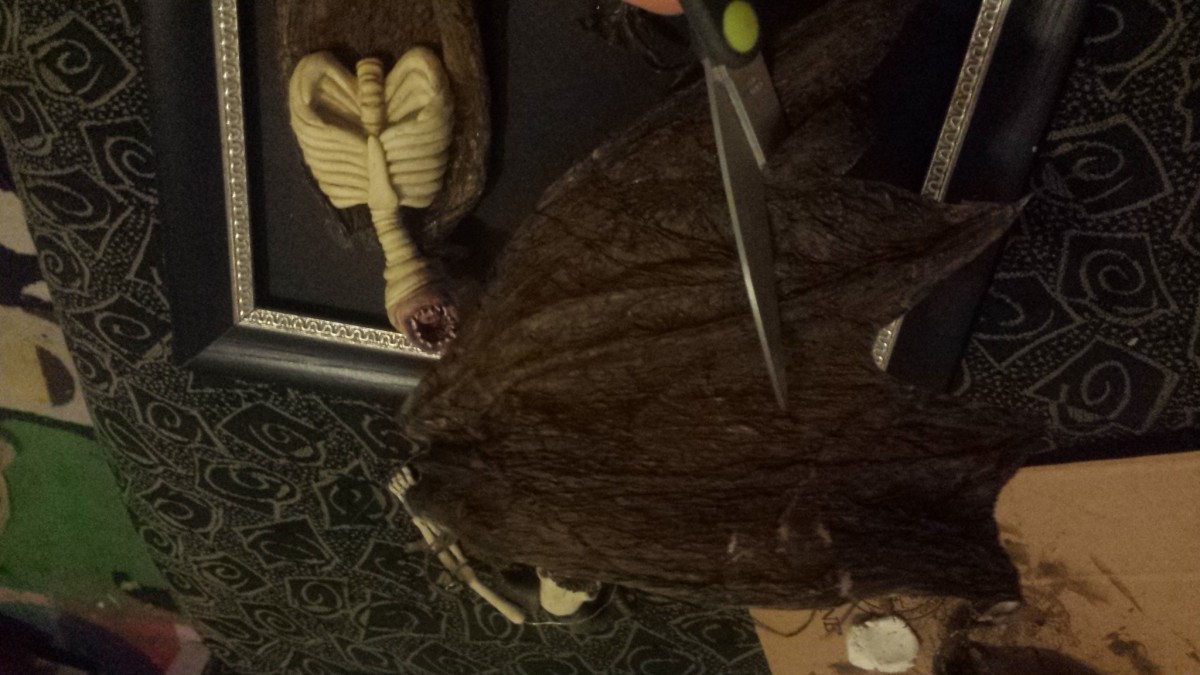
I’ve been looking up a lot of skeletons and grim reapers as I sculpted. I have now completed most of the upper torso of my monster which is the main attraction. I also made a major change. I was planning to have my sculpture standing upright on a board, but now I’m planning to have it, sort of coming out of a painting. So it’s becoming half painting half sculpture, in a way.
You can’t tell from the pictures below, but I didn’t like the first head, so I scraped it and started over (which cost me about 4 hours).
Here are a few pictures that show a little of the process:

Other work:
I’m thinking about attending a small business program called Enterprise for Equality. It’s designed to teach people about the beginning stages of starting a small business. I would like to one day try to start my own Oyster mushroom farming business, so this might be a good opportunity for me. The information session is this coming up on Monday the 30th. I plan on at least checking it out.
If anyone wants to know more or is interested joining the Enterprise for Equality program, here is a link: http://www.enterpriseforequity.org/
Week 4
Lets talk business
My week began with the informational meeting for Enterprise for Equality. As I mentioned last week, they are a school aiming to help people begin small businesses. The informational meeting did seem helpful, and I am interested in taking a coarse. It sounds like their goal is to help individuals narrow down the logistics of their business, and create a business plan. Unfortunately, the next opportunity to join is not until this coming summer or fall. I will probably look into it again when the time is closer.
Research
This week I’ve been trying to focus more on my research project and fine tuning my blog site. I still haven’t dove as deeply into my research as I would like, but at least I have begun. The subject of mushroom evolution is already huge, even when we exclude the topic of their medicinal properties (a subject debatably larger). I feel like I have barely scratched the surface. I began by refreshing my biology knowledge on cells and the evolution of the Eukaryota. My thought is that having a well rounded understanding of cells is a good place to begin my understanding of how fungus evolved.
Lose ends
I also watched some YouTube videos on the subject. Being dyslexic, videos help my retention of the material. However, after about an hour and a half, I became distracted with how lacking my blog bibliography was. I usually save everything I so much as glance at in Google docs. It is, however, unorganized and scattered. I spent quite some time organizing my materials and going over the last few weeks of blog writings (not all updated work is presented in blog yet). Currently, my blog has only referenced videos and podcasts from my bibliography, but other references will be included soon. I am also trying to add links to help navigate through my blog.
Mushroom update:
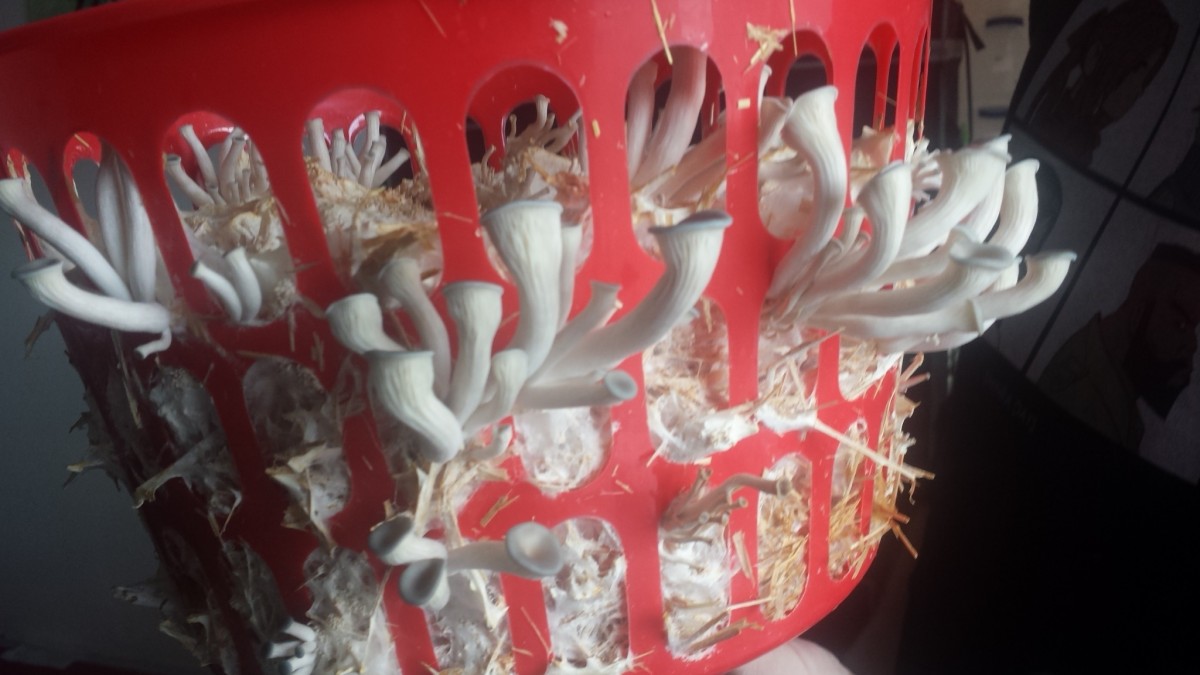
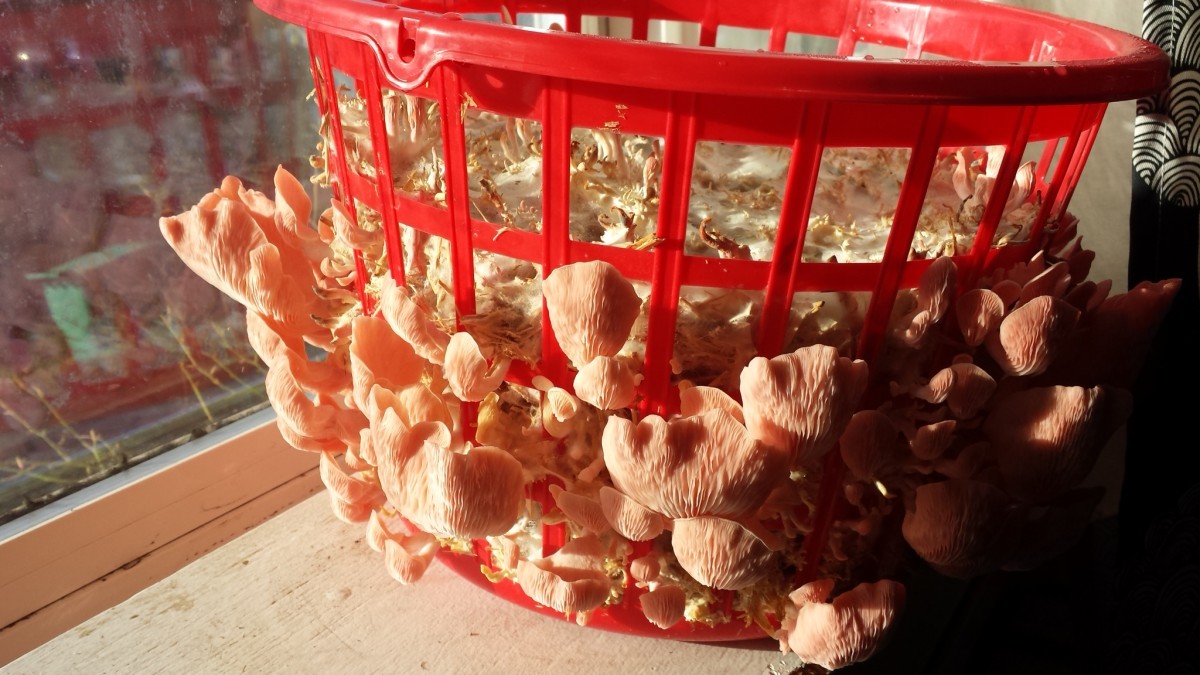
The oyster mushrooms have fully colonized the straw substrate! Super exciting, because this means I’m about a week away from having ready-to-eat oyster mushrooms!! Yay!!
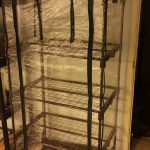
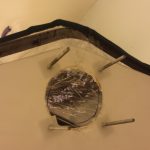
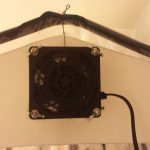
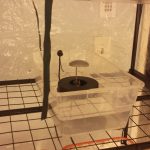
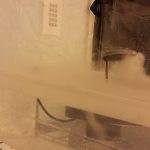
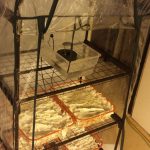
I built a fruiting chamber, which involved putting together rods and plastic pieces to form a 4 level greenhouse structure. Oyster mushrooms need a surplus of oxygen. This meant cutting a hole in the plastic and installing a fan. The mushrooms also need lots of moisture, which I obtained by placing a humidifier on the top shelf. There is a timer connected to both the fan and humidifiers’ cords. Its set to turn on every hour for 15 minutes.
Pictures of fruiting chamber being built:
I also started the whole process over again with the pink Oyster mushrooms. My hope is to have two kinds of Oyster mushrooms to taste for the lunch I signed up for on week eight of class.
Just as in week 3, I pasteurize the straw substrate, and added the colonized grain in plastic baskets, then stored them in garbage bags.
Art update:
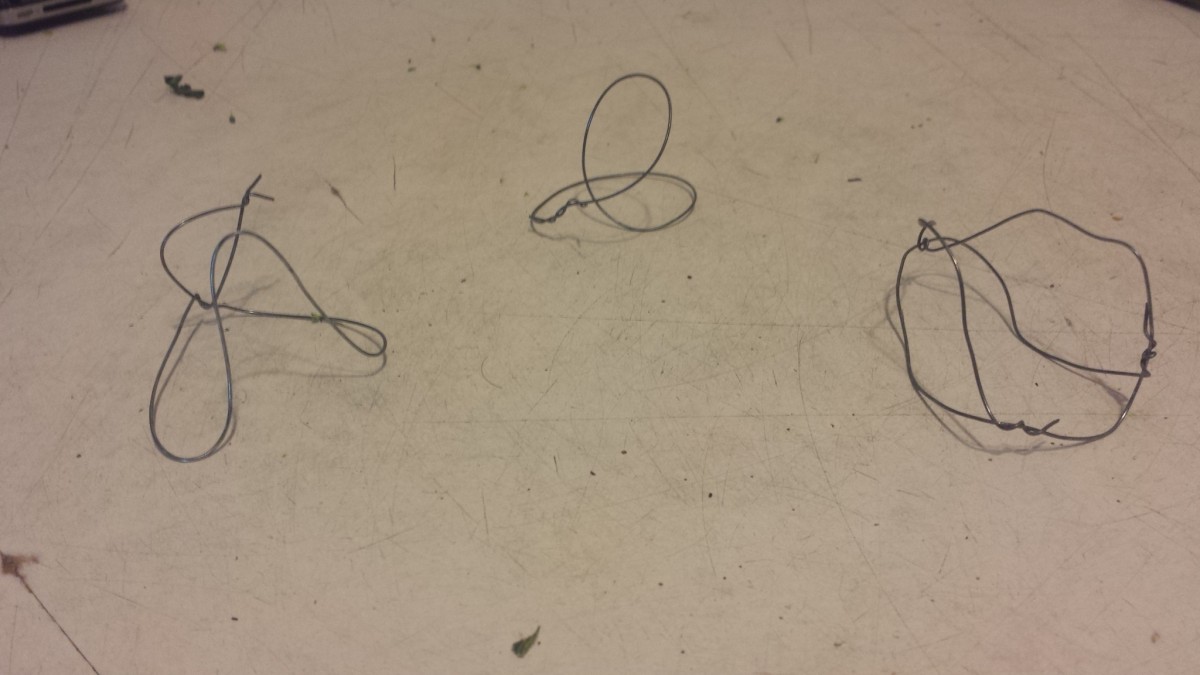
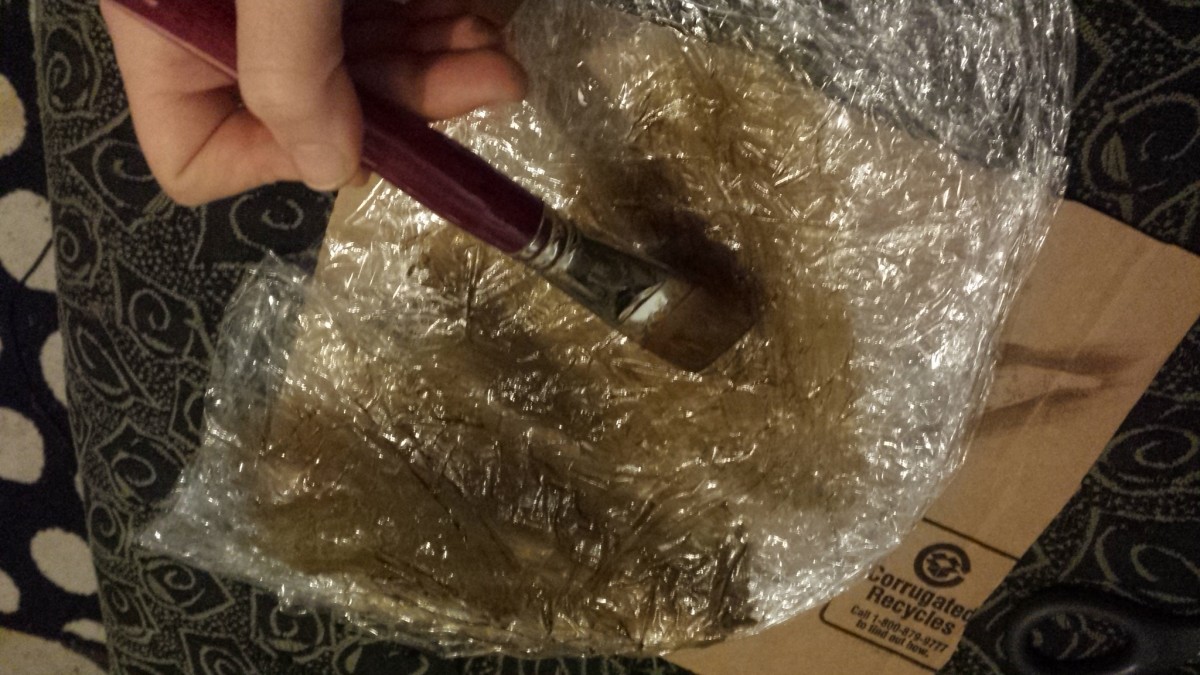
Also like in past weeks, I again spent time mixing paint and resin to create an oil look. This week I played around with mixing oil paints into the resin, and melting cellophane on wire.
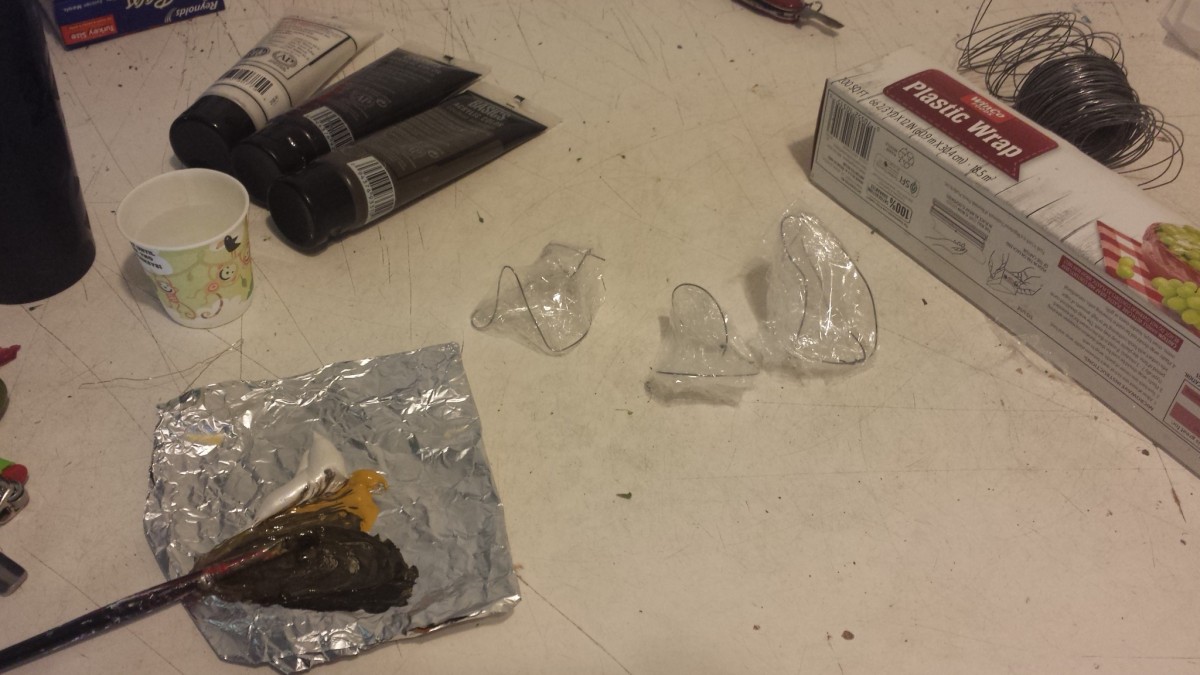
I think I really like the look the painted, melted cellophane gives. To me, at least, it looks the most like the oil and trash one might find floating in the water.
I created this look by making a wire frame, wrapping it in cellophane, painting it with acrylic paint, and melting it in the oven. I added additional layers of cellophane and paint and melting.
Something New!
I recorded a podcast-style interview with a person who ran a small oyster mushroom business with two other business partners in Seattle. His name is Jaya Palmer and he was incredibly knowledgeable on the subject of growing and selling Oyster mushrooms. In fact, he was so honest and insightful about the subject that I am now rethinking starting a mushroom business. Please take a listen to the recording if you’re interested.
Interview:
https://soundcloud.com/kirstin-humason/interview-with-jaya-palmer-on-oyster-mushroom-farming
Week 5
Research Paper:
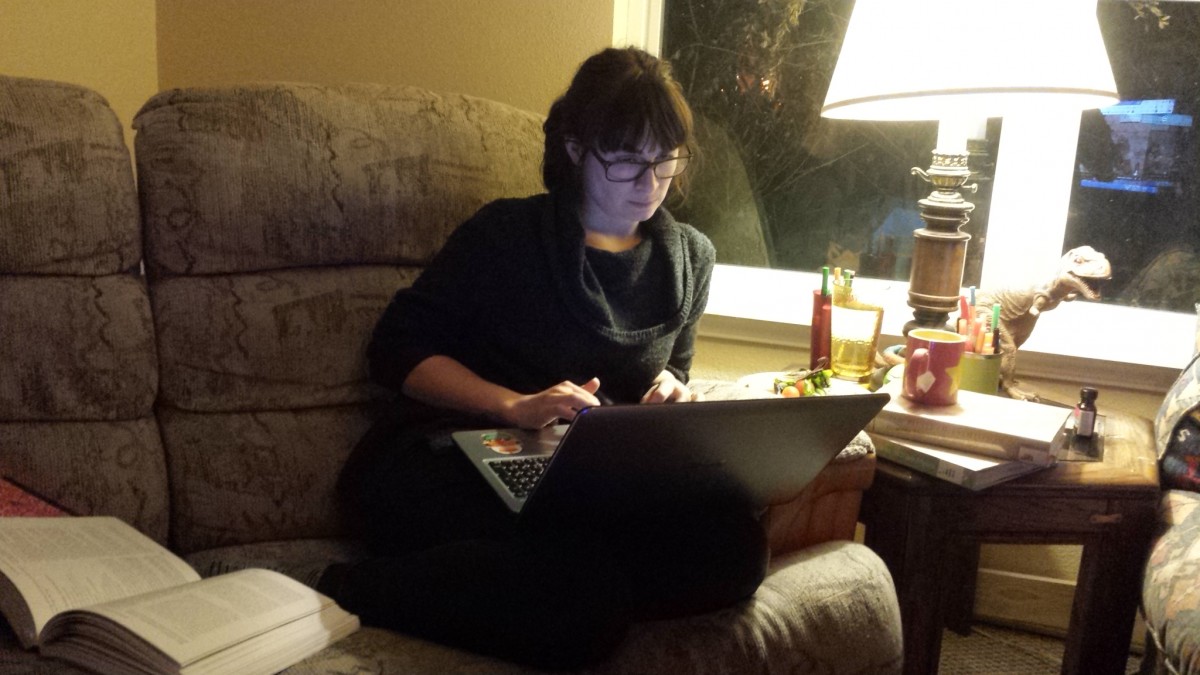
This week began with a snow day! It was awesome! I had a whole extra day to work on my project! Normally I work all day Monday and Wednesday, so I don’t get started on my project or homework till Wednesday night.
I took this opportunity to really get started on my research paper. I have mostly been collecting research material and reading mostly the abstracts. Now, I have actually read a bunch of articles and began writing my paper. I spent over ten hours on it! Go me! Monday was a very good day, I wrote a little over a page (no spoilers). It’s amazing what an extra day can do for me!
Mushroom report:
Not much for me to do this week, but my mushroom are growing!!! Its was so exciting the day they started pinning (the beginnings of little mushroom caps). Every day since I have seen major growth. It’s so exciting!!
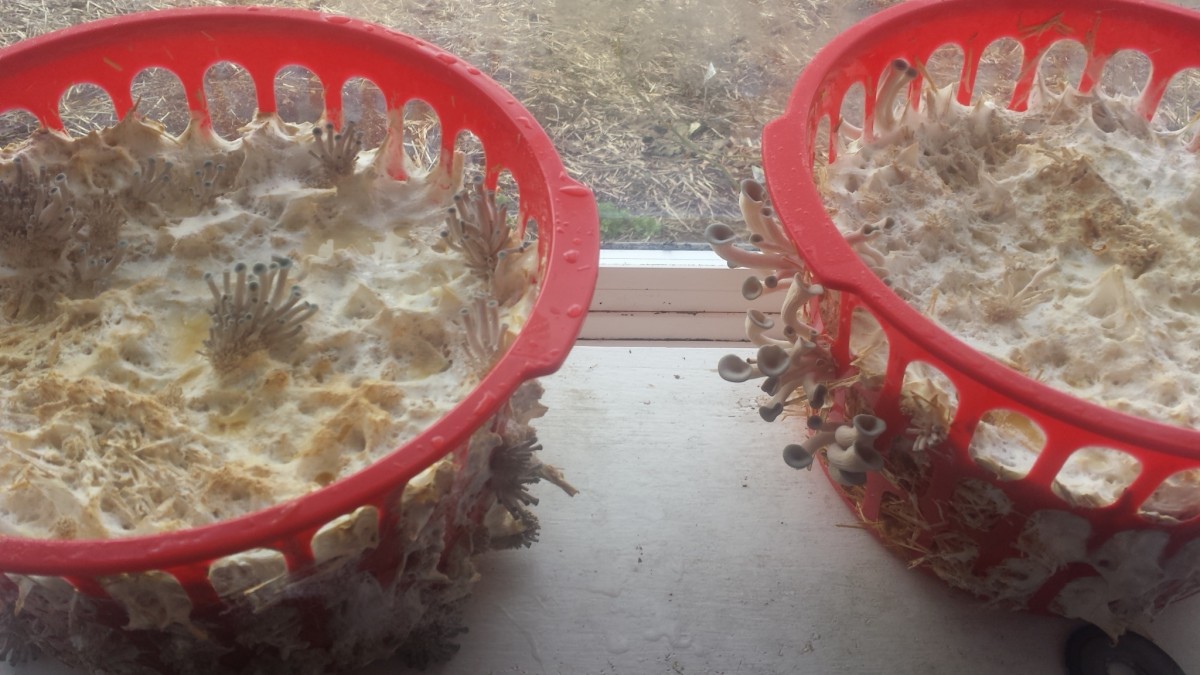
As an experiment, I took a few baskets and set them in the window sill. The major difference is that the baskets receiving more natural sunlight seem to be turning more blue. I’m also wondering if it will affect the size. I may want to look deeper into this and possibly even run controlled experiments for next quarter. Something for me to think about.
I also switched the Pink Oyster mushrooms to fruiting conditions. I am running out of room, so I I’m keeping half of the baskets in the fruiting chamber and the other half in plastic tubs. This in itself is an experiment. It will be interesting to see which baskets grow better. I’m considering as a pilot study that may turn into a possible controlled experiments I was talking about maybe doing next quarter.
Art
Slowly but surely, my sculpture is still coming along!
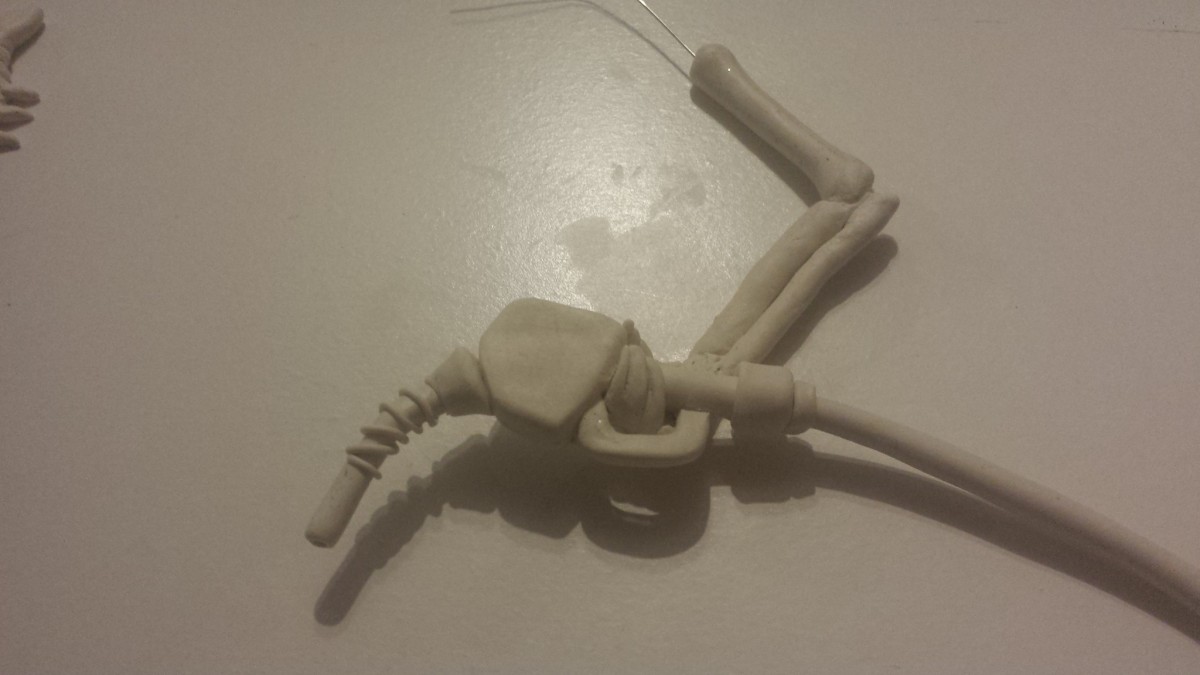
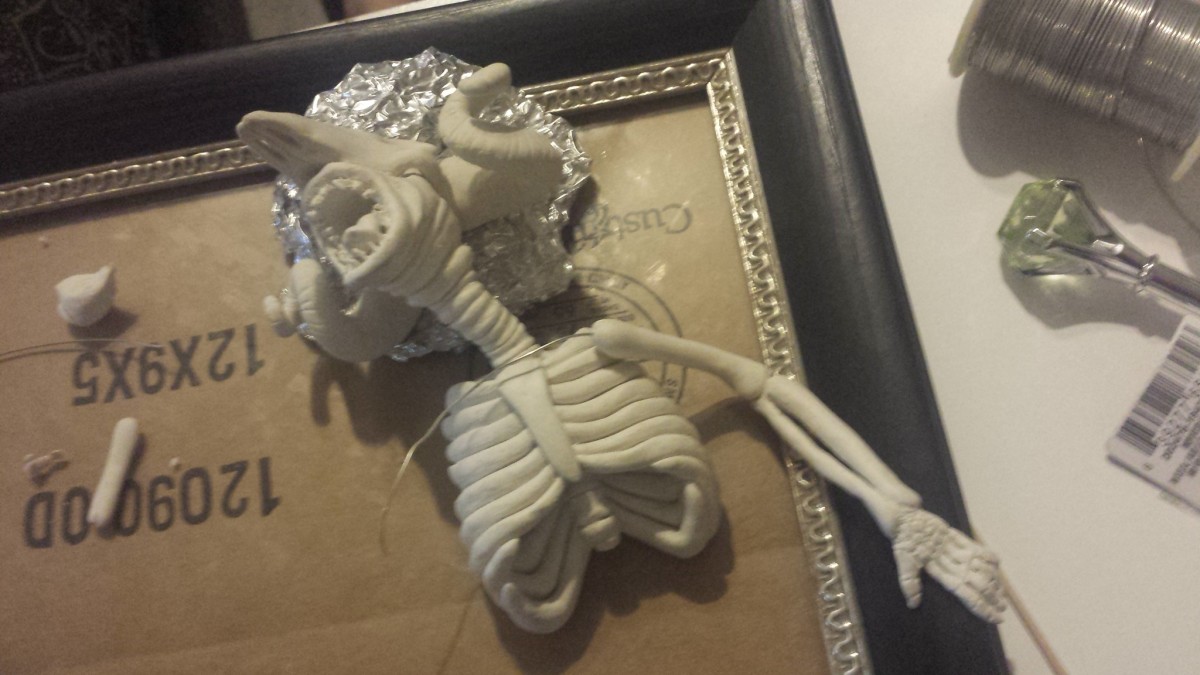
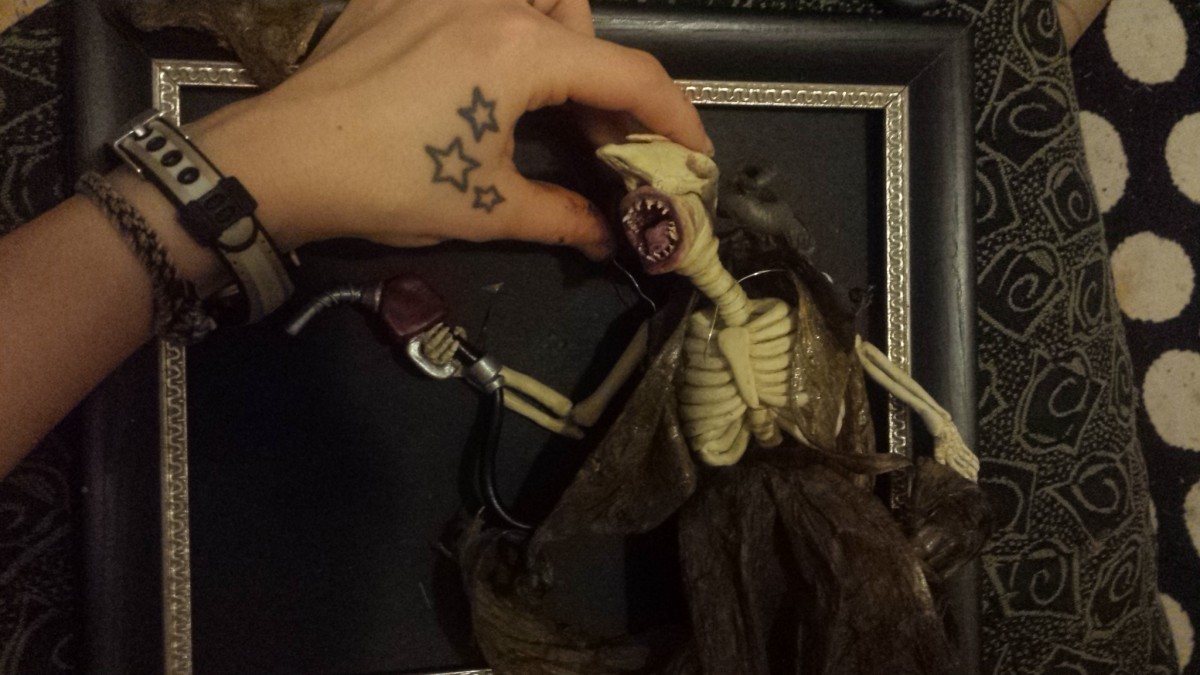
This week I finished the left arm and sculpted a gas pump nozzle gun thing. My thought was, in order to make it clear what my sculpture represented an oil spill monster thing, it needed have a prop. I don’t think I’m going to have any problems making my monster look like it’s evil or oil spill like. My biggest concern is making it look like it’s actually being attached by Oyster mushroom, not just growing them passively. The only way I can think of expressing this is through the figure’s posture. This is why it’s screaming and (hopefully) looking distressed. Meh… We shall see….
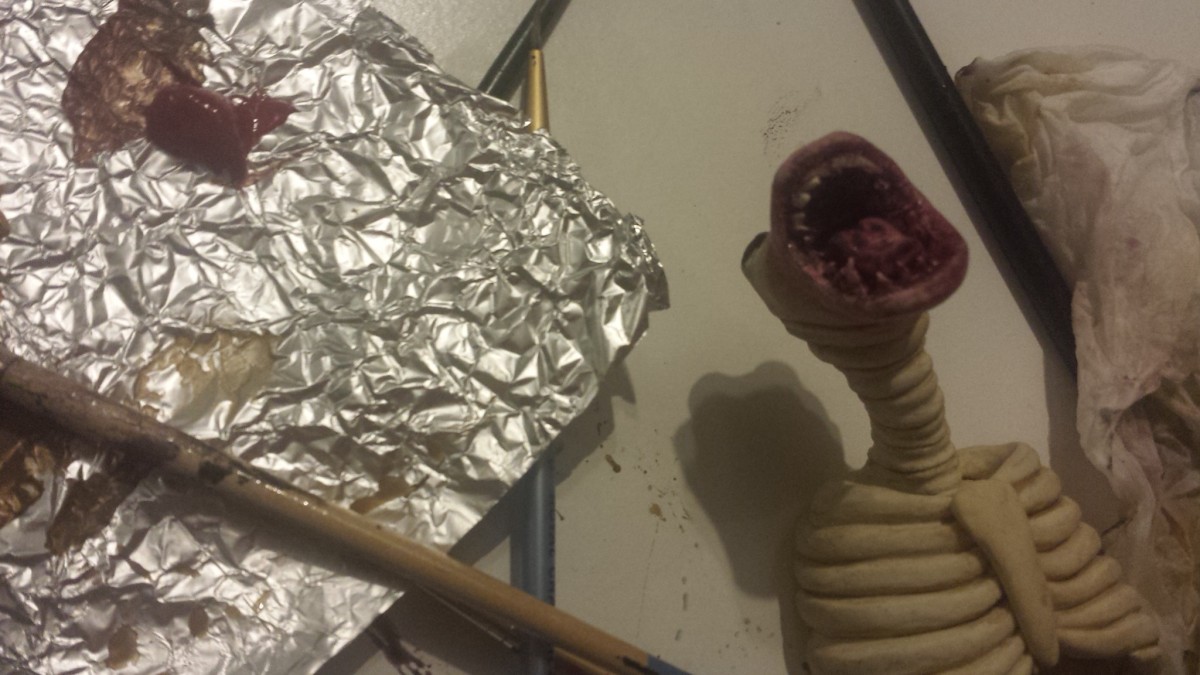
I also worked on painting the sculpture, giving definition to its bones. Natural bone have an off white yellow tint. I painted the mouth to kinda look like rotten meat, hoping to make it appear gross. As long as no one wants to make out with it, we’re good.
Between everything I was able to get done on Mondays snow day and how productive the rest of my week went, I have really collected some extra time. For this program, students need to complete and log 40 hours per week. My goal of each week has been to make a few extra “rainy day” hours just in case life happens. Due to working Mondays and Wednesday, you can imagine I haven’t had much of a social life. But that’s ok. I have been really enjoying this project. However! This week I made so much extra hours, that maybe, in future…. i’ll take some time off! Wwwooh!
But we’ll see, I also need to make sure I actually complete all three of my learning objectives and the required homework. Things tend to take me longer than the average person.
Over and out!
Week 7
Sick week! No fun!
I took being sick as an opportunity to work on my research paper! I’m pretty happy with the amount I’ve put into it. However, more and more I’m finding the subject to be quiet and dense. I’m spending a lot of time re-learning the basics of biology. It’s been a long time since I learned about how a cell works and the origins of how life began. I’m finding that, because the evolution of fungi took place so early in evolutionary history, it’s important that I have a better understanding of how everything began on a micro level.
I’m diving pretty deep into compounds found in Oyster mushrooms. One, in particular, I’m looking into is L-Tryptophan. I have kind of turned a corner, and am now learning the evolution of L-Tryptophan. It’s a really confusing and deep hole i’ve found myself in. So that’s fun…
Mushroom report
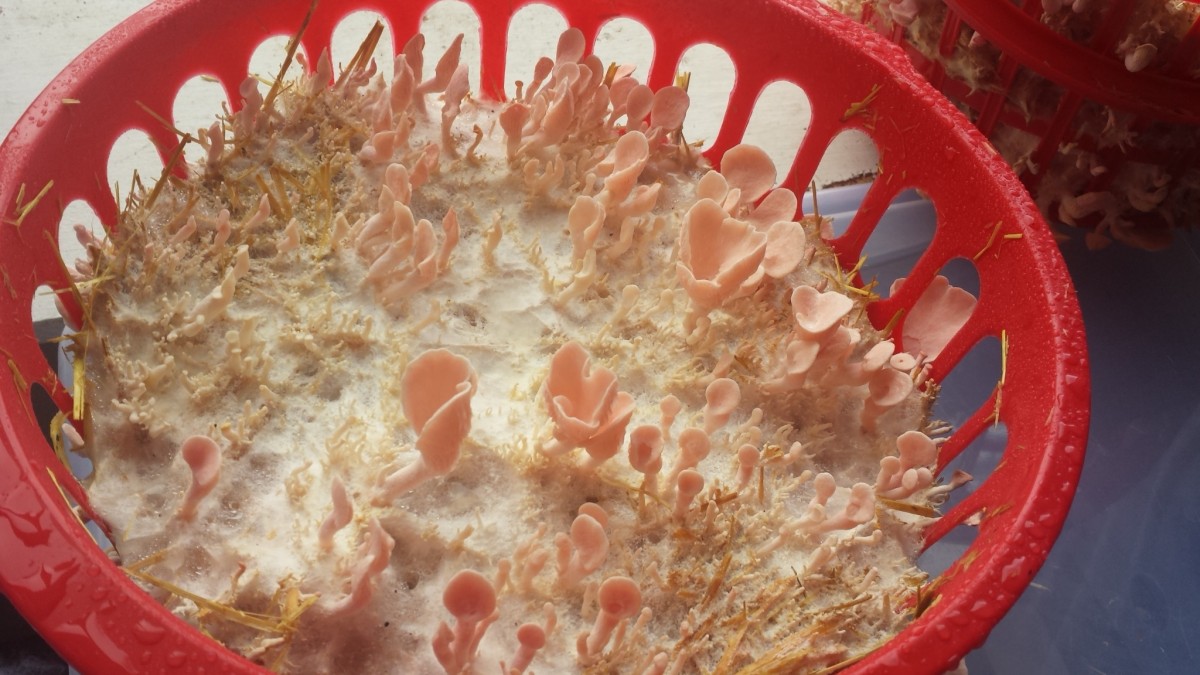
The pink oyster mushrooms have begun to grow!! And man are they PINK! The blue Oyster mushroom had a blue tint to them for sure, but the pinks are super pink. It’s so interesting. Now I want to know how and why they are different colors. Interesting stuff!
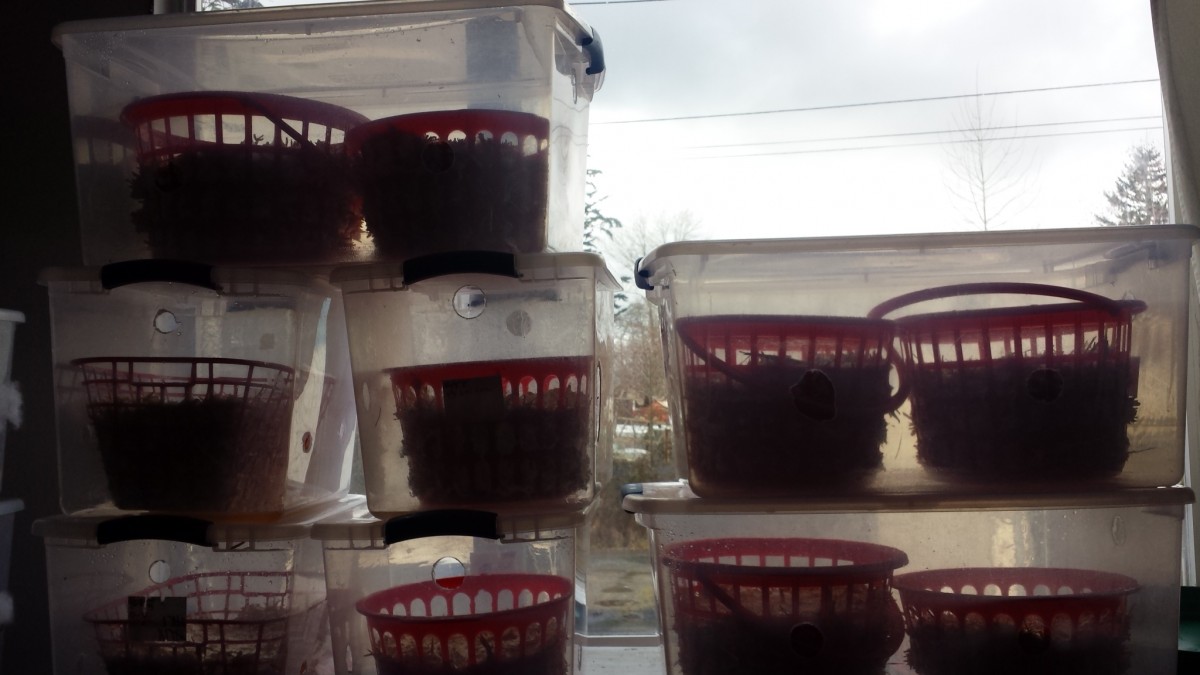
I have half the brackets in plastic tubs by the window sill, and the other half in the fruiting chambers. I think the Oysters that receive more natural light are doing better. However, it’s a bit more of a pain to keep them in the plastic tubs because they need to be misted several time daily to keep them humid. I also had to drill holes into the bins for air flow.
The second flush of the blue Oyster mushrooms have begun to pin again. The way you stimulate a second flush is to fully submerge the basket or colonised substrate into water for about an hour, then place it back into the fruiting chamber. This simulates a quick rainy season.
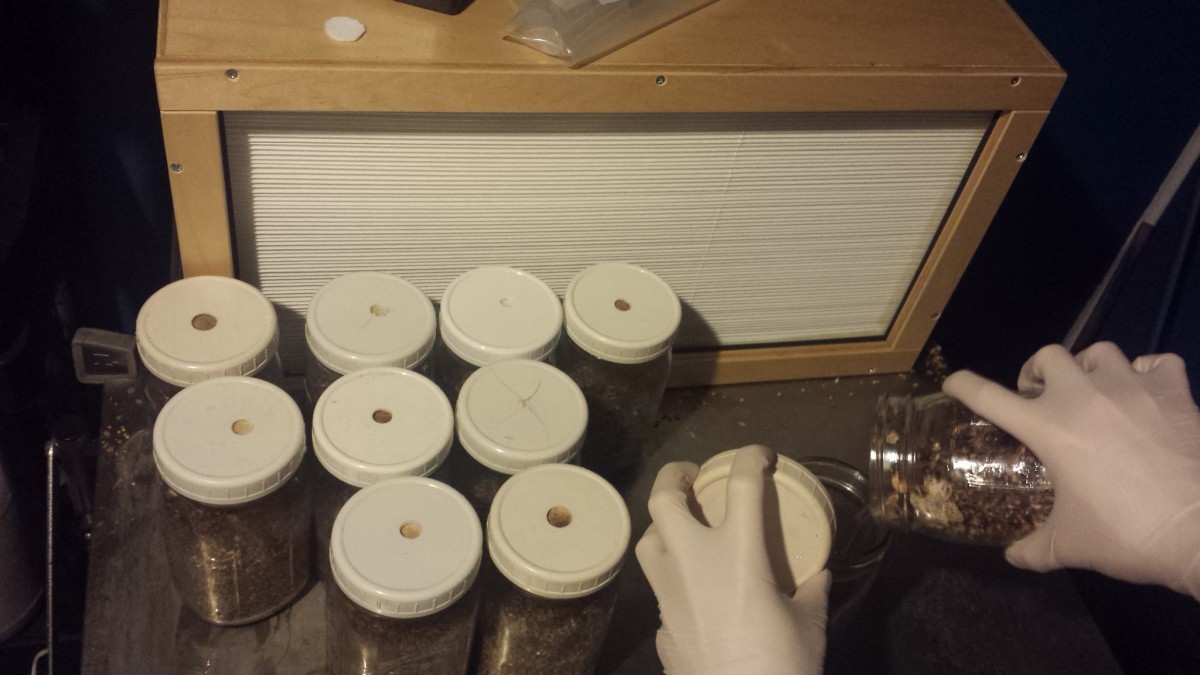
This week I also split the remaining grain jars into new grain jars. This is done by going through the same process as before (soaking, pasteurising and sterilising the grain). Then you take the existing fully colonized grain jars and split one into ten new grain jars. When the mycelia is again fully colonized, I will start new straw in baskets or logs, keeping the cycle going forever!
The thing I’m now going to really focus on is mushroom size. My hypothesis is that I may need less surface area to fruit. I’m thinking about making straw logs or bagging the substrate. By poking holes for the mushrooms to grow through, I think it will localize its energy and grow fewer, but larger mushrooms.
Art update
This week I’ve finished painting a lot of the sculpture and am now working on my sculptures clothing. Basically, I’ve been melting cellophane on wire (just like how I experimented with in week 4).
My sculpture is now clothed! I just need to figure out how I’m going to complete the background. My plan was to paint an ocean scene…then I realized… I’m not a painter! What was I thinking? So guess what folks? I’ve been looking at some Youtube videos of Bob Ross! He may just be the answer to all my problems!
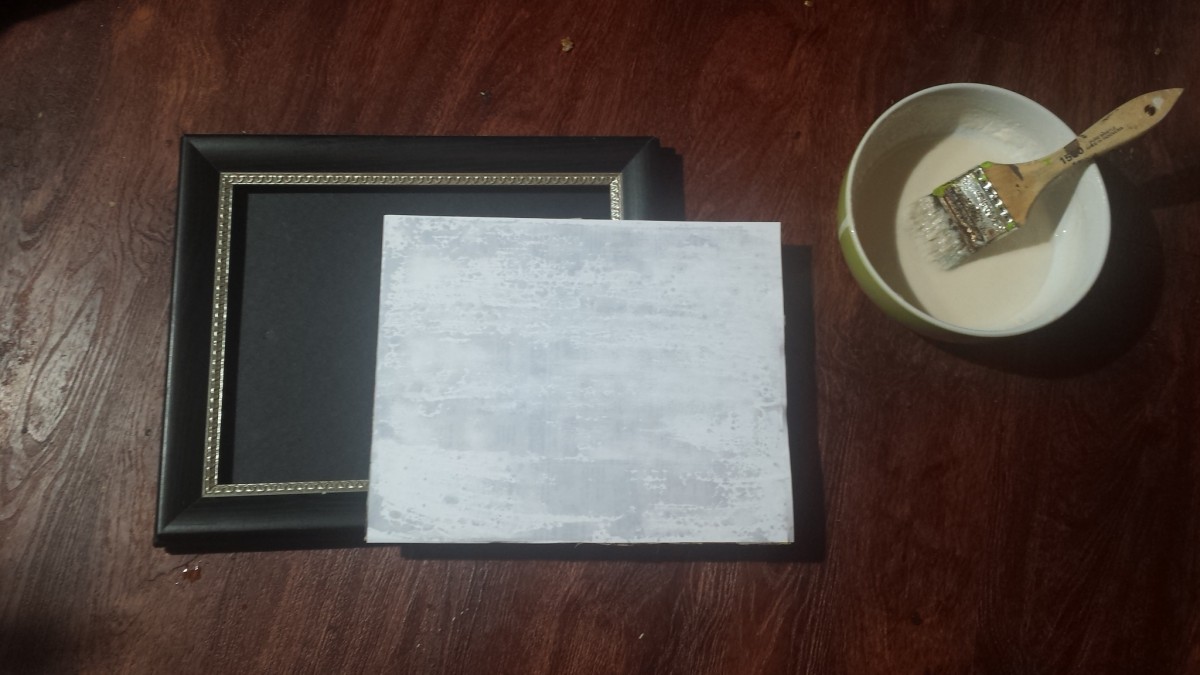
I began the background by making a canvas (not actually made of canvas). I took the existing glass from the frame, made a layer of paper mache, followed by a sheet of white paper. This is where I plan to paint the Bob Ross ocean scene.
Week 7
Research project:
This week started out with President’s day, so I didn’t have to go to work, which gave me an extra day to work on my projects. That worked out perfectly because I didn’t have as much time as I would have liked during the rest of this week.
I mostly worked on my research paper. I think it’s really coming together now. I still can’t help but feel like I’m mostly just explaining evolution itself, but that’s ok. It’s been really interesting; I now have a way better idea of how life began.
Sure, my college focus has been in evolutionary biology, however I didn’t really take biology in high school, and we were expected to already know a lot of this stuff upon entering those programs. I got by just fine, but now I’m really getting it. So I’m super happy about that.
Mushroom report:

Not a lot going on at this point. All the baskets are going through their second flush. I feel quite successful about how much yield I have gotten.
There should be a sufficient amount to cook this week for class (for anyone who doesn’t know, this program expects all students to cook one lunch for the class during the quarter). I wanted to cook the mushrooms I have been growing, which makes sense, considering how much I talk about them in class.
Art:
I put some time into my art this week. I’ve been a little hesitant to paint, mostly because it’s out of my comfort zone.
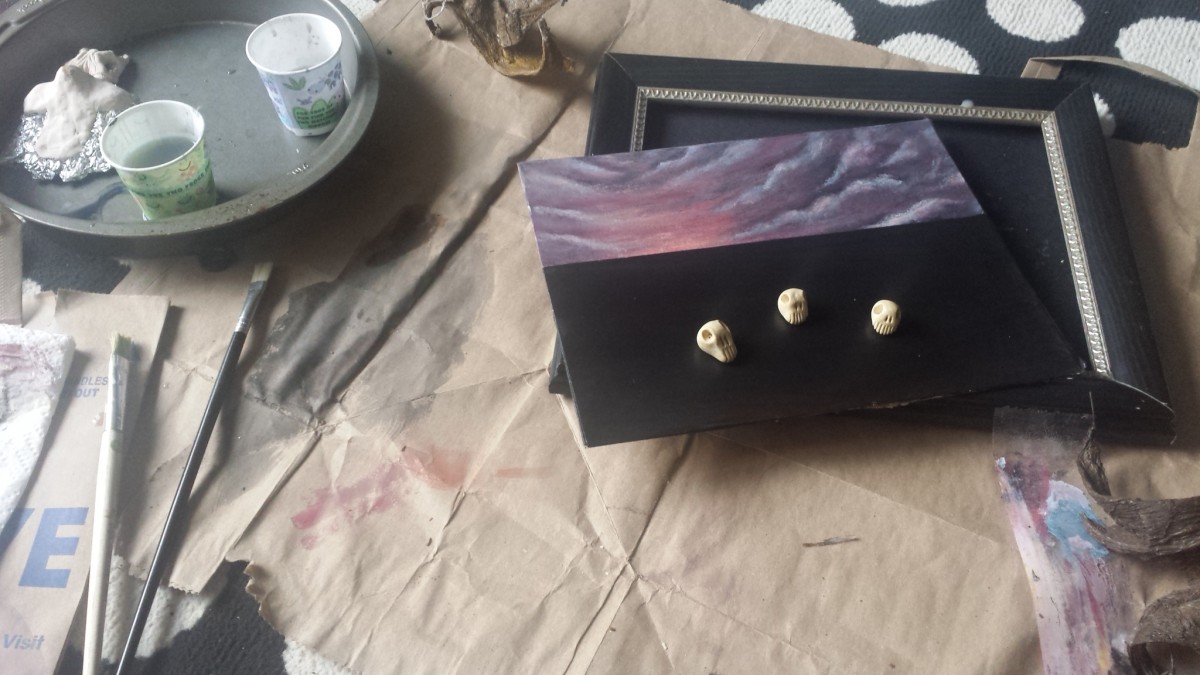
I began by painting my blank canvas black. This give a dark background that really pops the colors. I want to paint a beach scene with an evil red stormy sky and sea. I totally watched several Bob Ross videos while painting. So far I have completed the sky portion. I’m not sure if I’m completely satisfied, so I might start again on the back side, and then choose between the two.
I also sculpted a few skulls that I may include at the end. I might strategically place the skulls between the fold of the monsters robs.
Week 8
Research research research
This week I mostly focused on my research paper. I spent at least 17 hours on it this week, probably even more, but I lost track and just rounded down.
When It comes to focusing on anything dealing with reading and writing, I need a quiet place where little can distract me. I can sometimes take a good hour just getting into the flow, but after that I can work productively for hours. After a while my work space begins to look a little like a nest. I try to have everything I could possibly need next to me. This makes it so I don’t have any excuses to get up and find ways to procrastinate.
One thing I found really difficult about this research project was finding extensive nutritional information. I found lots of information on specific oyster mushroom compounds, but I’ve been having a real hard time obtaining a complete list. What I really want to find is some solid data on the levels of tryptophan found in oyster mushrooms. I have mostly run into studies showing evidence of tryptophan simply being present. I think this information is really important to know if oyster mushrooms can be considered a good source of tryptophan. I think the reason why there isn’t much information on this is because there is no actual approved daily value for tryptophan. What little information exists in this area is, I believe, not completely reliable. I think that if I could start over on this project, the one thing I would change is the compound I decided to focus on. I should have done a little more research in the beginning, and figured out which compounds have been more extensively researched.
More Mushrooms!

Everything is winding down now. My baskets have all done at least two flushes. The blue oyster mushrooms first two flushes were their strongest. In contrast, the pink oysters did their best the second and third flushes, which I found interesting. I’m still soaking the baskets to see if I can get a fourth flush, though I have a feeling that I won’t get much.
Art
Sorry folks! I haven’t worked on this at all this week. I really wanted to focus on my research project, and also had some troublesome events sneak up on me. This started with my truck breaking down, requiring that I come up with a new way to commute back and forth to school and Seattle, where my mushroom project is based. I’ll be returning to more art stuff next week!
Week 9
Research paper
Well, the quarter is coming to an end. This week, again, I mostly worked on my research paper. I had it looked over by the professor, who noted some weak spots and loose ends that needed addressing. I plan to post my finished paper on week 10. If anyone is interested, please feel free to take a look. The paper is about the evolution of tryptophan in Oyster mushrooms, and why it could be considered medicinal. It was a lengthy and confusing subject. I apologize if there is any information that’s not completely right, though I think I did a pretty good job.
This week I spent a chunk of time learning how to use Zotero on my personal computer. For anyone who doesn’t know what Zotero is, it’s basically a program you can use to help make a bibliography. As you research material you can click a button on the corner of your screen, and it logs the site for you and creates a citation. Once you have everything downloaded and installed, it’s really simple to use. However, the actual getting it on your computer part is somewhat confusing. Over the course four hours, split between a few very frustrating days, I have finally figured it out. Trust me, I totally did a happy dance. This was, of course, right before a tech person from school agreed to help me. That’s okay; through many Youtube tutorials and a little help from my room mate, I did it! Yay!!
Art and Mushroom report:
It’s a good thing we’re at the end of the quarter, because my mode of transportation no longer exists. This whole quarter I’ve been commuting back and forth between Olympia and Seattle (Mukilteo to be exact). About a week ago my truck started giving me trouble, and I now no longer have it. It’s also complicating my plans for next quarter. This meant I couldn’t make it to Seattle, where my Oyster mushrooms and art sculpture are. I have a plan to get to Seattle next week, and will hopefully have something to show everyone! I am still hoping everyone following this blog can see the finished piece, so everyone keep you fingers crossed!
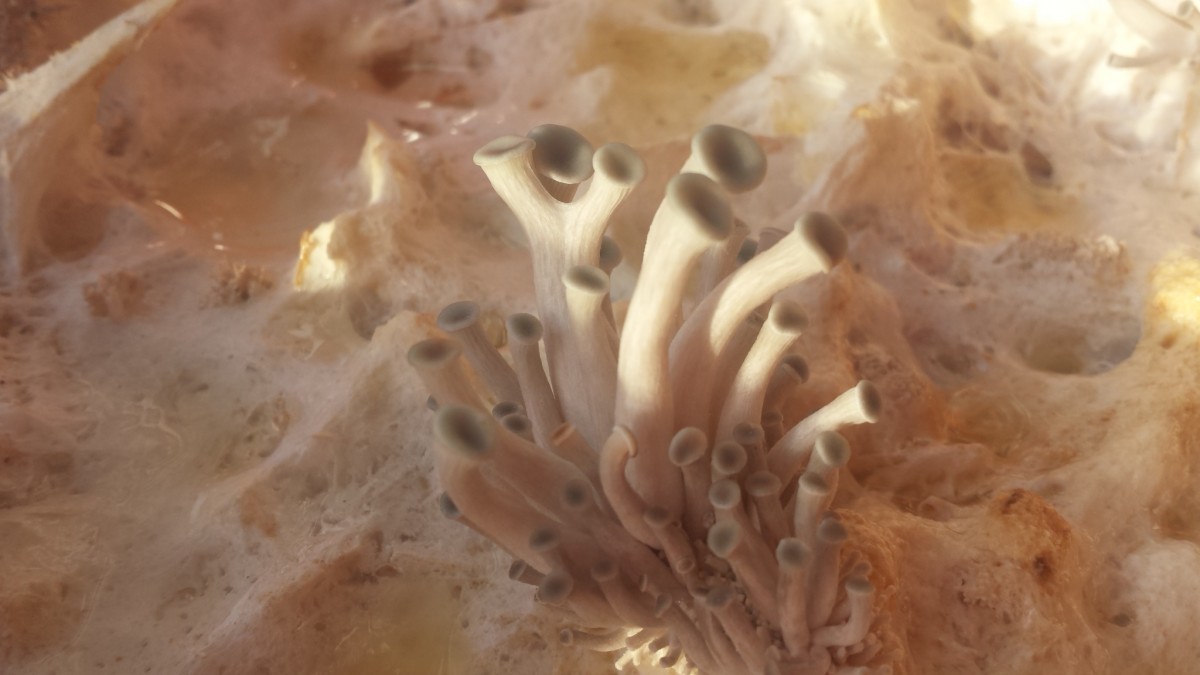
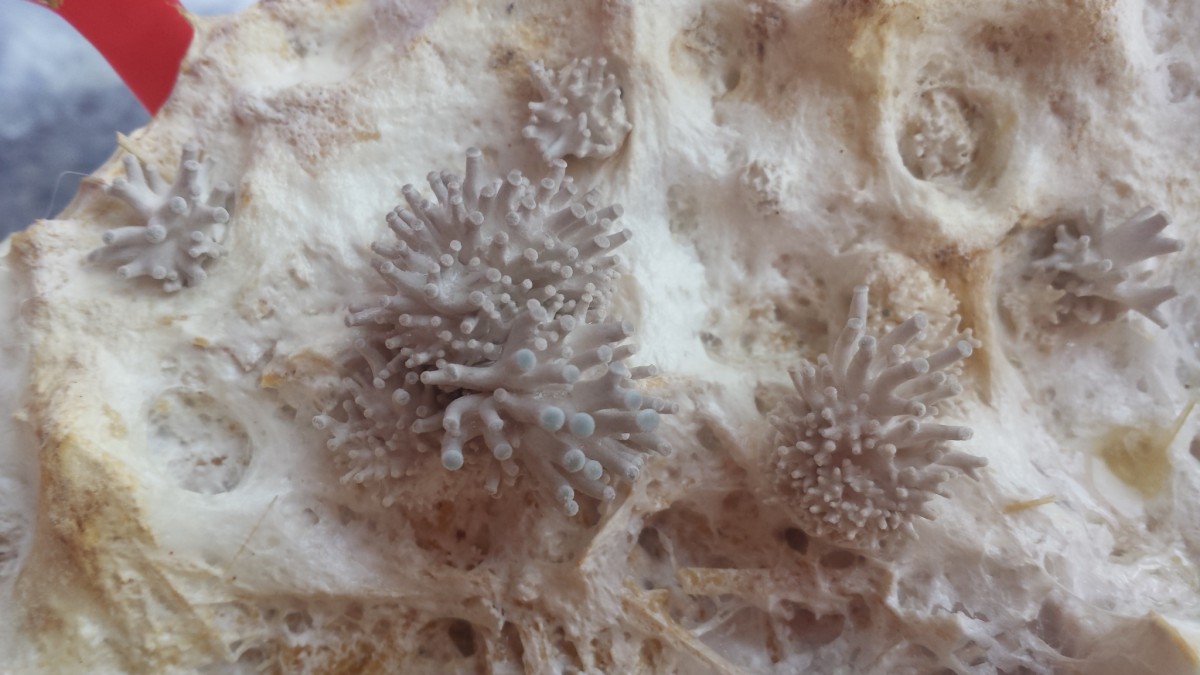
Just for fun, I took some pictures of a blue deformed Oyster mushroom. It kinda looks like conjoined twins. This was a few weeks ago but I thought they looked really awesome!
Week 10
Hello everybody! This is my last week of the quarter, as well as my final post!
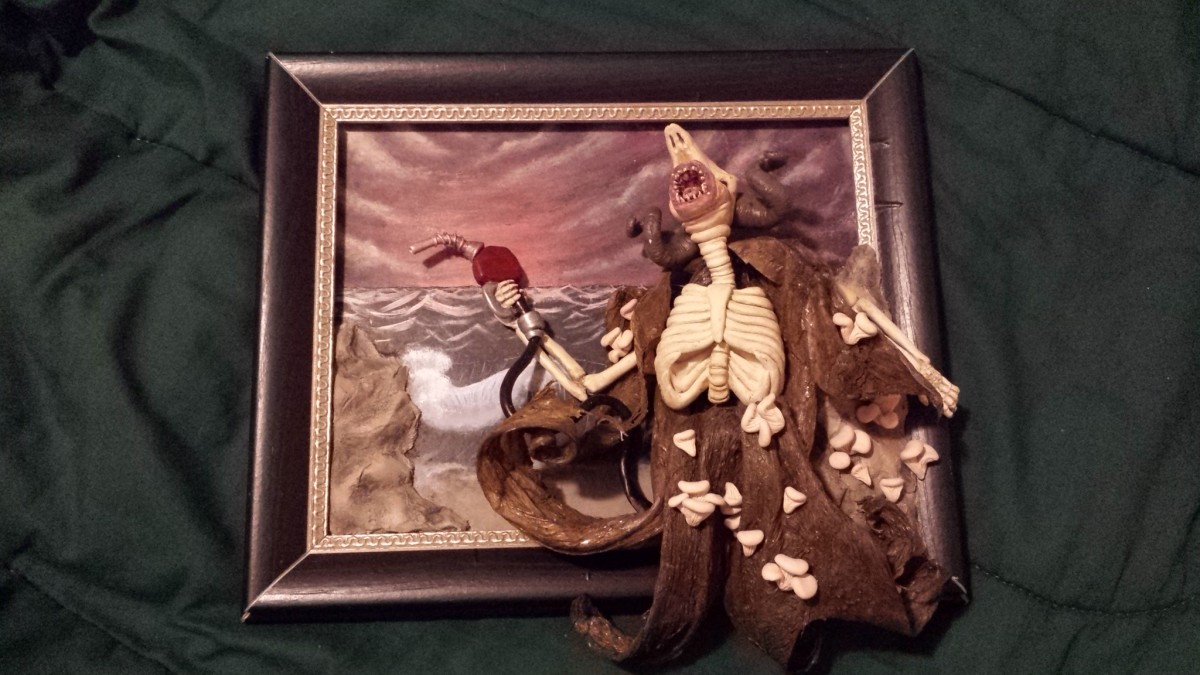
I think this quarter went very well. I learned a great deal and accomplished much. I believe I have completed all of my learning objectives, apart from my art sculpture. Unfortunately I ran out of time, but I’m definitely pleased with the work I’ve already done. I would like to claim that my art piece is in a stage of completion, because I do believe it can pass as a finished piece. I really want to finish this project, so I might be posting more pictures in the future.
Art:
As of now, my art sculpture has the oil spill monster, the painting of a beach bordered with rocks, and a bunch of oyster mushrooms swarming onto the monstrous figure. The finished product will have shells and oyster mushrooms glued to the frame as well. I will also cover everything with a bar top resin mixed with brown paint, to make everything look like it’s covered in oil.

Research paper:
I have completed my research paper, which has been edited twice. I’m sure it could be expanded on, but I am proud of what I have completed at this point.
Feel free to read it! Just click the link in blue: ResearchpaperOysterMushrooms
Mushrooms report:
Just for fun, as well as for health purposes, I will continue growing oyster mushrooms. I plan to start a new batch this spring quarter. I have unfortunately lost my pink cultured jars to contamination, but I still have fresh pearls! So this next batch will be blue and pearl oyster mushrooms.
I hope you all enjoyed my blog! Thank you for following me on this adventure!
This is a very interesting project you have going on here, mainly because I’ve never seen it done in mason jars. Where did you get the jars from? Did you pay for it out of pocket? Why did you choose the pink and blue oysters? Are they edible?
It’s interesting that you’re doing such a large batch because you’ll be able to see any phenotypic variations as they appear. You’re basically mushroom breeding at this rate, like plant breeding but with mushrooms. It’s a pretty lucrative vocation if you get into it and know what you’re doing. I’m excited to see how this goes~
Shani A
Hi Shani,
That’s interesting that you have never seen the inoculation process in mason jars. I personally have mostly seen it done with mason jars. This stage is only to begin the growth of mycelia,and later it will be transferred to straw logs. The straw log stage may be what you’re thinking of. The jars are from Lowes as well; I forgot to mention them because they were purchased weeks ago. I was planning to do this project with or without the program. Sooo, I already had some of the supplies, and yes they are coming out of pocket. I chose the Pink and Blue oyster mushrooms mostly because I wanted a variety of color and they are “apparently” easy to grow. YES they are edible! And not just edible they are also full of medicinal health benefits! I hope to further explain when I write my research paper discussing the evolution of oyster mushrooms medicinal properties.
And yes again, I am basically mushroom breeding. The idea is to someday start a local mushroom business, so having a large yield and having a large genetic variety is a good thing. The beginning batches are the “mothers”, after the mycelia takes hold I will be splitting a single jar into 10 more and refrigerate the remaining 9. After the oyster mushrooms begin fruiting I will be taking clones of the best phenotypes. Again, I plan to discuss this more thoroughly as I go through the process.
Thank you so much for your comment, I’m happy to see that someone is interested in my project. Please keep checking out my blog to see updates. The next time I talk about the oyster mushroom portion of my project will be in about a week, right now the project is on standby until the mycelia matures.
-Frankie