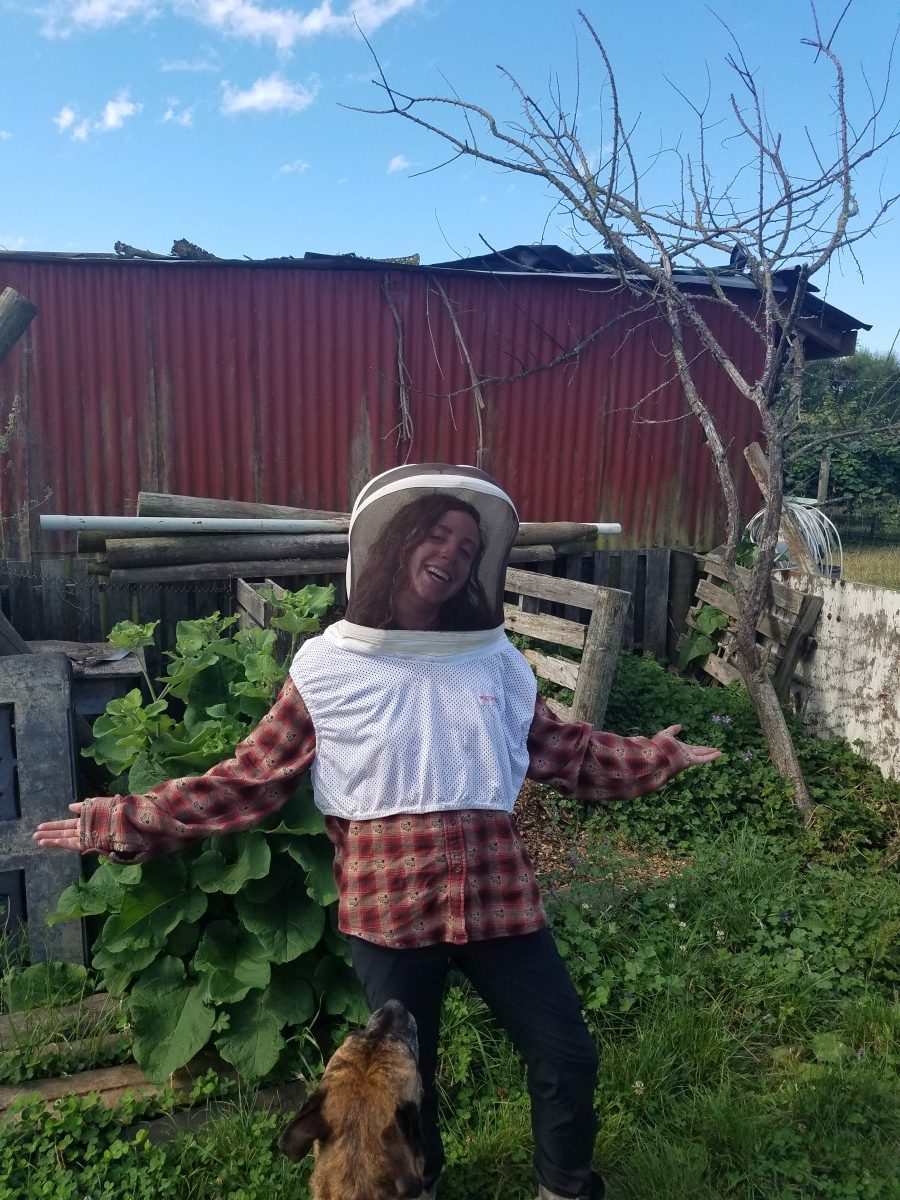
Lynda has 4 beehives filled with colonies that she caught as swarms, and they are all insanely productive. There are always hundreds of bees flying around near the hives and dancing in the flower patches. She hadn’t looked inside them for about a month so we decided it was time to check in on their current situation.
Upon opening the first hive we immediately saw that we needed to place another box on top because it was jam-packed in there! Bees were running over each other in masses and they built large lumps of protruding honeycomb from the frames to try to expand their home. These bulges can make beekeeping more challenging, as I experienced firsthand. The frames were really hard to pull out of the box since they were all practically meshed together with so much honeycomb. We used the hive tool to break them all off, otherwise in the future it will grow even worse and be more difficult to check on the bees health. As we went through the frames we saw lots of capped honey, and tons of both worker and drone brood, basically every cell was filled. The coolest thing I saw was some very freshly laid brood, when the frame was held up to the sun I could see little eggs like baby grains of rice which meant that the brood wasn’t very old at all. When checking on a hive, it’s good to find the queen because you want to know if she is still there, but seeing this is just as good of a sign because when we saw it we knew that she was here recently and still doing her job.
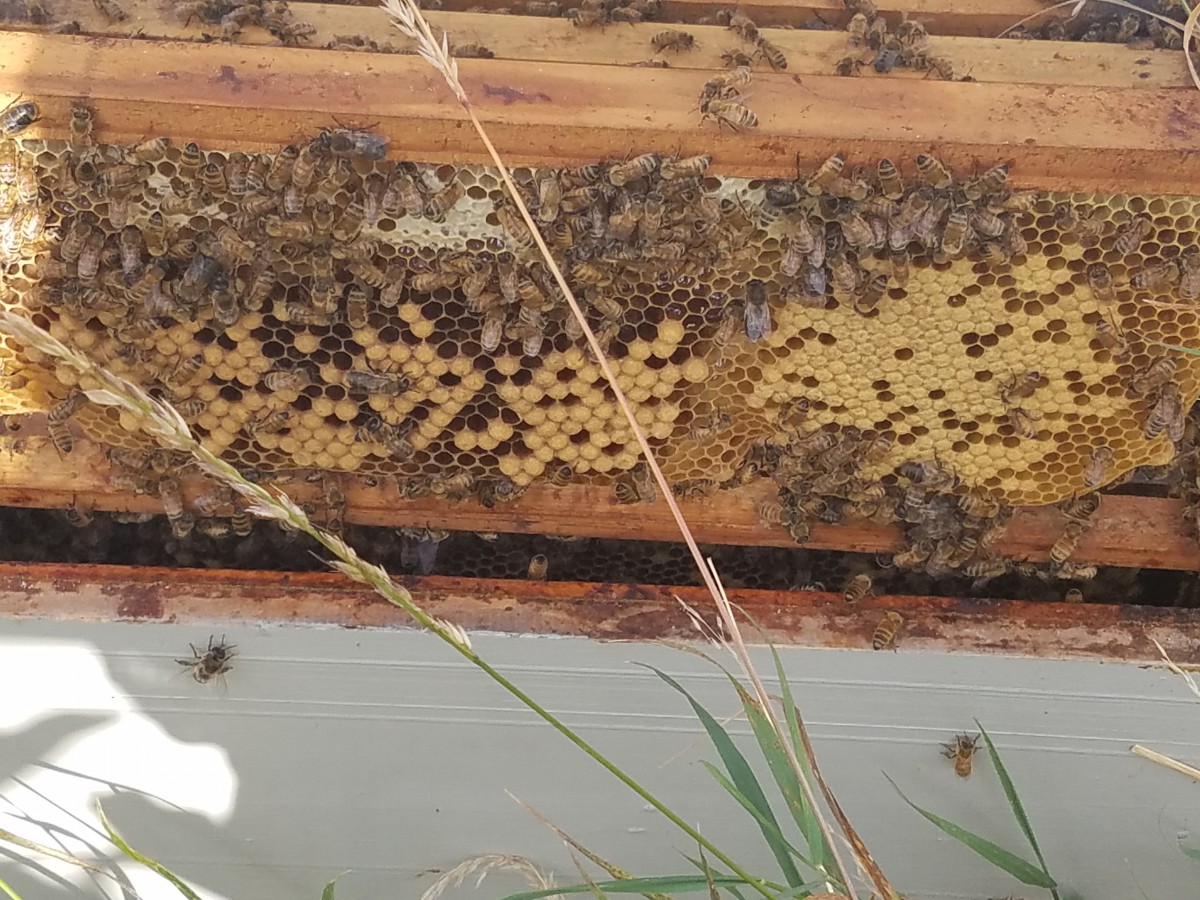
Honey around the left edges, brood in the middle right section
A good frame for showing the difference between drone and worker brood. The drone brood is on the left and is a slightly darker color with a more rounded bulb coming out of the comb rather than the more flat appearance of the workers
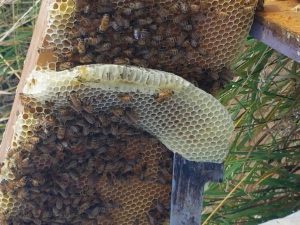
Huge chunk of comb sticking out
These frames were so hard to wiggle out of the box!
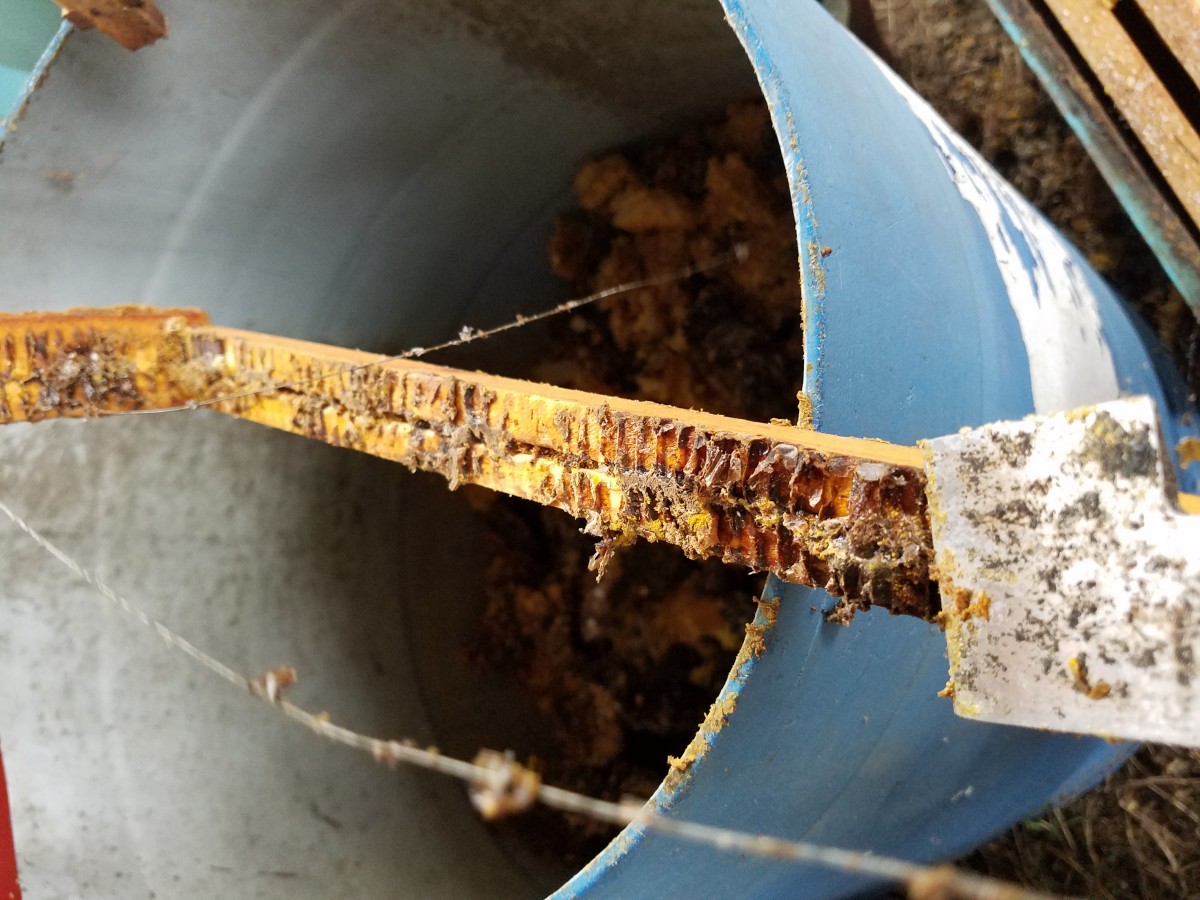
After removing all of the big sections of comb extending outwards, we scraped the edges of the hive for propolis, which is a resin-like substance produced from pollen that bees use to seal the edges in the hive. Propolis is a wonderful anti-bacterial and anti-inflammatory agent that can be a powerful medicine against wounds when made into a tincture, so we harvested as much of it as we could scrape. Once this was done we closed the hive again because we could tell that life was flourishing here, and the bees were starting to get more anxious and aggressive, I did get stung a few times because I didn’t have gloves (but it was well worth the experience)!
There were 4 of us doing the beekeeping so since there were still 3 hives left after we watched Lynda do the first one, we each got to practice doing our own. All of the other hives were equally, if not more prolific so we needed to put a new box on top of each of the 4 hives.
Lynda had a bunch of excess frames and boxes from a friend who gave up beekeeping after the death of a few colonies. They were really full of molding wax and stuff so we had to use the hive tool to scrub all of it off before we could put the boxes on, and we changed the wires on them too.
Now that all of the bees have new editions to their homes I’m sure they’re ecstatic and working hard to fill it up! Hopefully it will be a great year for honey yields.
When Lynda bought this property as a commercial kiwifruit orchard, there was lots that needed to change, and she is still in the process of getting where she wants to be. The first thing she had to do was rip out most of the kiwi vines (originally there was 800- now there’s approximately 100).
The next big step came from her disappointment that the land was completely flat, which led her to decide she would put a hill in! Wanting to incorporate some permaculture aspects into her growing, she wanted to use the hill as a powerful tool for irrigation. The idea is that she can plant herbs that need lots of sun and not too much water around the top of the hill, and herbs that need plenty of water and less sun around the bottom. This way, when it rains, the plants on top get some water but a lot of it will leech through quickly and puddle up around the bottom edge. Around the bottom will be things like parsley, basil, dill, cilantro, and chives as they’re much more water-intensive than other woody perennial herbs. Thyme, oregano, rosemary, and sage, are all examples of more drought-tolerant plants that will be good picks for the peak and slopes of the hill.
There was one section of the soil where she noticed a lot more rocks than any other section of the farm. This area would prove to be a perfect spot to dig up for the hill! Last year, she had a digger come in to make a big hole in the earth and pile up all of the stone-filled soil to make a mound. This season she hopes to have enough income to hire the digger to come back so that all of the removed kiwi trees that are currently just lying around can be filled into the pit. The digger will also have to make the hole a little bigger because it can’t possibly fit all of the deceased trees at the size it is now, which also means the hill will grow too. Once this is done, compost will be spread around the hill and she’ll be able to plant into it.
Can you believe how rocky this soil is!?
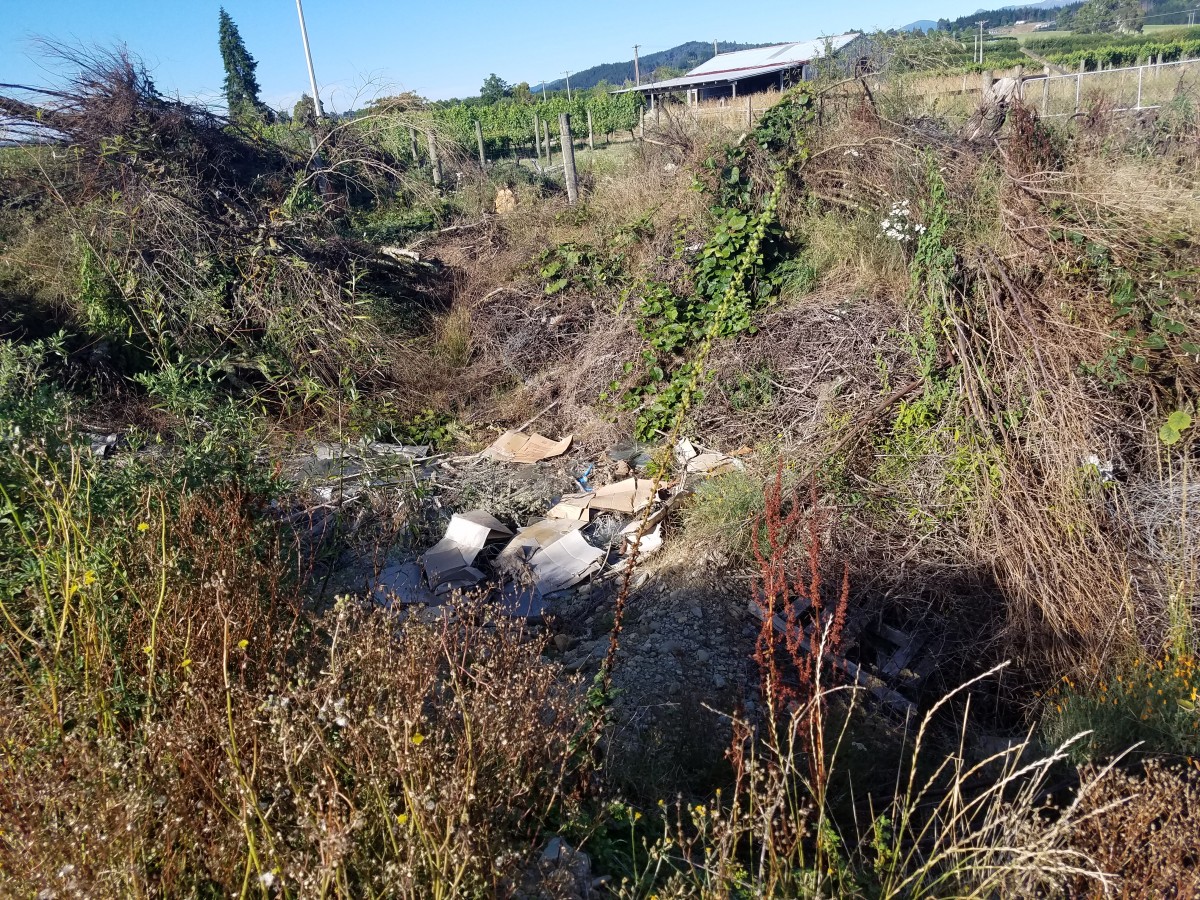
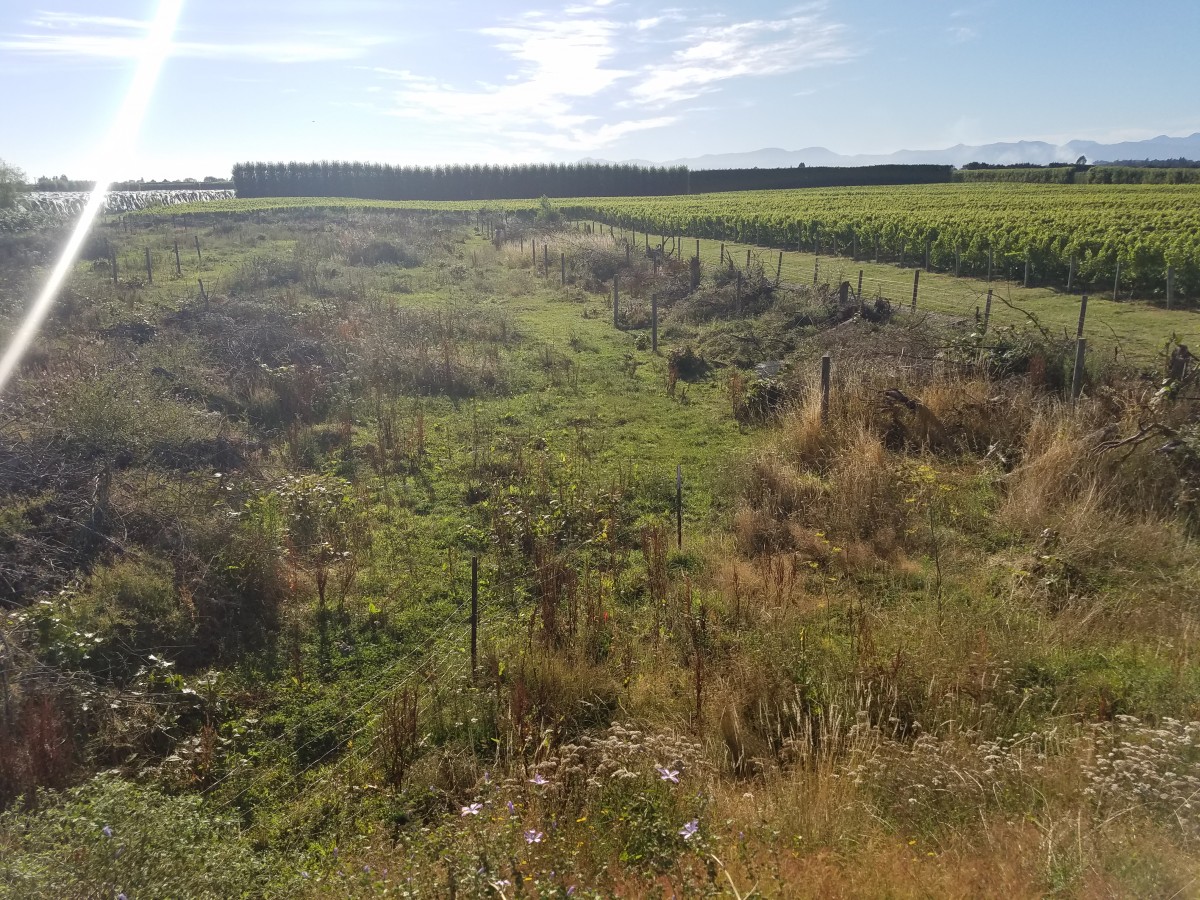
One project I’ve been working on is clearing the land adjacent to the hill. The plan for the field here is to implement a big native tree/shrub patch!
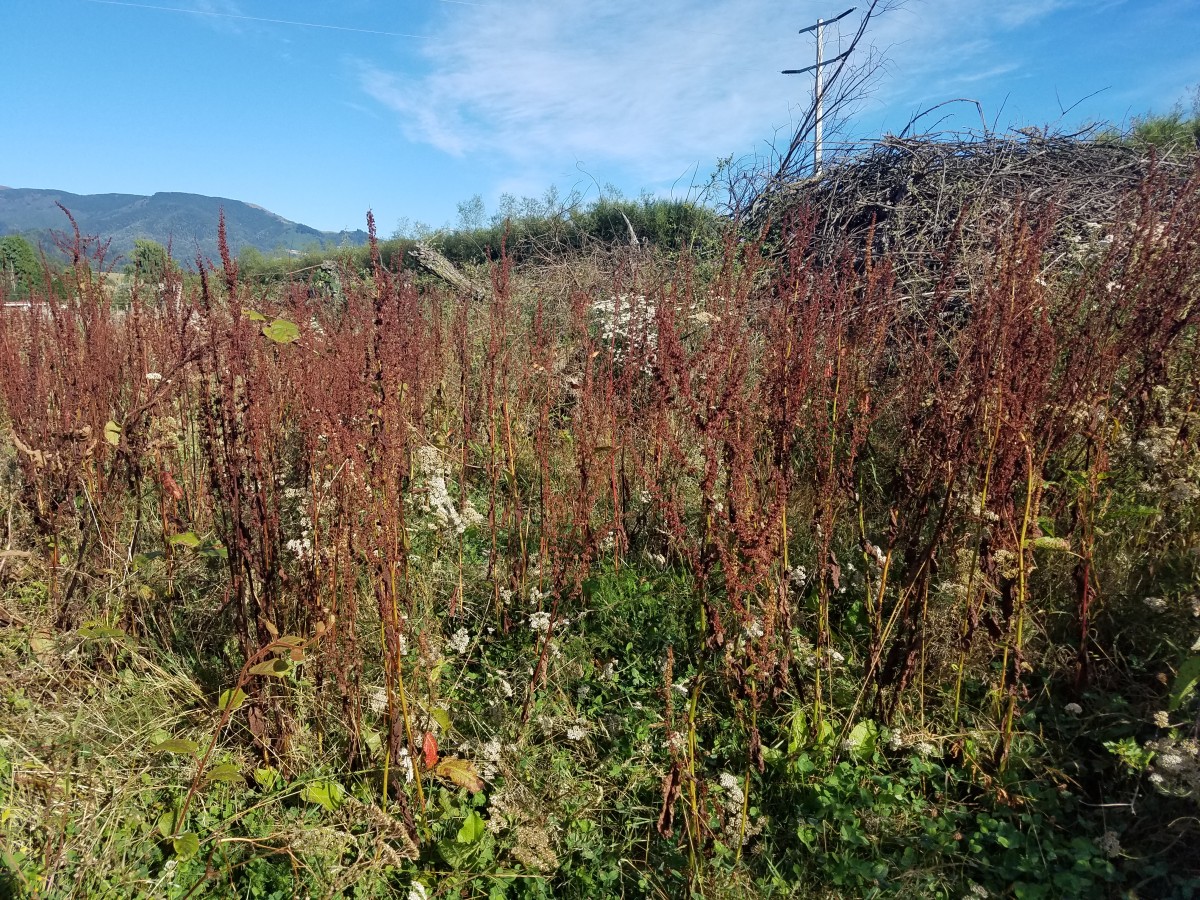
Right now, you can see lots of a weed called dock. This notorious plant has been known to take over farms in this region, and the plants are just about to seed! We’re just starting to focus our energies on removing as much as possible before it unleashes more of it’s wrath.
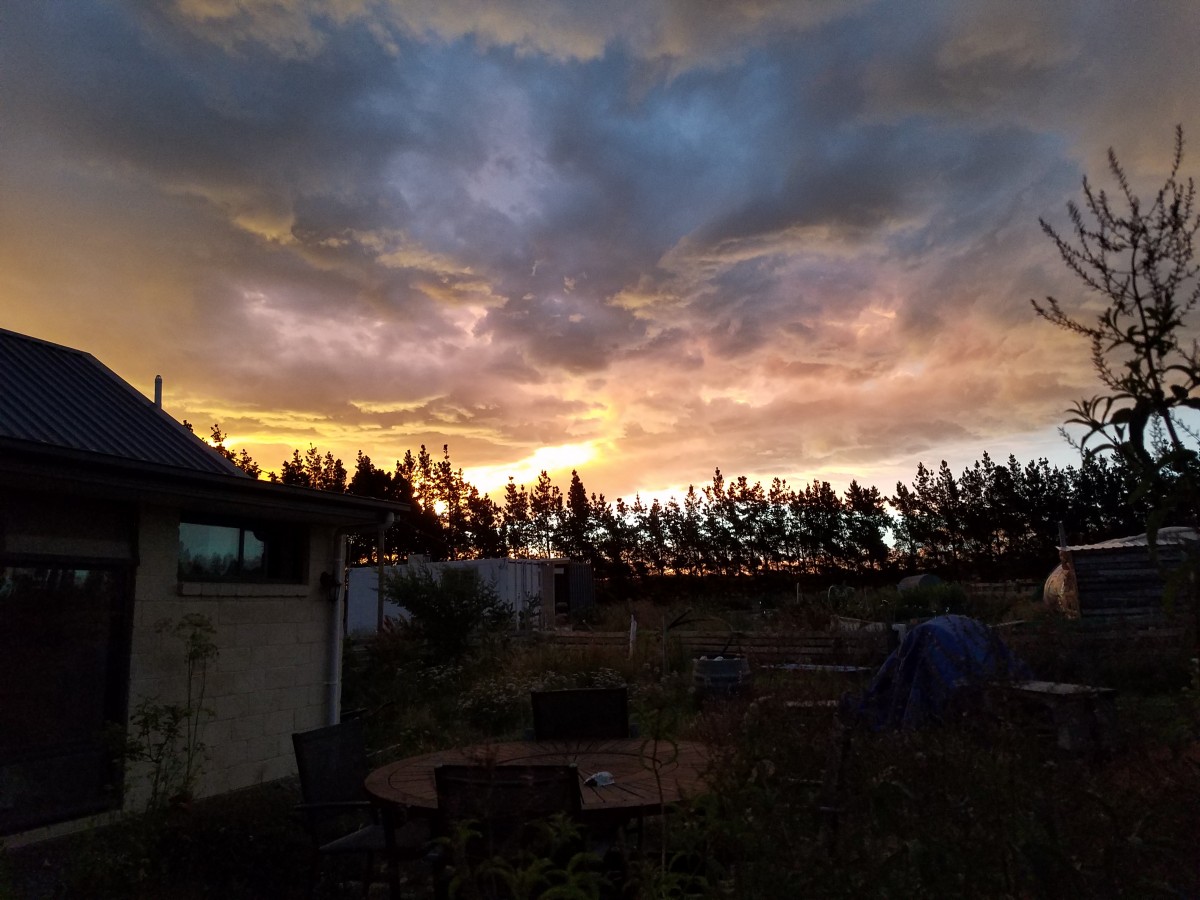
View from the peak of the mound (looking over prospective native tree patch)
Dock plants
What I’ve learned from walking around and seeing all of these big projects is that converting a monoculture into a diversified permaculture setting takes years of hard work, lots of money, and an unmatchable effort accompanied by enthusiastic motivation to actually change a food system. Lynda could have just bought land that would have been easier to design into a paradise-like farm, land that had open pastures and rich soil that had been tended with care. However, with a dream to transform the agriculture world that is predominantly over-run with farms cultivating rows on rows of a singular crop, she has made a commitment to spend her life working towards literally tearing down unviable systems and directly rebuilding them from scratch with sustainable food and medicine production.
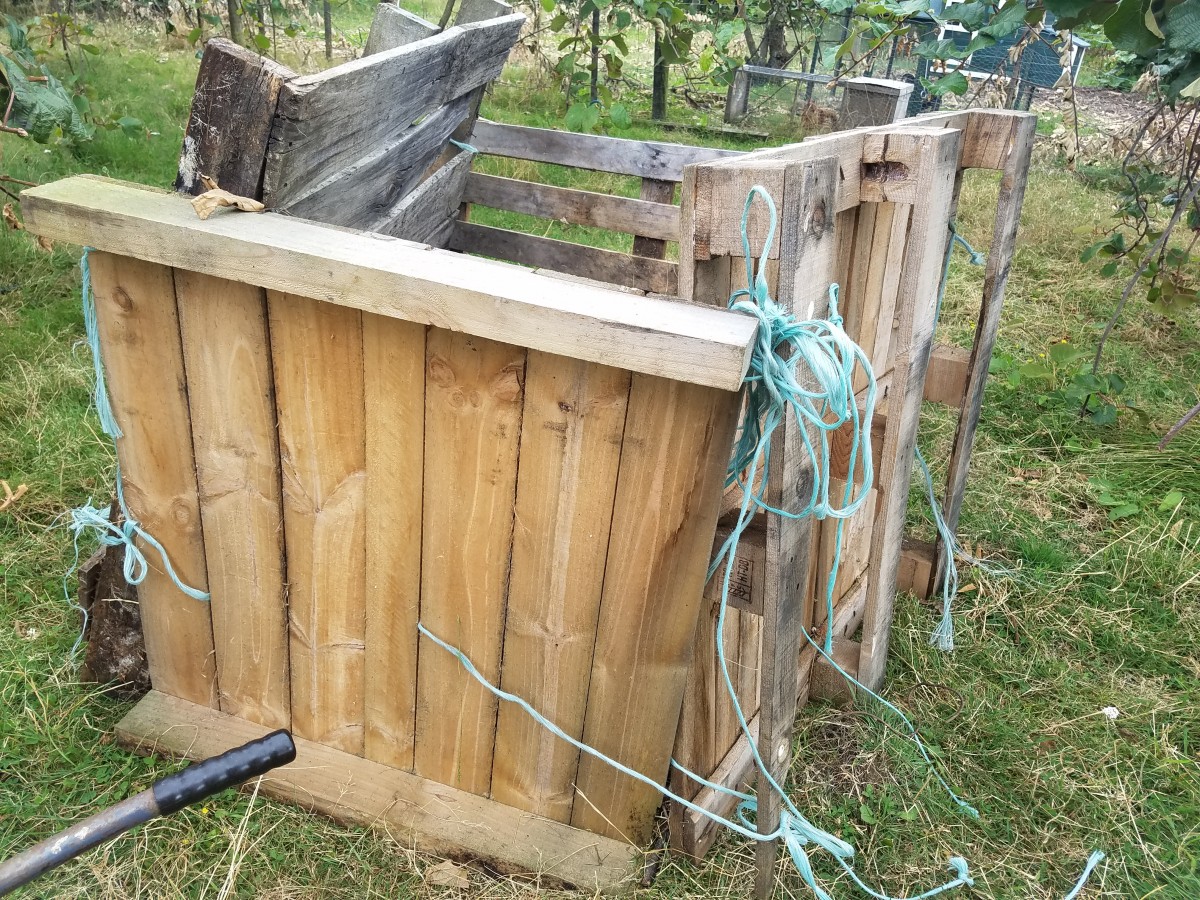
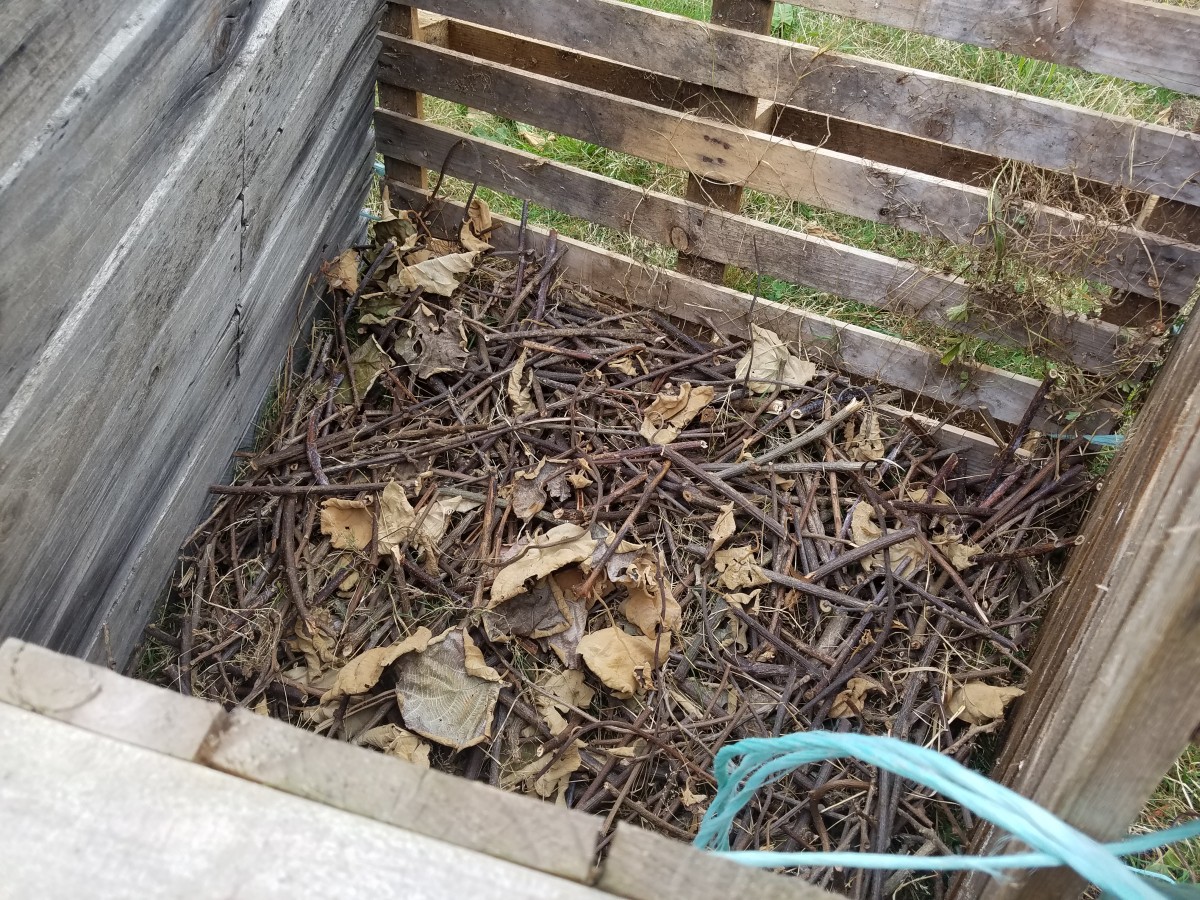
I’ve been making heaps of compost to feed to the kiwifruit vines and use in the vegetable and herb garden nearby. I started by creating a structure for the pile, tying together four wooden pallets to create a box. Then I gathered some old kiwifruit prunings and chopped them up into little sticks to make up the bottom layer.
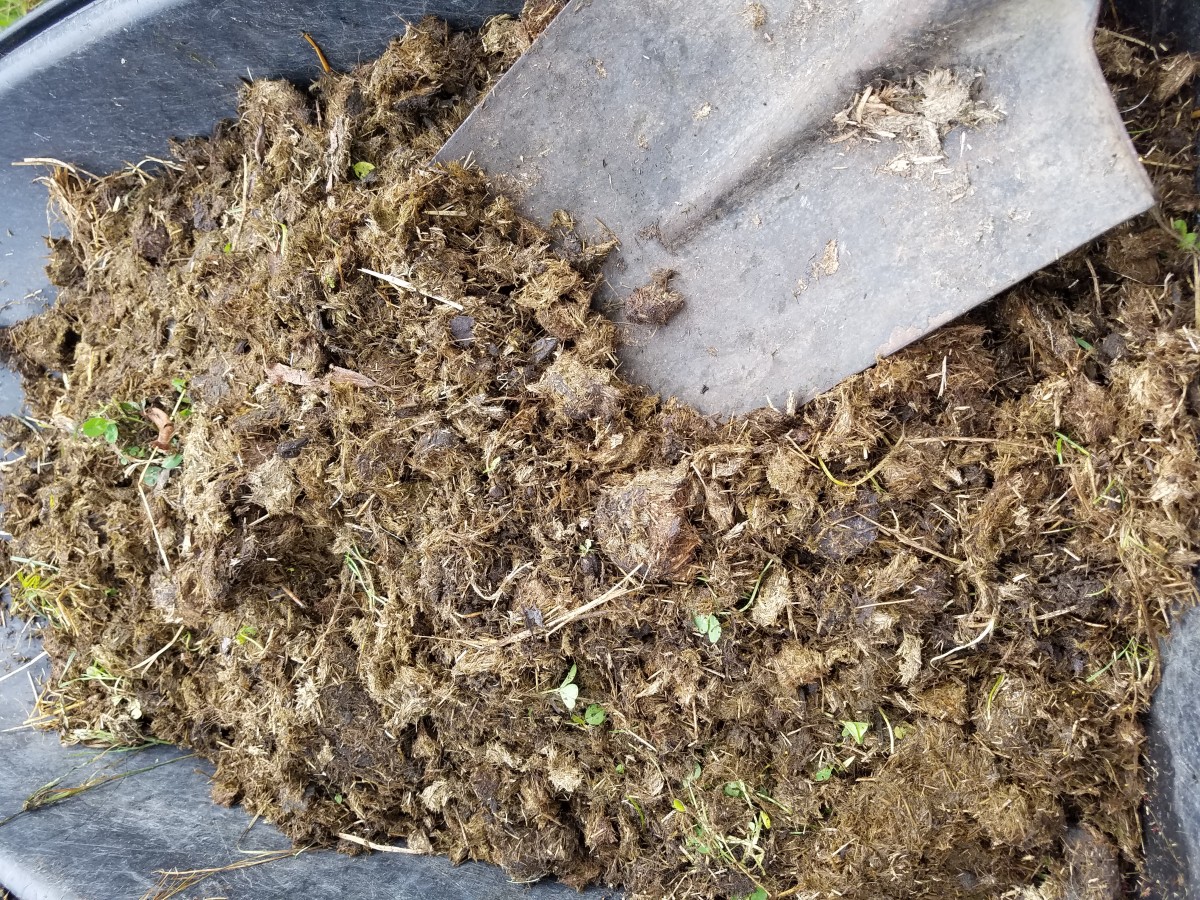
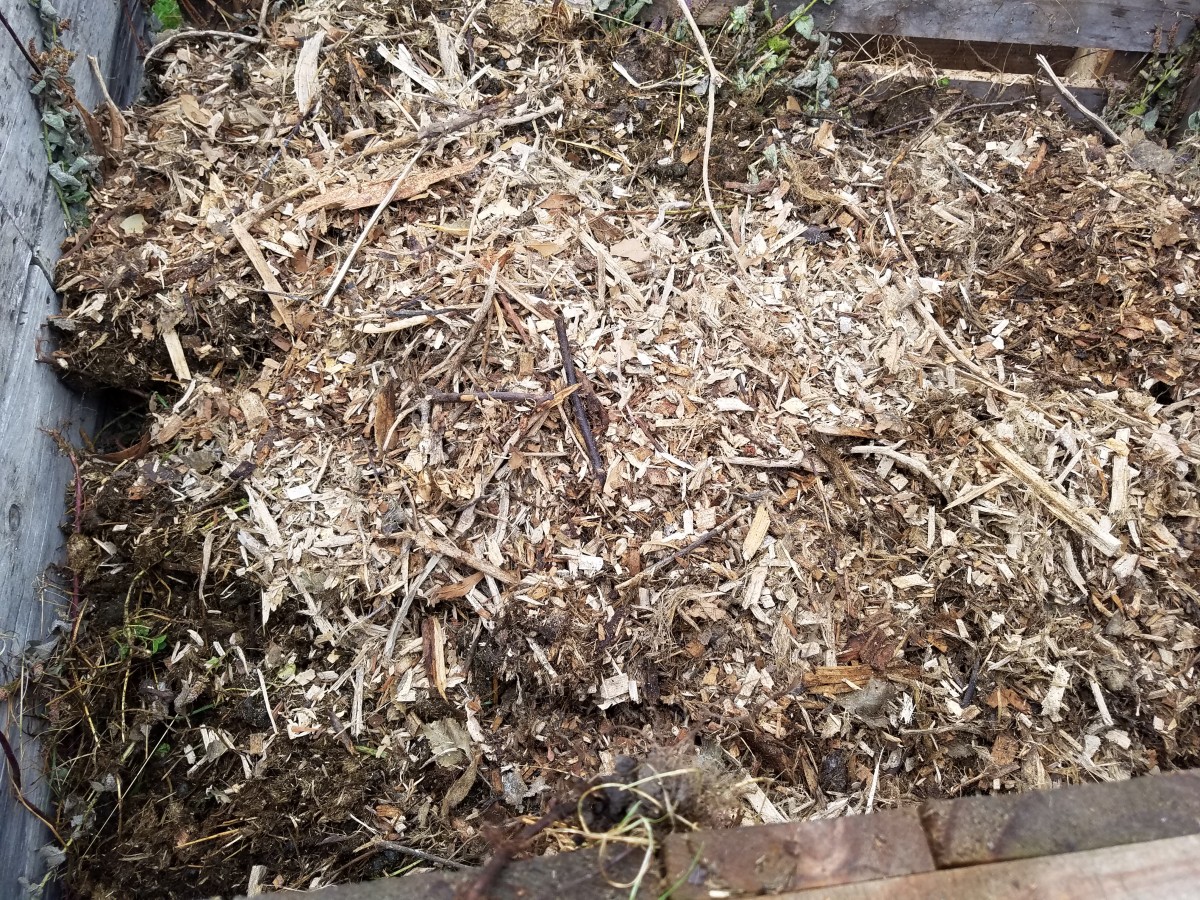
Next I had to wander around the property with a shovel and look for horse and alpaca poop to gather into my wheelbarrow. I layered the nitrogen-rich goodness in alternating with wood chips! The recipe was one wheelbarrow of excess plant matter, two wheelbarrows of poop, followed by two of wood chips. Whenever the food scraps tin got filled up in the house we threw that on too. Finally, we stacked hay on top to keep the chickens from jumping around and digging in it. (I didn’t do the hay part because of my allergies!!)
My nostrils are filled with the delightful aromatherapy of manure!
Once this heap finishes composting (which will take a long time) it will make a big lump of nutritious supplements to feed to the kiwi trees, perennial herbs, and vegetables in the garden.
The Maori people are the aborigines of New Zealand, which they refer to as Aotearoa (meaning land of the long white cloud.) They are not technically speaking “native”, as they originally immigrated from Polynesia, however the immigrants that moved here created a distinct culture that lived here for a long time before the british colonizers arrived, so they are considered essentially, to be the native people. The exact date of their arrival is still debated by historians but is thought to be somewhere around 900-1100 A.D. There was another group of people who also inhabited Aotearoa around the same time, called the Moriori, who lived exclusively on the Chatham Islands, although there’s not many people of Moriori descent left. But that’s a long and sad story I’ll discuss on another day, because right now I want to discuss the very special day I’ve just had!
Monday the 6th was Waitangi day, a national holiday celebrating the signing of the Treaty of Waitangi which was an agreement between the Maori and the settlers (the Maori refer to the settlers as the pakeha). I attended a powhiri (welcoming ceremony) at the local marae (a sacred gathering place for the Maori people). As you can probably tell, I’m learning lots of new terms that are important to the Maori people.
The treaty, in a nutshell, founded the government of Aotearoa/NZ as a society binding the two cultures together. However, there were many language barriers at the time the treaty was signed and many misunderstandings took place. There were actually two documents involved, an english version of the treaty as well as a treaty written in Maori language. Many differences were found in the language of the two articles, but the main discrepancy is that the Maori people thought they would still be able to own their lands and manage them as they pleased, only giving away the government over the land. Most Maori chiefs that signed the documents assumed it was a pretty good deal for them, they would get to maintain their rights to property and also gain the citizenship benefits that British government offered. However, the english writing is a little bit different as it states that Britain has ‘sovereignty’ over the country, which is a slightly varied meaning, them supreme authority rather than just a shared government. It still states that the Maori people have rights to their land and resources, but it also says that the government can purchase land that they wish to buy from the Maori. This maybe would have been an okay law, except for the fact that when the Maori people didn’t want to sell their land, the British Crown appointed different officials who ‘represented’ the land that the Maori owned and could then sell it to colonizers without the Maori’s permission, unless the Maori people could pay rent, which of course, they didn’t have any form of money that the British would accept.
It’s understandable why their were so many discrepencies. A Maori woman explained to me this afternoon that they really didn’t have words for ‘government’, ‘own’, ‘buy’, or ‘sell’, before the British arrived. The Maori culture instead adapted the philosophy of sharing all of the land and resources between everyone, with certain groups of people responsible for looking after specific areas, mountains, and rivers, to ensure that the environment was protected everywhere. I can imagine how difficult it might have been for them to grasp the concepts of ownership of natural features given that they lived without this idea so peacefully and so well for years. The fact that they didn’t even have Maori words for the things the British were trying to write agreements about is crazy, there’s no way they could’ve fully come to understand what the treaty meant when they barely had any comprehension of what owning land really entitled.
The treaty is still widely debated today and many Maori people have bitter feelings about the holiday and the treaty. As one member of the Maori community said to me today, their history with the British Crown can be described as “some good, some bad, and some ugly” implying that there has been more bad blood shed than benefits as a result of Waitangi day. They still feel that they deserve more say in the government and should have access to more land, resources, and social equity. Despite all of the underlying racial issues that are present in society here, the Maori people are friendly, optimistic, and hopeful, and an event like the one I attended today occur all across the country on Waitangi day as a way of looking positively towards the future and honoring the working relationship they have with other cultures that occupy Aotearoa/NZ.
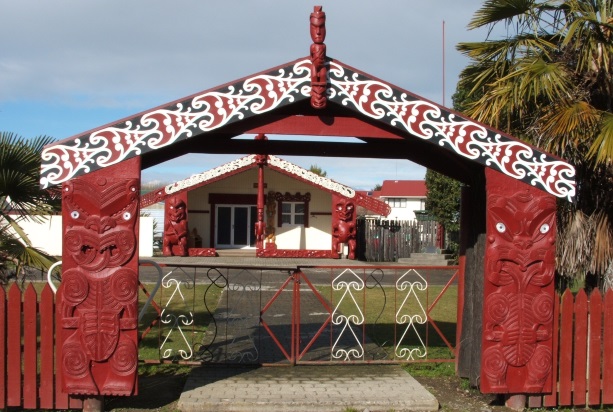
The marae I visited is called the Te Āwhina Marae o Motueka. While there are tons of different iwis (iwi is the Maori word for tribe), that travelled around and occupied different areas at different times, the two major iwis that live in the Motueka area are Ngāti Rārua and Te Ātiawa. The people associated with this marae are primarily descendants from these iwis, and the symbol of this marae depicts an image of two important ancestors, one from each iwi.
It’s disrespectful to take photos of the marae as a tourist so I wasn’t able to capture any images from my time there. However I did ask one member on the board of trustees if I could use photos from their website on my blog (I explained my project for the SOS) and they said that would be fine, so here’s a photo of what it looks like.
When I arrived for the celebration, I was directed to walk around the back of the property to wait for the official welcoming process, where all attendees who have not previously been to the marae are invited properly. There was a big group of us all awaiting our first experience, lots of us travelers. Newcomers to the marae are all referred to as tapu before they enter. The Maori man who was leading the invitation explained some aspects of the upcoming powhiri. First, all of us were given a few minutes to introduce ourselves to those around us who we didn’t know, to have a better idea of the community gathering today. The welcomer then let us know that maraes across the country have differing procedures for powhiris, and that this is just their way of doing it, so some things may change if attending a different iwi’s powhiri. Then, we arranged ourselves in the traditional assembly format, women at the front of the group with men surrounding the edges and piling up in the back. The reasoning behind this is that the women of the iwi represent wisdom and knowledge, as well as the gift of life, and it is the mens responsibility to protect these aspects. Staying in this formation, we entered through the sacred gate at the front of the marae and stepped on to the big concrete slab that covered the opening courtyard. We paused here for a moment of silence, which is done as a time to remember all of our loved ones who have passed on. The marae is where all traditional Maori funerals take place, hence the need for giving respect and honoring these people when you step onto the property. The silence was broken by a call (karanga) from a selected female caller (kaikaranga). The karanga is an essential part of the powhiri ceremony as it acts as a link between the living world and the spiritual world. It’s important that the first words that are spoken in the marae when a group enters is the karanga call, because it ‘pulls’ the visitors into the sacred, spiritual space of the marae. Every karanga is different, and it is up to the kaikaranga to create a call that contains a message from the heart that is relevant to the occasion. In this case, the karanga was about joining the living and deceased spirits onto the property, proposing that we all unite together. It welcomes people of all walks of life, which they call people from the four winds. I did feel a wave of enlightenment as this call pierced the air, a kind of uplifted soul sensation, similar to the feeling of finally meeting with a friend you haven’t seen for awhile or achieving something difficult by working together with a group of people. There was a strong community connection that almost immediately and wondrously fell upon us. The karanga was responded to by a male kaikaranga who had his own call, and then we all removed our shoes and entered the main meeting house, called the wharenui.
We filed inside and began by hearing the stories and speeches (called whaikōrero) that the active members in the Maori community had to tell. I didn’t understand any of the beginning ones because none were told in English, but it was still beautiful to hear and participate in. After awhile, though, they switched to english and had a few speakers talk. One of the main speakers was Barney, and I really loved everything he said. He talked a lot about how important it is that members outside of their community are engaged in their culture on Waitangi day, and emphasized that it’s one of the best days of the year for them because they get to educate new people about their lifestyles and traditional practices. He even talked a little bit about Donald Trump, which I thought was pretty interesting. He gave his condolences to the Americans present in the room and acknowledged that at the moment, we’re going through more intensive racial tension than they are facing, and he said he wanted everyone from the USA to know that the hearts of the Maori people are with us. Another speaker, named Monty, discussed the modern reasons for keeping maraes active. The primary reason is to pass down the traditions onto Maori children so they can be apart of their ancestors practices. The second reason is for days like this, when they are given the opportunity to educate the public about their history. And the third main reason is that when the colonizers first arrived, Maori chiefs agreed that they would always help protect and look after the land and people that they knew much better than anyone else, and they are still striving today to teach citizens to work with the earth in the natural lifestyles they have led since before settlement.
Two speakers were non-Maori, they were members of the parliament who advocate for equity and help communicate between Maori representatives in the disputing of the treaty. They come to the powhiri every year and are actively involved in most events that occur at the marae. I was really moved by their speech, as they discussed the necessity for the non-Maori people of Aotearoa/NZ to be connected to the culture practiced here and work to strengthen the voice of those Maori who still feel unheard by the government. Between each speaker was a song (called waiata), where everyone present who spoke Maori got up to sing a traditional chant, there are many songs that are widely used but in this case they sang the Maori national anthem because it is known by lots of people. I found a translation of the lyrics online, and they go as follows:
“O Lord, God of nations and of us too
Listen to us, cherish us
Let goodness flourish, may your blessings flow.
Defend Aotearoa.”
These lyrics are clearly very powerful to them, I even witnessed one singer shed a tear as she blessed the air with her melodic voice. It was unbelievably exhilirating to observe all of the heartfelt emotion that filled the room as the ceremony progressed.
After everyone that wanted to talk was finished, it was time for the hongi, which is when all of the Maori community members stand in a line across the front of the room, and then all those who have been welcomed meet each one for a handshake accompanied by the pressing together of noses. They spent much time discussing the importance of this procudure as it is a chance for us to look into each others souls, to feel the pain and joy of everyone present at the powhiri, and to give support to all as we continue on our journeys through our time on earth. As I made my way down the line, I was greeted by the friendliest smiles, the kindest eyes, and the warmest hands and noses. The love that was present overflowed from me, and I can still feel that loving feeling even now when I remember it.
We had a small break to eat watermelon slices and sit outside talking with one another before gathering again for question time, where we were all invited to inquire about anything we wanted relating to Maori history, current affairs, and the property itself. One of the most intriguing questions was about the story behind the different carvings in the wharenui. There were 16 human-like wooden statues that are called pou by the Maori. Each one represented important ancestors, some were holding weapons or wearing greenstone jewlery, some had very detailed patterns and others were more simple, and all of them had carved out rings made of paua shells for eyes. Wearing the paua shell is said to strengthen the heart and body, and it represents the beauty of life which is primarily observed through the eyes, hence the use on the pou. It would take way too much time to write about all of them but I was impressed by the ability of the Maori speakers to remember every little detail about the history behind each one. Most were either captains of canoes that travelled here from Polynesia, chiefs of iwi, or warriors. If you’re interested in hearing the tales behind them, send me a message and I’d be happy to talk with you about them! Another compelling answer was in response to a question asked about the location of the marae. This marae was established here because the modern town of Motueka was once a huge hub for the Maori, as the land here is rich given the huge estuary provided both fresh and saltwater food sources, and it’s surrounded by hills which means the valley soil here is very fertile. This place is also particularly special to them because it is a common landing spot for the kotuku bird (commonly known by english speakers as the white heron/great egret). They are not very common in Aotearoa/NZ, and have long been admired by the Maori for their long white feathers, graceful movements, and extreme beauty. Their known landing places are far and few, so Motueka was thought to be a sort of paradise because the birds knew this place would always be bountiful. The kotuku bird is involved in several folktales, and is thought to be a gift from the land of spirits. Maori chiefs even traditionally wore the feathers on their headpieces. The building of the marae at this spot near the river was primarily to keep an eye on the kotuku, because it is said that when the bird no longer returns, we will face great doom as it means the environment is too far out of balance. The Maori are extremely concerned because year after year they are seeing less of them. Because of their emphasis on their protection, the Department of Conservation actively monitors their populations and has established a reserve for their habitat.
After two hours, everyone had the chance to ask the questions they were curious about. So, finally, we had a feast! They had built a hangi, which is a traditional earth oven. After settlement, the Maori stopped using hangis except for special occasions and used pots like the British. Essentially, the hangi is a giant pit filled with stones, and they light a fire to make the stones very hot, then they layer on bark from the manuka tree, followed by the food, which was usually inside greenstone-ware, or baskets woven from cabbage tree leaves, however our meals were individually wrapped in tinfoil. The pit is then covered back up with soil and left to cook with the earth to cook for several hours. Our meals contained a couple foods that were common when the hangi was used, including puha leaves and the kumara potato. The maori used to cook these vegetables with meat from the moa bird lying underneath, however the moa is now extinct so we had chicken. The food was cooked to perfection, infused with a smoky, woody flavor and including hints of mustiness. The chicken was so tender and juicy that it fell right off the bone and the potato was almost pumpkin-like. It was the perfect way to end the day, sharing food with a community I now feel apart of.
As I said goodbye to the marae members, they hugged me and told me to feel welcome to come back for future events because this marae was just as much mine as it is theirs now that I’ve been welcomed on and heard their stories. I still haven’t stopped smiling since I left! It truly was a once in a lifetime opportunity that I feel blessed to have experienced. It reminded me that there is still so much hope in the world, and that humanity does contain people who deeply value our planets resources and equality between all inhabitants. I don’t know if I’ll get the chance to return to the marae or not, as the public is only invited on every once in awhile. I’ll always hold a special spot in my heart for my experience here, though, and whenever I’m feeling down about the troubles of society I will remember the Maori’s outlook on life and the influential energy I felt in their company.
Bibliography:
While all of the information presented here comes directly from speaking with members of the marae, I did need reference material for song lyrics, spellings, and dates.
“C. Waiata – Songs.” Maori Ki Otago – Maori at Otago. University of Otago, 2010. Web. 07 Feb. 2017.
Keane, Basil. “‘Marae Protocol – Te Kawa O Te Marae – Pōwhiri Process’.” Te Ara – the Encyclopedia of New Zealand. N.p., 5 Sept. 2013. Web. 07 Feb. 2017.
Te Āwhina Marae O Motueka. Te Āwhina Marae, 2016. Web. 06 Feb. 2017.
“Treaty of Waitangi.” NZHistory, New Zealand History Online. Crown Copyright, n.d. Web. 06 Feb. 2017.
Lynda has a sourdough culture that she makes bread with, and has taught me and the other visiting students here how to make our own bread, which we need to do every couple of days because we eat a lot of it since it’s so good.
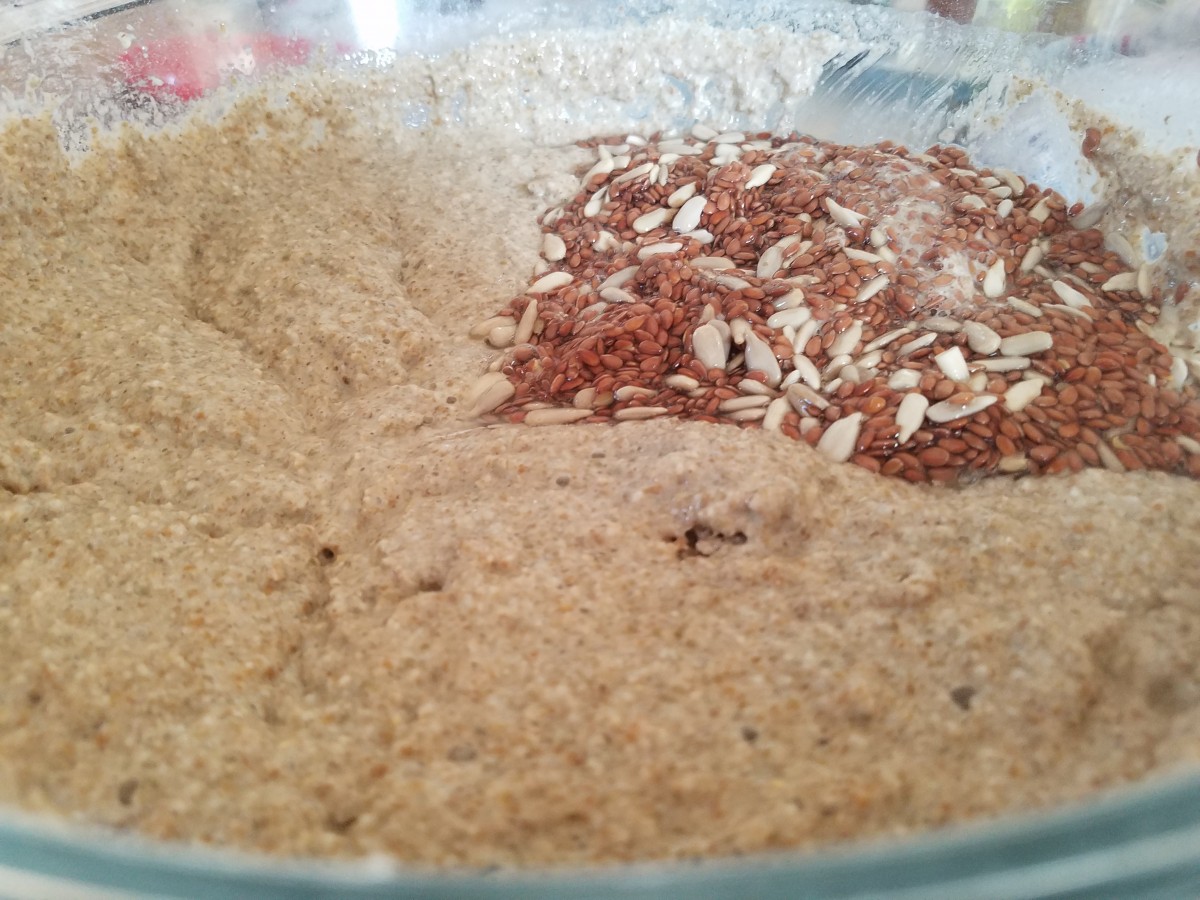
We begin by placing the sourdough starter (a couple cups of the dough from last time) in a big mixing bowl. It’s kind of an art because there’s no real recipe- we just keep adding rye meal flour and water until it turns to a batter. So far every batch we’ve made has turned out slightly different in densities and flavors which is kind of exciting, we never know what we’re going to get! The dough should be a lot moister than normal bread dough at this stage- there will be some liquid floating on the top with bubbles in it.
After this initial mixture is made we let it rise for many hours. How long it will need to finish rising depends on the heat and humidity levels, on a moist, warm day it rises much quicker than on days when it’s cool or dry. The way to tell that it’s done is just keep checking on it and when it hasn’t grown any higher for a couple hours, then it’s reached its peak. It’s quite surprising how big it can get! The dough practically doubles in size.
Now, the most important step of all is to grab a scoop off the top and put it in the cup for the next batch’s starter! Otherwise there will be no more bread making to come. Lynda has had this starter for 8 years and says she will cry if we accidentally bake the bread without saving the starter. To keep feeding it we mix in another cup of flour and some water.
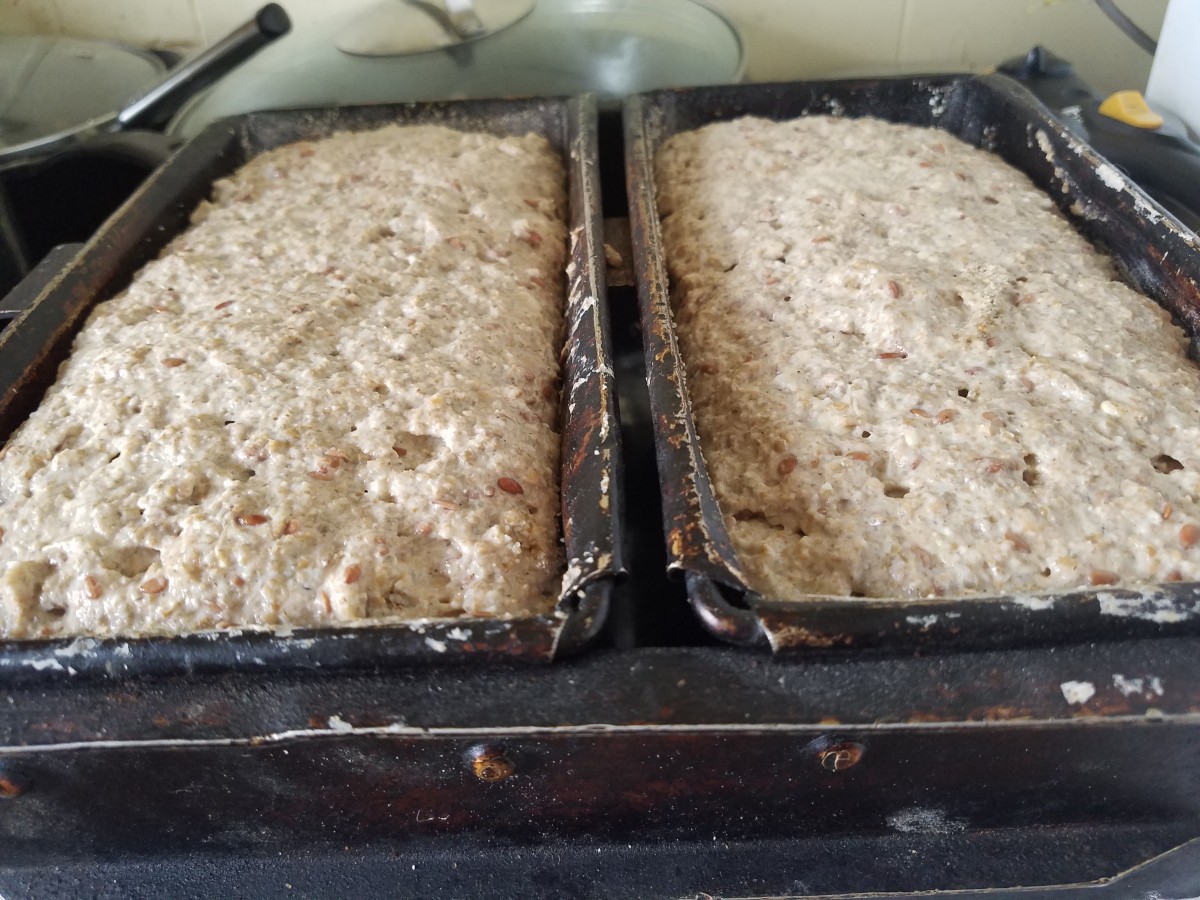
With the remaining dough, we add flax and sunflower seeds that have been soaking in water to expand while the dough was rising. These are stirred in with a cup of wheat flour and a bit more water! After everything is mixed, the dough is laid out in the bread tins and left to rise for a few more hours.
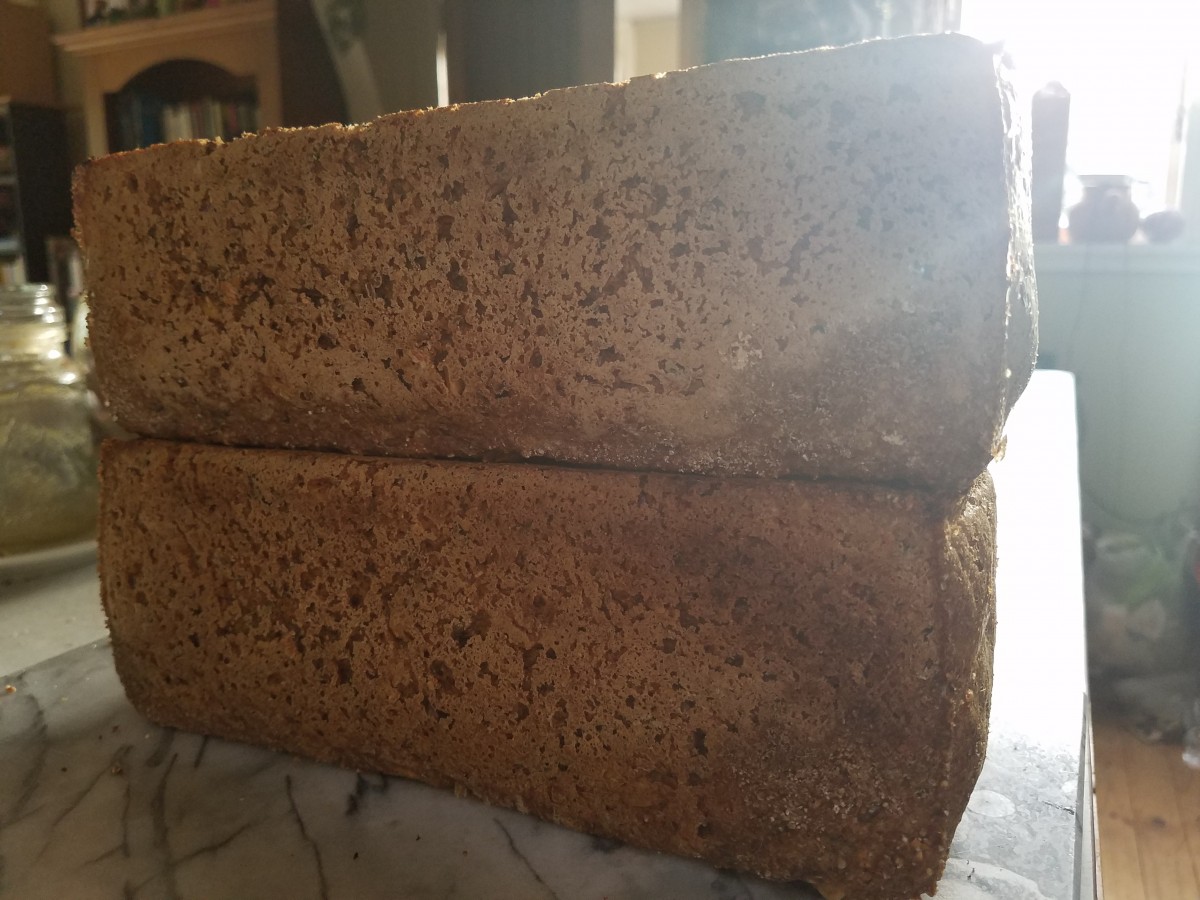
Once the bread reaches the top of the pan, it goes in the oven to become soft, delicious, yeasty bread! The flavor is rich and savory, and it is nutrient dense and fills me up for much longer than preservative-packed white bread! This is one item that is much tastier and more nutritious when you bake it yourself rather than buy it from the store.
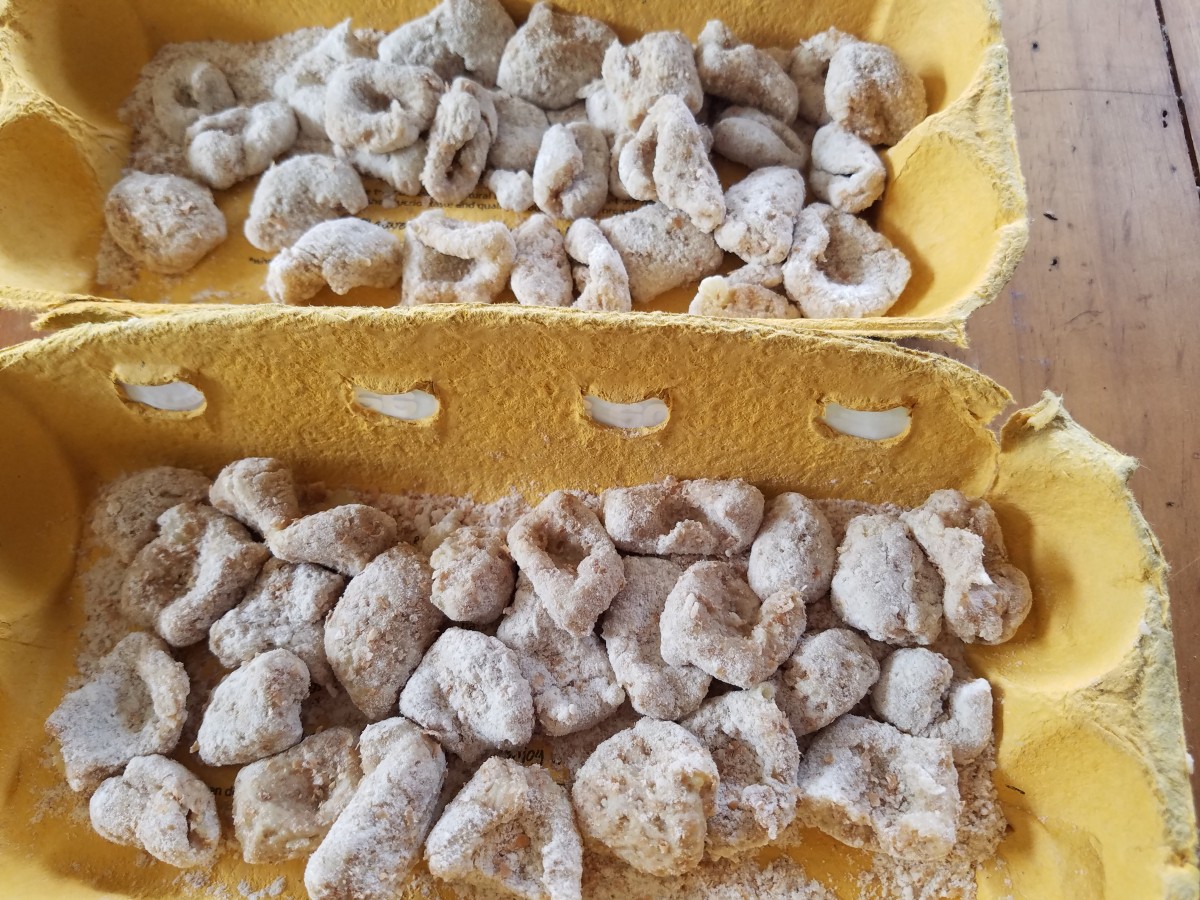
A very sweet italian girl, Matilde, who is staying at this farm told me that she is excellent at making homemade gnocci with her grandmother’s recipe. Well of course as soon as I heard this I darted to the kitchen and begged her to teach me her ways! Everyone else staying at the farm was excited to join too. It’s one of my favorite things I’ve ever made, the process is fun and the outcome is delicious!
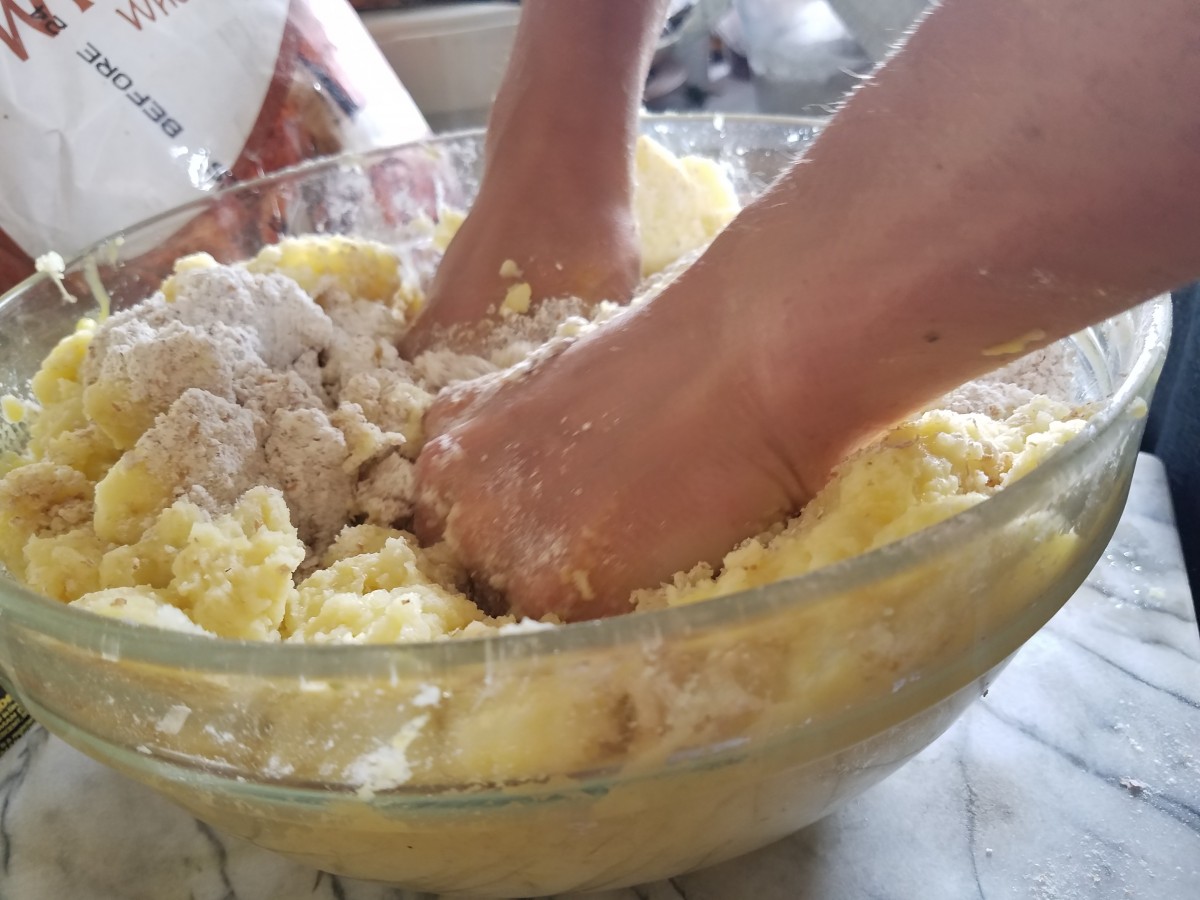
There’s this crazy tool called a potato press (Crazy to me because I’ve never seen one, but maybe not to everyone). We peeled and boiled potatoes, then pushed them into the press causing little bits of potato to come out like rice.
The potato-rice is then mashed together to form a malleable ball, and we incorporate eggs and flour into it slowly. If I ever try this recipe on my own without an italian expert at my side, I’ll have to play around with the measurements because Matilde says you can’t go off a piece of paper, the true way to make it is by feeling it out. However on this occasion we added 12 potatoes, 2 eggs, and no one knows how much flour. We added very small handfuls at a time until the dough was able to stick together in one uniform ball without changing shape.
Here comes the cool part- we grabbed off sections of the dough and rolled them into long, thin logs. Then the logs were cut into tiny little chunks, only about a half of an inch in length. Everything was tossed around in flour, and the best part was getting to stick my thumb into the chunks to give them that signature gnocci cute tiny indent (it helps them cook faster and more thoroughly). Once the gnocci were formed they only had to boil for a couple minutes, they’re finished cooking once they rise to the top of the pan and can be scooped out with a slotted spoon!
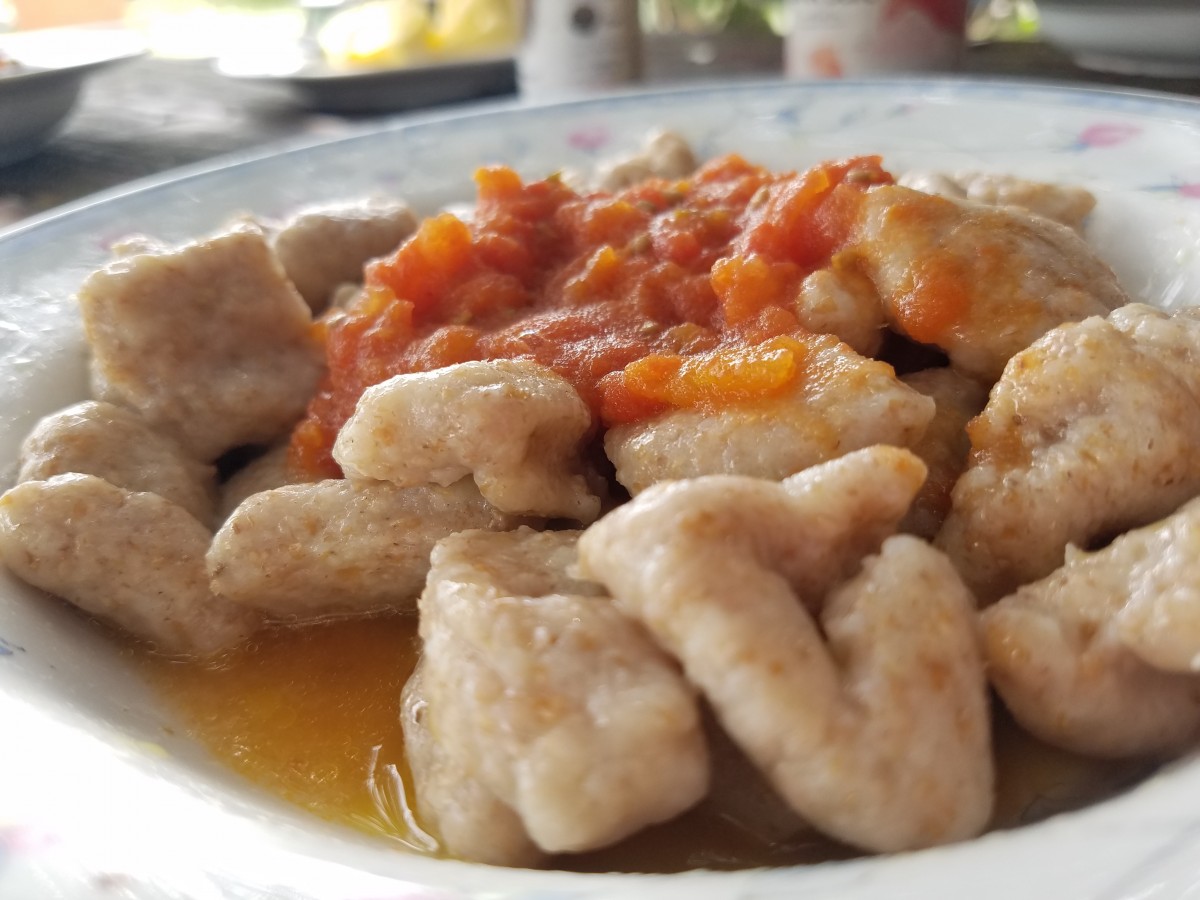
The sauce was pretty simple to make and it was some of the best tomato sauce I’ve ever had/.All we did was boil some tomatoes (6, in this case), skin them, mash them up, and then let them simmer in a pan with dashes of olive oil, salt, pepper, oregano, and basil. I never want to buy canned sauce again!
Who knew gnocci could be this good? It didn’t taste at all like the starchy potato balls that you buy in the supermarket. They were soft, tender, rich little clouds of pasta paradise.
All I can say is that I was very impressed by the quality of our hand-made grain products. As someone who hates big food processing chains, I was very satisfied to try out making my own bread and gnocci with all fresh ingredients and no preservatives added.
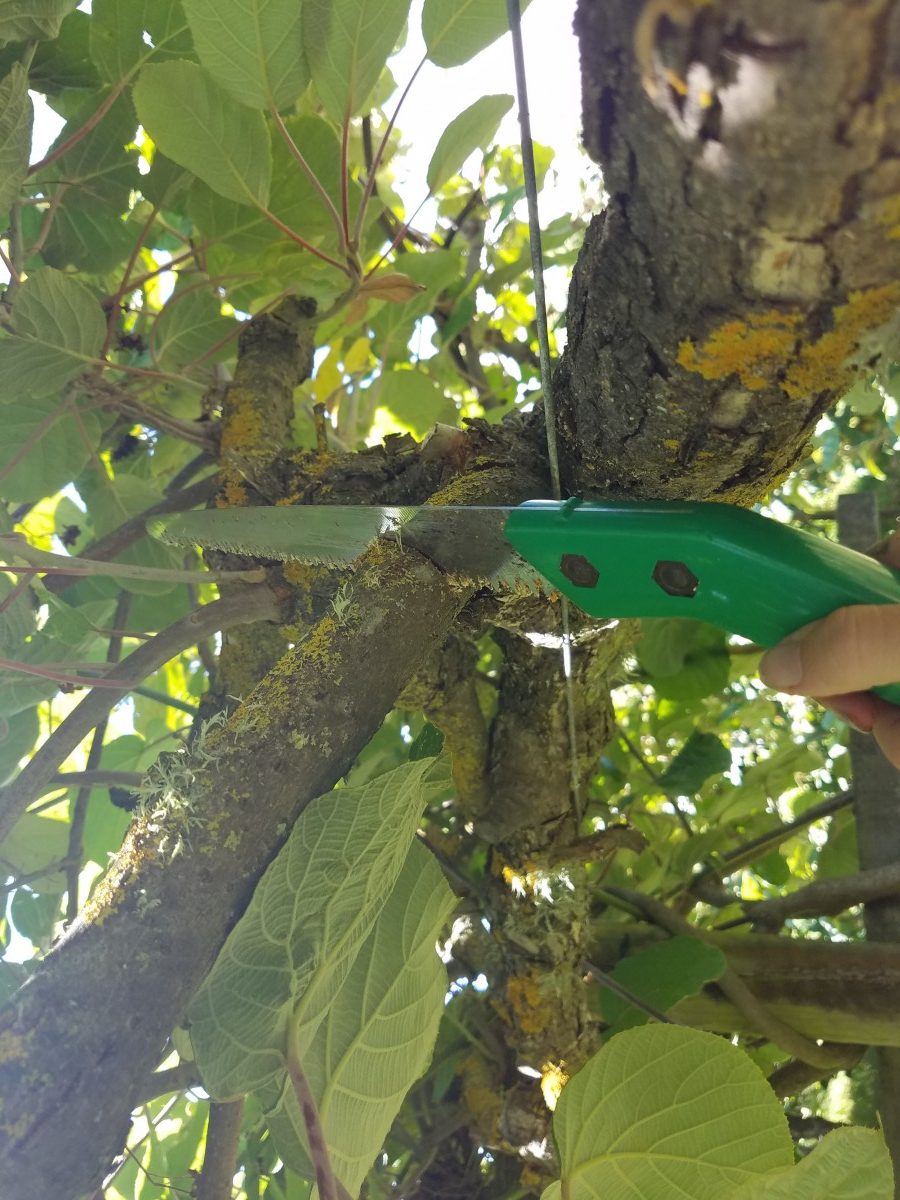
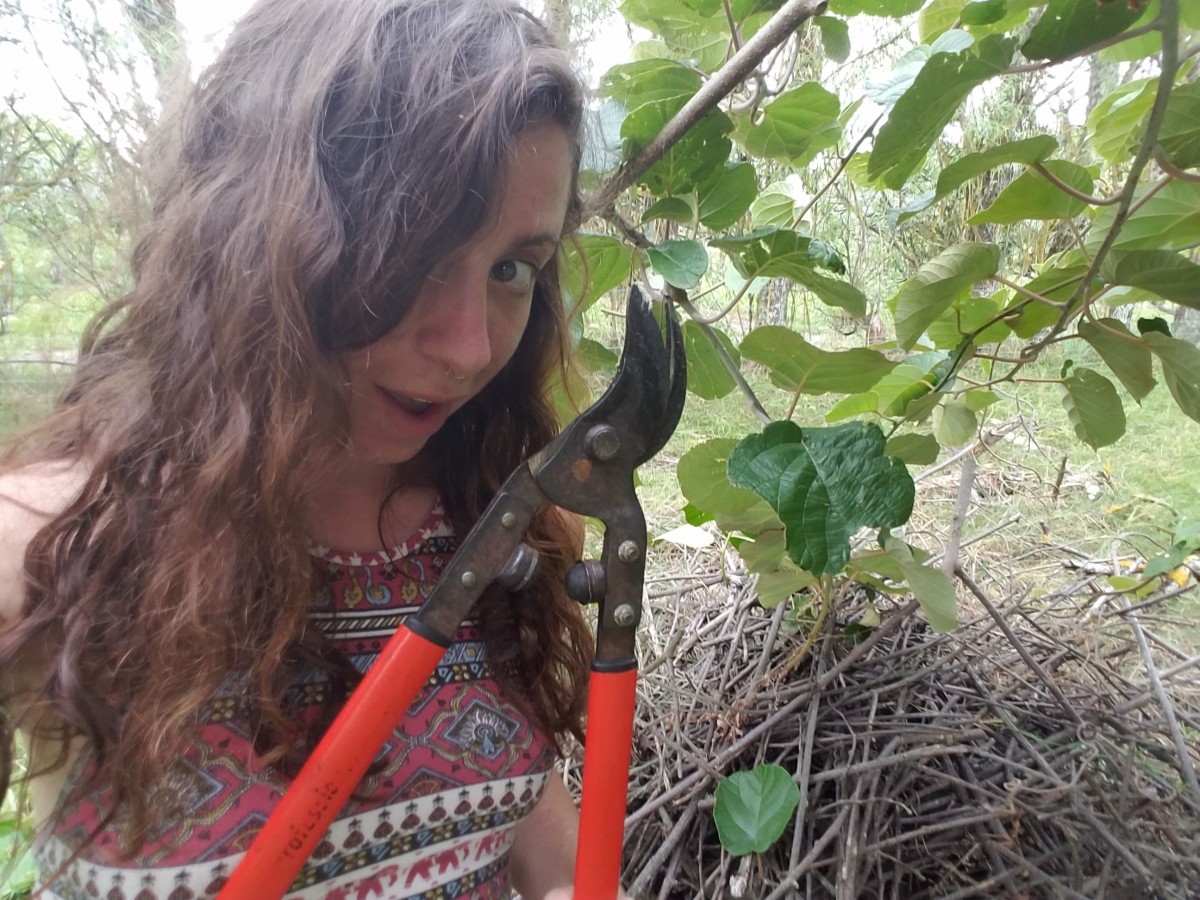
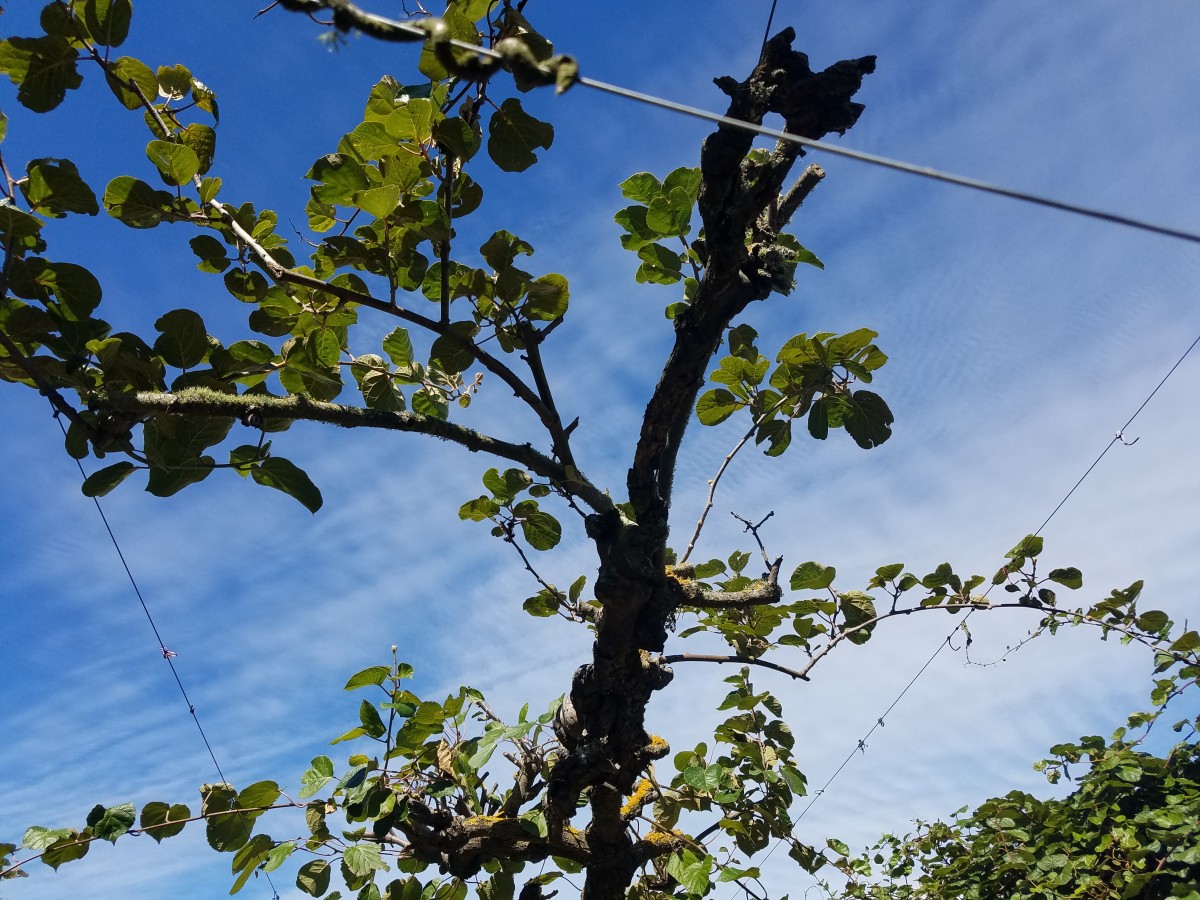
The male vines of the kiwifruit flower in the springtime, and after the flowers perish it’s time to give the vines a trim! Lynda taught me the guidelines for this procedure. The first step is to choose four “stabilizers”, which are long, healthy branches that can help balance the tangled vine as it grows. The stabilizers create an X shape, two diagonal branches shooting out from one direction of the trunk, and two shooting out from the other. The stabilizers are clipped to a wire running along both sides of the vine to hold them in place. Next, lots of other branches are cut off! The most important thing is that all fresh growth from this year stays on. It’s easy to tell whether or not it’s new growth because the branches are fairly thin, the bark has a light greenish color to it rather than brown, and they are shooting directly up into the sky. All of this new growth will flower next year. Any of the old, long branches draping across that aren’t stabilizers can be cut away, unless they have lots of new shoots coming off of them, in which case they are just trimmed to keep the new growth on the vine. Additionally, branches that are going off in wrong directions (curving backwards on themselves) can be removed.
The whole process is quite a dramatic change- every vine goes from being a jumbled, complicated mess into a nicely organized and well-kept arrangement. It’s necessary to do this every year because it keeps the vines under control and helps improve the yield by allowing the vine to channel all of it’s energy into this year’s growth which will produce flowers to pollinate the females next spring.
I am very sad to report that I have left AislingQuoy due to the fact that I was struggling with severe hay fever and asthma in the environment there. After assessing my health with a doctor, Lyndal, and my parents, we all came to decide that in order to protect my wellbeing I must move on. I miss Lyndal, Steve, Maddy, and every animal already but I know that it is for the best as my health is already improving significantly after departure. If I ever do have my own goats or sheep I might have to find something else to feed them besides hay!! Even though my time was cut short, I am grateful for all that I have learned from this wonderful farm, and honored to have had the privilege to work with Lyndal, who was an astonishing mentor. I gained a lot of insight as to what it’s like to live on a sustainable farm to provide for yourself, and am thoroughly impressed and inspired by the work that goes on at AislingQuoy to make this lifestyle possible. I felt the passion and motivation that Lyndal and Steve feel for their special place, and greatly admire their desire to be so connected with with where their food comes from. The knowledge I absorbed and the experiences I had will always be remembered.
For now I am visiting another farm in Motueka, a small town on the north end of the south island. A lovely lady named Lynda (I know it’s confusing because it’s only one letter away from Lyndal) owns a little farm where she grows herbs for her herbal medicine counseling. When she first bought the property a few years ago, it was a commercial kiwifruit orchard. She is now in the process of converting it into a permaculture garden and has lots of work to do! I am hoping to do some work with farmscaping and learn more about herbal medicine, as well as help her out with the maintenance that needs to be kept up with and doing odd jobs that are required when beginning a farm. I am hoping to get a better idea of the practicalities of starting out with a dream and a messy plot of land.
As for the rest of my journey for the quarter, I’m planning to do some traveling throughout the country studying what is growing where, and why. I plan to visit other intriguing farms, attend food festivals, volunteer at co-ops, farmers markets, or community events, get in touch with the native Maori population and learn about their food culture, and spring on any opportunity I find to learn about alternatives to the super-market diet. I am feeling optimistic and excited to see where my path takes me!
The best part of farm life is that every day I get to eat foods that are made from home-grown and hand-picked ingredients. It can be a bit taxing to come up with new ways to create meals out of whatever needs to be eaten that day, but Lyndal is a wonderfully creative chef who is used to cooking in this way so she always has lots of fresh ideas. I believe at AislingQuoy we have all worked together to succeeded tremendously in cooking up masterpieces. Current surpluses include mostly peas, zucchini, and plums. Of course there’s always plenty of cheese too. Here are photos of some of my favorite things we’ve been concocting!
Pea & goat cheese quiche with a carrot & kale salad
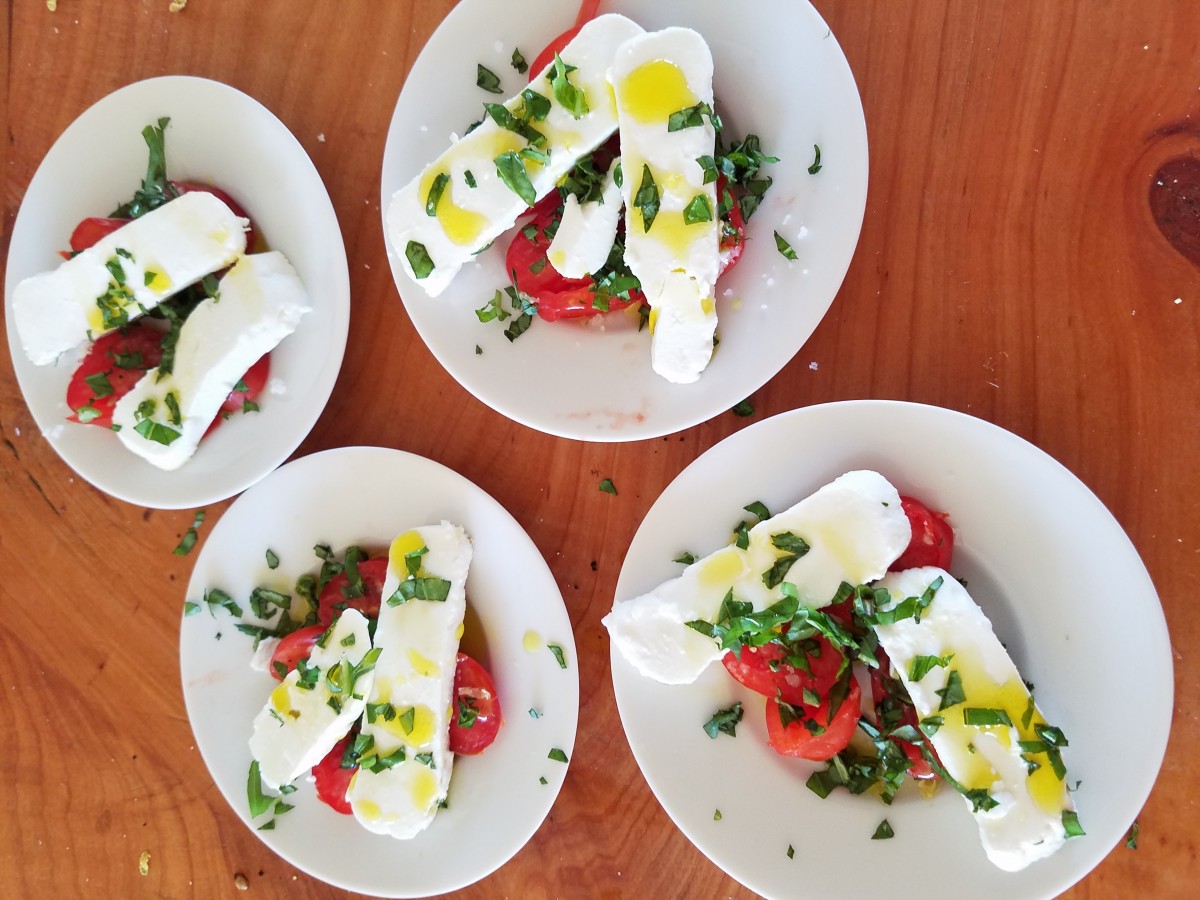
Cherry tomatoes with a mozzerella-style cheese, basil, and olive oil
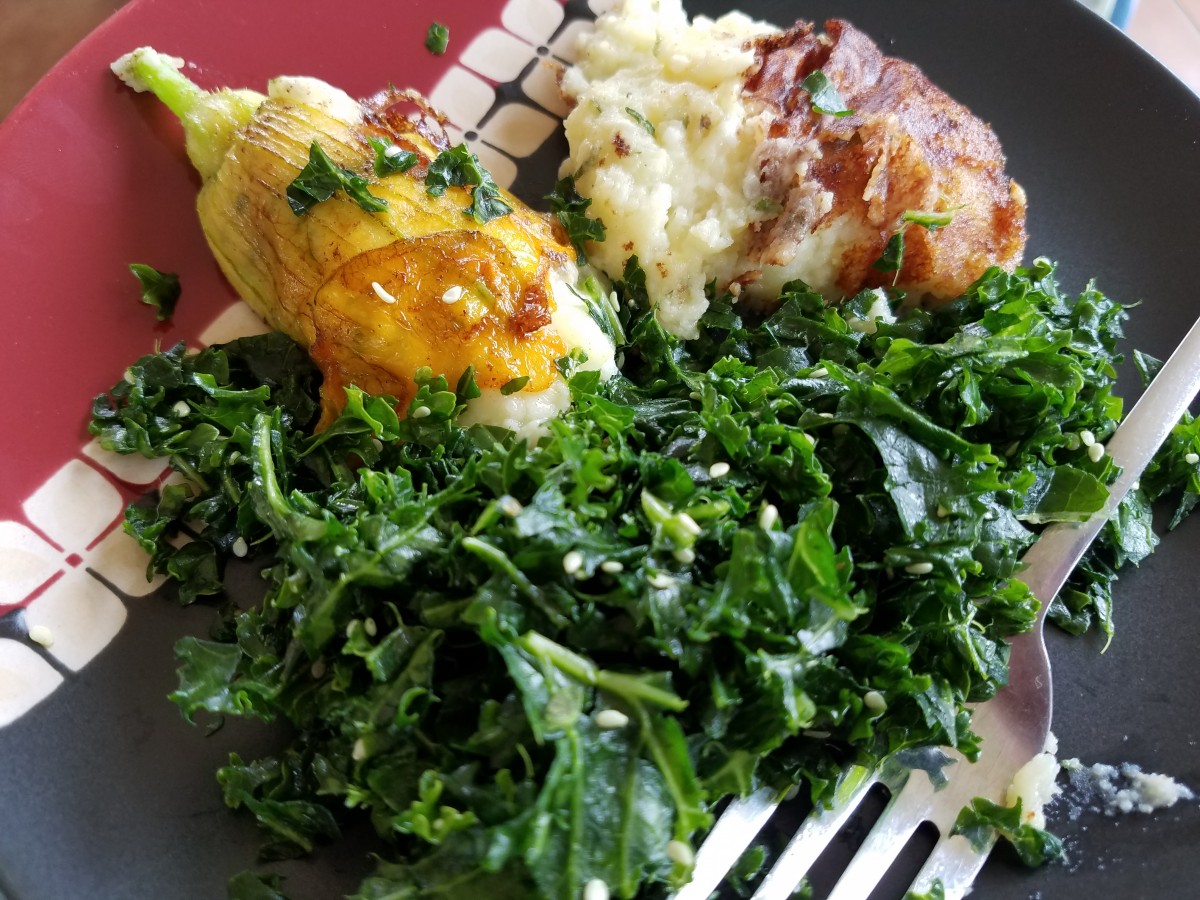
Garlic mashed potatoes, zucchini blossoms stuffed with potatoes, and massaged kale with olive oil and sesame seeds (massaging the kale gives it a similar texture to cooked kale while keeping it cold)
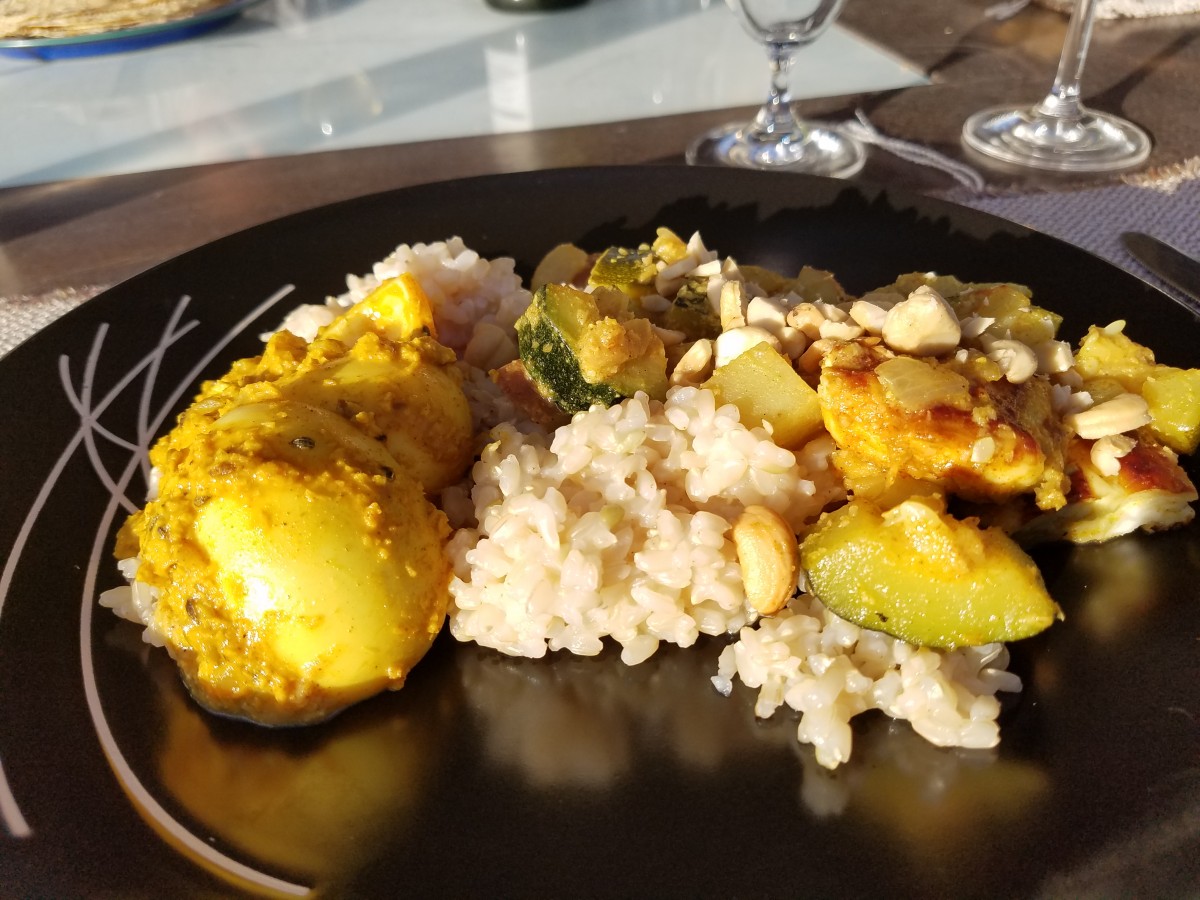
Left side: egg curry, right side: curry with zucchini and fried halloumi (halloumi made by Maddy &I!)
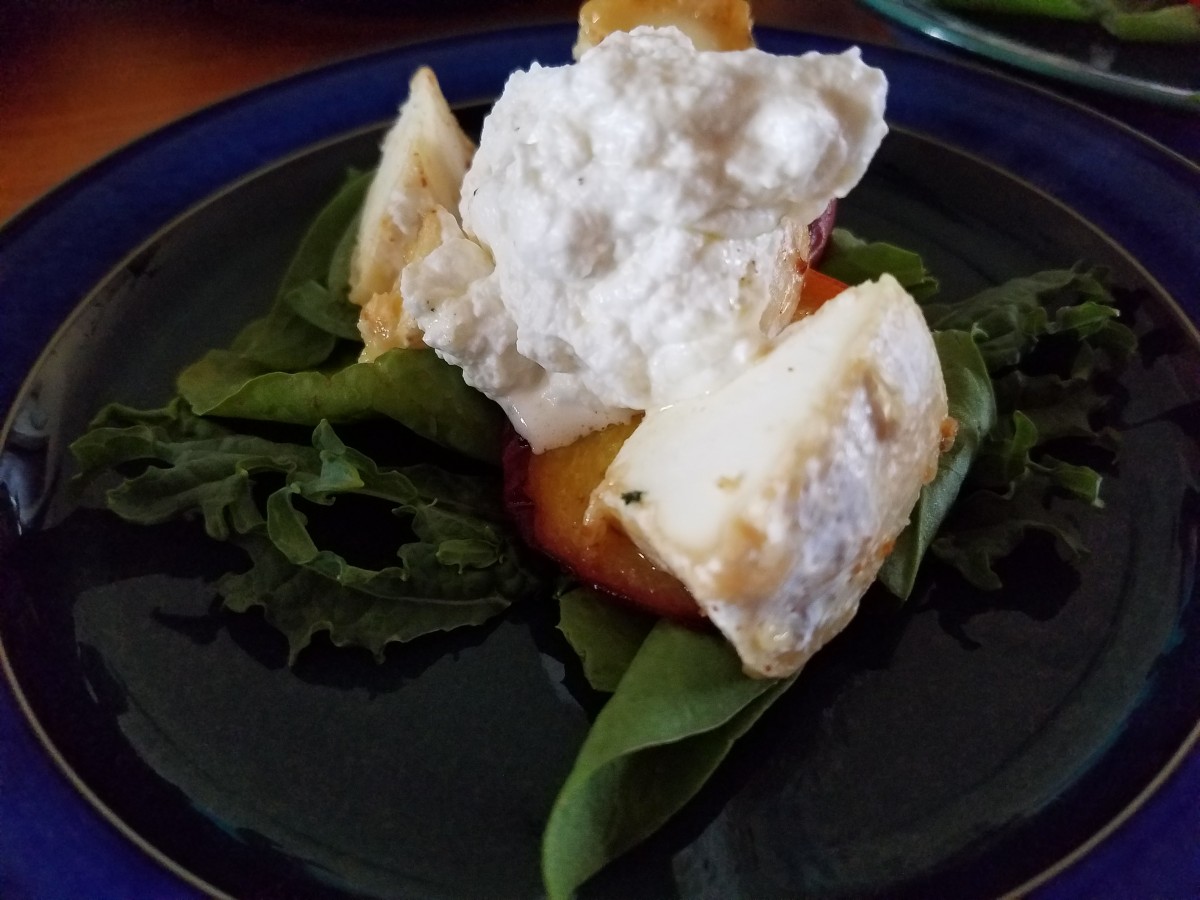
Spinach and lettuce salad, topped withed apricot slices and some homemade cheeses
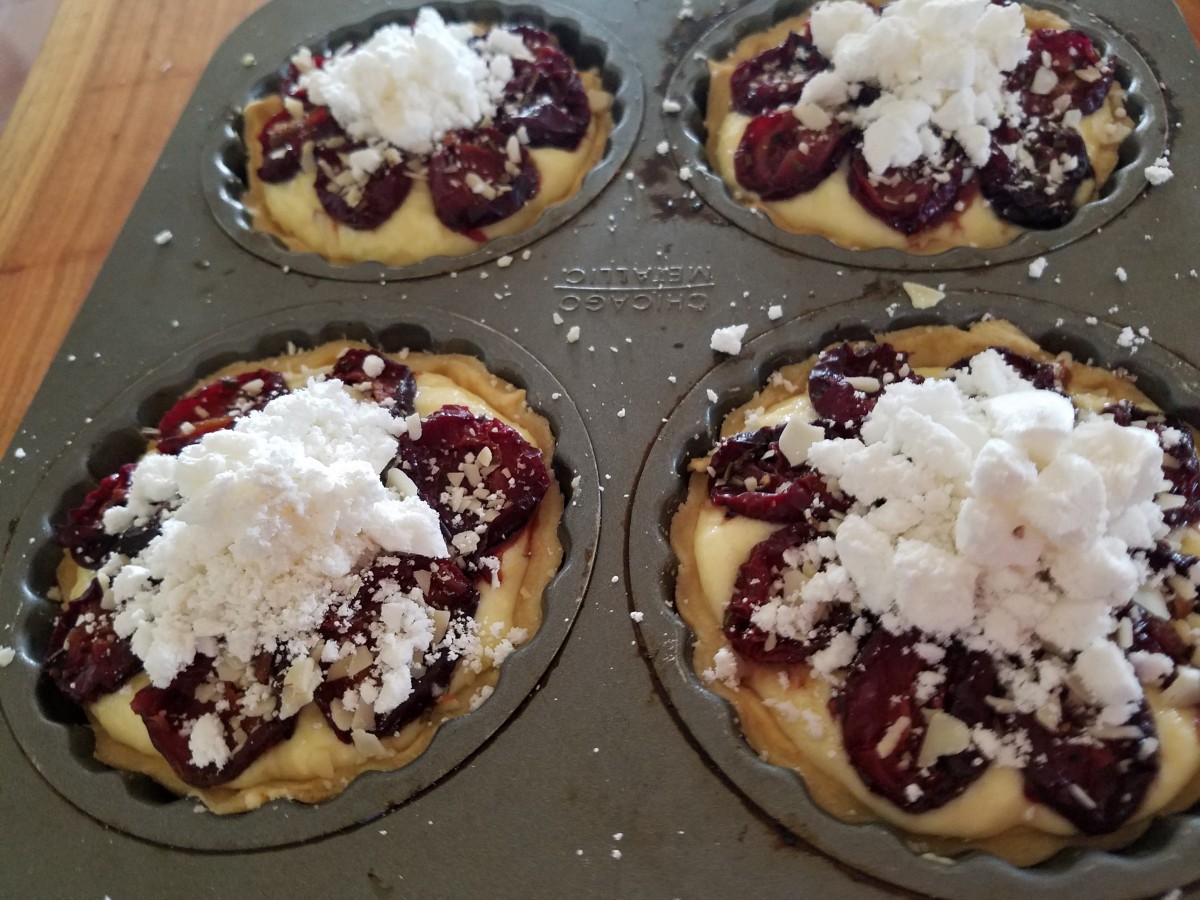
Plum and goat cheese tarts with a custard base (Made by Maddy Q. & Lyndal)
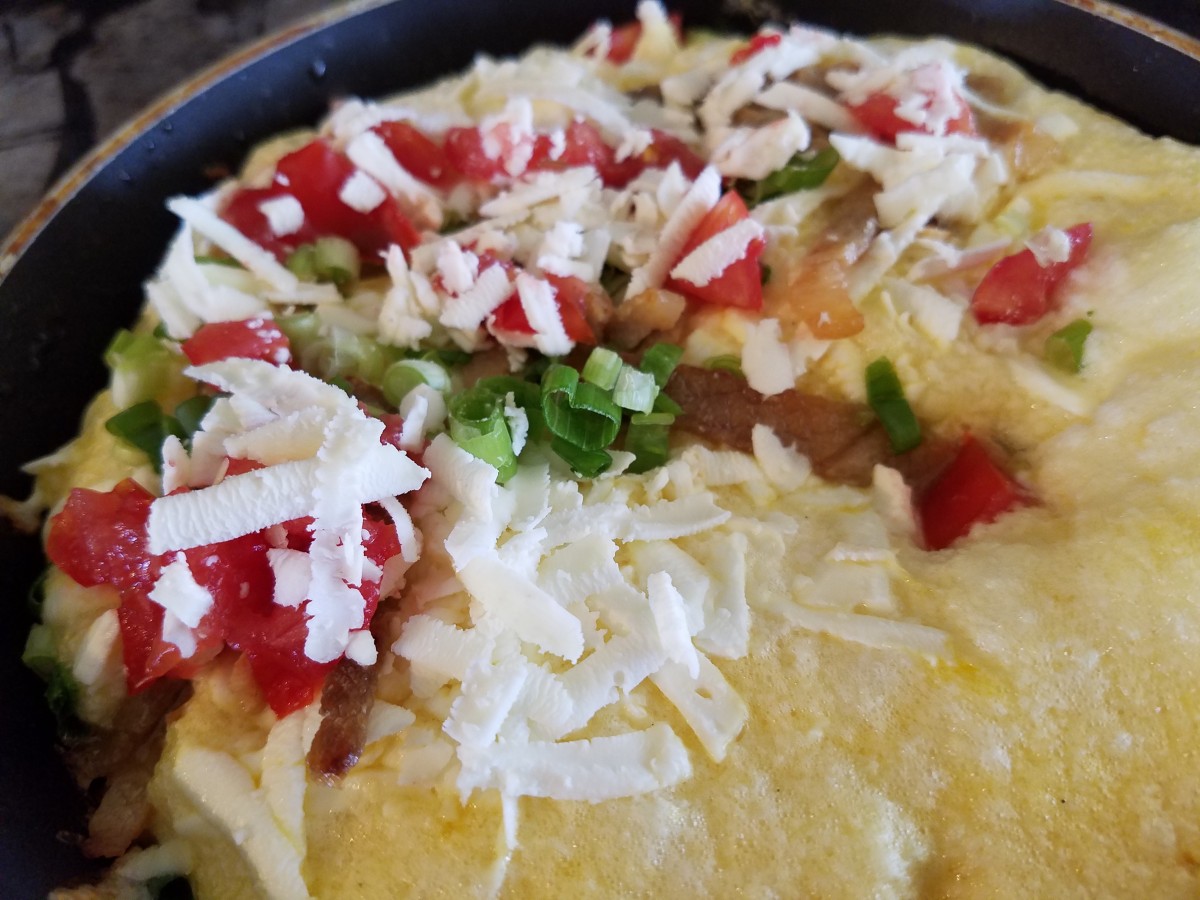
Omelette with tomatoes, green onions, and a mozzerella-style cheese
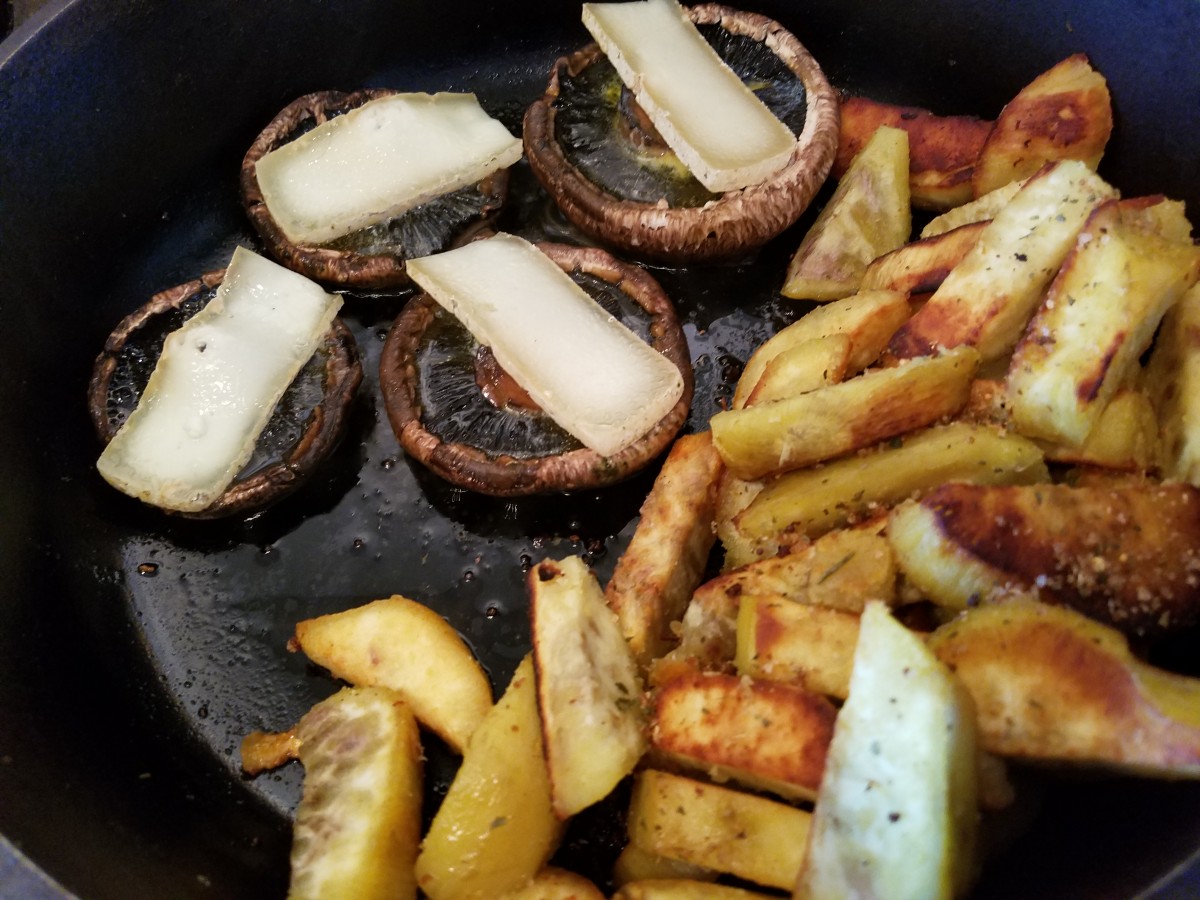
Foraged mushrooms topped with truckle cheese, alongside potatoes frying in olive oil and spices
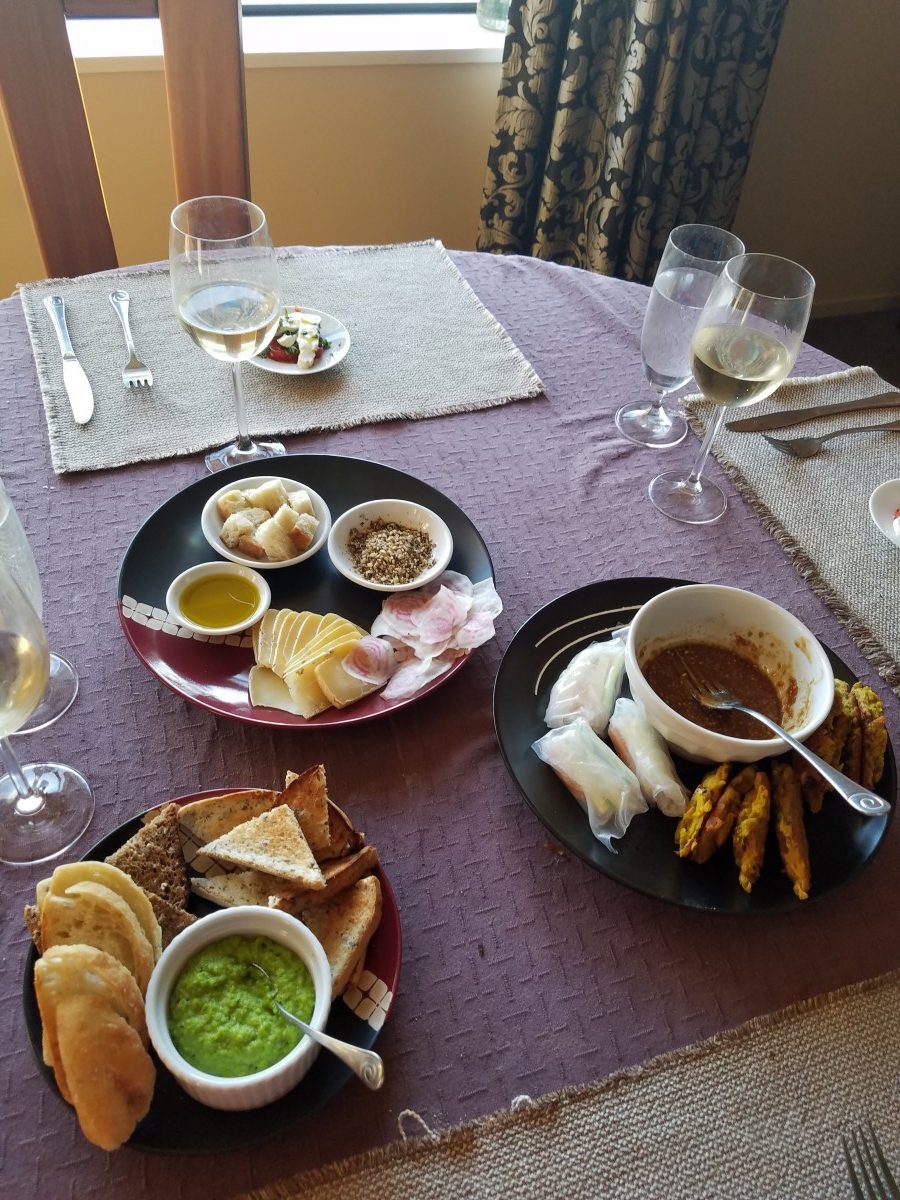
A beautiful spread consisting of breads from the bakery paired with olive oil and a spice blend, freshly made pea-pesto, sliced truckle cheese and beets, spring rolls filled with carrots and zucchini, and fried zucchini fritters, and a soy-sesame sauce for dipping
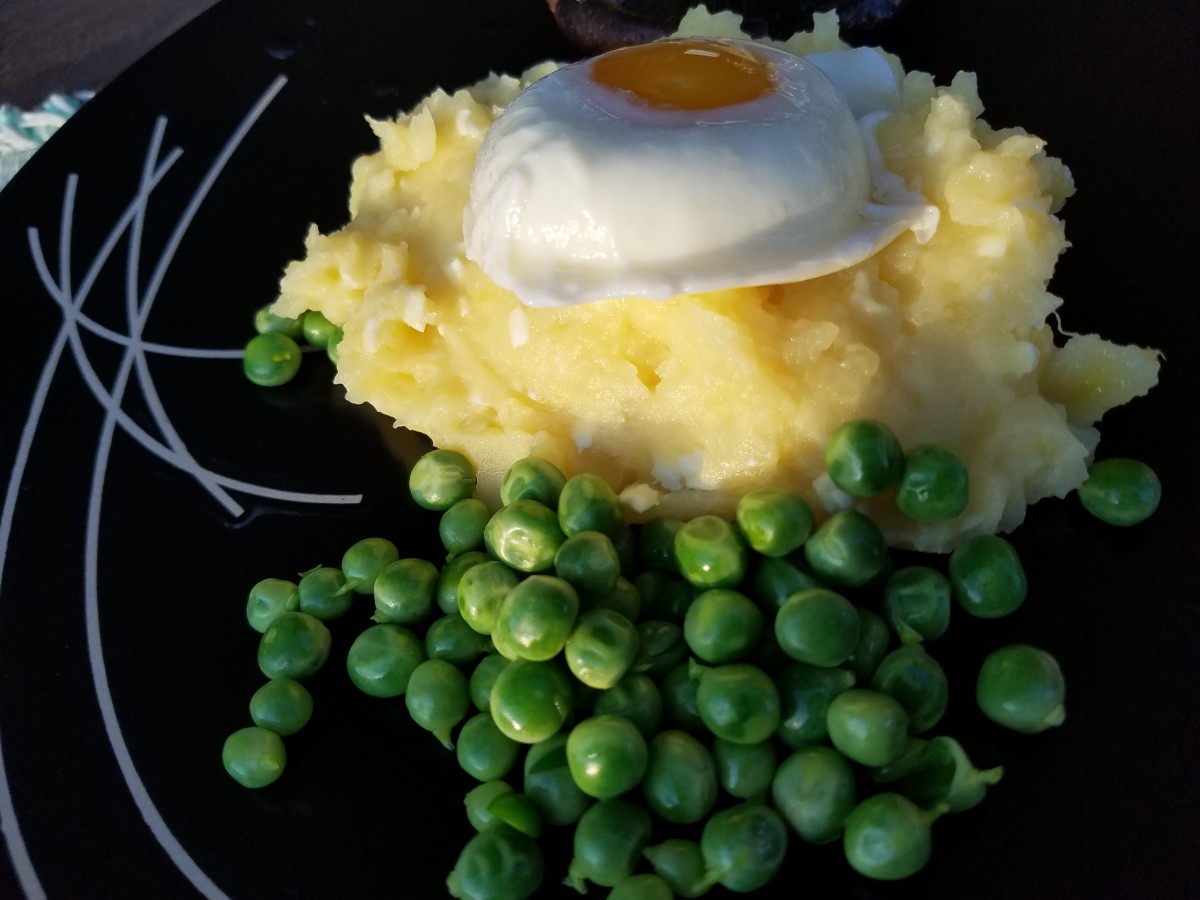
Steamed peas, and mashed potatoes topped with a poached egg (Fun fact: if you take an egg that was laid TODAY, you can crack it directly into boiling water and it will stick together perfectly and come out looking like this)
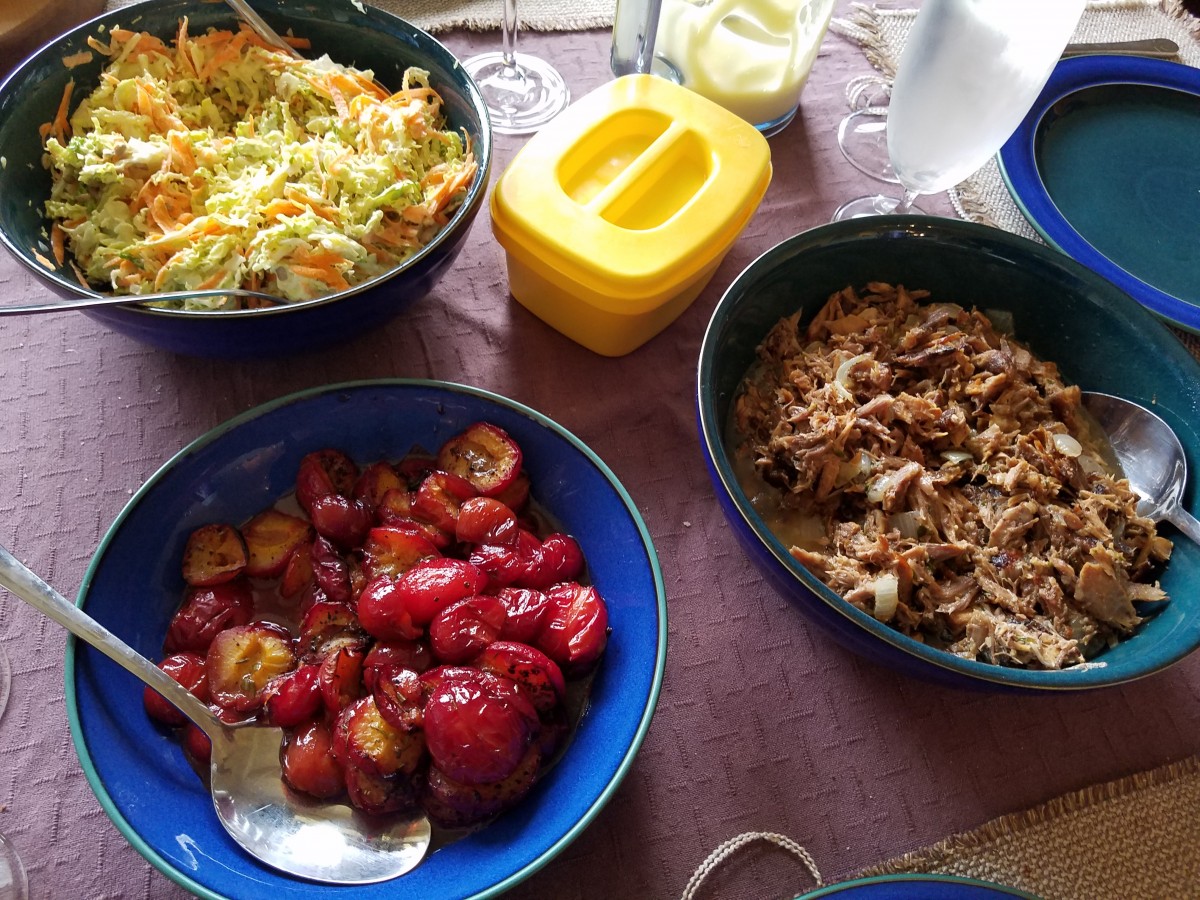
Sandwich making supplies: pulled pork, roasted plums with rosemary, and a carrot-cabbage blend. Piled on top of fresh bakery bread!
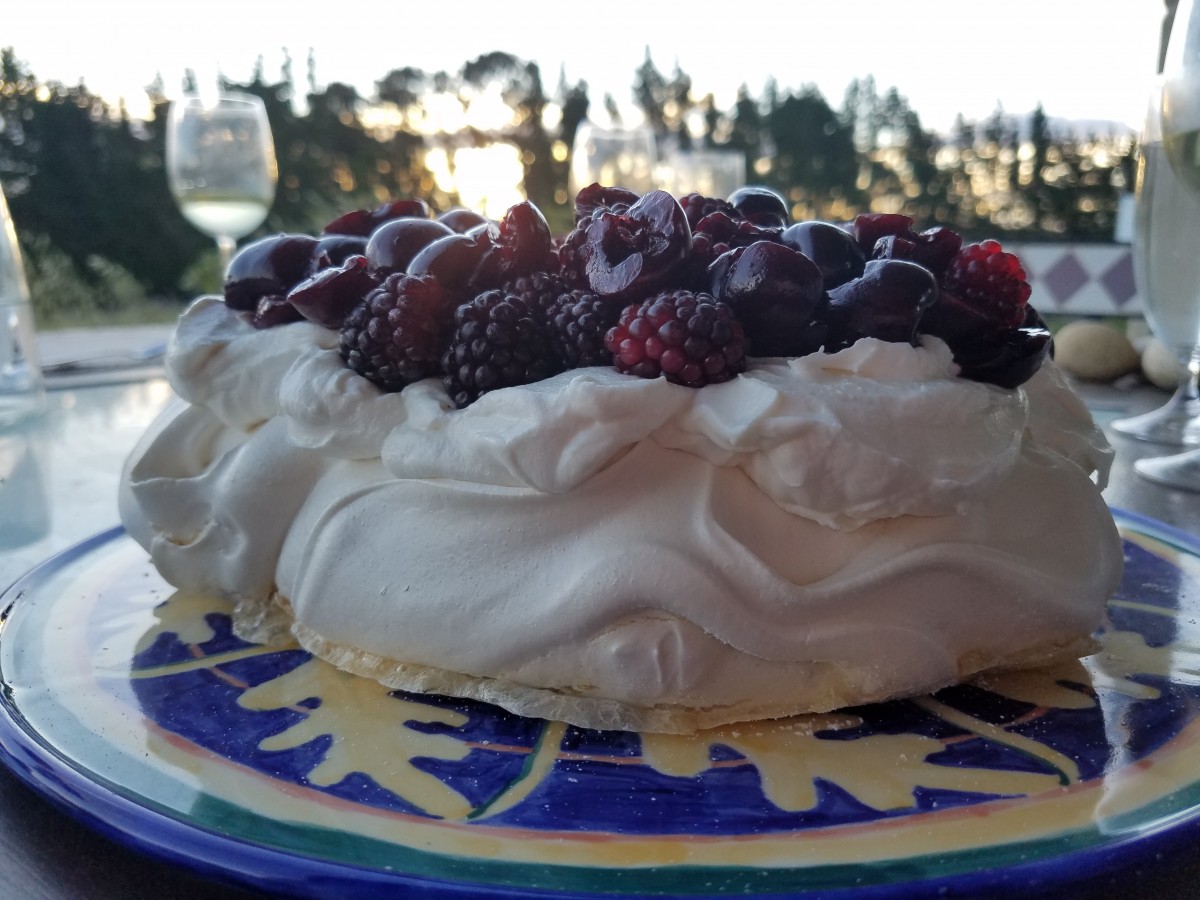
Perhaps my new favorite dish of all time, pavlova! It’s a common dessert that people make here, and consists of a big fluffy merengue that is still soft and oozy in the middle, smothered with creme patisserie and layered with fresh fruit (in this case wild cherries, blackberries, and plums) This work of art was created by my dear friend Madeline Quarles. Isn’t it impressive?
One of the challenges of a self-sustaining food system where much of the food consumed is grown yourself is that when things are ready, you have buckets full of more than you can eat, and want it to last across the year until next years crop is ready again! I’ve been doing lots of preservation of different fresh things that need to be prepared for storing through the months where they aren’t in production. At AislingQuoy, Lyndal and Steve provide much of their own diets with things they grow and only need to buy in things like bread, tortillas, flour, sugar, butter, maple syrup, tortillas, peanut butter, wine, etc., items that they either can’t make themselves or don’t have the time to make. In order to have fruits and veggies in the winter, they have to use various methods to keep them safe to eat for later consumption.
Pile of apricot pits
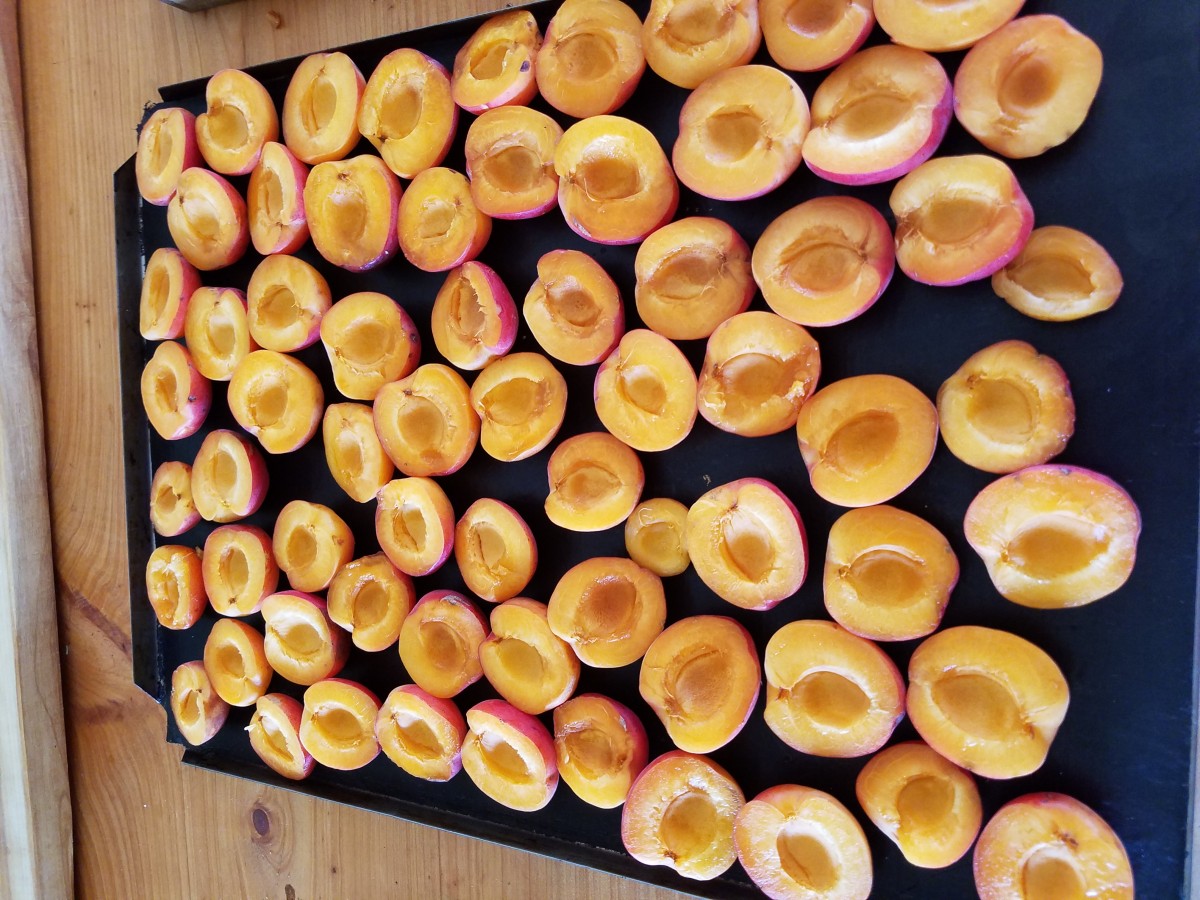
Putting apricots in oven to dry and save
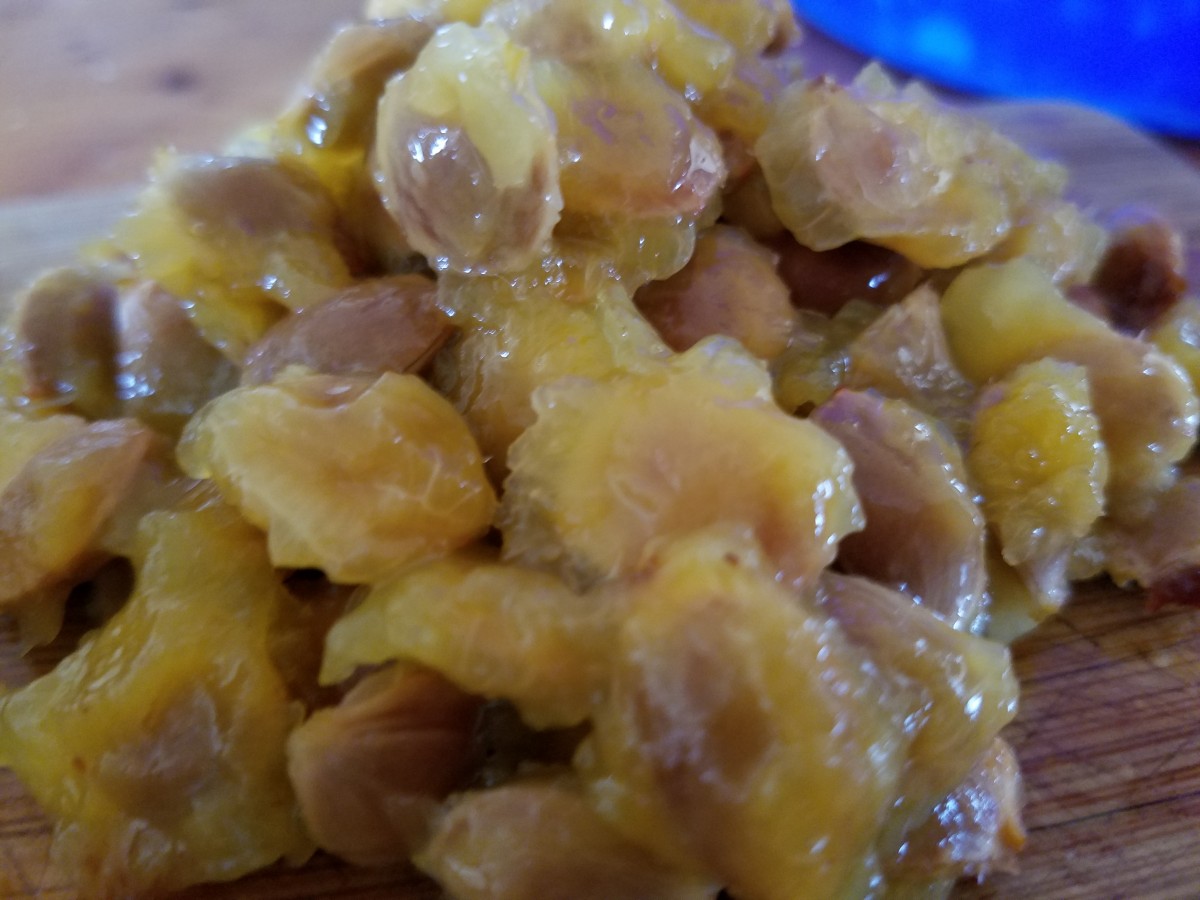
Apricot, ginger & vanilla Jam. Recipe is 1 kilo of diced apricots, one cup water, two cups sugar, spoonful of powdered ginger, and a spoonful of vanilla
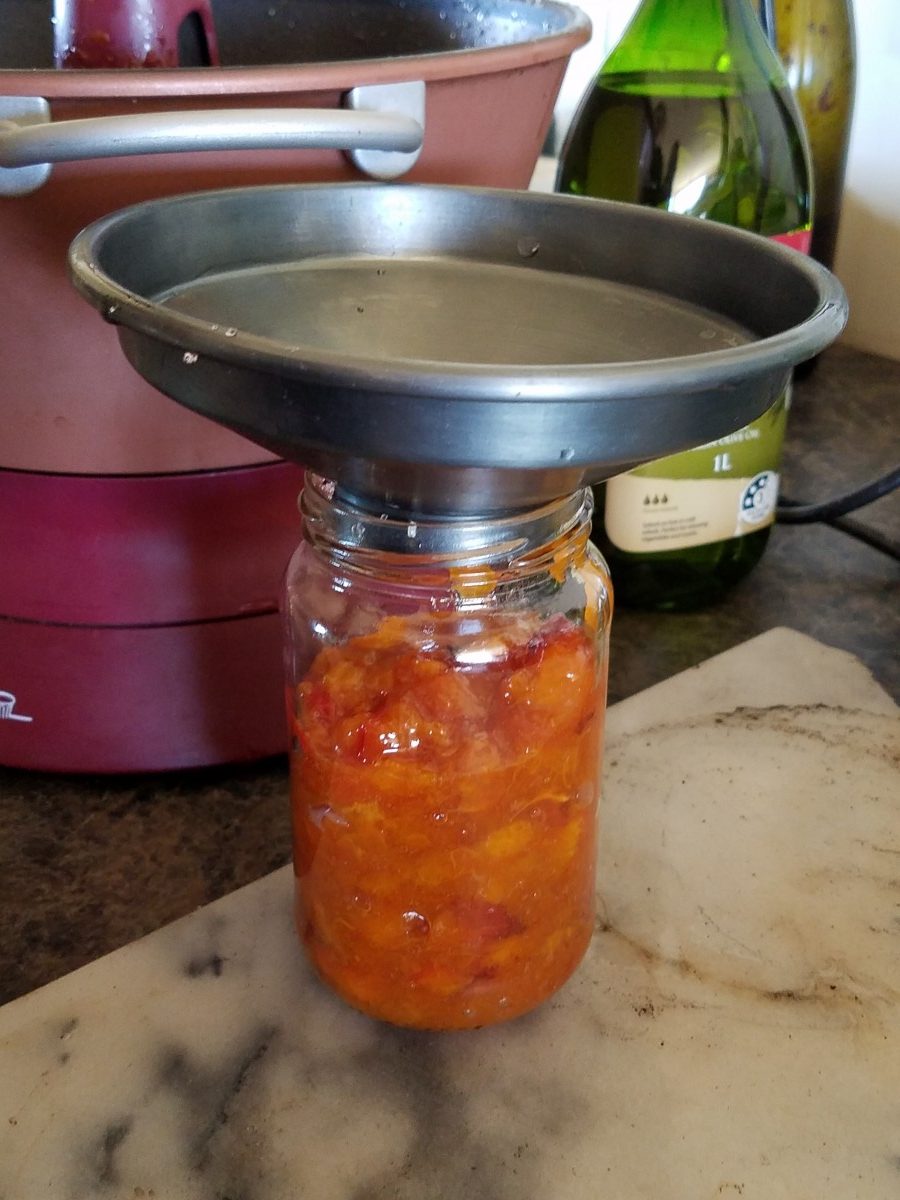
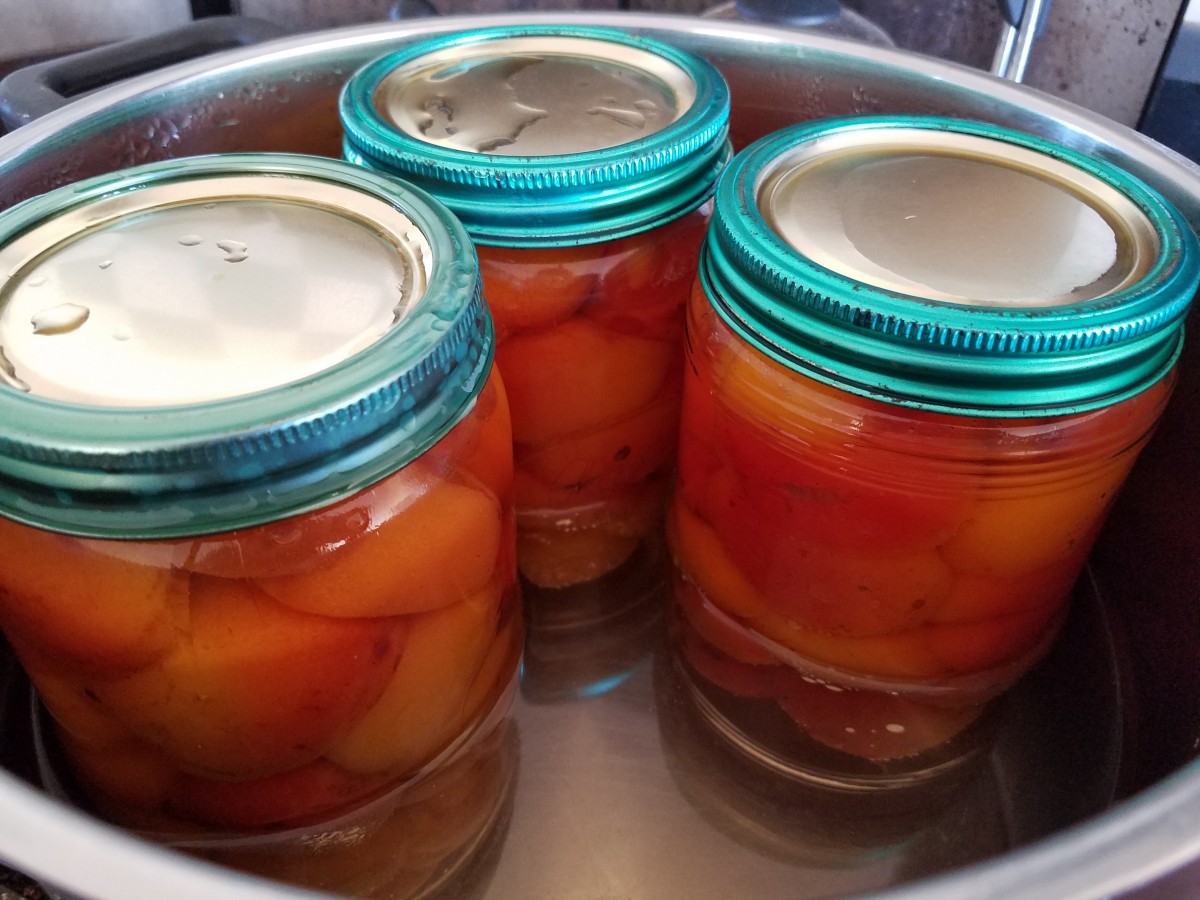
Canning apricots, sealing the jars by boiling them in water
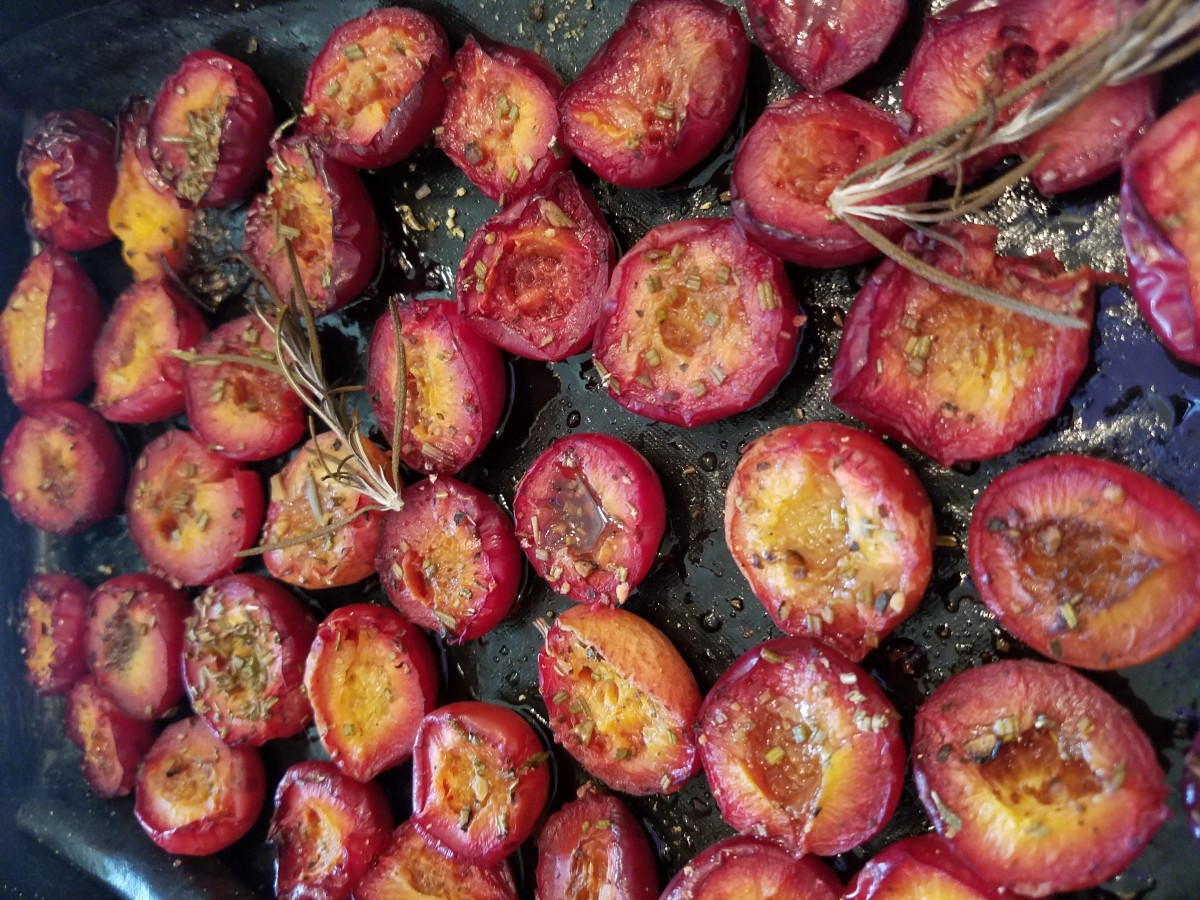
Roasting plums with rosemary, to be frozen and used in the off-season
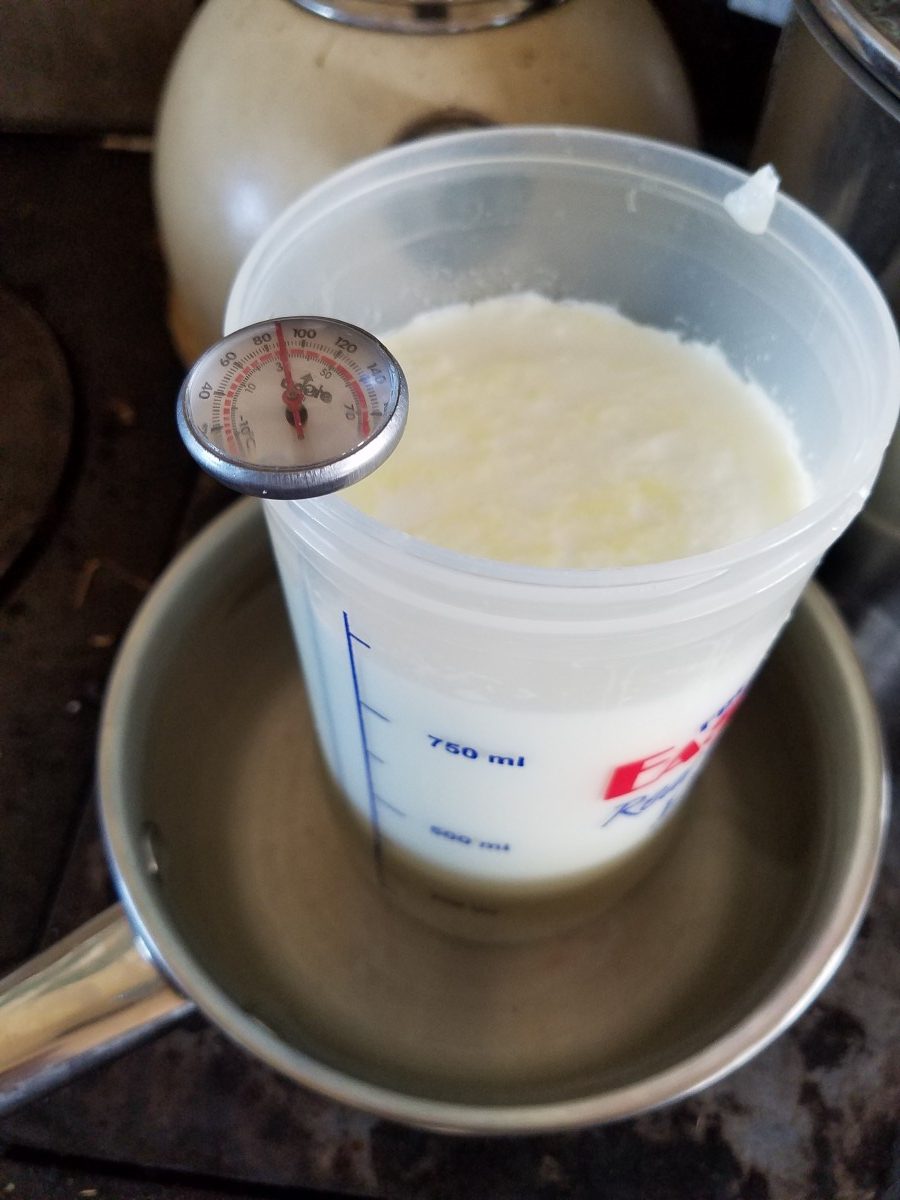
Making yogurt! Done by putting a tub of milk into a pot of water, monitoring temperature until it reaches 85 degrees, then letting it cool to 32.
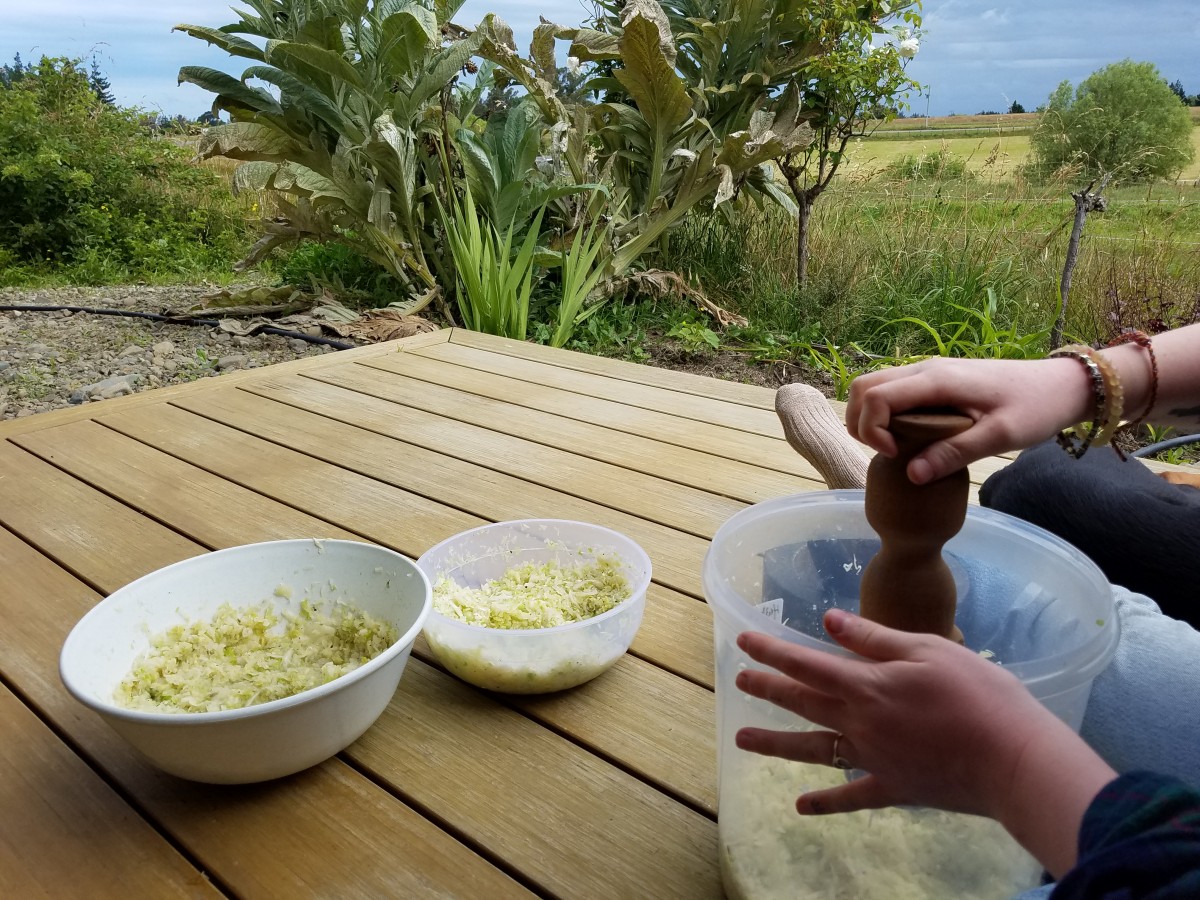
Pounding cabbage to make sauerkraut
Shelling peas to be blanched and frozen, stopping along the way to admire the shells beautiful veins
Hazelnut sorting, picking out the hollow nuts from the full ones
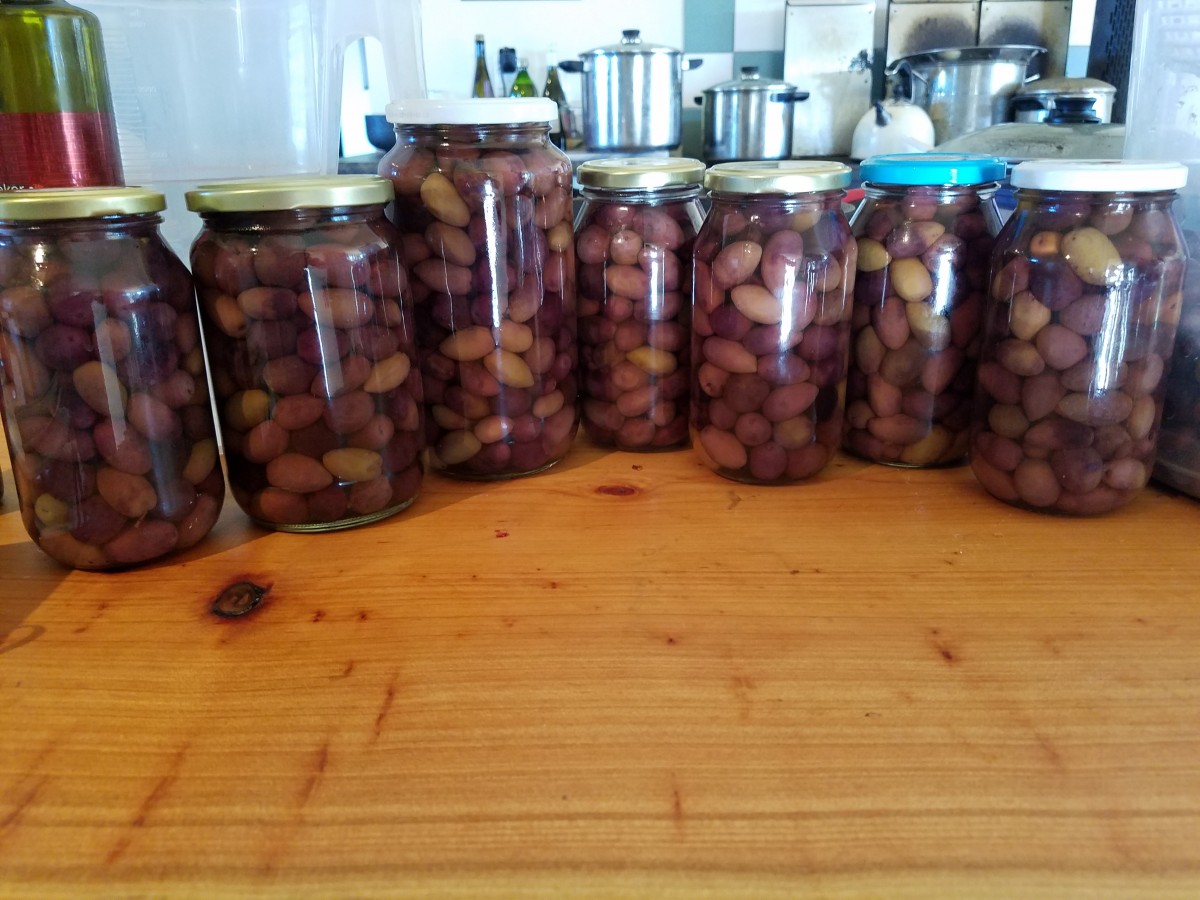
Olive bottling, in a solution of 50% saltwater brine, 50% red wine vinegar
There are other ways to coagulate cheese that don’t involve animal rennet. Plants like thistles, nettles, and figs all contain enzymes that act similarly to the chymosin and rennin that is extracted from the 4th stomach of calves, lambs, and goat kids.
Madeline Q. had a fantastic idea that we could use some of the surplus milk that we can’t drink or make cheese with (since we gave some of the animals a chemical wormer) to experiment on. Lyndal had never played around with how many stamens to use for coagulation so it was a brilliant way of doing a purposeful experiment with the unusable milk.
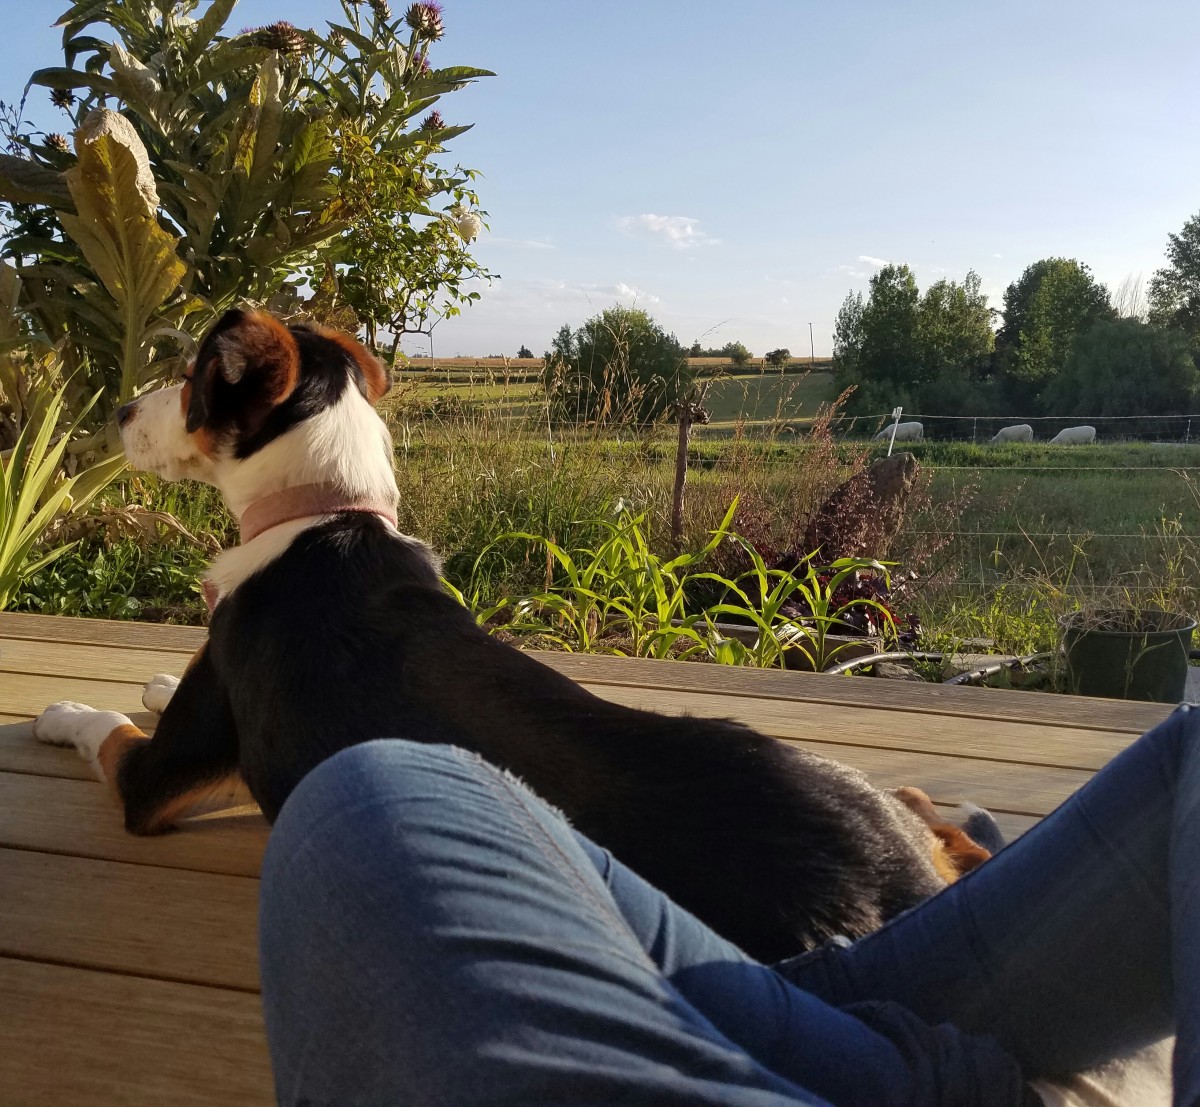
Jazz and I sitting by the cardoon plants
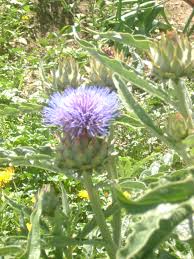
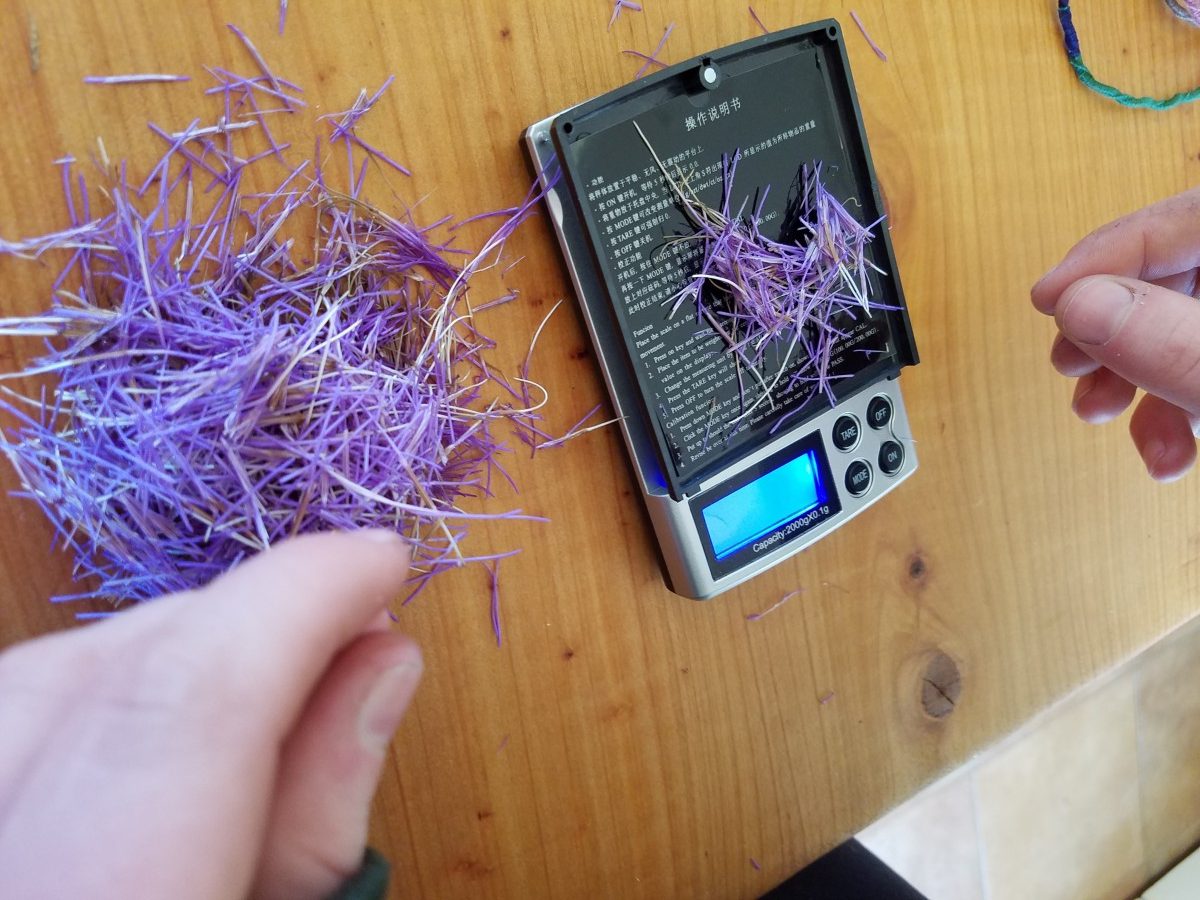
Cardoon Stamens
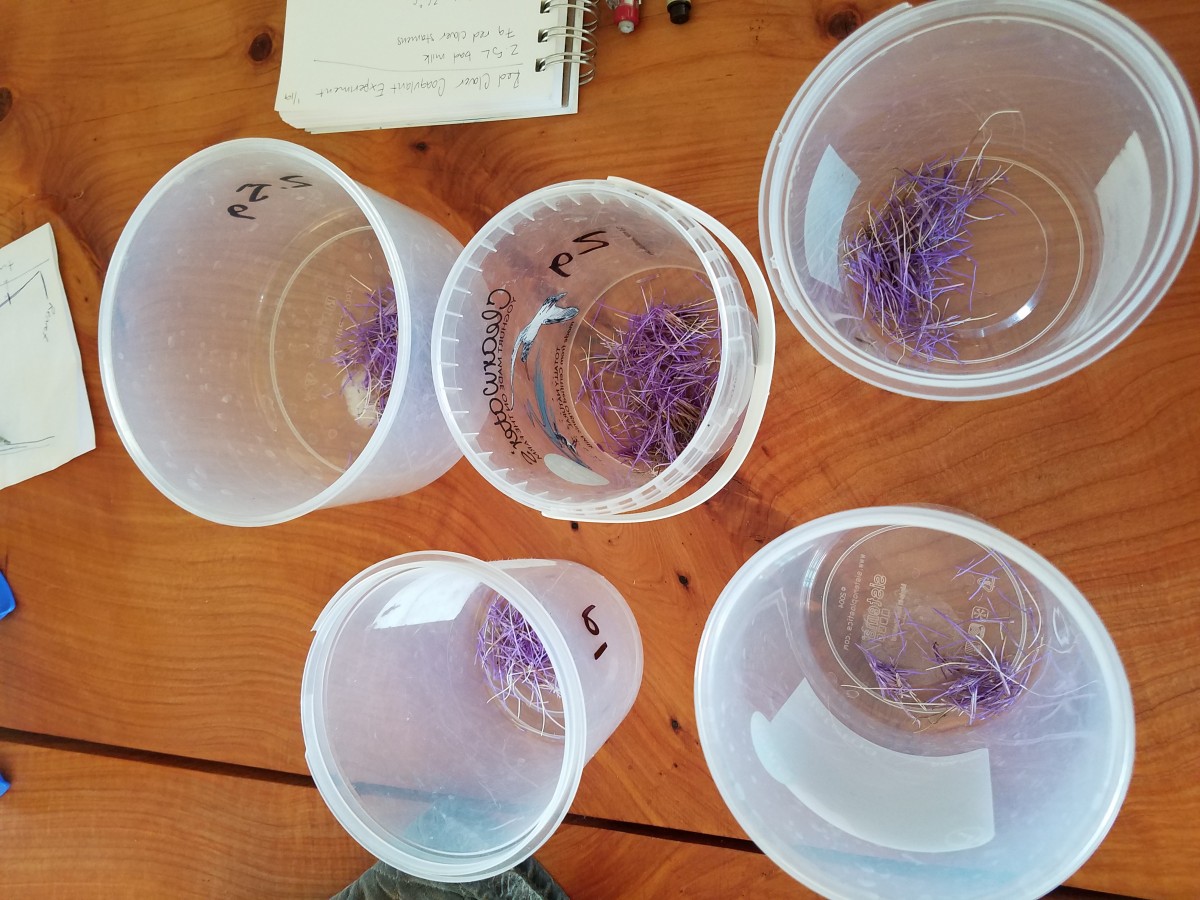
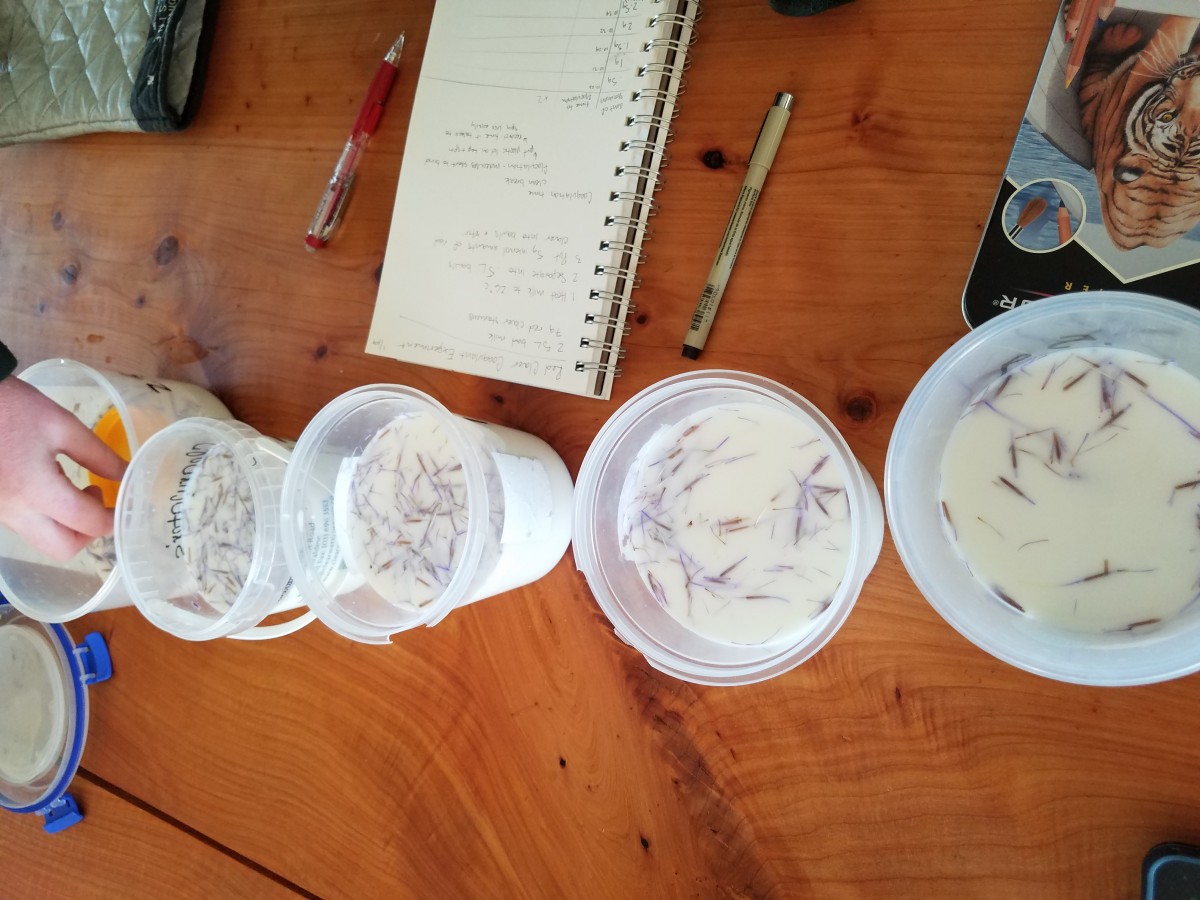
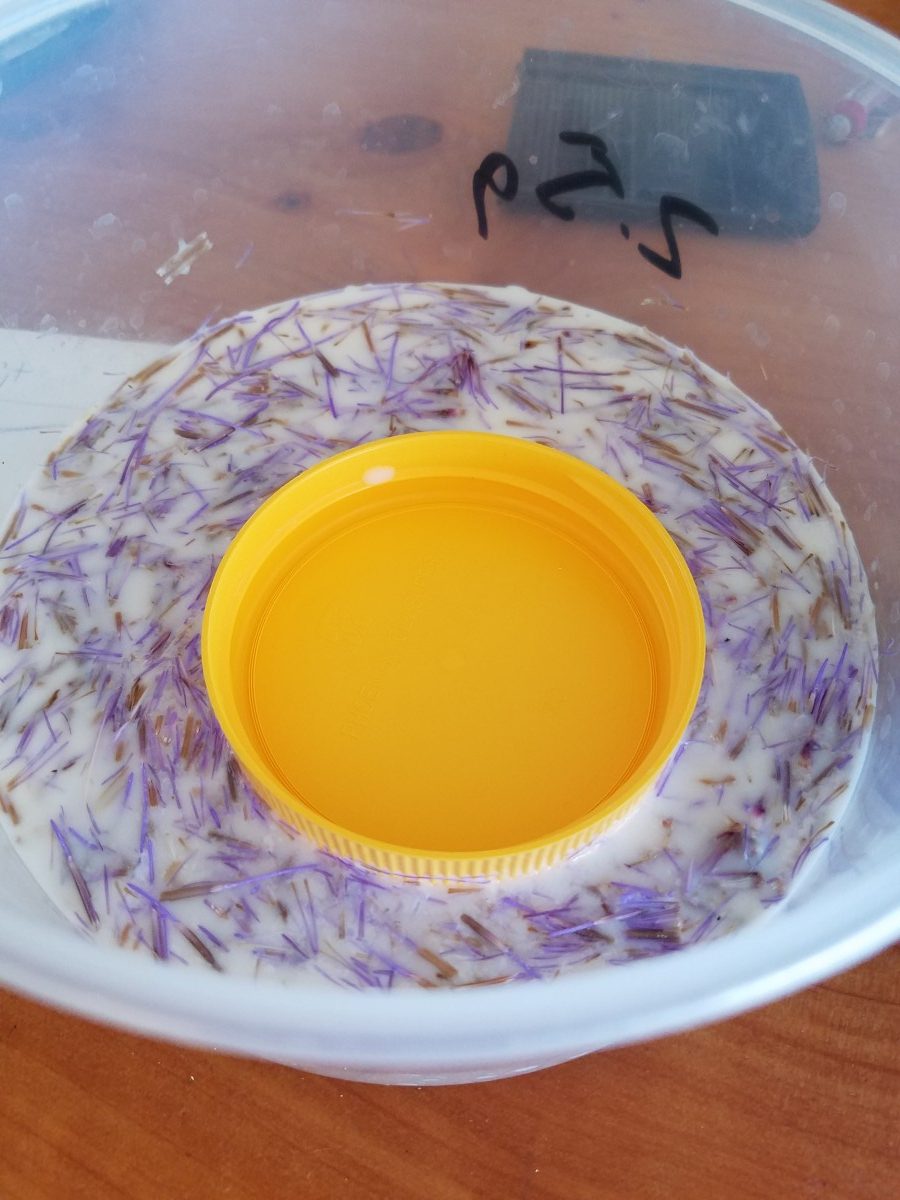
To use the plant for rennet, you extract the purple stamens from the blooming heads. To coagulate the milk properly, it must reach a point called flocculation fairly quickly, but not too fast. Flocculation means that the molecules of the milk are starting to bond together, and it is measured in the time that it takes for the milk to become coagulated. Flocculation is tested (in the simple way) by putting a plastic lid on top of the thickening milk and giving it a spin. Before you add the rennet, and in the first few minutes, the lid spins freely without resistance. When the milk is flocculated, the lid will be hard to spin and turn only sluggishly. Typically once the milk has reached the flocculation point, you add the equivalent amount of time to wait for the milk to become curd. Sometimes it needs to be doubled or tripled depending on the firmness of the desired cheese.
We had absolutely no idea how many stamens to start with so our attempts were a shot in the dark. We had 2.5 liters of milk from the morning from the animals we dewormed, so we decided to split the milk into five 500ml samples. We then collected stamens and measured them out into samples of .5 grams, 1 gram, 1.5 grams, 2 grams, and 2.5 grams. Each jar received one of these amounts, and then we added 500 mls of milk to each one.
The experiment design and process was primarily designed and carried out by Maddy, who was very excited about her idea. I had fun being an active watcher and learned a lot just from observing.
After waiting for about 15 minutes, nothing was happening. Lyndal told us the milk definitely should’ve reached flocculation by now so we clearly didn’t add nearly enough stamens for proper coagulation. There weren’t too many stamens left on the plants, but we collected the remaining ones which gave us an additional 5 grams. We threw the 5 grams in with the sample that had 2.5 in it already. Alas, the milk was thick and flocculated 6 minutes later, which is a much more appropriate time.
Our experiment didn’t give us too much data, other than that many more stamens are needed to coagulate the milk than we thought. Once the cardoons produce more stamens we could rework the experiment with larger sums of the stamens or less milk to get better results. At least we know more than we did before and made use of unusable milk!