Family: Papaveraceae (also in this family: any and all poppies, including opium poppy, California poppy,
Genus: Papaver
Scientific Name: Papaver nudicaule
I
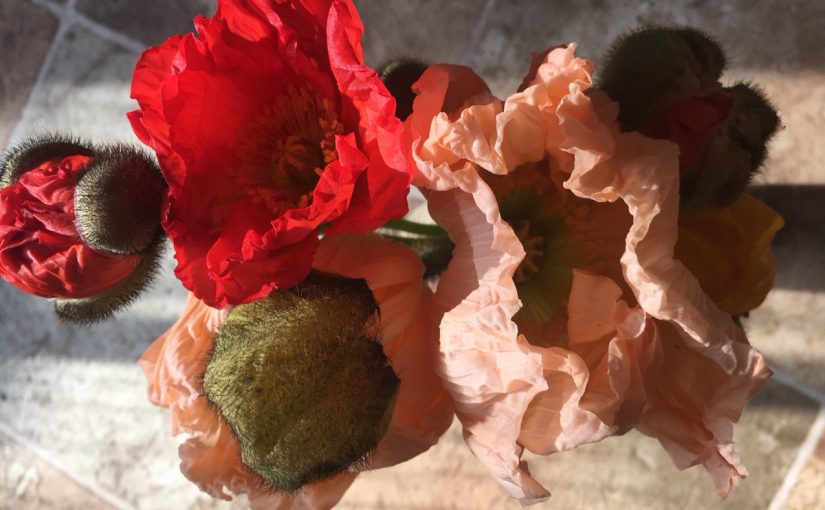
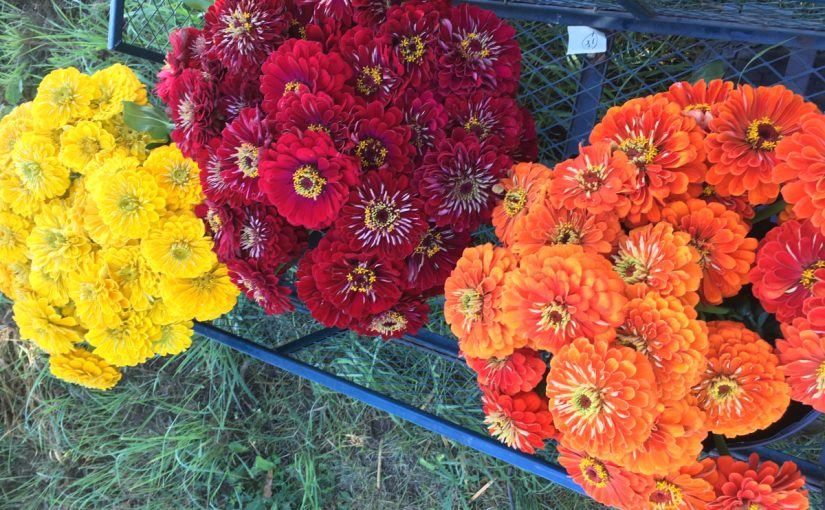
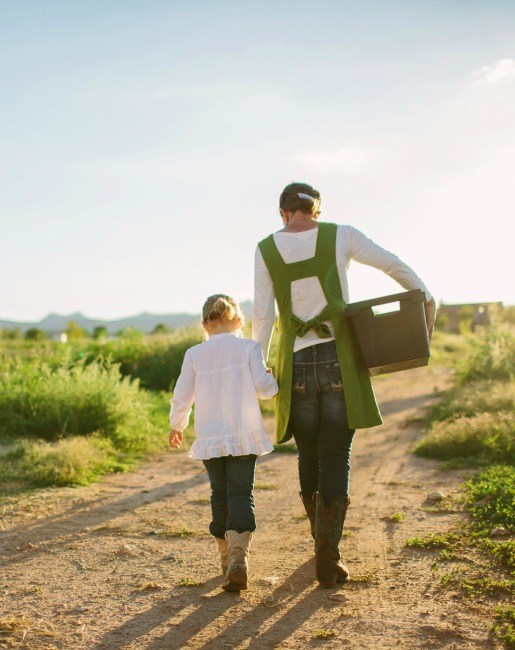
Iceland Poppies harvested at Jello Mold Farm Photo: Allie Kuppenbender
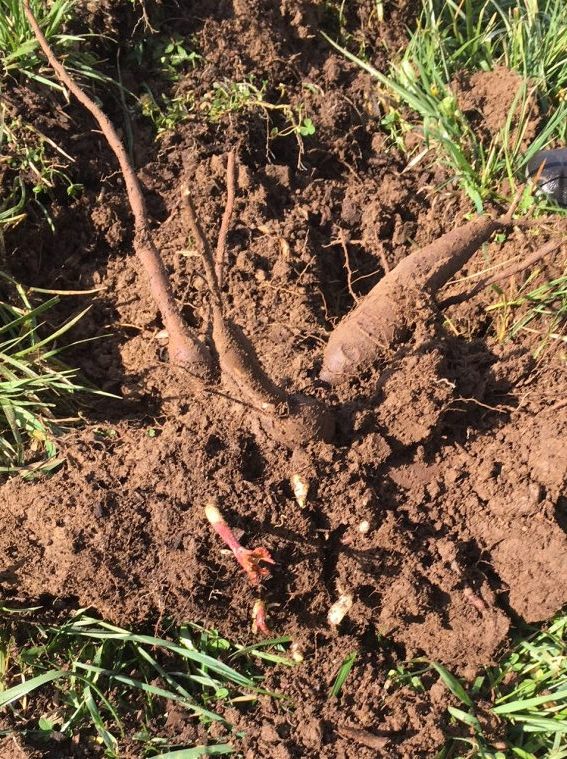
celand Poppies are native to the Arctic region of North America and Eurasia. Iceland poppies, like all poppies, possess exceedingly minute seeds and long taproots that resent disturbance. In cool summer climates on well-drained soils, Iceland poppies can live 2-3 seasons, flowering from early spring to fall. Thus they are a hardy but short lived herbaceous perennial and can often treated as a biennial in gardens with the right conditions. Otherwise, they can be grown pretty much anywhere as an annual as they will not survive hot summers. (Iceland Poppy – Papaver nudicaule).
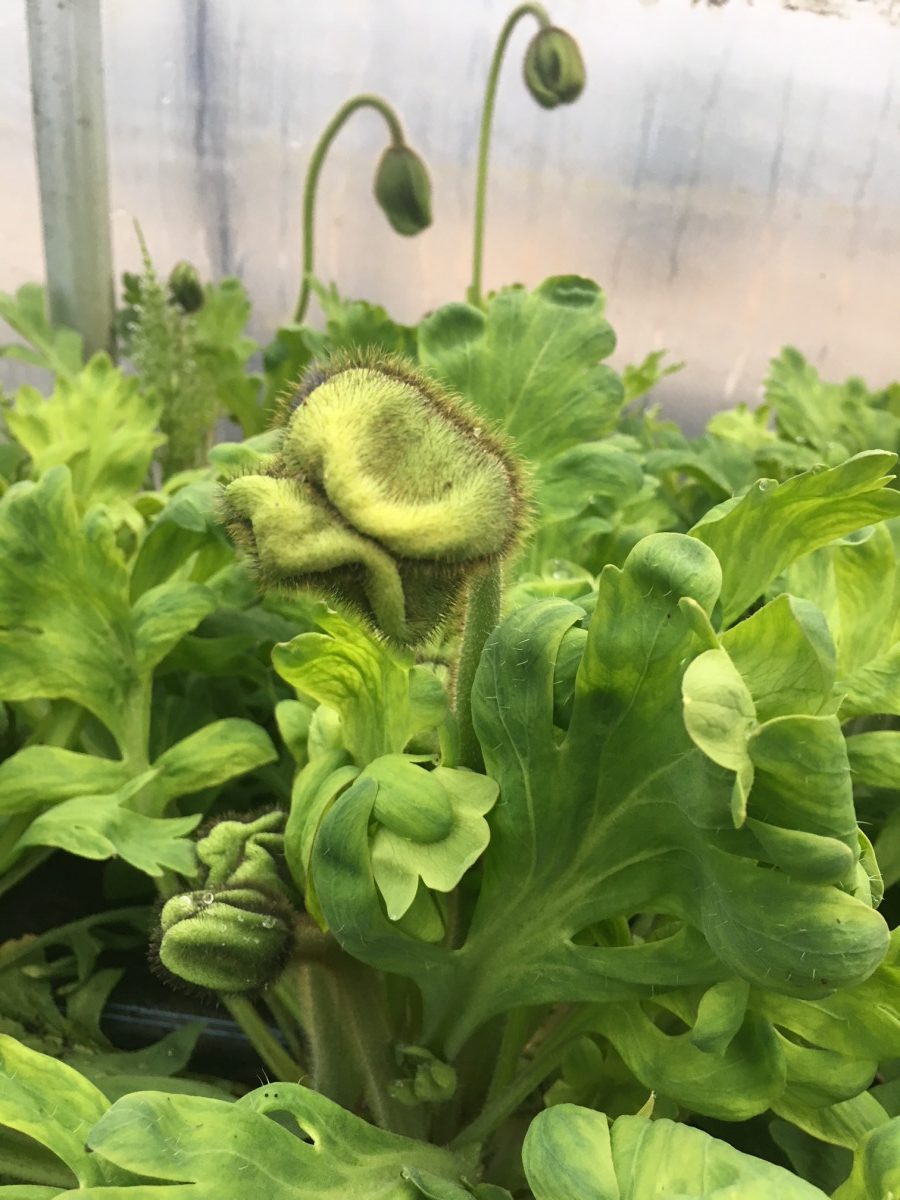
These flowers are composed of a single flower head that have four tissue paper like petals, with a center of many stamens. There are no leaves on the wiry, hairy stems; instead the leaves are basally arranged around where they stem pokes out of the ground (Iceland Poppy – Papaver nudicaule).
Iceland Poppies growing at Jello Mold Farm Photo: Allie Kuppenbender
Bloom Time: early spring to fall, weather/temperature dependent
Bloom Size: 2-4 in
Height: Up to 24 in
Soil: Needs loose soil and prefers neutral or alkaline soils to acidic.
Site: Full sun, well-draining soil of average moisture
For best vase life:
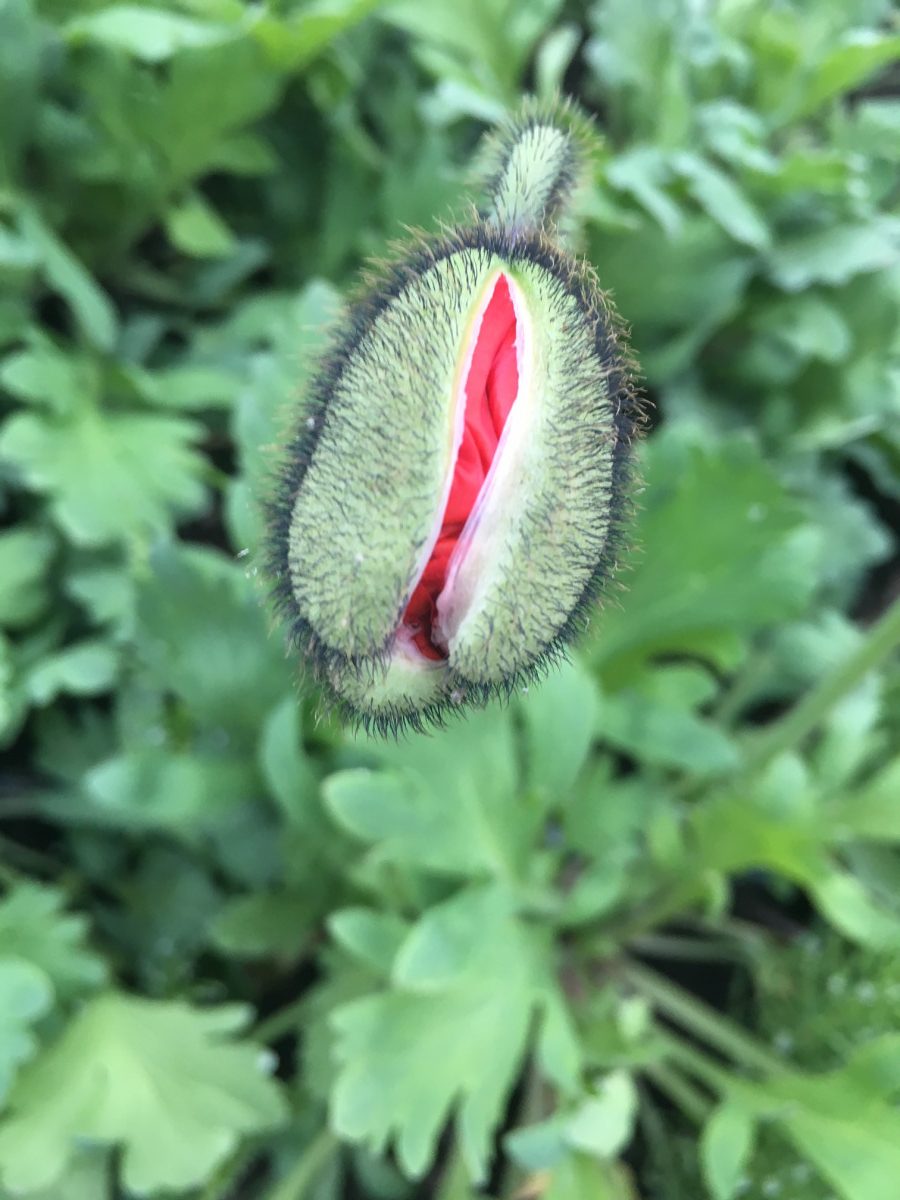
Perfect harvest stage for Iceland Poppies: when the bud has cracked and you can see a bit of color Photo: Allie Kuppenbender
Harvest when the buds first crack and the color is just barely present into clean 1/2 gallon buckets and never reuse buckets as Iceland Poppies (and all poppies really) ooze a milky white latex substance that leaves the water murky. These delicate blooms don’t have too terribly long of a vase life, but can keep up to one week by daily changing the water. If transporting these blooms without water, burn the stems. This will ensure they do not ooze the latex.
Family: Ranunculaceae (also in this family: buttercup, ranunculus, anemone, nigella, delphinium, clematis, columbine)
Subfamily: Helleboroideae
Genus: Helleborus, approximately 20 species of herbaceous or evergreen perennial flowering plants.
Helleborus species are differentiated based upon stemming and rhizome patterns.
“The caulescent (stemmed) species grow their rhizomes from the thickened lignified hypocotyl and the bottom part of the stem. The bottom stem branches by growing new shoots from axillary buds. These species produce secondary roots on the primary rots.” (Botany: Helleborus Gold Collection)
The stemmed species have clumps of numerous tall stems. Each stem will also grow several evergreen leaves. In early to mid-winter, racemes or clusters of flowers will bloom atop these stems. After the flowers are spent, the stem will never blossom again, in which case gardeners will cut back the stem to the ground after the flower is spent. (Information on the Genus Helleborus)
“In acaulescent (stemless) species, the primary root dies as the seedling develops into an adult plant. Each year, the plants produce new adventitious roots on the new rhizome side shoots. Old roots are thick, fleshy and often a brownish or blackish colour. This large difference between these two groups’ root system explains why only acaulescent species can be propagated by division.” (Botany: Helleborus Gold Collection)
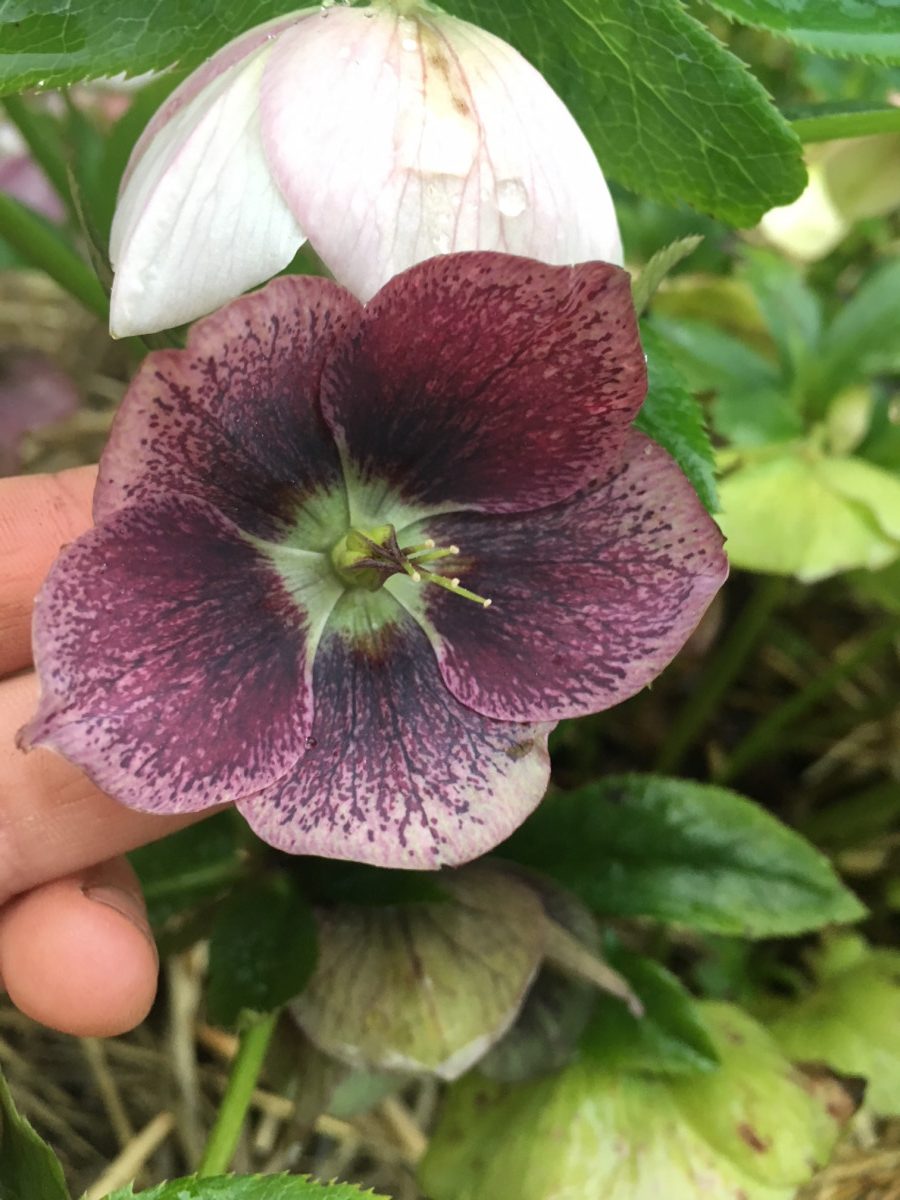
Helleborus orientalis (also know as the Lenten rose) and hybrids of this species are common garden and cut-flower Hellebore. They are an acaulescent species. These species have basal leaves rather than leaves on their stems and the stems grow right up from the ground.
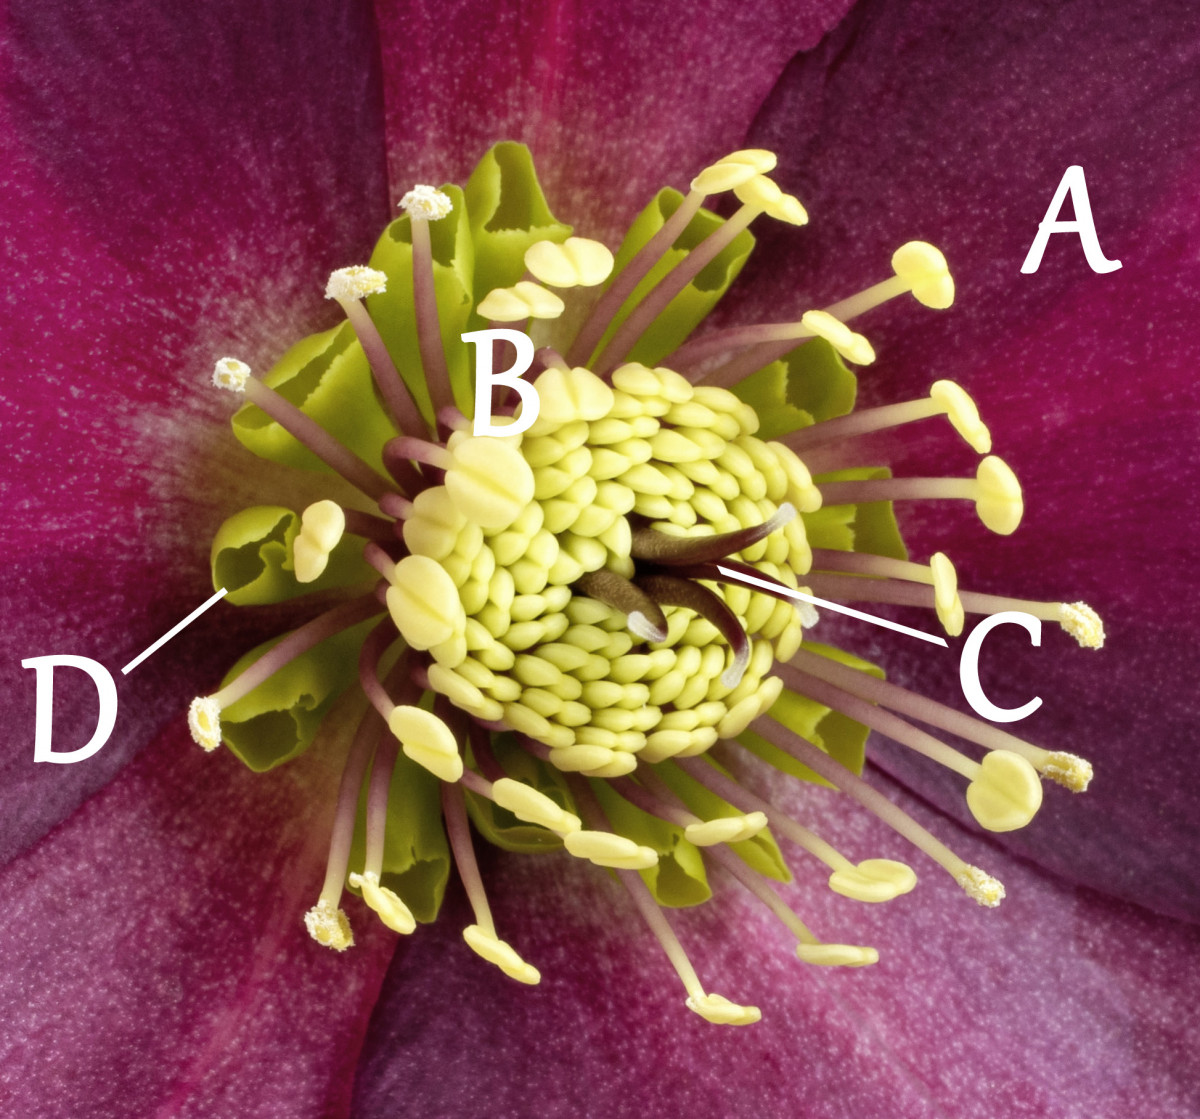
Hellebore flowers are unique in that the colorful flowers are actually made up of sepals rather than petals. Sepals are generally for protection. The Helleborus petals evolved overtime into nectaries (short, tubular flower organs producing nectar to attract the few and far between insects around in those early month of the year when Hellebores are blooming). The cool thing about Hellebores is that those beautiful sepals remain in tact until the seeds have matured (Botany: Helleborus Gold Collection).
These purplish “petals” are actually sepals of the hellebores
There are no Helleborus native to the Americas, generally brought here from the British Isles, Europe, Asia Minor, and one species from China. They mostly grow on the periphery of slopping and well-drained deciduous woodland or in shaded clearings among scrub or rocks. They can also found on apparently open, sunny slopes which may later become overgrown and thus shaded in summer. Mostly found in limestone areas, but can thrive in both acid and alkaline soils (Information on the Genus Helleborus). According to Janet Loughrey in an article entitles Planting and Caring for Hellebores published in Garden Design Magazine:
Zone: 4-9, evergreen 6-9
Bloom Time: February-May
Bloom Size: 2 to 3 1/2 inches
Height/Spread: 18 to 24 inches/24 inches
Site: Partial shade, well draining soil
When harvesting, for longest vase life:
Wait to harvest until after the hellebore have dropped their stamens and actual petals and it begins to form its seed pod. This is when hellebores hold up the best as cut flowers. Vase life is up to one week.
If you want to harvest prior to this stage, before the flower is pollinated, methods like putting the stems in boiling water, slicing up the side of the stem, and/or putting the stems in a hydrating solution can all work to extend the vase life.
Hoptopia; A World of Agriculture and Beer in Oregon’s Wilamette Valley by Peter A. Kopp
“With expanding acreages by midcentury, growers needed a labor pool from which to draw workers. It was at this moment that larger operations in New York adopted the European, and particularly the English, model of hop-labor recruitment and the treatment f hired help. The labor of women and children from urban areas became important, since farms or factories in the industrializing towns mostly commanded the labor of men” (57).
“Throughout the 1920s, the Willamette Valley hopyards took on a new meaning. By no means was nonwhite labor excluded, but the increasing presence of urban white families harked back to London and Kent in the early 1800s. The hop picking time became an occasion to cut ties with the city. Conversely, the hop harvest connected the city once again to the rural countryside. In an era before the proliferation of summer camps, children had opportunities for new friendships and entertainment” (109).
These two quotes were interesting to me as I had never thought of agricultural labor as something seen as enjoyable or done primarily by women and children. While the two quotes juxtapose East Coast versus West Coast hop harvest cultures, I think they exemplify an overall trend of the importance of women and children as hop-pickers. Its also interesting that families would come a pick hops as a sort of quasi vacation. Not only was it enjoyable and almost festival-like, they were also paid to do this work. Because it was so predominantly urban whites seeking this kind of carnival-type vacation for pay, I wonder if this impacted labor standards and labor abuses. While child labor laws have been passed, agricultural work is actually excluded from those laws. I wonder if there were labor abuses at all or if, because these were generally middle class, white women and children or families if that had sway on how the workers were treated and if they had safe/fair pay, housing, and working conditions.
Kopp kind of touches on this with sociologist Annie Marion MacLean’s account of hop picking in the Willamette Valley (51-53), talking briefly about the omissions from her work. “But there were also glaring omissions from her work. Most notably, MacLean failed to comment on issues of racial and ethnic diversity or poor working and living conditions. These oversights might have reflected an emphasis on women workers, or perhaps, an experience that lacked cultural diversity and social tension. The absence of these themes at least provides an avenue to investigate the multiple meanings of the harvest, which is the most remembered and celebrated aspect of the Willamette Valley hop industry” (53).
This section was probably the most interesting and frustrating to me. So many agricultural workers have been and continue to be taken advantage of because they have little to no social clout—farm owners and overseers felt that they would take advantage of their workers because no one really cared about what was going on behind the scenes. Was it because these were white women and children that their experience was different than that of most agricultural workers? What was it about hops? Why was it so celebratory and beloved by those that did it rather than typical monotonous harvest work? Were there any experiences or accounts with the hop harvest (either in the Willamette Valley or beyond) that were not positive?
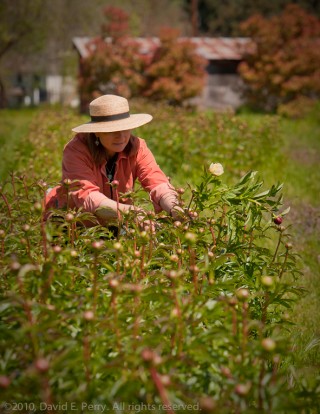
Monday Anika wasn’t feeling well on Monday so I was flying solo. The temperatures started out below freezing but ended up being in the seventies by the time I left at 3PM. Doug and I started off in the greenhouse, watering all of the seedlings. We also finished weeding bed 5 (the orphanage, where all of the misfit and mystery peonies were planted) of the peonies. Doug also found a random peony growing in the lawn by his house. Apparently, every year he finds a new couple of eyes popping up around there and every year he digs it up, thinking he has gotten the last of it, but they still seem to keep popping up. Either way, I got to see how a peony is lifted and what it looks like after being dug up and how to divide them. We squished our divisions into the orphanage bed.
Cerinthe transplants Photo: Allie Kuppenbender
Once it got into the mid-40s outside, we transitioned to preparing the bed where the Matthiola and Cerinthe were to planted. Doug had already removed the occultation tarp over the weekend to let the bed dry out and had Phalin power harrow the bonemeal in. We set up drip tape and put up the support for the row cover that will keep the plants warm and pest-free. Then we got to planting. We planted out two trays of Matthiola (one of each variety, Glory Lavender and Noble White) and two and a half trays of Cerinthe (Kiwi Blue variety). The bed is 75 feet long, and we planted three rows of each. The Matthiola spacing was 6-8 inches apart and the Cerinthe was a foot apart. The Matthiola’s roots were not as mature as the first two flats of Cerinthe which were nearly pot bound, meaning the Matthiola takes a little longer than the Cerinthe in terms of days to maturity in the greenhouse. It was also interesting to see the first two trays of the Cerinthe (seeded 2/5) which were just past prime for transplanting versus the half flat of Cerinthe we stuck into the bed (seeded 2/13) which were not quite ready to be put out into the field (roots not quite long enough, stems kind of flimsy).
The last task of the day was digging up thyme and dividing and transplanting it into the tiered planting area just behind the house. We also pulled back the occultation tarp we put onto the southeast field on our very first day of working at Thistlehook. We pulled it back just 10-15 feet to let the ground dry out so we can (hopefully as long as it doesn’t rain too much) transplant the rest of the Cerinthe and the Antirrhinum there on Wednesday.
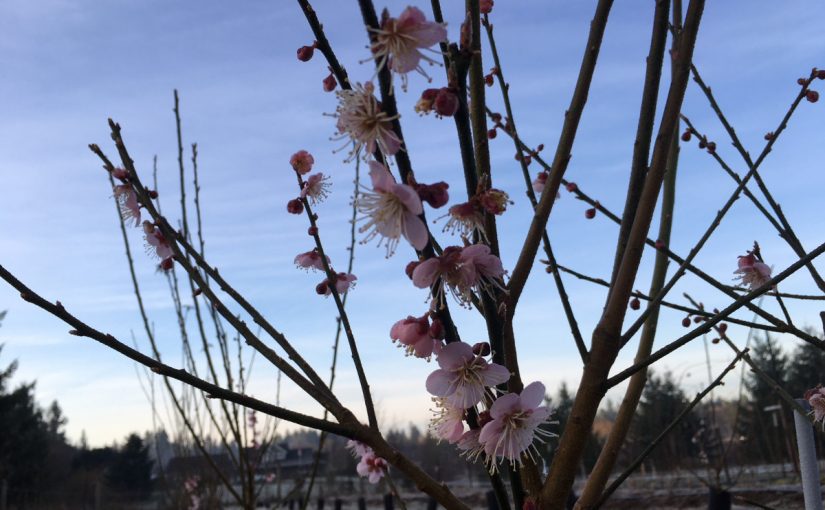
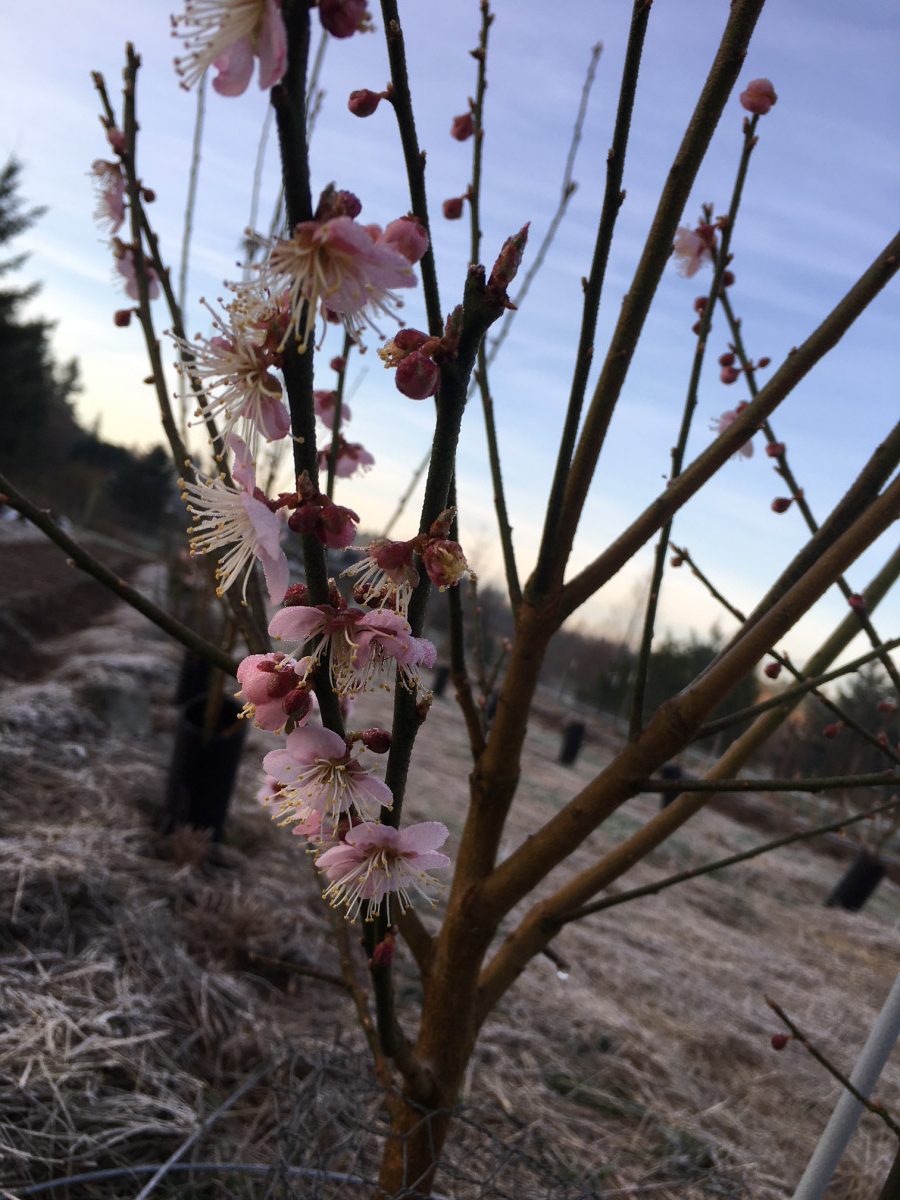
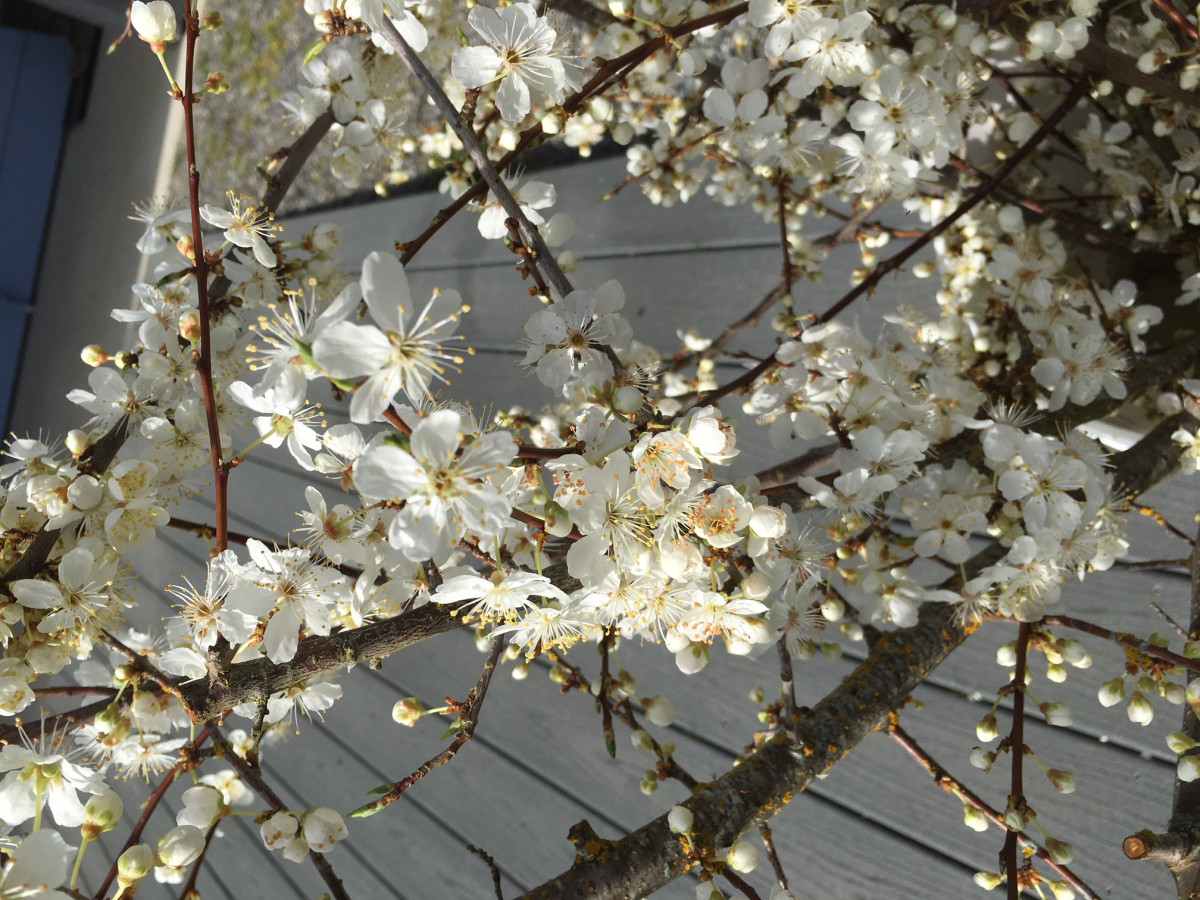
It was cool to see everything blooming; the Prunus mume was flowering and the plum branch leftovers that had been sitting outside since we cut them week 8 are all flowering.
Flowering mystery plum Photo: Allie Kuppenbender
WEDNESDAY
Our last day was filled with planting. We prepared a bed from the bed we covered on our first day working with Doug way back in January and planted out more Cerinthe and Matthiola, as well as some Antirrhinum. We also planted out all of the yarrow that had been potted up and growing in the greenhouse.
In the afternoon, we dug up, divided, and transplanted more thyme as well as all of the marigolds we had potted up (and threw down some marigold seed).
Monday was peony madness. We spent pretty much the whole day after our morning chores working on the peony beds. We fertilized beds 1 and 6 (filled with the earliest emergence and the most expensive plants) and weeded beds 4 and 5. All of the drip tape had to be set up for all of the peony beds, the asparagus, and the raspberries. Doug’s drip tape is so well organized, but does take up a lot of space. He has it laid down in straight rows so it’s easy to tell the length (just use a measuring tape!) and easy to pull out/doesn’t tangle or get kinked. In addition, we set up HortiNova netting for bed 1.
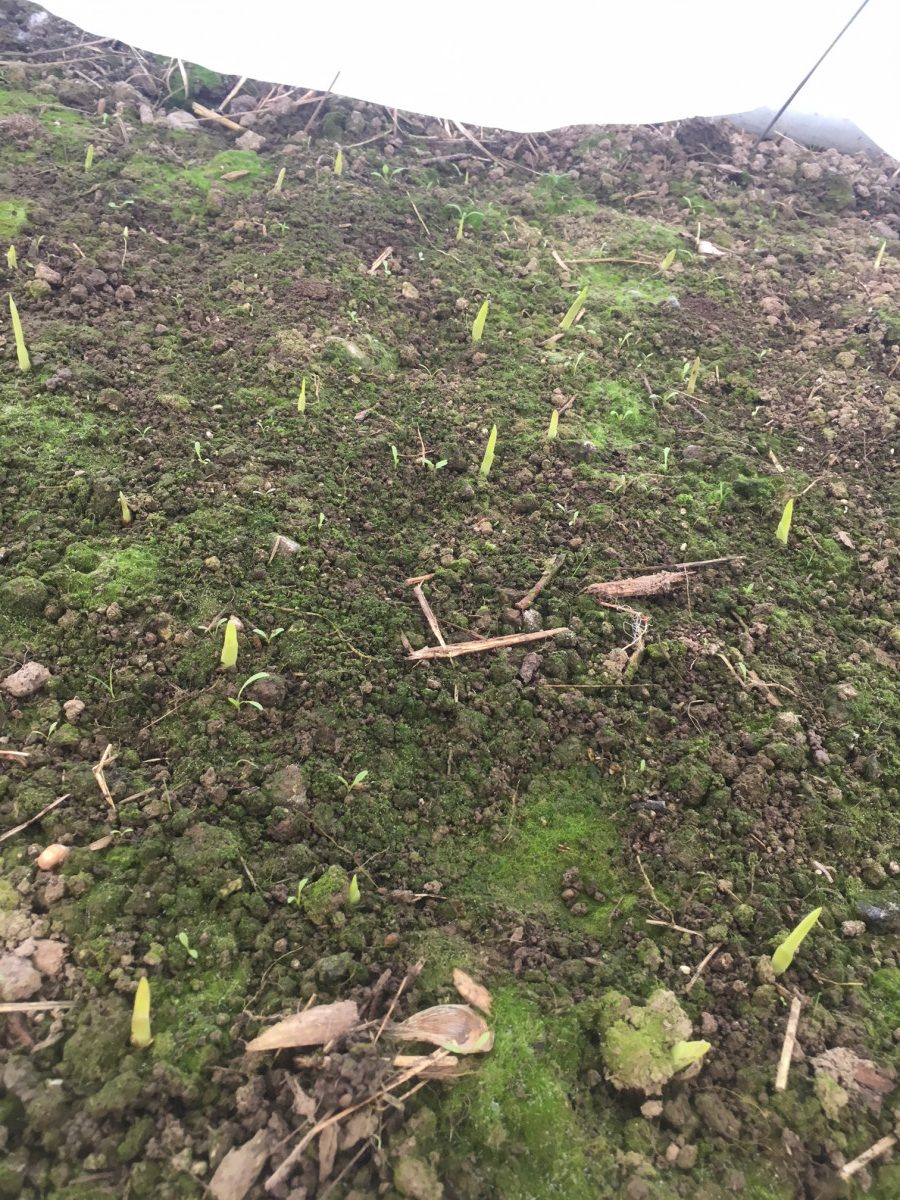
Side note, exciting news for Doug. He was awarded a grant to build a permanent greenhouse structure on his property! Also, the freesias that we planted week 5 have started to emerge.
Freesia emergance in the unheated greenhouse Photo: Allie Kuppenbender
WEDNESDAY
Cerinthe and Matthiola outside hardening off Photo: Allie Kuppenbender
Started out Wednesday in the greenhouse, watering and seeding. We bottom watered all of the bigger seedlings and misting those not yet germinated. We moved the Cerinthe and Matthiola outside to harden off. And then we seeded 2 flats of more Matthiola, one of each variety (Glory Lavender and Noble White).
We spent the rest of the morning and a good portion of the afternoon weeding beds 2 and 5 of the peonies. We also washed a ton of buckets and pots.
Propagating plants asexually vis divisions of crowns or through cuttings is super beneficial as it is a (usually) free alternative to getting more plants. If you have a mother plant, you can take lots of cuttings to get more “clones” of that plant. Especially if it is a really expensive or unusual variety, this is an extremely cost effective way to get more plants for yourself. The major disadvantage to this method of propagation is it takes a long time for especially cuttings but also certain crown divisions to establish itself—often a couple of years, which means its taking up space and not producing anything for you. There is also a pretty high rate of failure for cuttings success, which can be frustrating.
In terms of sexual reproduction versus asexual reproduction, sexual reproduction introduces genetic variance into the offspring; they have the genes of both parents which can be good or bad depending upon what you’re looking for. For example, it is good if the original plant wasn’t producing well in the climate you’re growing in as genetic variety may allow for better yields, etc. but it is bad if you can’t predict the outcome of the sexual reproduction (i.e. roses from seed versus from cuttings; you know what you’re getting from the cutting as it’s a clone of the mother plant but it’s a total crap shoot what you might get from seed due to the genetic variance of the two parent plants).
When taking a hard wood cutting, you should be taking the cutting in the winter when your plants are dormant. Use only last year’s growth not anything that’s woody. Cut into pieces with 2-3 leaf buds, with the bottom cut just below a bud (that is where the roots will come from). Dip in rooting hormone or willow water (if organic) and place into either pearlite, vermiculite, or some sand mixture. These mediums have very high pore space, which will allow the little roots to more easily push through the medium. Give them a good soak and water often, can use willow water en lieu of regular water if desired. Keep out of direct sunlight for a month.
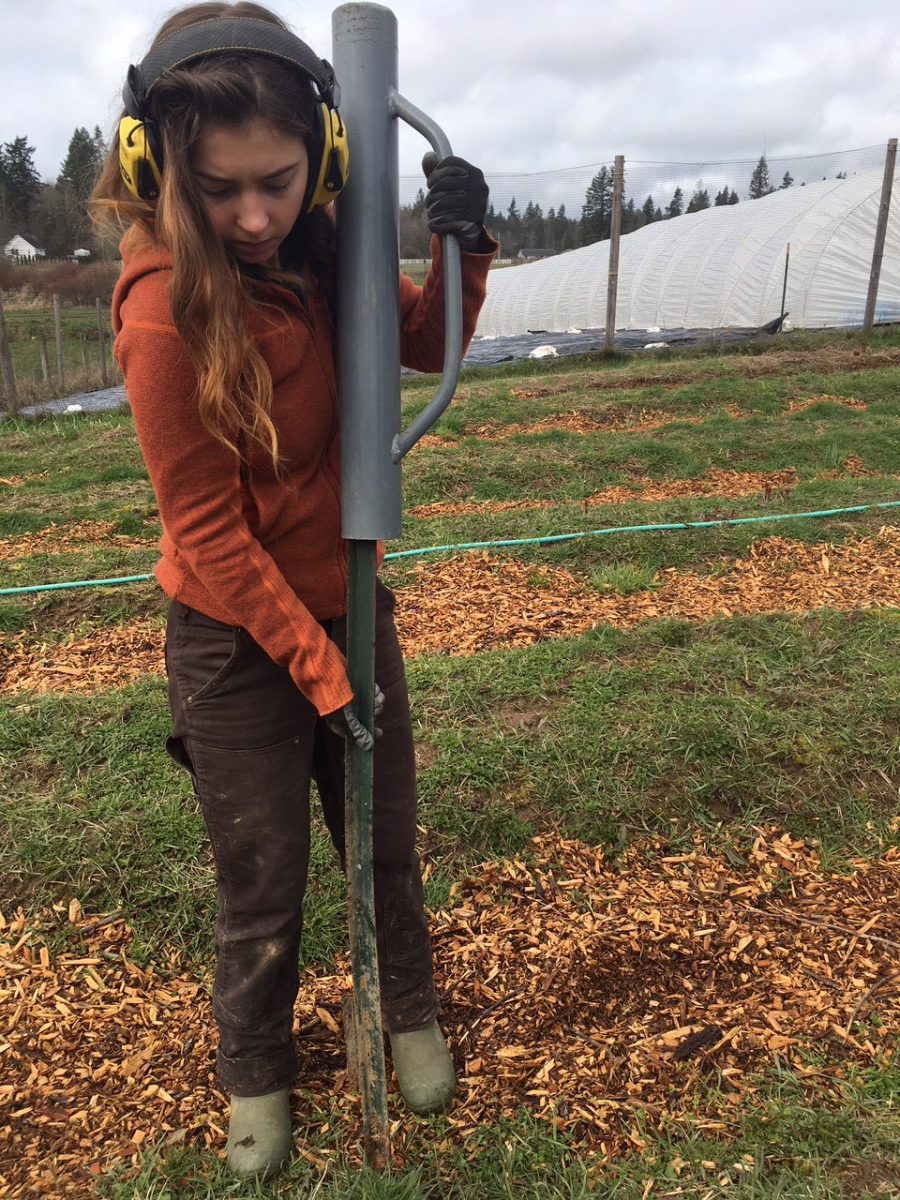
Anika pounding a T-post for the peony netting Photo: Allie Kuppenbender
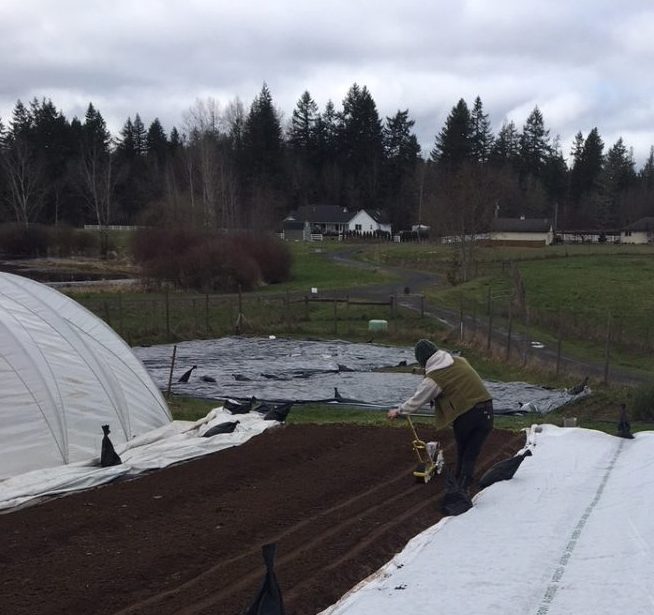
Monday started off with Anika and I adjusting conditions in the greenhouse. Doug has noticed there have been some issues with damping-off so we tried to address those. Damping-off is a fungal infection and usually caused by too damp of conditions for seedlings. We also potted up the marigolds.
We then put up to Hortinova netting for the earliest-to-bloom bed of peonies. This involved putting up two rows of T-posts spaced 4 feet apart and at 8 foot increments. The Hortinova will be used as a support for the peonies once they start growing and blooming.
Maya using the Jang Seeder to seed carrots Photo: Allie Kuppenbender
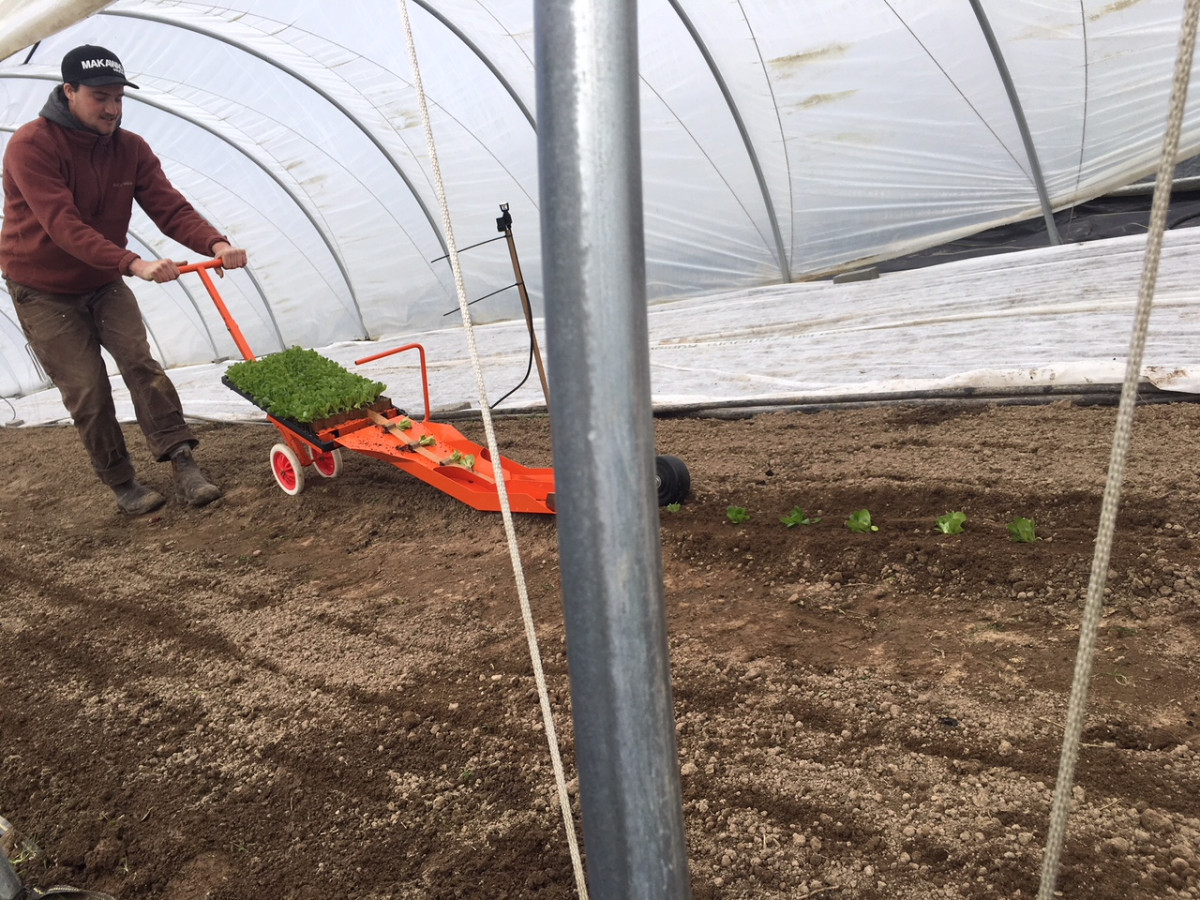
Maya and Phalin of Little Big Farm were also working on their site at Doug’s place on Monday so we were able to talk to them about what they’re up to right now and see some demonstrations of their equipment in action. Maya showed us their Jang seeder while she seeded some carrots and Phalin showed us their backpack flame weeder and paper pot transplanter on a row of lettuce. It was really cool to get to talk to them and see how efficient their operation is.
Phalin using the paper pot transplanter Photo: Allie Kuppenbender
In the afternoon, I finally got to put my research on air layering to action. Doug was given special containers specifically for air layering from his neighbor so we used those on the mystery plum, California Bay, and Prunus mume (Japanese Apricot). Hopefully this will work to procure rooting and subsequent multiplication of these plants. On the Prunus mume we actually tried three different types of layering. We did air layering, tip layering (where the tip of the branch is buried), and simple layering (where the branch is buried but the tip is sticking out from the ground).
We also planted out the asparagus that we divided last week. All of the newly divided crowns were squeezed into the already existing bed of asparagus on Thistlehook and the excess we got to take home with us!
WEDNESDAY
Right away Wednesday morning we were outside before the heavy rains hit. We covered our planting of cornus and Pieris japonica in the west pasture orchard with landscape fabric and set up the drip tape lines for these plants. We also covered Doug’s most expensive peonies with landscape fabric, but did not set up the drip tape lines for them as it was raining pretty heavily by then.
Pieris japonica covered by landscape fabric and with new drip tape Photo: Allie Kuppenbender
We then got to work with all of the watering in the greenhouse. All of the un-germinated/small seedlings were misted with a spray bottle, but the bigger seedlings were bottom watered. To do this, we set the 72 flat in a shallow pool of water for 4-6 minutes. It was really cool to visibly watch the water level go down as the seedlings suck up the water into their cells.
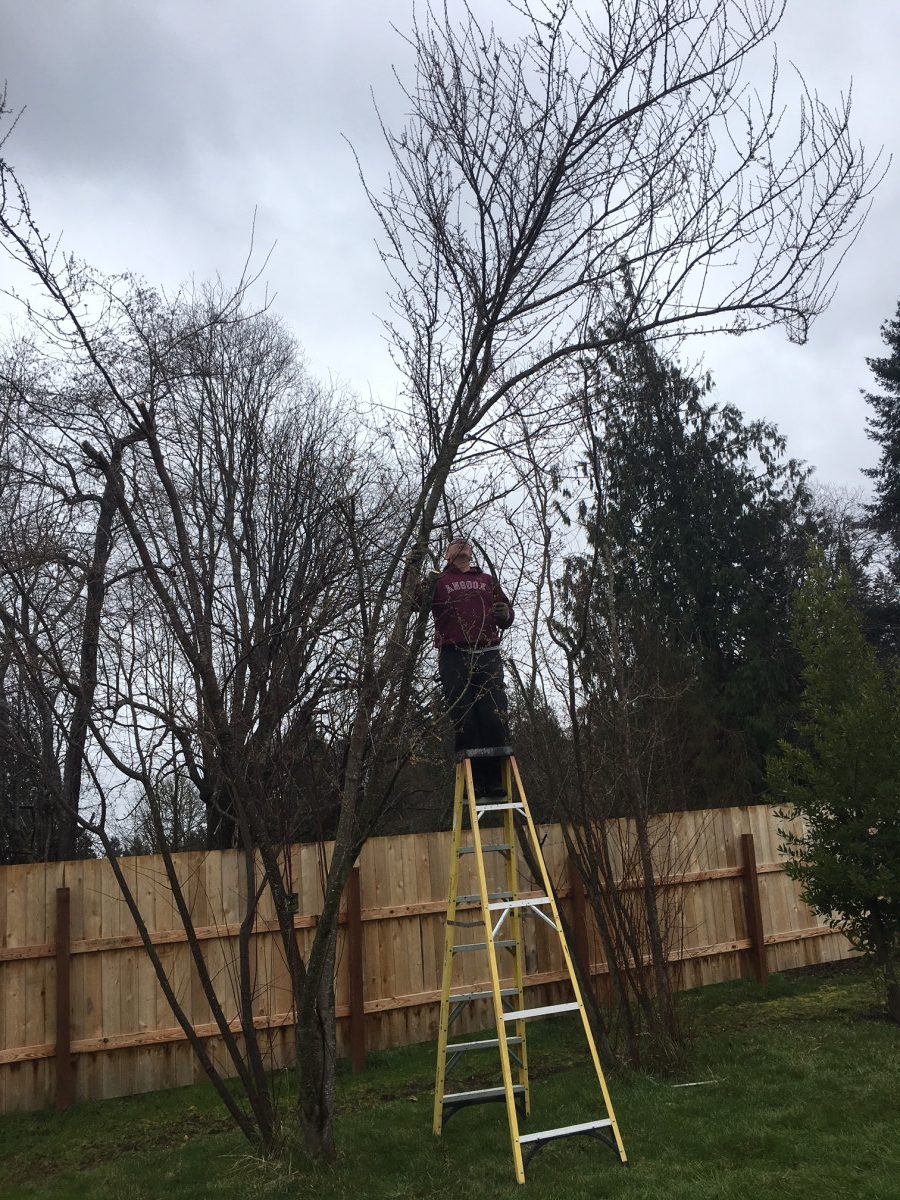
Meanwhile, Doug got to work cutting the mystery plum trees in the front orchard. After lunch, we bunched the plum branches for Doug to take to market. He is going to force them to break bud and begin flowering. To do this, he will put them in the greenhouse (60-70 degrees Fahrenheit) for 3-4 days or until some of the blossoms start to pop. Once he sees that, he will immediately put all of the bunches into his cooler and they should hold for up to a week in there. These branches are sold by the Seattle Wholesale Grower’s Market Co-Op at two lengths; 18-24 inches long “grower’s bunch” (roughly 10-15 branches) for $8/bunch and 36 inches long 10-stem bunch for $12/bunch). Anika and I spent the afternoon bunching these branches and seeding 4 72-flats of Cerinthe, Pride of Gibraltar.
Doug cutting from mystery plum Photo: Allie Kuppenbender
Saturday morning started out early at 7:30AM in Corvallis, OR with some breakfast and some networking. As a lot of the sessions overlapped and all looked really interesting and relevant (and because the conference was only $50 total), I forced my partner Tony to attend with me so we could collectively attend more of the breakout sessions and thus gain more of the knowledge. It was definitely good he came not only because of all of the sessions he attended but also because he was able to my future bosses Denis and Diane of Jello Mold. They were there because Diane was giving a talk during the Cash Flow session on crop insurance (which Tony attended). It was good to chat with them and have them meet Tony.
The official welcome session started at 8:50AM with a recognition that the conference was totally sold out, all 1000 seats filled. I also liked that they addressed why the conference cost was so low. As most attendees are just starting out with farming and considered “socially disadvantaged” or “low income,” the organizers of the conference put most of the cost on the sponsors. They really don’t want to gouge those that are just starting out on their journey or are actively working on the slow, local, sustainable food movement.
The keynote speaker of the welcome session was Javier Zamora of JSM Organics located in Aromas, CA. Originally from Mexico, Zamora started with an acre and a half in 2012 but now has 120 acres of fruits/vegetables and 200+ acres of pastureland for cattle. My biggest take-away was that, to be successful you have to diversify and you can’t do it alone. He really stressed having a really solid crew that works well together is derived from paying people what they are worth ($13-$19/hour). To do this, he said he must educate his customers so they know why his produce is priced the way is it and the real cost of their food. He talked about how multifaceted sustainability is. Businesses must focus on economic sustainability and social sustainability as well as environmental sustainability. Without economic sustainability (cash flow) and social sustainability (paying your employees what they’re worth), you won’t be in business long enough to actually be able to achieve environmental sustainability.
SESSION ONE: Profitable Flowers of the PNW
This is the fourth year the OSU Small Farms Conference has had a cut flower track at the conference, which is really cool because there are a ton of people growing or wanting to grow cut flowers in the PNW as it is a really good environment to grow a wide variety of flowers. Three flower farms were showcased during this session.
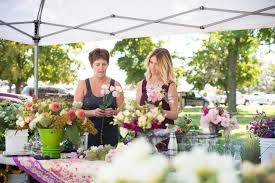
Mother Teresa Engbretson and daughter Katie Elliot making hand-tied bouquets at the Tri-Cities farmers market Source: When In Tri-Cities
The first farm was My Garden Overfloweth, located in Paterson, WA and was a mother-daughter duo doing most of the work. This will be their sixth season growing cut flowers; the mother and her husband farmed a very large swath of land (growing asparagus and potatoes and raising cattle and hay) for 39 years before he retired and she took over two acres near the house for her flowers. They are technically located in the desert (zone 7A) and thus water is their biggest worry (although not too big of a worry as their water rights access the Columbia River). They also are 30 miles from the closest town, so access to markets can also be a challenge.
In terms of avenues of revenue, they do weddings (DIY, a la carte, and full service), wholesale (someone picks them up from their farm and takes them to Portland), direct to florists (weekly run in a 200 mile radius), and one weekly farmers market in the grow season (make custom bouquets on site for market-goers). They also host two on-farm events (a Spring Fling and a Fall Fling) that allows their customers to visit the farm. They also just built a farm store that allows them to sell bouquets and other local wares on-site, as well as host wreath-making, succulent terrarium-making, and hanging basket design classes to name a few.
Their top five best selling crops are lisianthus, eucalyptus, roses, dahlias, and heirloom pumpkins.
The second farm was Le Mera Gardens, located in Talent, OR and also a mother-daughter duo. Originally started 25 years ago, Joan Thorndike started on 1 1/3 acre but is now on 12 acres. Through a partnership with Fry Family Farm also located in that area, they sell their flowers wholesale, to DIY brides at the Fry Family Farm store, and at 5 local farmers markets. The daughter uses her mother’s flowers in her own floral design business (JackLilly Floral) to make floral design products as well as full service weddings.
As Portland is located 4 and a half hours away and San Francisco is 5 hours away, is was absolutely crucial that they be able to sell locally, which they do! In terms of success, the key factors for them are: recognize beneficial partnerships, do what you love, know your market (i.e. what will sell, what won’t), educate your market, and produce a consistently excellent product (study your crops: what will make each one last as long as possible?). In terms of what makes a good crop, some things they said to consider: grows well on your land, suits your market, has multiple useful stages, long growing season, and doesn’t ship well (people can’t get it from anywhere else).
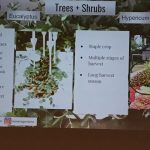
In terms of their successful crops, some of them include eucalyptus, hypericum, delphinium, lisianthus, sunflowers, and gypsy dianthus. Another interesting tidbit shared was to plant color varieties according to season as people want/expect to see certain colors in spring versus summer versus fall.
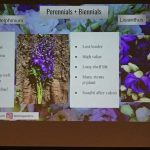
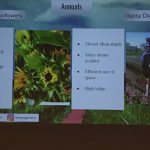
Slide (3 of 5) from Le Mera Garden’s presentation
Photo: Allie Kuppenbender
Slide (4 of 5) from Le Mera Garden’s presentation
Photo: Allie Kuppenbender
Slide (5 of 5) from Le Mera Garden’s presentation
Photo: Allie Kuppenbender
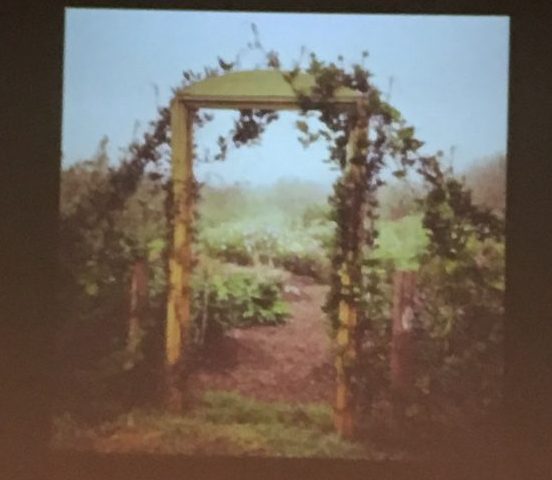
The third farm was Field to Heart, located in Snohomish, WA. Run by Danielle Swan with the help of her husband Valiant Poole, they started on 1/8 of an acre at first from their midwife who owns and operates Raising Cane Ranch (a cane berry and highland cattle farm). On that 1/8 of an acre, they started a U-Cut flower patch. The goal of this was to get people out on a farm and experiencing local flowers (something physical/tangible). To do this, the immediately made a killer entryway to ensure people felt welcomed and invited into their U-Cut space. This is now their fifth season growing flowers.
Field to Heart’s entryway at their U-Cut patch Photo: Allie Kuppenbender
Their biggest problems thus far has been too much water/flooding. Being located at the bottom of a river valley and about 8 feet elevation above sea level, they flood pretty much every winter.
They now have two locations and are growing one patch for U-Cut and the other patch for wholesale (Seattle Wholesale Growers Market Co-Op!!!) as well as DIY brides, a bouquet CSA, edible flowers for restaurants in Seattle, and for wreath parties/flower socials. Two crops they were incredibly excited about this past year were Chrysanthemums and Marigolds.
This session showcased two farms that have two very different but successful marketing strategies. Both are located in desert regions outside of the PNW.
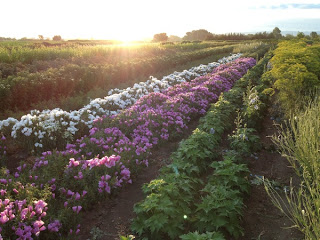
Bindweed Farm, East Field at Sunrise Photo: Bindweed Farm
The first farm was Bindweed Farm, located in Blackfoot, ID, located in between Sun Valley, ID and Jackson Hole, WY. Owned by couple Ralph Thurston and Jerriann Sabin, they have been in business for 25 years. The really unique thing about their location and market is that, as they are in the desert there really isn’t anyone else growing flowers in their area but these two towns have a lot of high-end resorts and vacation destinations. Their grow season is March through September, but their selling season is primarily Memorial Day to Labor Day and really 50% of their sales occur in July and August. They do have some season extension via high tunnels, with tulips and other bulbs for Easter and Mother’s Day. They grow over 90 varieties, focusing mainly on unique things and things that don’t ship well. They sell almost exclusively directly to florists, primarily for destination weddings and weekly resort floral arrangements.
In terms of things to focus on, Jerriann broke down the core components to success for her. These were pricing (make it easy for the customer; focus on shopping rather than buying), communication (two different ways of getting product lists out to accommodate various commutation styles of customers, website archives past season’s crops), and service (24/7 access, courier delivery service on days they don’t deliver). All of these combined with their quality blooms ensure a great product and service, meaning they can charge top dollar because customers know they can always count on them.
The second farm was Whipstone Farm, located in Paulden, AZ. It was really funny that this was the showcased farm in this session as they were also showcased in the Floret Online Workshop’s Module One as a model flower farm business. Owned by Corey and Shanti Rade, Whipstone started 20 years ago on 6 acres as a small vegetable farm. Over the year, they expanded to 18 acres at two different sites. About 10 years ago, Shanti started experimenting with flowers and they’ve been a part of their business ever since. She grows on roughly three acres and has all sorts of varieties of flower crops going. They sell the flowers at three farmers markets, as bouquet add-ons to their vegetable CSA, weddings (mostly DIY, but some full service), and some wholesale to restaurants/florists. As they are really the only ones growing flowers in their area, there is zero competition at the farmers markets in terms of flowers. There is also really interesting crossover being a vegetable and flower farm. Some of this includes edible flowers, bolted/flowering herbs, and vegetable/fruit vines/branches in arrangements.
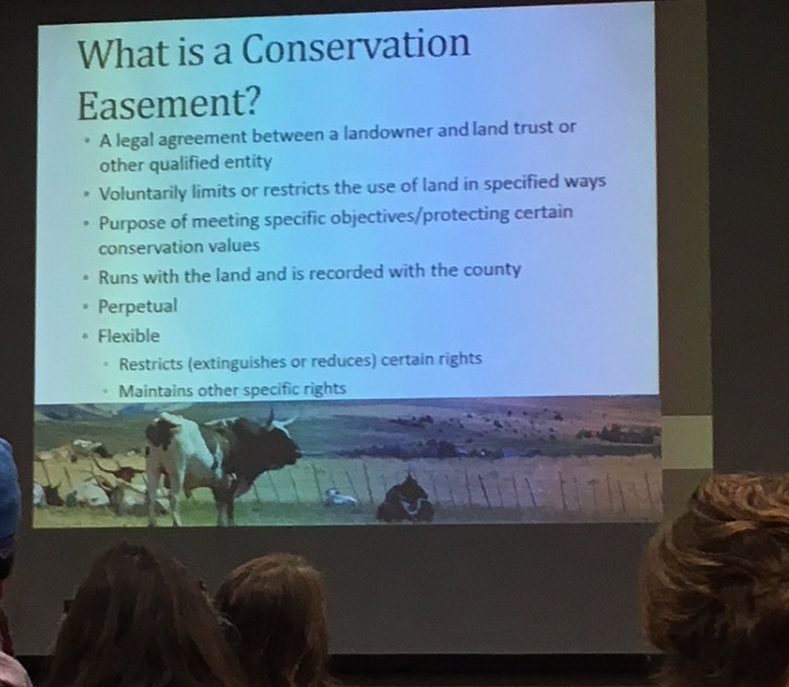
SESSION THREE: Accessing & Preserving Farm Land, Models from Oregon and Around the US
This session was predominantly about land trusts and conservation easements. The speakers were from two different land trusts, Greenbelt Land Trust (based in the lower Willamette River Valley) and PCC Land Trust (based in the Puget Sound area). A conservation easement basically is a stipulation on the land that limits some of the rights of the land owner (i.e. development rights, subdividing the lot, buffer zones, habitat restoration, etc.) to ensure the land remains agricultural land. While this lowers the value of the land, that difference is paid for by a land trust (generally a non-profit or governmental entity). Conservation easements allow young farmers to access land because it makes the cost of purchasing land a lot lower.
These two speakers went over the basics of land trusts and conservation easements, as well as why they are so important in keeping agricultural land in agriculture. According to statistics PCC Land Trust shared with us, “in the last 4 years, the average price per acre of Washington farmland has increased by 47%, 71% of retiring farmers have not identified a successor, and some Washington counties have lost over 70% of its farmland since 1950.” They also gave examples of farmers they have worked with that put conservation easements on their land, which was probably to most helpful part of their presentation. It was kind of weird though that both of these land trust entities prioritized large farms (100+ acres) as this was a small farms conference.
From Greenbelt Land Trust slide 1/1)
All in all, I had a really good time at OSU’s Small Farm Conference and learned a ton. Especially considering it was only $50 to attend, I really feel I got a lot of bang for my buck (the food for breakfast and lunch alone made it worthwhile). I definitely want to go back next year.
Letters to a Young Farmer, Stone Barns Center for Food & Agriculture
Dear Mrs. Barbara Kingsolver,
“Maybe you’ve even had to defend that choice already against family or academic advisors that don’t see the future in farming” (15).
I get this a lot from my mom especially, but everyone seems to have their two cents about me wanting to become a farmer. My mom left the family farm to find something better for herself, so I can understand where she is coming from. She grew up on a cattle and grain farm from in a tiny town—about 200 people total—in southern North Dakota.
It is ironic, however, that people seem to believe that there is no future in farming as farming is the past, present, and future. Without it, no one eats. It may not be glamorous or even easy most days, but we all need food. Farming and people willing to farm are absolutely essential to a future of any kind.
“Traditionally, farms passed down through generations, but at this point in history, that’s not likely to be your case. It will be up to you to find your farming family, people who can teach you how to make smart choices and forgive your own mistakes. You’ll meet long-timers at conferences, and, if you’re lucky, in your own neighborhood. Even if some of these old-schoolers have approaches that strike you as outmoded, they stayed on the land when everyone else was leaving, and for this they deserve respect” (16).
This quote struck a chord, as it is two-fold in many ways for me. I come from a farming background and I feel conflicted about it for a lot of reasons. On one hand, these are some of the most resilient and resourceful people I know, willing to help one another out on a whim’s notice. Further, they have a deep rootedness to the land they live and farm on. Yet, on the other, they utilize monocropping, pesticides, and massive machinery—things I just don’t think should be incorporated into our food system. But I really like you saying “Even if some of these old-schoolers have approaches that strike you as outmoded, they stayed on the land when everyone else was leaving, and for this they deserve respect” (16) because it is so true. They survived the 1980s, with massive farm foreclosures and farmer suicides, and they persevered. Their practices may not be what I think of as ideal, but they’ve managed to stay.
Further, I really wanted to get into farming because I come from a long line of farmers, but those considered the farmers were men. My male cousins, my uncles, my grandpa, my great-grandpa. Even though the female members of my family have always had gardens, they have never really been considered farmers the way the men have been. Instead they are seen as caretakers of children/elders or helpers of their husbands, growing food on the side for their families to eat while the crops the men grew went to market. I remember as a kid helping out in my grandma’s garden, growing tomatoes, watermelons, herbs, sweet corn, cucumbers, and flowers of every kind. While my grandpa was growing GMO corn using huge John Deere tractors, combines, and pesticide-spraying airplanes, she grew fairly low-tech and organically.
I got into farming because I really want to be able to pass down that familial legacy to my children and want to be able to learn more about my roots to the land in order to eventually go on to be more self-sufficient the way my female relatives have allowed my family to be for generations. It’s the women gardeners of my family that inspired me to want to farm.
Module 6 marked the end on the Floret Online Workshop and boy did I learn a lot. All in all, I’m glad I took part in this online workshop and feel like it was worth my time and money. I think if I wouldn’t have gotten a partial scholarship it might not have been as a lot of the information was things I learned in the Practices of Organic Farming program at The Evergreen State College. But is it really nice that I have access to all of these videos forever, as I’m sure I will need future reference on how to do things like divide dahlia tubers and build a caterpillar tunnel at some point.
Additionally, I did love all of the seeding and succession planting resources attached with module 2. This included an extensive excel spreadsheet template that does basically all of the math to plan out when to seed and transplant into the field for you. That will definitely be a great resource for me in the future. I also loved the random little snippets in there that I just had never heard of or thought about before. Some of these included harvesting tulips bulb and all, propagating dahlias from cuttings, and high intensity planting techniques.