MONDAY
It was 30 degrees Fahrenheit when we arrived at 8AM Monday morning. The entire farm was iced over as we started with our chores. Definitely wanted to linger in the greenhouse as it was more like 70 degrees Fahrenheit in there. While pulling staples from cardboard is a little mindless, it was a welcome task after chores were complete on such a cold morning.
We also seeded a bunch yesterday—14 flats total! All of the flats seeded in the past were looking really happy in the greenhouse. It’s really exciting to see all of the things you seeded and have been taking care of thriving.
What we seeded:
- two 72s—Cerinthe, Kiwi Blue*
- two 72s—Cerinthe, Pride of Gibraltar*
- 72—Matthiola (Stock), Noble White
- 72—Matthiola (Stock), Glory Lavender
- two 72s—Antirrhinum (Snapdragon), Chantilly Bronze
- two 72s—Agastache, Pink Pop
- two 72s—Marigold
- two 72s—Dill
*We are doing a trial on the Cerinthe. Half the seed was soaked before being planted, half planted dry. One tray of each variety was covered and the other was uncovered. This is to see what germinates when.
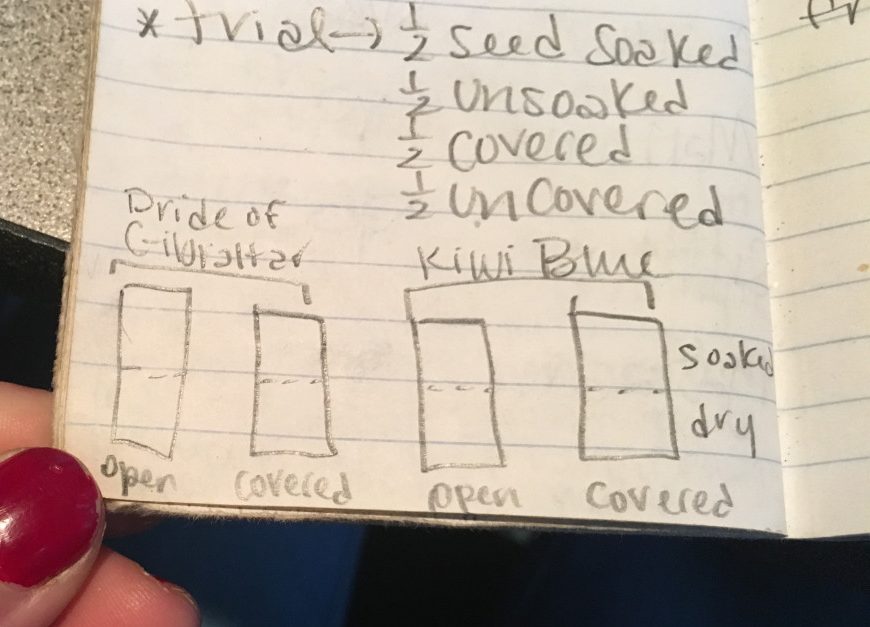
Photo: Allie Kuppenbender
In the afternoon, we covered part of the west pasture with an occultation tarp. To ensure the tarp wouldn’t be taken away by the wind or snow on the radar for Tuesday and Wednesday, we dug a trench around the tarp and buried the tarp in the trench.
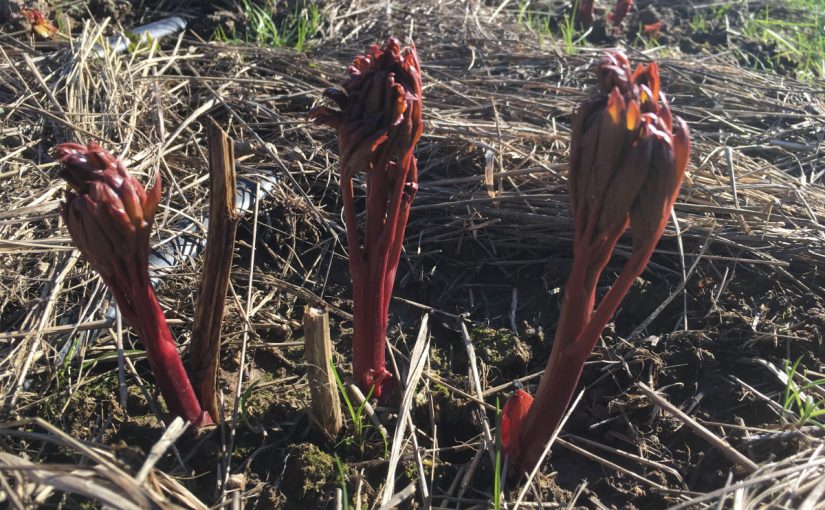
We also pulled the row cover off of the peonies as it wasn’t really doing the job of weed suppression very well. Either on Wednesday or sometime next week we will be recovering with better landscape fabric or solar mulch and netting the earlier-to-bloom varieties so they will have support when they start getting bigger.
Our final task Monday was to wash and divide asparagus crowns. Doug got these from his neighbor, who no longer wanted them because they are all female plants. Asparagus are dioecious meaning they have separate male and female plants. The male plants are what produce the majority of the spears, what commercial growers sell thus making male plants more prized if you are trying to grow apparatus for eating. Doug, however, really wants the female plants because they produce berries on their fronds which are desirable for florists. To divide asparagus, dig up, wash, and tease apart the crowns to softball-sized clumps (make sure there is a crown part in the clump and it’s not just all roots). Anything that can’t be teased apart, divide using a spade, knife, or screwdriver. They can be stored for a fairly long time (their roots hold a lot of water), just keep them in slightly dampened peat moss and plant in early spring.
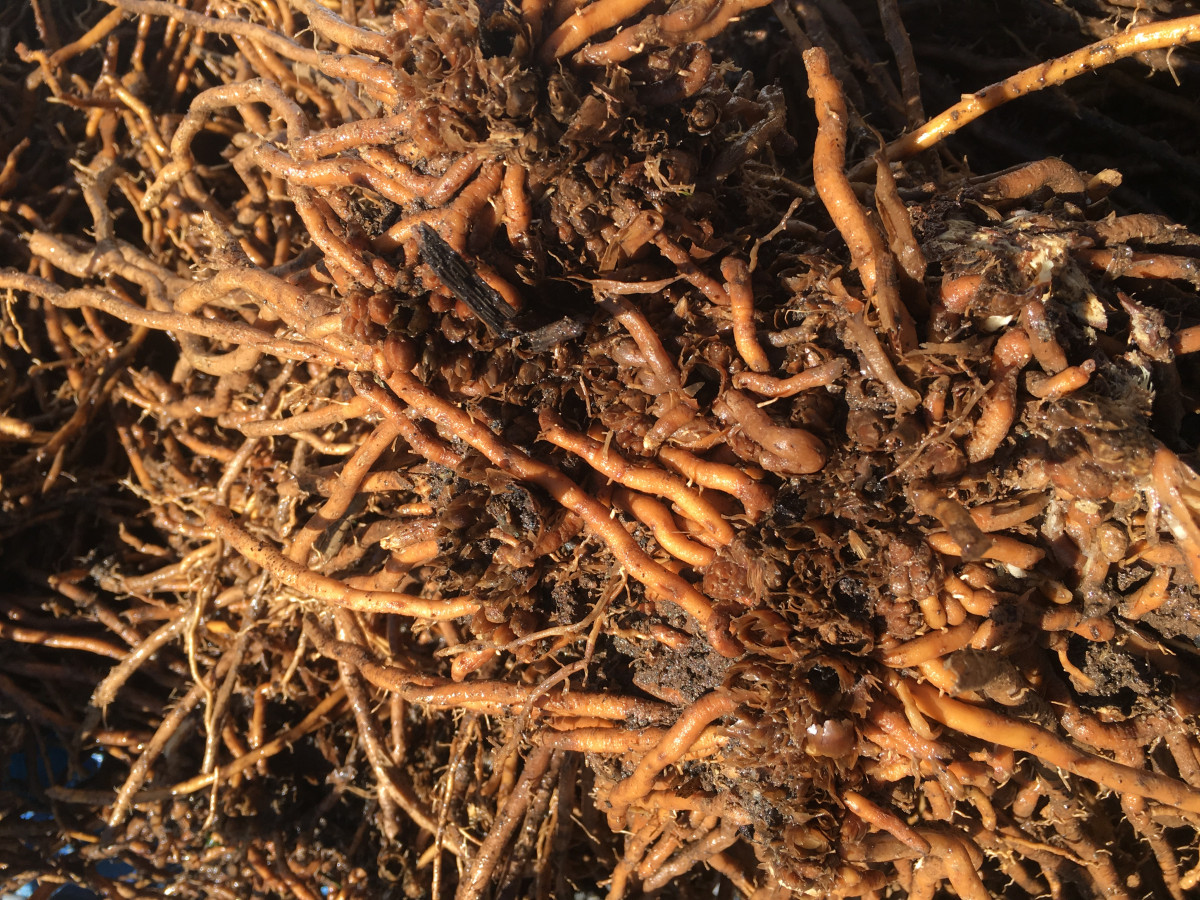
Photo: Allie Kuppenbender
WEDNESDAY
SNOW DAY!!!! Used the day to work on self-evaluation for Doug and research on air-layering.
Here’s a little of what I learned about air layering:
According to the Royal Horticultural Society, “Air layering is a method of propagating new trees and shrubs from stems still attached to the parent plant. The stem is wrapped with damp moss to encourage roots to form.” Plants that don’t propagate well from cuttings and generally don’t have the shoots that make mound layering possible would benefit from air layering. Some of these species include magnolia, hazel, Cotinus, flowering Cornus species, acers, camellias, Chaenomeles, daphnes, Ficus (fig), Forsythia, Hamamelis (witch hazel), jasmine, Philodendron, rhododendron and azalea, lilac, viburnums, holly, roses, boxwood, wax myrtle, and honeysuckle (Grant and Royal Horticultural Society).
Photo: NC State Extension
How to Air Layer (from Royal Horticultural Society):
- Choose a one- to two-year-old stem that is straight, healthy and vigorous. Trim off side shoots and leaves from a 30cm (1ft) section. Do not leave any snags
- Wound the stem, making a 2.5cm (1in) cut through a leaf bud, angled towards the shoot tip. This will create a tongue that can be lifted
- Apply hormone rooting compound to the surface of the wound
- Pack a small amount of moist sphagnum moss under the tongue of the wound
- Wrap the wounded stem section loosely with black plastic*, sealing it at one end with weather-proof adhesive tape
- Pack the wrapping sleeve with moist sphagnum moss, to a thickness of 7.5-10cm (3-4in)
- Seal the other end of the wrapping sleeve with weather-proof adhesive tape
- Leave the wrapping in place for up to a year. Open and check it occasionally for signs of rooting
- When strong new roots are visible through the moss, remove the plastic sleeve. Cut through the stem just below the rooted section
- Pot up the rooted stem in potting compost suitable for the plant in question. Do not attempt to remove the moss from the roots. Water, label and grow on until large enough to plant outside
*Use black plastic as clear will allow light to seep through, encouraging algae growth because of the damp conditions inside the wrapped sleeve.
SOURCES:
What is Air Layering: Learn About Air Layering Plants by Bonnie L. Grant