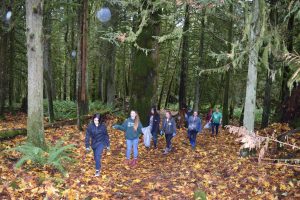
RAD Facilities partnered with RES Life last Friday to organize a woods cleanup event through the trails of the North campus woods. You can thank these students, RAs, and student workers for keeping our forest clean!
Archive for the 'Uncategorized' Category
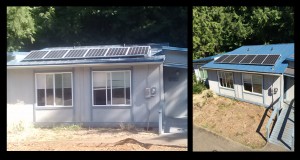
Interested in solar? We have 18 photovoltaic solar panels on top of MOD 302. This November, they’ve produced enough electricity to completely power the refrigerator every day of the month.
Check out how they are holding up in all of this grey here:
https://enlighten.enphaseenergy.com/pv/public_systems/ggfa523388?preview=1
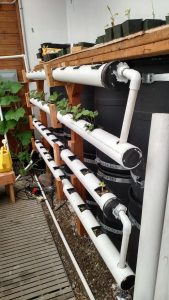
We have recently put in a horizontal nutrient addition to our aquaponics setup! Water is pumped from our fish tank to the top pipe which then constantly flows through through the underlying pipes and roots of our plants thanks to gravity. We’ve already noticed flowering in a couple of our strawberry plants within a week of adding them to the system. This setup requires even less water than our original (and still existing) media bed system.
Written by Cecelia Verde with research done by Sarah Scott
Next week we are headed over to Cedar Creek Corrections Center to pick up tilapia that they have been growing in their aquaponics system. The prison has a large and successful system that is fully maintained by inmates. We will be fortunate enough to tour the facility, get some tips and see how an efficient aquaponics system operates.
We are particularly excited to be getting tilapia and thoroughly believe they are the right fish for our greenhouse. Tilapias are naturally rugged fish; resistant to disease and parasites, temperature changes, high levels of ammonia and low levels of oxygen.
In an aquaponics system all of these needs should generally be met with little effort. Although fish naturally produce ammonia through their waste, bacteria and the growing plants convert and absorb it respectively. Oxygen is provided during the water’s circulation between the tank and bed. On the off chance that something does come up, tilapia’s strength will give us ample time to address the situation without putting their lives in danger.
We are planning on eating the tilapia! These fish are also super cool because their meat is naturally bland. This gives the caretaker the freedom to adjust the flavor via the fish’s diet and water quality. Giving tilapia a variety of food and potable water adds to their flavor complexity and makes for a tastier fish. We plan on giving the tilapia a high quality food designed especially for them and duck weed. We are adjusting the water quality by making sure what we are adding to the tank is dechlorinated (which involves letting the water sit out for about 12 hours) and something we would all be willing to drink.
In order to eat the tilapia we have to make sure we have enough to keep the system running. This will be done through strategic breeding in separate tanks. Tilapia can spawn every 4-6 weeks and fry, like adults, are relatively easy to care for. The fry will mature quickly and will be ready to eat in only 7 months! Once we have replacement fish we will be able to eat the present adults.
Please feel free to come into the Mod Shop, ask for a tour and meet our new fish!
For more info on tilapia farming check this out:
https://lakewaytilapia.com/How_To_Raise_Tilapia.php
For more info on Cedar Creek Corrections Center:
http://www.doc.wa.gov/corrections/incarceration/prisons/cccc.htm
By Joe Anderson, RAD Sustainability Lead Predecessor.
RAD Sustainability worked on inoculating cardboard with oyster mushroom spawn. Cardboard is a great medium to establish a mushroom colony with because it’s flat and easy to transport. Once it’s completely covered with mycelium, you just slap it down where you want mushrooms to grow, give them some substrate to digest, and they are ready to go.
We used pearl oyster sawdust spawn from Fungi Perfecti to make our cardboard colonies. First, we soaked our cardboard overnight to make it soft and moist, just how our mushrooms like it. Then we mixed up the sawdust spawn with water and shredded it up by hand as much as possible.
We laid down a piece of cardboard and peeled off the first layer and set it aside, revealing the corrugations. Next, we threw on a few heaping handfuls of oyster spawn and worked it into the grooves. Finally, we placed the first cardboard layer back over the inoculated cardboard and repeated the process, stacking up the cardboard spawn layer by layer.
And that’s all there is to it! It takes about three weeks for oysters to colonize the cardboard. When they’re ready, we’re going to sandwich them in towers of straw which they’ll consume in a few months before fruiting. Until then, we have to keep them moist and watch out for mold or any other contamination. I’ve been checking on our cardboard spawn each morning, and I can already see them starting to take hold!
By Alana Mousseau, Sustainability House Resident.
The Sustainability circus for the Sustainability house was a huge success! The event was collaborated between RAD Facilities, RAs and the community, and held on the soccer fields just outside of the HCC. On April 20th from 1pm to 5:30, there were games, events guest speakers, and even a raffle drawing for participants.
For the sustainability house specifically, between the five of us, we worked with two different booths. Jenna ran the mushroom log inoculation booth, alongside the Olympia Mycelia Network while Cassandra, Ashley and Alana taught people about pollinator flowers and helped people make seed bombs. There was a variety of people set up with stands and booths teaching about Shellfish Club, Clean Energy Committee, Yoga, WASHPIRG Solar Campaign, DIY cleaning supplies and soaps, and more. People were encouraged to learn about products and supplies all while having the experience to do hands on work, and keep the projects they made.
Beside the aquaponics greenhouse there is a small shed with a solar tube penetrating the southernmost wall. This solar tube has a dome on the end of the tube outside of the shed. This dome takes in light from all directions and pushes it down the tube. Right below the dome, the inside of the tube is coated with panda film and below the panda film is a six inch aluminum tube. We are collecting data on the light intensity that it being reflected out of the end of the solar tube using a Hobo Pendant that captures light intensity in footcandles. We are also collecting light intensity data outside of the shed just above the solar tube’s dome. Our aim for this solar tube is to find the best way to direct sunlight, so we can give the bottom bed of plants in the aquaponics greenhouse access to more solar radiation. The alternative to this method is buying grow lights and setting them up above the plants. The solar tube method ultimately saves energy as the solar tube requires no energy and just redirects sunlight, but the grow lights require energy to run.
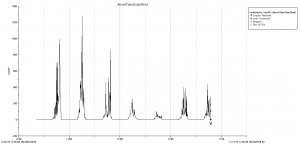
When we first installed the tube, we were getting very low readings for light intensity. We fashioned a twelve inch tube that was coated with panda film. We attached this new tube to the end of the solar tube inside of the shed and, for a while, our readings for light intensity were much greater than without this tube extension. On the 17th of April 2015, our light intensity readings decreased significantly after the twelve inch tube extension was applied. You can see this trend in the graph below.
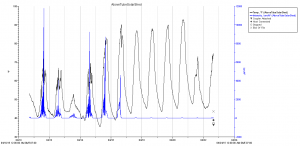
This is light and temperature data collected from the end of the solar tube, where we’re hoping to push all the solar radiation.
In this graph, the blue line represent light intensity, which is calculated in footcandles (luminosity / feet^2). The black line is temperature. (Later in this blog post you’ll see we stopped recording temperature for the sake of using less space on our hobomonitor device. ) In an attempt to fix the drop in production and to increase the projected luminosity altogether, on May 6th we fashioned a six inch tube out of aluminum with no panda film lining. We’d learned about the fact that telescope mirrors are made of aluminum, so we wanted to see if it would reflect more solar radiation than the panda film. The graph below shows the light intensity at the end of the solar tube before and after attaching the new aluminum tube extension.
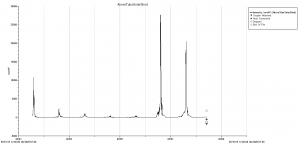
You can see that on May 6th, our light intensity readings increase drastically. May 6th was the day that we installed the new six inch aluminum extension to the tube, we can see that it seems to have increased our light intensity readings on both the 6th and the 7th. The plants we intend to grow in the bottom part of the greenhouse bed need a luminosity of about 1,000 footcandles, but our solar tube was giving us an average of about two-hundred. We uninstalled the solar tube and replaced it with a professionally made solar tube in hopes of increasing our luminosity readings. After collecting data on this new tube for two weeks, we’re seeing a small increase in luminosity. We’re hitting our mark of 1,000 footcandles, but only on some very sunny days and we only hit this mark for about 10 minutes each of these days. Although showing improvement, these readings are still too low to be usable for a growing space. The below graph shows the data we collected over the past two weeks.
From this graph you can see that our luminosity spikes at about 1,000, but it only does so for a few minutes at a time. The rest of the time the luminosity readings range between zero and 350. The grow bed we’re trying to illuminate only has luminosity problems during the spring and summer seasons. During these seasons the sun is much higher than fall and winter and the top bed is shading the entirety of the bottom bed. During the fall and winter seasons, the sun is much lower in the sky and generates a good amount of light in the bottom bed, ranging between about 1,000 to 2,000. Since most of our dips in production are on cloudy days and on really sunny days we’re getting a decent amount of solar radiation, the new solar tube should be able to provide us with the luminosity we need during the summer and spring, but during the winter and fall the sun’s angle will provide the luminosity for us.
Our next step is to install our solar tube into the side of the greenhouse and then plant some plants and see how well they grow. If these plants grow well, we’ll install a few more solar tubes to illuminate the remaining dark parts of the bed and increase our greenhouse’s food production.
Why did our solar panels suck sometimes in fall and winter of 2014?
Published December 2, 2015 Uncategorized 0 CommentsAs you may know from our earlier posts, we’re generating electricity for mod 302 using eighteen 275W solar panels. After noticing significant production dips in our solar panels we did some investigation and learned some interesting information about maintaining solar panels, when they’re ideal for electricity generation, and where they stand in regards to other resources. This is the report on these production dips.
Abstract:
The Solar panels on Mod 302 were experiencing dips in production every day from around 10:45am to 11:30am and 12:45pm to 2:00pm. We believe these production dips were being caused by two tall trees to the south of the building. At the before mentioned times, the sun was hiding behind these trees, thus shading the solar panels and reducing their electricity production.
Analysis:
These dips in production were caused by two different trees. One of these trees was almost directly south of the solar panels and the other tree is generally south east of the solar panels. The sun dips behind the southeastern tree at 10:45am and is fully visible again by 11:45am, the sun then dipped behind the southern tree at about 12:45pm and was fully visible again by 2:00pm. In January of 2014 the 302 solar panels showed an average energy production level of 1.28 kWh. During the dips in production we saw power production decrease to as low as .003 kWh (3 Wh) with a high of about .133 kWh (133 Wh). In February, the 302 solar panels showed an average production level of 1.29 kWh. During the dips in February, we saw a low of about .013 kWh (13 Wh) and a high of about .116 kWh (116 Wh). In February the lowest dip is not as drastic as the lowest dip in January, with a small difference of .01 kWh (10 Wh).
Something important to note about this is the fact that the sun’s altitude angle changes drastically as the seasons change. In the winter you may find the sun at an angle of 20 degrees, but during the spring and summer the sun can reach a maximum of 90. So these production dips are only taking affect in the fall and winter, but during the spring and summer the sun rises high above both trees.
Relevance:
With the growing threats that are being caused by climate change, there is an also growing need for renewable resources that emit low amounts of carbon. Solar panels are one of many ways to attempt to satisfy this need for renewables. Solar panels emit significantly less carbon per kWh than electricity pulled from the grid, exactly how much depends on where you are and the systems used to generate grid electricity. When planning urban environments, if you’re going to use solar radiation as a primary resource, you need to design the urban system to have access to this radiation. This may mean slanted roofs facing the incoming solar radiation, placing windows specifically to capture passive solar heat, or removing trees to make way for incoming solar radiation. Planning urban environments, or altering established ones, to be geared towards using solar radiation is known as “solar zoning.” If we want to build communities that are environmentally friendly and sustainable, we need to plan these communities and their locations to have maximum access to the sun’s incoming energy.
I will make another blog post soon explaining how we dealt with this problem.
This is the link to access the data being collected on the PV solar panels on Mod 302:
https://enlighten.enphaseenergy.com/pv/public_systems/ggfa523388?preview=1
TL;DR
Our solar panels were producing little to no electricity at certain times while the sun was out, we realized it was due to two different trees shading them.
By Rhianna Hruska
The Clean Energy Committee has funded a solar tube installation in the RAD Hybrid Solar Greenhouse. This will allow the bottom bed of plants to receive more light during the summer. This method ultimately saves energy because grow lights will not need to be installed. The materials are on their way and the solar tube will be installed soon! The funding is 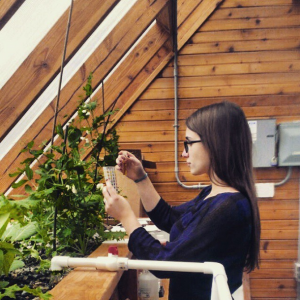 also paying for calcium and potassium API Water testing kits so we can better understand the nutrient levels cycling in the water. Ammonia, Nitrite, Nitrate, and pH levels are tested daily.
Work parties for the Aquaponics Systems are Mondays from 5-7PM. Work parties will continue throughout the summer and all are welcome to join. The work party for this coming Monday, May 15, 2015, will be at the Organic Farm Aquaponic Greenhouse. Come join us and learn more about Evergreen Aquaponics!
We also have an announcement from our operations director, Daniel Cherniske:
“For about two months, we have been cultivating Desert King Fig cuttings in our Deep Water Raft Culture system here at the Evergreen State College Organic Farm. They have surpased all expectations and grown incredible root and leaf structures. And now they need homes. As a fundraising endeavor for the operational budget of the system, we are selling these incredible, high producing, bioregionally adapted fig trees for a sliding scale of $20-40 dollars. Your support goes directly back into the amazing learning laboratory and community aquaponics center we have estabished over the years here in Olympia. If you are interested, please contact our operations director Daniel Cherniske at danielcherniske108@gmail.com or at 360-918-6682.”
Follow TESC Aquaponics on Facebook! https://www.facebook.com/TESCAquaponics
If you have any questions or would like a tour of the Organic Farm Aquaponics system send us an email at tescaquaponics@gmail.com.
If you are interested in an internship with the RAD Aquaponic system send an email to RADsustainability@evergreen.edu.
By Kai Stroud
We got new solar panels! Joe Martino, Joe Anderson and I spent a day on the roof of Mod 302 with Jesse and Sean from South Sound Solar to install them. They look super classy up there.
We’ve been talking about putting more solar panels in the mods, and we’d love to get some of our fellow students involved in the process. It’s pretty simple–piece together a metal frame on the roof, square it up, attach the solar panels, and plug it in. There should be an opportunity for greeners to help out sometime this year. Head down to Mod 302 and check out our handiwork! We’re getting ready to put a garden bed in the front yard there, too. Right now it’s just a square of ripped up grass and woodchips, but a month or two from now we’ll be looking at a big beautiful perennial plot.
