A few months after graduation, students lose access to their my.evergreen information. Former Student accounts can be requested, but even then you lose access to a lot of tools offered to current students. One of those tools is blogs.evergreen. Blogs.evergreen gives students a domain and account with which to make WordPress-based blogs or websites.
Some students are asked to create online portfolios through Evergreen’s WordPress server, and others post projects or simply take advantage of the online resource during their time as a student. Whatever may have been created through blogs.evergreen.edu, it’s reasonable to want to keep it after graduation. Here’s how to do that!
Step One: Log in
- To log in to your designated WordPress space through Evergreen, go to “blogs.evergreen.edu.”
- On the right hand side is a “Getting Started” menu in blue. Click “Login.”
- Your Evergreen login and password (logs you into my.evergreen and campus computers) will sign you in. For help with finding your username and password, take a look at the “Login Help” page on Evergreen’s Help Wiki. (http://wikis.evergreen.edu/computing/index.php/Login_Help)

Step Two: Locate the Blog for Exporting
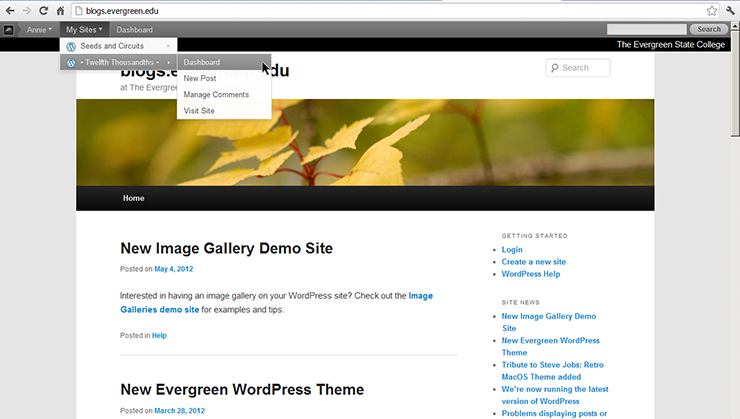
- Once you log in, a toolbar will appear at the top of the blogs.evergreen.edu homepage with your name and avatar.
- The drop down menu at the left side of the bar titled “My Sites” lists the names of the blog sites you are named administrator for.
- Locate the title of the site you’d like to export and select “Dashboard” when you hover over the title with your cursor.
Step Three: Time to Export
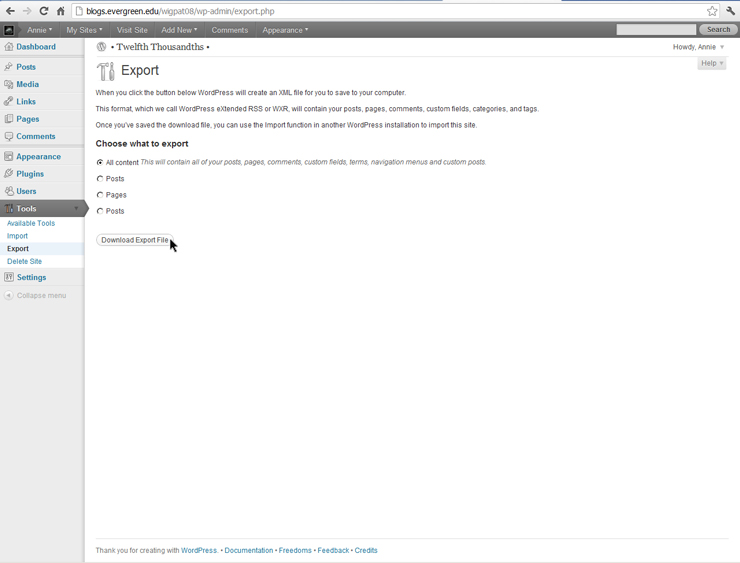
- On the dashboard, look through the options on the left until you find “Tools” towards the bottom. If you click on “Tools,” more options will appear below. From these, select “Export.”
- If you want all of your content exported (all posts, pages, and the most amount of content that WordPress can currently export), leave the “Choose what to export” option set to “All content.” If you want just posts or pages, select the appropriate option.
- Click “Download Export File.” This extracts the data from your WordPress page and compiles it into an .xml file.
Step Four: Domains and Preparing to Import
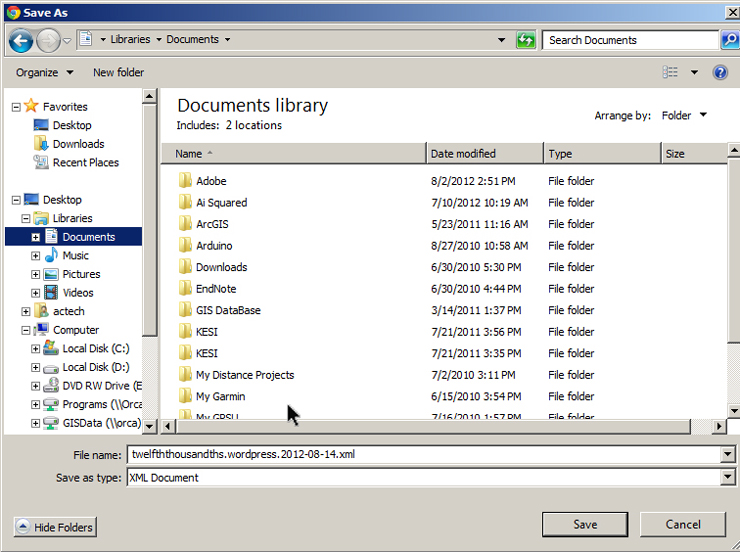
- Once your .xml document has downloaded completely, you’re ready to import.
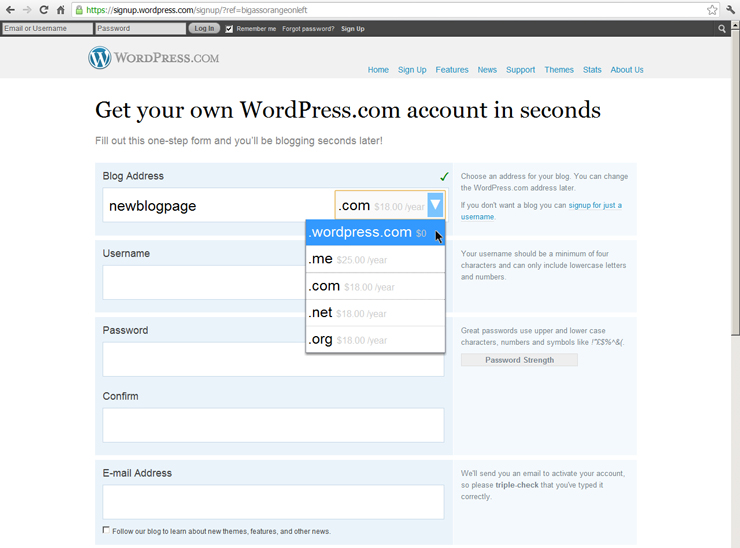
- If you already have a domain name for your new WordPress site (a web address that you own or have reserved), excellent! You may skip ahead to step five.
- If you don’t have a domain name, don’t sweat it. You can buy a URL through sites like godaddy.com, or have a slightly longer domain name that is free. WordPress.com offers a few URL extensions that are free, so if you’re not set on having a specific web address, that can be a good way to go.
- Once you have made a WordPress account, chosen a blog address, and logged in, you are ready to import your content! (Don’t worry about themes or appearance until later; you can change your theme and viewing options any time on your Dashboard.)
Step Five: Importing Your Content
- Go the the “Tools” menu on the left hand side. Instead of selecting “Export” in Step Three, select “Import.”
- Since we are importing a WordPress site, select the WordPress menu towards the bottom of the list.
- This will bring you to a standard file uploading page. From the “Choose File” button, locate the .xml file that you exported from your old WordPress site. After you have done this, click “Upload file and import.”
- The “Processing…” page will appear. WordPress is now working to import your content and put everything in place as best it can. Note that there may be some quirks as the importing and exporting functions aren’t flawless. An email should be sent to your WordPress account’s email when this process is complete.

Comments are closed.