Thistlehook Internship (Week 7)

MONDAY

It was 30 degrees Fahrenheit when we arrived at 8AM Monday morning. The entire farm was iced over as we started with our chores. Definitely wanted to linger in the greenhouse as it was more like 70 degrees Fahrenheit in there. While pulling staples from cardboard is a little mindless, it was a welcome task after chores were complete on such a cold morning.

We also seeded a bunch yesterday—14 flats total! All of the flats seeded in the past were looking really happy in the greenhouse. It’s really exciting to see all of the things you seeded and have been taking care of thriving.

What we seeded:

  • two 72s—Cerinthe, Kiwi Blue*
  • two 72s—Cerinthe, Pride of Gibraltar*
  • 72—Matthiola (Stock), Noble White
  • 72—Matthiola (Stock), Glory Lavender
  • two 72s—Antirrhinum (Snapdragon), Chantilly Bronze
  • two 72s—Agastache, Pink Pop
  • two 72s—Marigold
  • two 72s—Dill

*We are doing a trial on the Cerinthe. Half the seed was soaked before being planted, half planted dry. One tray of each variety was covered and the other was uncovered. This is to see what germinates when.
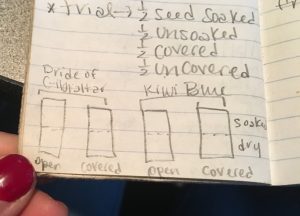
Cerinthe Germination Trials
Photo: Allie Kuppenbender

In the afternoon, we covered part of the west pasture with an occultation tarp. To ensure the tarp wouldn’t be taken away by the wind or snow on the radar for Tuesday and Wednesday, we dug a trench around the tarp and buried the tarp in the trench.

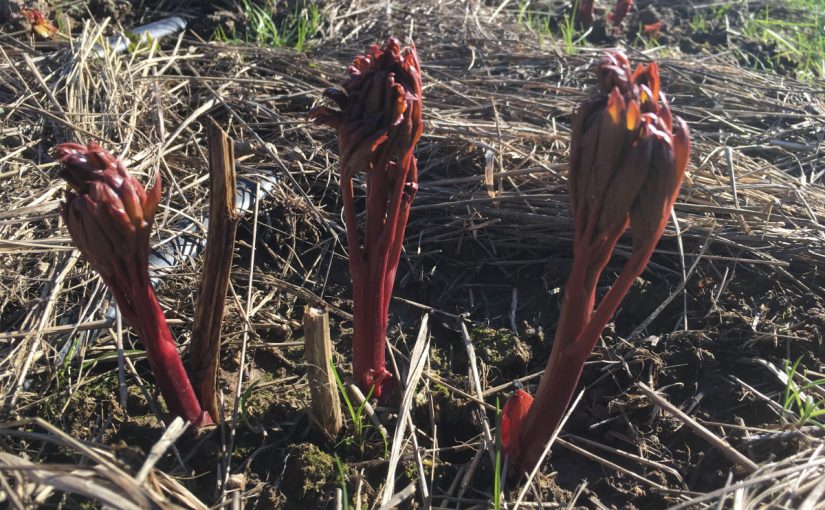
We also pulled the row cover off of the peonies as it wasn’t really doing the job of weed suppression very well. Either on Wednesday or sometime next week we will be recovering with better landscape fabric or solar mulch and netting the earlier-to-bloom varieties so they will have support when they start getting bigger.

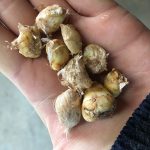
Our final task Monday was to wash and divide asparagus crowns. Doug got these from his neighbor, who no longer wanted them because they are all female plants. Asparagus are dioecious meaning they have separate male and female plants. The male plants are what produce the majority of the spears, what commercial growers sell thus making male plants more prized if you are trying to grow apparatus for eating. Doug, however, really wants the female plants because they produce berries on their fronds which are desirable for florists. To divide asparagus, dig up, wash, and tease apart the crowns to softball-sized clumps (make sure there is a crown part in the clump and it’s not just all roots). Anything that can’t be teased apart, divide using a spade, knife, or screwdriver. They can be stored for a fairly long time (their roots hold a lot of water), just keep them in slightly dampened peat moss and plant in early spring.
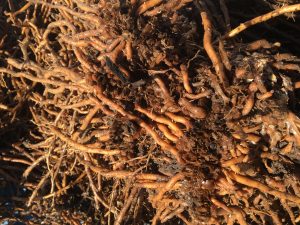
Asparagus Crowns
Photo: Allie Kuppenbender

WEDNESDAY

SNOW DAY!!!! Used the day to work on self-evaluation for Doug and research on air-layering.

Here’s a little of what I learned about air layering:

According to the Royal Horticultural Society, “Air layering is a method of propagating new trees and shrubs from stems still attached to the parent plant. The stem is wrapped with damp moss to encourage roots to form.” Plants that don’t propagate well from cuttings and generally don’t have the shoots that make mound layering possible would benefit from air layering. Some of these species include magnolia, hazel, Cotinus, flowering Cornus species, acers, camellias, Chaenomeles, daphnes, Ficus (fig), Forsythia, Hamamelis (witch hazel), jasmine, Philodendron, rhododendron and azalea, lilac, viburnums, holly, roses, boxwood, wax myrtle, and honeysuckle (Grant and Royal Horticultural Society).

Air Layering How-To
Photo: NC State Extension

How to Air Layer (from Royal Horticultural Society):

  • Choose a one- to two-year-old stem that is straight, healthy and vigorous. Trim off side shoots and leaves from a 30cm (1ft) section. Do not leave any snags
  • Wound the stem, making a 2.5cm (1in) cut through a leaf bud, angled towards the shoot tip. This will create a tongue that can be lifted
  • Apply hormone rooting compound to the surface of the wound
  • Pack a small amount of moist sphagnum moss under the tongue of the wound
  • Wrap the wounded stem section loosely with black plastic*, sealing it at one end with weather-proof adhesive tape
  • Pack the wrapping sleeve with moist sphagnum moss, to a thickness of 7.5-10cm (3-4in)
  • Seal the other end of the wrapping sleeve with weather-proof adhesive tape
  • Leave the wrapping in place for up to a year. Open and check it occasionally for signs of rooting
  • When strong new roots are visible through the moss, remove the plastic sleeve. Cut through the stem just below the rooted section
  • Pot up the rooted stem in potting compost suitable for the plant in question. Do not attempt to remove the moss from the roots. Water, label and grow on until large enough to plant outside

*Use black plastic as clear will allow light to seep through, encouraging algae growth because of the damp conditions inside the wrapped sleeve.


SOURCES:

Air Layering of Plants

What is Air Layering: Learn About Air Layering Plants by Bonnie L. Grant
Plant Propagation by Layering


Practicum Week 6: Raspberry Cultivation

If I were to grow raspberries, I would want a good mixture of varieties as well as a mix of summer-bearing and fall-bearing types. This would ensure a longer window of harvest and allow a good mix of flavors (and even colors) for customers to choose from. The fall-bearing varieties could also command a higher price as less growers are likely to have raspberries that late in the year. Additionally, because fall-bearing fruit buds are set on primocane (or first-year growth), maintenance could be as easy as mowing down the old canes every year at the end of the season.

To maintain the summer-bearing varieties, for the first year allow the primocanes to grow. Should use heading cuts on apical buds to encourage branching (done in the summer on primocanes). The next year, harvest from the floricanes. Remove floricanes immediately after harvesting all the berries. Maintain new primocanes using heading cuts.

No matter the variety, raspberries must be trellised to ensure larger yields, healthier/better tasting berries, and easier harvests. Trellising can be as easy as corralling the canes within two rows of wire set 12-18 inches apart. Generally raspberries grow so tall that you’ll need two sets of wire, one set around 30 inches from the ground, the others at 5 feet.


SOURCES

Fitzgerald, Tonie. Raspberries. Washington State University; Spokane County Extension. Accessed 12 Feb 2018.

Lockwood, David W. Berries; Pruning Raspberries and Blackberries in Home Gardens. Agriculture Extension Service; University of Tennessee. Accessed 12 Feb 2018.


Floret Module 6: Harvesting & Caring For Cut Flowers

This final module was all about how to harvest and properly care for your flowers to ensure maximum vase life. Especially the harvesting portion of this module took heavy inspiration from The Lean Farm; How to Minimize Waste, Increase Efficiency, and Maximize Value and Profits with Less Work by Ben Hartman. Erin kept emphasizing that you don’t want to be wasting energy, taking extra steps, or going out of your way to get a task accomplished. She also went over best time to harvest specific varieties, including dahlias, snap dragons, peonies, Iceland poppies, etc.

In the post-harvest handling section, Erin broke down flower food (they use sugar, acidifier, and biocide), including “Quick Dip,” Hydration Solution, Holding Solution, and Flower Food. Each one has a different ratio of the three ingredients, depending upon what you need/final destination of the flowers. For example, Holding Solution has very little sugar and would be used to hold flowers if their final destination is wholesale or grocery while Flower Food has a lot more sugar and would be used to get flowers to really blow open if you were using them in a wedding arrangement. Just as a note, you can’t use these products if you are certified organic.

All of the flowers cut on Floret fall into various categories as well and will dictate how best to treat them in order to increase vase life. Whimpy Drinkers or things that wilt really quickly (i.e. hydrangea, mint, scented geranium) would be dipped in “Quick Dip” and put into Hydration Solution. Woody Branches (i.e Crab Apple branches, Nine Bark) would get the same “Quick Dip” then Hydration Solution, but you would want to “X” the bottom to ensure water can get up into the branch. Sappy Stems or things that ooze sap upon cutting (i.e. euphorbia, daffodils) would be put in boiling water for 7-10 seconds, sealing the stem up so it would leak any longer and put into Hydration Solution. Dirty Flowers or flowers that turn the water murky or brown really quickly (i.e rudbeckia, yarrow) you would want to use a CCB (chlorine) tab or bleach in the bucket prior to harvesting.

Dahlias and Iceland poppies also can be tricky, but Erin shared some tips for them. Both need their stems heated. Dahlias, you would put them in boiling water and let the water cool. This will allow better water circulation through the flower. Iceland poppies can also react positively to boiling water, but you can also flame torch the tips of their stems.

In terms of packaging, consistency and quality is key. Because local flowers are way fresher than flowers brought in from South America or California, there is a huge niche market available to local growers. However, there is a standard of quality and consistency in the floral industry and if you don’t match (and exceed) that standard, it won’t matter how local or fresh your flowers are. Ensuring long stems, clean stems, and quality packaging will ensure long-term customers.

Finally, Erin went over how to make market bouquets (these make up 60% of their sales!) Elements of these bouquets include focal flower, filler (2-3 types), spike, disk, and air. They can make 60 bouquets in an hour by treating market bouquet making as a assembly line.

Market bouquets gettings ready to go to market at the Organic Farm at TESC
Photo: Allie Kuppenbender


RESOURCES:

Floret Online Workshop, Module 6: Harvesting & Care for Cut Flowers

Hartman, Ben. The Lean Farm; How to Minimize Waste, Increase Efficiency, and Maximize Value and Profits with Less Work. Chelsea Green, 2015.

Thistlehook Internship (Week 6)

SUNDAY

Sunday we woke up at 3AM to drive to Seattle for a special Valentine’s Day event at the Seattle Wholesale Growers Market Cooperative. Doug is a full member of this coop and sells all of his product at their market. During peak season (May-October), they have normal markets on Sundays, Wednesdays, and Fridays from 6AM-noon (10AM-noon the market is open to the public). During the off season (November-April), they have one market on Wednesdays, same hours. However, with it being Valentine’s Day this upcoming Wednesday, they had a special Sunday event for florists to stock up on flowers for their Valentine’s Day orders.

During the off season, they bring in a lot of product from California and Hawaii to supplement the lack of product from local growers, but all of this product needs to be salmon-safe as a base requirement to be able to sell at the market.

Product on display at the Seattle Wholesale Growers Market Cooperative
Photo: Allie Kuppenbender

It was pretty insane when we got there at 5AM, with people running around and trucks coming in and out of the loading docks. Immediately, we were given a tour of the new space by Diane and Denis, board members and owners of Jello Mold Farm in Mount Vernon (and my future bosses!). The space includes a storeroom, lobby, and meeting room, and is about double the size of their old space (moved locations in November 2017). They are also located a couple blocks from the other floral wholesaler of Seattle, which is good because it is now more convenient for their customers to be able to go to both in the same day.

Protea (orange and pink) and banksia (yellow) for sale
Photo: Anika Goldner

After, we were put to work uploading trucks/vans, unpacking boxes, filling buckets, sorting flowers/greenery, and chopping stems before sending them out to the floor. We saw so many really cool and totally new to me plants. Some of these included Proteas and other Leucadendrons, Chamelaucium (wax flower), Claycina, and Moroccan Date Palm. It was really cool to see all of these unique and downright weird plants in conjunction with the more native things like English Ivy (yes someone was selling this noxious weed at the market), pussy willow, and cedar as well as the more familiar things like roses, ranunculus, and tulips.

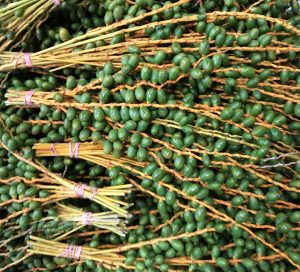
Moroccan Date Palm for sale
Photo: Allie Kuppenbender

Doug was really excited by the variety of things the growers from Oregon were able to bring this early. He thinks this is good news for him as Washington will get an earlier spring too. They had a lot of Oregon-grown tulips, ranunculus, anemones, and heather.

In terms of product, they received 90 boxes worth of flowers and greenery this past Wednesday for this market and we received 150 boxes Sunday morning. All of these were unpacked and processed by us Sunday morning. All of this product came from California and Hawaii, thus not even including the actual grower-members’ product. Doug said he believes all of the California/Hawaii product will be sold Sunday or else on their normal Wednesday market on actual Valentine’s Day. The stuff that is less likely to sell is actually the grower-member stuff that’s not the tulips, ranunculus, etc.—the things like the pussy willow and cedar as it doesn’t really say “Valentine’s Day.

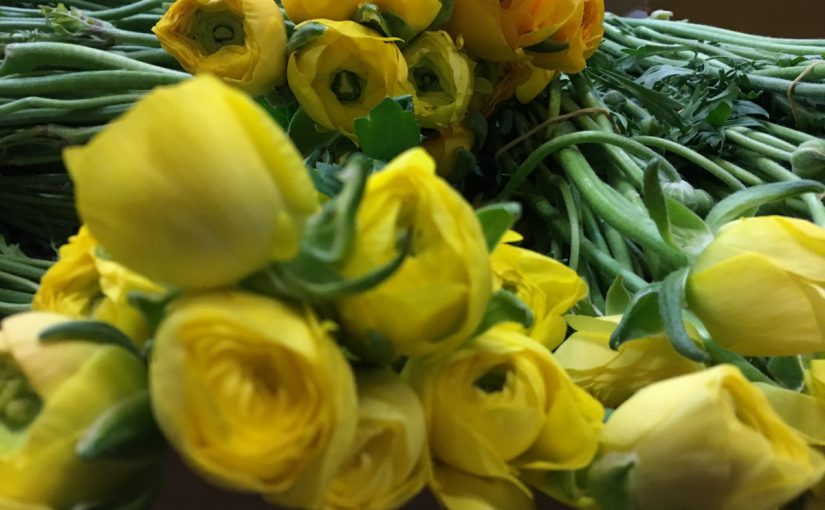
Ranunculus to be unpacked
Photo: Anika Goldner

It was a long day—we got home at 2PM. But it was fun and I learned a lot. Plus it was really good to see Denis and Diane of Jello Mold Farm as well as the new space for the market.

MONDAY

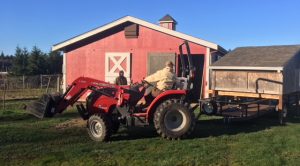
Monday morning was rough (Anika and I were really tired from the day before), but we had a really interesting project to accomplish. We were tasked with rotating the chicken coop. When I first heard that I was incredibly skeptical, but it actually worked! A little bit sketchy at times, but we did it. Basically, we used a car jack to jacked up the coop, used 4x4s to brace it on top of the trailer, used the tractor to rotate the coop, and set it upon cinder blocks, now facing the south (and the sun).

Rotating the chicken coop
Photo: Anika Goldner

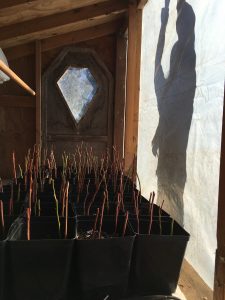
Why rotate the chicken coop? Well, Doug has been treating it as a grow room and keeping our blueberry cuttings in it, but the window that lets light in is facing north not south (thus flipping it around would allow sunlight to help the blueberries in their rooting process). We used a car jack to hoist the coop up and suspend it on the trailer. Doug used the tractor to turn the trailer (and coop) around. We had to dig a trench for the leg clearance, but it worked! We rotated the coop so it was facing south.

Inside the converted Chicken coop now that it's rotated
Inside the converted Chicken coop now that it’s rotated
Photo: Allie Kuppenbender

After rotating, we ripped off the front wall and window and part of the westside wall. We then covered that open area with extra greenhouse plastic Doug has lying around. This was to ensure additional light into the coop. Considering I was so skeptical at first that this would work, it was pretty cool to see this project from start to finish. That’s what I really like about working with Doug; he is constantly pushing my limits in terms of what I think is possible/will actually work (i.e. the garage greenhouse conversion, building a foundation for the cooler). He is willing to try pretty much anything, which really seems to pay off for him. I will definitely take that with me into the future as I am not intuitively like that at all.

Monday afternoon, we seeded. We used a new method adopted by Doug from Little Big Farm. Basically, you don’t fill the trays quite as full and seed normally, but cover the top with vermiculite or pearlite. This ensures a crust won’t form over the top, disabling water to penetrate to the seed. Floret also uses this method for seeding.

What we seeded:

  • two 72s—Cerinthe, Kiwi Blue variety
  • two 72s—Agastache, Pink Pop mix
  • one 72—Antirrhinum, Chantilly Bronze

Also the spring crocuses began to bloom! I’m so excited for spring and all of the new blooms to come.

Spring Crocuses have arrived!!!
Photo: Allie Kuppenbender

Seminar Week 5: The Cooking Gene

The Cooking Gene by Michael W. Twitty

“I have often wondered whether white people who know we are kin actually see us as family. It’s critical to me to think about the possibilities of every Southern white family connected to African Americans on DNA tests truly reaching out and vice versa, to create a dialogue. Would we be better off if we embraced this complexity and dealt with our pain or shame? Would we finally be Americans or Southerners or both if we truly understood how impenetrably connected we actually are? Is it too late?” (Twitty, 116).

“Shifting cultivation, the uses of animal manure and ashes as fertilizer, using vegetable scraps to enhance a garden’s fertility, multiple turning of the soil, and the modeling of garden spaces after the plant communities of nature—all tips out of the permaculture handbook—came hand-in-hand with Africans in the South” (Twitty, 266-267).


Through these quotes, we can explore identities seen and unseen, known and unknown, acknowledged and unacknowledged. They alter how we view kinship, labor roles, and knowledge in a way I haven’t ever really thought of before. As someone who has lived her entire life in the northern states of the United States and has never really been to the South, this book was provoking for me on so many levels. Although it seems so blatantly obvious after reading this book, I’ve never really thought about the origins of comfort or soul or Southern food or how truly important they are to the identity of the Southerner, no matter black or white.

Influenced by many different African cuisines, cooking practices, foods, and flavors; Indigenous American practices as well as cultivated and foraged foods; and various European cuisines, cooking practices, and crops, Southern cooking occurred in a specific place at a specific time for a specific reason. And African Americans were absolutely paramount to the creation of it. (Twitty says on page 163 “…and you will understand how beautifully bewildering out heritage is, and why it was impossible to birth this cuisine anywhere else on the planet”). I never really thought about the importance of Southern food as an identity for African Americans, but it makes perfect sense. Food is something easily passed from generation to generation. It is a way to remember, honor, and stay connected to those before you. Even when there are little to no material goods to pass on, food endures and bines. Food is powerful and important and evocative. Slavery ripped away histories and cultures and familial connections to kin and land, but it couldn’t quite take away the memory of the food even as it evolved and adapted to the food available and the practices used.

For me, these quotes embody who gets to choose their identity and their legacy and who does not. Those with power have the ability to erase—erase either their own histories or erase the histories of those they oppress. With the first quote, this is clear in the unwillingness to acknowledge the literal connection (kinship) Southern white families have to black families. The connection is there, but it is too shameful for white folks to touch upon it or talk about it.

The second quote hit a different nerve in that this is also a component of the African American identity and history—one of skilled and knowledgeable farmers. This is the way agriculture is heading in the future, but it is by no means new—something many permaculture adherents neglect to mention. Yet again those in power have the ability to erase a history and identity.

For me, it comes back to the question: who do we think of as farmers and why? But even more so: who really grows our food? and who actually gets credit for growing our food? This is just as applicable today as it was in the antebellum Old South. Then, it was truly the enslaved African Americans with the knowledge and experience to grow and harvest the crops needed to sustain. Now, it is often migrant farmworkers that cultivate and harvest our food. Neither of these are the faces we tend to think of when asked who is a farmer but both have played a huge part in our food system over time and space. Why is that?

Even more so, this second quote goes beyond African Americans having a role in the food system—these practices shows a deep knowledge and connection to the land that goes beyond commodification or profit margins. These farming practices take into account a reverence, respect, and understanding of the balance farming should seek to maintain. This type of farming is not the same as monocropping a cash crop, and it is important it is not erased. Permaculture is not a new trend or fad, and there needs to be credit where credit is due.


SOURCES:

Twitty, Michael W. The Cooking Gene; A Journey Through African American Culinary History in the Old South. Harper Collins, 2017.

Floret Module 5: Sales & Marketing

Sale Breakdown for 2014
(copyrighted images removed)

You grew all those flowers now how do you actually sell them? This is what Erin tackled on this week’s module of the Floret Online Workshop. She went into depth, including pros and cons, of all of the different avenues one can take to sell the flowers. These included weddings (both DIY and full service), farmer’s markets, farm stand, bouquet CSA, wholesale, grocery, direct to florists, to name a few.

They also broke down some of their finance numbers, such as Annual Sales, Annual Earnings, Specific Crop Sales, Crop Earnings per Square Foot, and Crop Demand. While all of these were for years past (generally 2012-2014), it was helpful to get a breakdown and better understand what sells best and what crops earn the most versus what crops are demanded most.

Floret Farm Annual Earnings (2012-2014)
(copyrighted images removed)

This module also went into social media and websites–and the importance to have and use both. Erin gave some tips like invest in a professional photographer, have your contact info easily available, and tell your story. Especially because flowers are so aesthetically appealing, taking really quality pictures is important to share with customers and potentially appeal to new clients.

RESOURCES:

Floret Online Workshop Module 5: Sales & Marketing

Thistlehook Internship (Week 5)

MONDAY

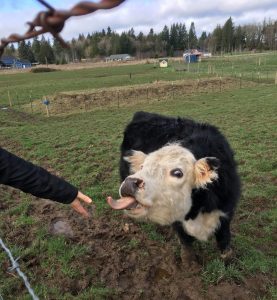
Reggie (a miniature cow NOT a calf) eatting an apple from Anika
Photo: Allie Kuppenbender

Right away Monday morning we began with our chores. Again, these include misting the blueberry cuttings; checking the west pasture; watering greenhouse cuttings; and feed the animals. This included filling the bird feeders, putting out tuna for Blackie the cat, and giving the cows (Reggie, Boyfriend, and Betsy) next-door apples. These are things we do everyday right when we get to Thistlehook. It’s nice to know exactly what to do right when we get there regardless of if Doug is around immediately or not.

Allie foliar spraying the peonies
Photo: Anika Goldner

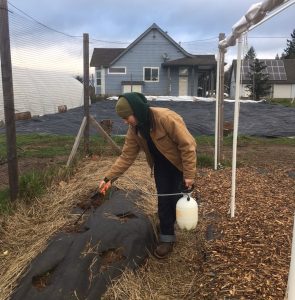
After our normal chores, we got to work mixing up a neem oil foliar spray for the backpack sprayer. To make this spray, we mixed 2 tablespoons neem oil to 1 gallon of water. The spray was used on the Turkish Bay to help alleviate the scale pressure and on the peonies to help ward off botrytis. For best results, spray every leaf top and bottom as well as soak the ground around the emerging eyes of the peonies.

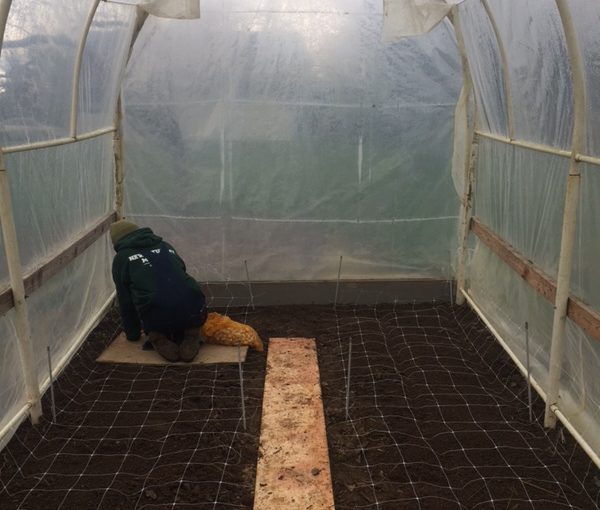
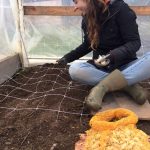
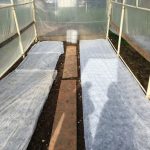
We then got to work planting freesia corms in the unheated greenhouse. To do this, we rolled out HortiNova netting to act as a spacing guide. Two corms went in each square–one in the upper lefthand corner, one in the lower righthand corner. Doug had two different varieties to plant: Albertville (white variety) and Gold River (yellow variety). There were 500 corms of each and all of them fit into the two 3ft x 20ft beds inside of the unheated greenhouse. To plant, you just stick the corm 1-2 inches into the dirt and cover back up. After finishing with the planting, we removed the HortiNova (it was just used as a spacing guide, but will be added back to the beds when the freesias are about 2 inches tall for support) and covered the rows with row cover. The row cover, combined with the protection from the greenhouse, will ensure the corms don’t get too cold. They don’t like for their surroundings to get below 50 degrees Fahrenheit.

After finishing in the unheated greenhouse, we moved to the greenhouse for some seeding.

Here’s what we seeded:

  • two 72s (144 total)–Cerinthe Major, Kiwi Blue variety
  • 72–Matthiolas (Stock), Glory Lavender variety
  • 72–Matthiolas (Stock), Noble White (untreated) variety
Yarrow field pre-planting
Yarrow field pre-planting Photo: Allie Kuppenbender
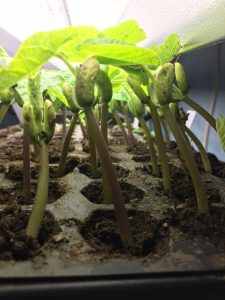
Look how happy these bean sprouts are!
Photo: Allie Kuppenbender

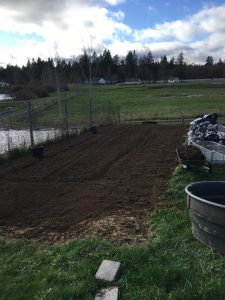
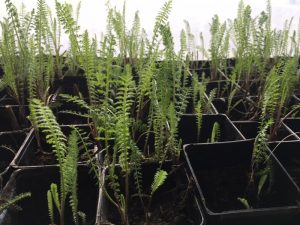
The afternoon was filled with transplanting yarrow into the field in Doug’s backyard. So much yarrow! That field is going to look beautiful in full bloom this summer.

A side note: the garage greenhouse is doing it’s job really well! The potted up yarrow is looking really happy and has green new growth. The marigolds and beans from the seed germination trial popped up over the weekend. This means that the grow lights and heater in the greenhouse are actually working to keep the seeds and potted up plants happy and healthy.

Happy yarrow in the greenhouse
Photo: Allie Kuppenbender

WEDNESDAY

Wednesday, we finished up mulching the peony paths (Doug got more wood chips from the free place on Delphi on Tuesday). I learned some new things about peonies and tips/tricks on dividing the crowns. Depending upon variety, peonies can be divided every 3-5 years, but at the very least every 10 years if you want them to be productive (they can live up to 100 years without ever being divided, but the center on the crown will die over time as the eyes spread outward). Peonies don’t really like being lifted, though, and will take 1-2 years before you can start harvesting from them again.

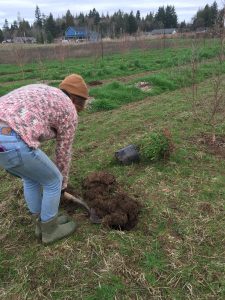
Anika digging a hole to plant Pieris japonica Photo: Allie Kuppenbender

After the peonies, we finally planted the Pieris japonica in the west pasture! Pieirs japonica (Japanese Andromeda) is in the Ericaceae or heather family (so are blueberries) and many of these species like acidic soils, which was perfect because that pasture is slightly acidic–no need to add any lime. We planted 10 Dorothy variety in 1 gallon pots and 9 Snow Drop variety also in 1 gallon pots. There were also 1 of each variety, each in a 5 gallon pot. These pots came with slow-release fertilizer so the holes we dug didn’t need as much amendments as the cornus we planted week 1. Again, we dug holes two times as wide and as deep as the pot we were planting. In the hole, we added 1 cup bonemeal, 1/4 cup azomite, 1/4 cup sulfur, and a pinch of borax.

We also continued with the yarrow planting. Only the yarrow potted up in the greenhouse remains to be transplanted into the field; everything else we got in on Wednesday.

Upcoming excitement: This Sunday (February 11th), Anika and I will be going with Doug to the Seattle Wholesale GrowersMarket Cooperative! As Valentine’s Day (the single most economically profitable day for flowers in the US) is next Wednesday, they are having a special market event for the florists to get their flowers so they can make their Valentine’s Day arrangements. It will be really cool to see the market in action and get a chance to talk to the employees of the market and the florists that frequent the market.

Practicum Week 4: Kiwi Pruning

The hardy kiwis on the Organic Farm at the Evergreen State College are desperately overgrown and unmanaged. Since it would be really difficult to try to untangle and properly trellis the vines, what I would do is prune the male all the way back to two or three vines—just enough flowers for fertilization of the females. The male has overgrown and begun to encroach on the females, which will affect fruiting eventually.

According to Burnt Ridge Nursery—propagator, grower, and seller of hardy kiwi—it is very difficult to kill hardy kiwi by pruning if you prune during when the plant is dormant. Pruning in the spring, after it begins to push buds, is bad for the plant’s circulatory system and the cuts will not heal properly.

Kela pruning hardy kiwi berry
Photo: Allie Kuppenbender

What I would do:

  • Prune males after they’ve bloomed (late May, early June)
  • Males can be left as long as they are not entangling the females
  • Use heading cuts to bring the males in
  • Attempt to untangle cut male vines from female plant
  • Prune females only when the plant is dormant
  • Assess needs: how much fruit do you want over the next few seasons?
    • If proper trellising is the main priority: prune the females way back except for the cordons
    • Retrain the female cordons to the trellis properly
    •  If fruit is the main priority: prune accordingly (see below)
  • Prune back anything that is curling back on itself or twisting in anyway
  • Prune any second year growth (will not fruit again)
  • Prune anything that is dead and diseased (scrape test; if its not green get rid of it)
Pruned female hardy kiwi berry plant
Photo: Allie Kuppenbender

RESOURCES:

Growing Kiwifruit

UGa Minor Fruit


Floret Module 4: Get Growing

Module 4 was all of the tips, tricks, and tools needed to successfully grow the flowers out to harvest. The categories this week were tools (hand, machines, gear), mulch, landscape fabric, supporting your flowers, transplanting, the benefits of pinching, season extension, irrigation, and putting the farm to bed. Clearly a lot to learn with a wide range of topics. For the most part, all of these topics and the tasks shown (i.e. mulching, setting up netting, irrigation, hoop houses, tools used, transplanting, etc.) were very similar or the exact same as the practices used on the Organic Farm at the Evergreen State College.

The one thing that I knew about, but have never had hands-on experience with before was pinching (cutting the tip of the plant to promote branching rather than straight up growth). Pinching is done on “cut and come again” flowers–things like dahlias, zinnias, amaranth, marigolds, cosmos, scented geranium, etc. Anything that is a single-stem flower (i.e. stock, single-stem sunflower) you do not want to pinch. If possible, do it before the plant sets buds. This makes perfect sense to me–similar to why pruning is necessary for fruiting trees. Auxin from the apical meristem will prohibit side branching and give you one tall monster stalk rather than many branches to cut from. Erin pinches before she puts netting on.

At Floret, they use HortiNova branch netting (ensures flowers are supported) just like the Organic Farm. This can be used horizontally, for things like asters or snapdragons, to help the plants grow long, strong, and straight stems and are protected from strong winds. It can also be used vertically, as a trellising system, for things like sweet peas. Floret also uses a post-and-string corralling method for taller, bulkier plants like dahlias or chrysanthemums.

90% of Floret’s annuals are planted into landscape fabric. They pre-burn holes into the fabric with a propane torch with precut templates for their plant spacings. The exceptions to planting into landscape fabric are sweet peas, anemones, and ranunculus who don’t like their feet too hot, opting instead to use paper mulch covered with 2 inches of compost. Dahlias are also not planted in fabric (too difficult to lift tuber clump through the hole when digging them up) but the dahlia pathways are covered with fabric. They also don’t plant any perennials, vines, woodies, or shrubs into fabric as they have major vole populations who will overwinter underneath the fabric. All of these are sheet mulched, using cardboard and mulch over top. A tip I learned about sheet mulching from the videos was to wet down the cardboard before you mulch over top. While it’s probably not so important in the rainy PNW, it’s a great idea for drier climates.

Side note: it’s funny every week what I do at Thistlehook ends up being somehow touched upon within the Floret Online Workshop. This week it was sheet mulching!

I loved learning more about Floret’s greenhouses/hoop houses. Some of them were even  It helped me start to think about logistics for farming in Minnesota (the ultimate goal). Round hoop houses will not work for the snowy, icy winters there, which not something I had thought about before. But you could just take down the hoops for the winter and still use them spring-summer-fall for some sea some extension. They do have a gable or gothic-style greenhouse that has a pointy rather than round top, which would be good for a more permanent structure.

RESOURCES:

Floret Online Workshop, Module 4: Get Growing

Thistlehook Internship (Week 4)

MONDAY

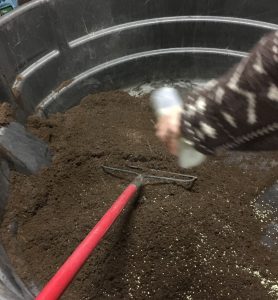
Monday was exceptionally wet and rainy, so we spent most of the day in the barn and garage. Firstly, we rebuilt a sieve to be able to sift through potting mix and compost as well as break up peat moss. Using the sieve, we then broke up some peat moss and used that to mix up seeding mix. We also used the sieve to sift through potting mix, trying to get rid of rocks and large woody bits.

Anika mixing up seeding mix
Photo: Allie Kuppenbender

Seeding Mix Recipe:

  • 4 buckets (20 gal) peat moss
  • 4 cup bonemeal
  • 2 cup lime
  • 1 cup azomite
  • 1 cup sulfur
  • 4 cup lime
  • 1 bag mushroom compost
  • 1 bucket (5 gal) vermiculite

Doug got this recipe from Bare Mountain Farm which is a no-till flower farm  in Shedd, OR. He made some switches and substitutes to this recipe (i.e. swapping pearlite for vermiculite, swapping rock dust for azomite). This recipe made enough to fill 4 bags worth of seeding mix.

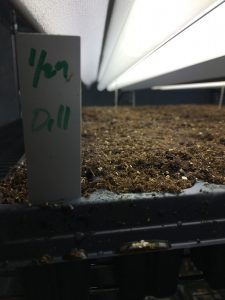
Seeded Dill under the grow light shelf we built last week
Photo: Allie Kuppenbender

With the new seeding mix made up, we were able to seed three 72 trays.

Here’s what we seeded:

  • 72–Agastache astromontana (Giant Hyssop), Pink Pop variety
  • 72–Antirrhinum (Snapdragon), Chantilly Bronze variety
  • 36–Dill
  • 36–Coriander


WEDNESDAY

Wednesday began with our morning chores, which consists of (1) misting the blueberry cuttings in the hatch, (2) watering all of the cuttings, yarrow, and seedlings in the greenhouse, and (3) checking the west pasture orchard for any downed or damaged cornus.

After our morning chores, we weeded and raked the apple and pear orchard (which is seriously nasty looking because it was poorly maintained by the previous owners of the property, but evidently looks significantly better than when Doug first arrived and the trees were 20-30 feet tall!). These apples, pears, and the plums just outside the orchard are all used both for their fruit (personal consumption and the cows) and for the flower market (cut branches either with blossoms or green fruit).

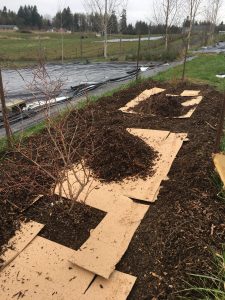
I then moved to the blueberries already established on Doug’s property (not our cuttings from Week 2) while Anika painted stakes for the peonies. I pruned the blueberries and weeded the patch. After lunch, Anika and I sheet mulched them, using cardboard and mulch on top.

Blueberries being sheet mulched
Photo: Allie Kuppenbender